New Items on the Stampin’ Up! Clearance Rack!

Stampin' Up! Clearance Rack Year End Closeouts New products added to the Stampin’ Up! Clearance Rack this morning!  Go check!  Available only while supplies last!

Details:

Promotion Dates: December 5, 2014 – January 5, 2014.

  • No minimum purchase required
  • No refunds or exchanges on Year-End Closeout items.
  • Items offered during the Year-End Closeouts are while supplies last.
  • Online customers can add non-Year-End Closeout items to their order.
  • Year-End Closeouts orders are eligible for hostess benefits/Stampin’ Rewards with qualifying orders.

Following the Year-End Closeouts, some remaining clearance items will be moved to the Clearance Rack.

Don’t forget the Weekly Deals, the Holiday Catalog and the Holiday Supplement!

Shop ALL Stampin’ Up! Products Right Here!


Iridescent Ice Snowman Coaster Magnet


Iridescent Ice Snowman Coaster Magnet

You’ll never guess where I got inspiration for this Iridescent Ice Snowman Coaster Magnet! I found it on Pinterest but what I thought was an outdoor Christmas decoration actually was a Snowman candy pop on a stick! So even if you see something cute to eat, you can also make it into a stamping project!

When I went looking in my stash for some round coasters to make an ornament, perhaps, I found these much larger 5″ cork coasters from a craft store, which I thought were great.  When I turned them over, here they all had a magnetic strip on the back!  So this is really a magnet!  Cute to stick on the fridge for sure!

I traced around a piece of Whisper White card stock to cut out, but ended up gluing the coaster to the card stock and trimming off the edges, but I think it would have been better to just cut out the circle in the first place. As I was getting ready to glue on the embossed cap, I remembered I had thought to stamp Versamark ink all over the card stock face of the snowman and emboss with Iridescent Ice to get the glittery sparkly snow look.  THEN I glued on the cap, the band at the bottom, and the tassel at the top.  I think I should have sponged some Craft White ink on all the pieces to make them stand out a little better. Then I punched out black circles for the eyes (1/2″ Circle Punch) and circles to form the mouth (Owl Punch) and just hand cut his carrot nose.  The little highlights on his eyes are with the Chalk Marker.  You should always put a little highlight in eyes.

If you need any stamping supplies, please visit my Stampin’ Up! Online Store!

FYI:  TOMORROW, Dec. 5, Stampin’ Up! is adding new items to the Clearance Rack so be ready to check it out and order your favorites right away.  You know they are only available while supplies last!

Shop the Stampin’ Up! Clearance Rack HERE!

Many Merry Stars Christmas Tree Card

Many Merry Stars Christmas Tree Card

Today I decided to make something with the Many Merry Stars Stamp Set and this is what turned out – Christmas trees punched with the Tree Punch rather than stars!  See, you never know when you start creating!  The one stamp in the set looked like it should be stamped on a tree shape so that’s where I got the idea. Maybe that’s not what it is really intended to be, but it doesn’t matter.  I stamped that shape with Versamark and embossed it with Gold Stampin’ Emboss Powder with the Stampin’ Up! Heat Tool. I used several shades of green colors (I think Wild Wasabi, Mossy Meadow, and Old Olive) and punched out with the Tree Punch. The one tree embossed with the Perfect Polka Dots embossing folder was just a scrap piece of paper in my bag of colors, and I thought why not use it?! Then for more variation, I stamped the snowflake in the Many Merry Stars Stamp Set all over a scrap of green, embossed with the Gold Powder and then punched out. The background paper is from the All Is Calm Specialty Designer Series Paper. It is layered on Whisper White and the card base is Pear Pizzazz, one of the coordinating colors in the All Is Calm set. What are Christmas trees without a little layer of snow, so I tore some strips of Whisper White and added some Dazzling Diamonds Glitter with the 2-Way Glue Pen. And of course I had to punch some stars with the star in the Itty Bitty Accents Punch Pack from the Gold Glimmer Paper but one for each tree seemed a bit much. And the greeting is from Holiday Home.  I needed something really small and this was perfect!

Tonight Stampin’ Up! Demonstrators all across the country will be attending livestreaming events at certain movie theaters to watch Stampin’ Up! unveil the new Sale-A-Bration and Occasions catalogs! I’ll be watching the livestream from home, which will be so much fun, although I miss out on getting the catalogs and “swag” by not being at the theater in person. But those of us at home livestreaming are eligible for the door prizes!  Not that I will win, probably! It’s hard to believe that it is almost time for Sale-A-Bration and spring things when we are right in the midst of Christmas, but crafters always have to be working ahead of the game!

Now go make a Christmas card! It’s time to get going!


Stampin’ Up! Deals and More Deals!

Stampin' Up! Online Extravaganza 2014

LAST DAY for the Stampin’ Up! Online Extravaganza!

Shop HERE at my Stampin’ Up! Onine Store, but please ask if you would prefer me to put the order in for you!

And with ANY Stampin’ Up! order today you will also receive my special bonus, a PDF with four easy and quick Christmas projects to make!

Karen's Christmas Project Bonus PDF

And MORE!  Stampin’ Up! Weekly Deals today through Monday, December 8, 2014.

Stampin' Up! Weekly Deal Dec 2 2014

 Build Your Own Bonus: Join Stampin' Up!

Want to be a Stampin’ Up! Demonstrator?  Last day for this great deal!  Buy the Starter Kit to join for ONLY $74.25 (regularly $99).  Choose $125 worth of product for your Starter Kit (you choose!). THEN you get an EXTRA 5% off on orders you place in December! It’s like a Christmas Bonus for you! For more information, just CLICK HERE. Then click the JOIN NOW Button, check off the Agreements, and then you will see the opportunity to start building your Starter Kit and take advantage of this special deal! I’m happy to answer any questions about being a Demonstrator and I will be your guide in getting your business started in the way you want to go.

Happy Cyber Monday! Last Two Days of Stampin’ Up! Online Extravaganza!

Project Life by Stampin' Up! Bundle

Two days left of the Stampin’ Up! Online Extravaganza and today has these two Doorbusters available, while supplies last! (Sorry, Blendabilities sold out quickly!)  If you have ever wondered about Project Life, a quick and easy memory-keeping solution.  Just slip your photos and any of these cards and embellishments into pocket pages, perhaps do a little journaling, and you have your special memories recorded.

Project Life Bundle – 15% Off  #140352
Black Leather 12″ x 12″ Project Life Album (135292)
Design 1 12″ x 12″ Project Life Photo Pocket Pages (135295)
Seasonal Snapshot Project Life Card Collection (135830)
Seasonal Snapshot Project Life Accessory Pack (135832)
Project Life Holiday Cheer Photopolymer Stamp Set (135188)

Stampin' Up! Gift Box Bundle

Gift Box Bundle! #140353 Save 30%! This bundle (retail value $17.85) includes these amazing products:
* Tiny Treat Boxes
* Decorative Window Gift Boxes
* Takeout Boxes

You can make so many cute projects and of course wrap gifts in these nice gift boxes!

Click HERE to see the whole Stampin’ Up! Online Extravaganza List PDF!

A BONUS for you!  Place any order today or tomorrow and receive a PDF of some easy Christmas projects from ME!

Bonus

Click HERE to shop at my Stampin’ Up! Online Store!

I’m happy to put your order in for you, if you prefer!

Christmas Candy Bar Wrapper Ideas

Christmas Candy Bar Wrapper Ideas

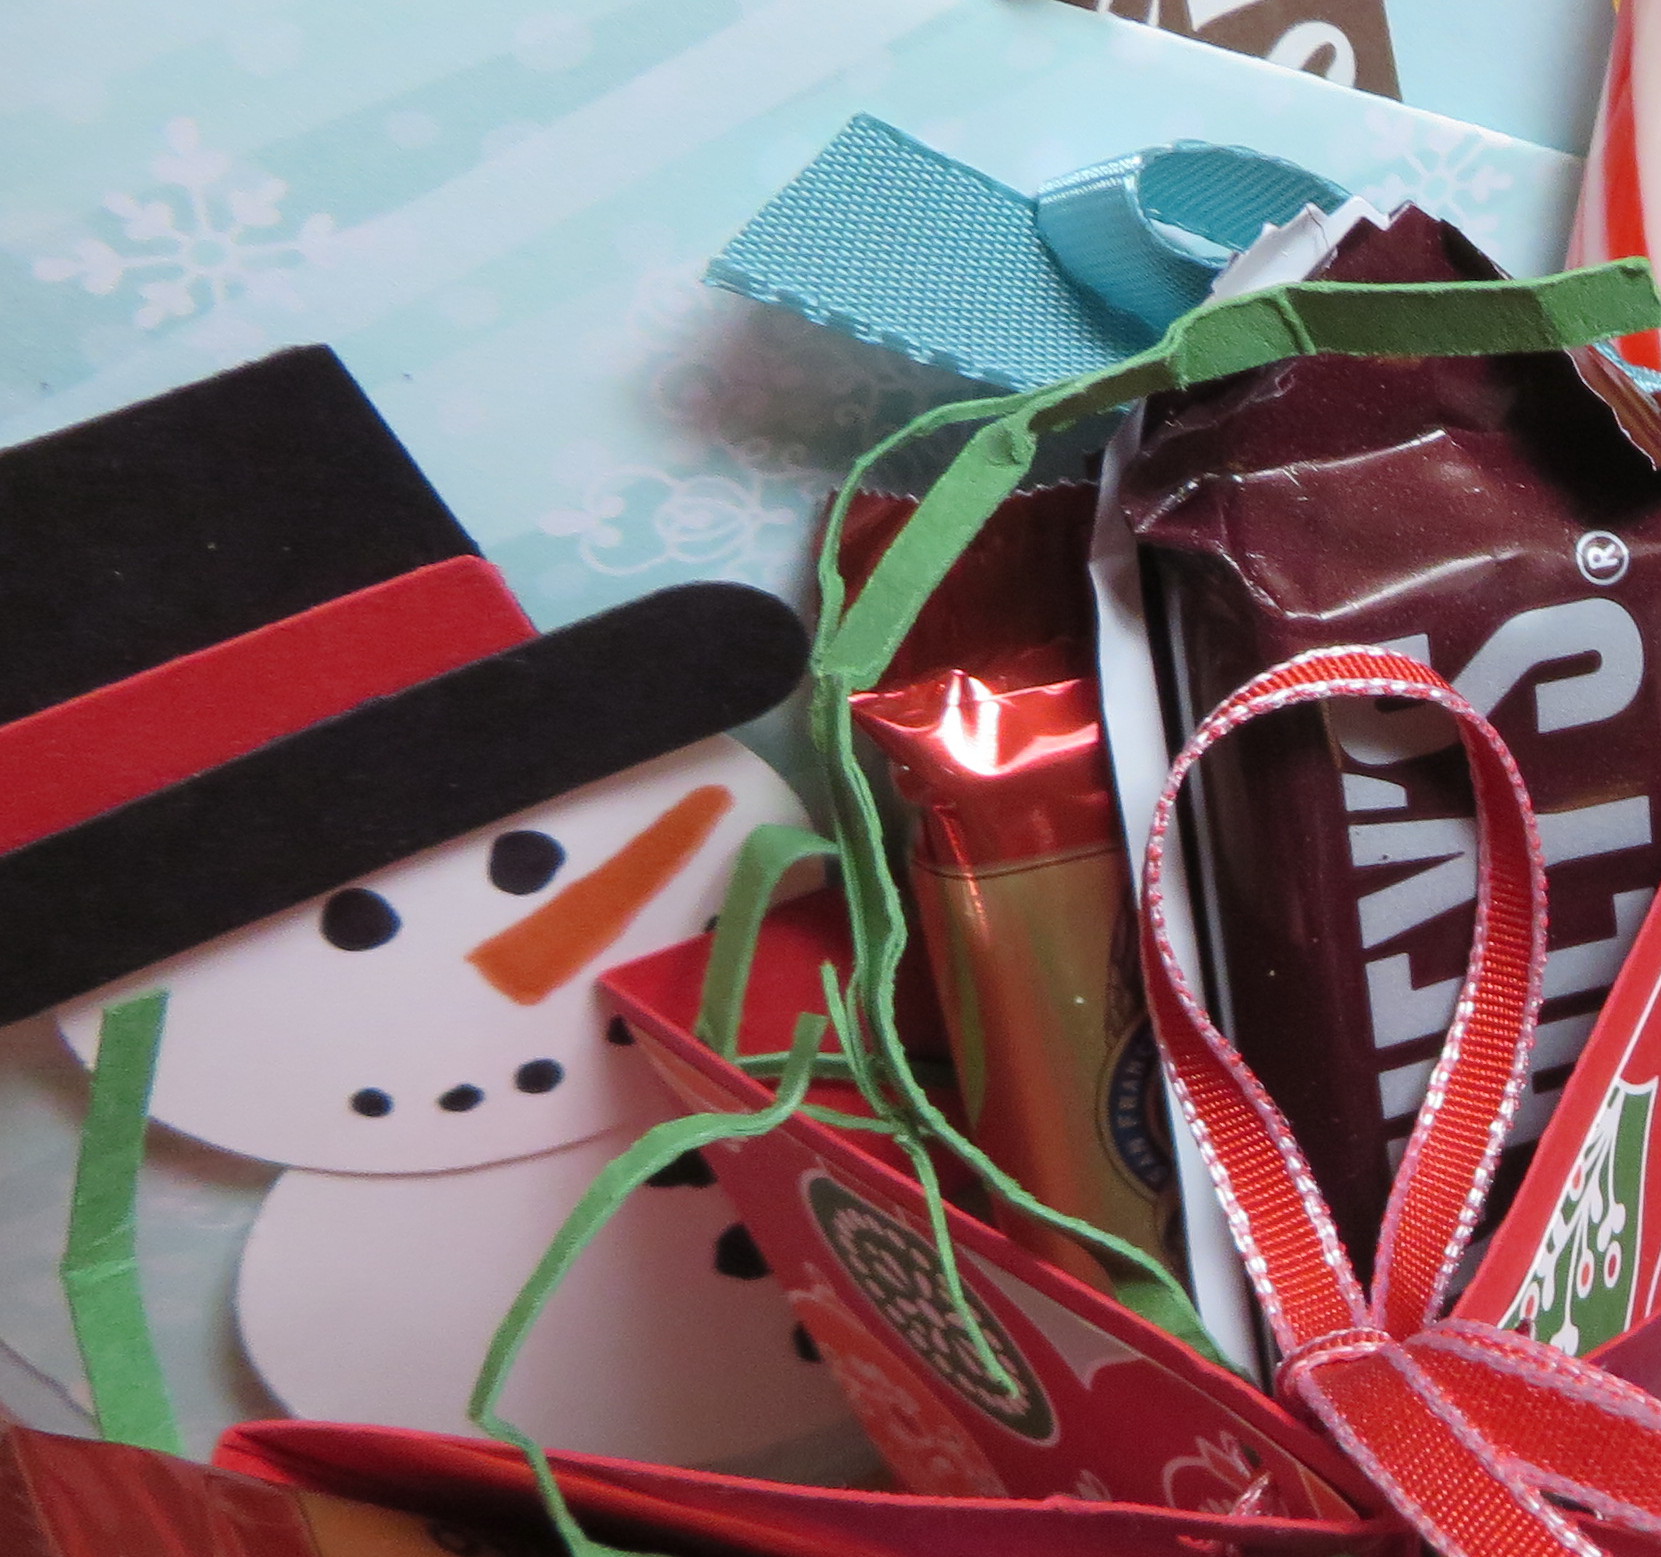
For a fun and delicious Christmas craft project, get some candy bars (regular size) and wrap them in paper and decorate. If you are looking for Candy Bar Wrapper Christmas ideas, here are three for you!  I swear I only bought these Hershey Bars with Almonds for the purpose of crafting and creating! You will have to measure your own candy bars, but for mine, I cut the card stock at 6″ x 4 1/2″ to wrap around the candy bar. You could also use designer paper. Then just decorate! It’s a good way to use up some of your scraps!

For the snowman, I just used three circle punches in different sizes for his body, a scrap of designer paper for his scarf and the 1″ Square Punch and Word Window Punch for his hat!  Plus a little flower punched out with the Boho Blossom Punch with a little Rhinestone for an accent.  I just drew on his face with markers.

For the Santa candy bar, just tear a strip of  Whisper White on both sides after wrapping the candy bar in Real Red card stock. Punch some black buttons with the 1/2″ Circle PunchThe belt buckle is Gold Foil punched with the Curly Label Punch and a square of Basic Black in the center to make it look like a belt! And of course the belt itself is a 1″ strip of Basic Black.

The elf legs are made with strips of designer paper from Nordic Noel Designer Series Paper. The shoes are fashioned out of the Curly Label Punch trimmed down to look like shoes. The wrapper still needed something so I glued on a strip of Real Red around to look like shorts and a belt around the middle.  See, you can just play around and see what you come up with!

Remember the Stampin’ Up! Online Extravaganza is still going on through Tuesday, Dec. 2, 2014. Be sure to double-check the Doorbusters on Monday! Are the Blendabilities calling your name??!

And any orders placed through Tuesday, I will send you a free PDF of some Christmas treat projects you might find easy to do!
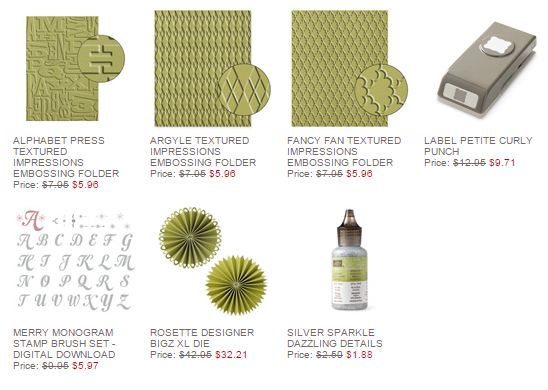
Bonus Gift with Purchase

Have a Happy Thanksgiving Day!

Turkey Centerpiece and Flowers

This is my favorite Thanksgiving decoration, my turkey from years ago.  I bought a floral arrangement in this turkey one year at the grocery store and really loved the turkey.  Every year I would take it back to the grocery store to have them put flowers in it for Thanksgiving. More recently I have just been buying a bouquet of fresh flowers and making my own arrangement.  Flower arranging is not one of my skills, but I do love my turkey and I love having fresh flowers to look at.

Have a Very Happy Thanksgiving Day!


Thanksgiving Wine Bottle Tag

Thanksgiving Wine Bottle Tag

If you are going out for Thanksgiving dinner on Thursday and want a little something for your hosts, make a quick and easy tag for a wine bottle you are taking to them or some other beverage of choice! Or just make the tag portion to accompany some other hostess gift.

The tag is made with a base of Brown Sugar card stock, cut at 2 7/8″ x 8 1/2″ and scored at 2 3/8″. Punch a hole to fit over the bottle (sample uses 1 3/8″ Circle Punch) and if you like, also punch out a 1 3/4″ Scallop Circle to fit around the punched hole.  Layer the tag with a piece of the beautiful Color Me Autumn Designer Series Paper. I also love the stamp set  For All Things and stamped the images on the Deco Labels Framelits die cut piece and the greeting just on a scrap of Very Vanilla which I hand-trimmed in a banner shape and sponged with some Cajun Craze ink. The leaves are just cut out of some of the Color Me Autumn DSP!

Keep the Stampin’ Up! Online Extravaganza in mind that will be going on this whole holiday weekend and on through Tuesday, Dec. 2.  Don’t forget the Doorbusters on Monday, Dec. 1st!

Click HERE to see the Extravanza PDF.

And for any order placed during the Online Extravaganza, I will be sending you a Bonus Gift,  a PDF for some easy Christmas projects you will enjoy making!

Bonus

You can also add a Paper Pumpkin subscription to your order!  Just click HERE to see the Paper Pumpkin options that you can add to an order for varying lengths of time!

Paper Pumpkin Subscription Flyer Nov 2014

Click to Shop!

Have a Happy Thanksgiving!

Top Note Thanksgiving Cello Bag Treat

Top Note Thanksgiving Cello Bag Treat

If you haven’t had time yet to make some kind of Thanksgiving treat or table favor, here is something easy. Put your candy or treat into a cello bag and decorate with a topper made with the always popular Top Note Die and Big Shot. Just fold it in half and decorate! I stamped some leaves from the Fall Fest Photopolymer Bundle and cut out with the matching framelits, both of which come in a Bundle so you can save 15% if you buy the stamps and framelits together. The words are from a stamp in the For All Things Stamp Set, only the words I wanted colored in with an Early Espresso Stampin’ Write Marker and punched out with the Extra-Large Oval Punch.

Here are the new Stampin’ Up! Weekly Deals for November 25 – December 1:

Stampin' Up! Weekly Deal Nov 25 2014

Don’t forget, the Stampin’ Up! Online Extravaganza is ongoing! And more Doorbusters coming Monday, December 1st!

Stampin' Up! Online Extravaganza 2014

Stampin’ Up! Online Extravaganza Starts Today! Doorbusters!

Stampin' Up! Online Extravaganza Holiday Sale


The Stampin’ Up! Online Extravaganza begins today! For the first day, Nov. 24, there are special Doorbusters!  These are available at the sale price only while supplies last! The Doorbuster Sale lasts today until 11:59 pm MT tonight! Of course you can add any of the other sale items to the Doorbusters as well as any current catalog items.

Shop HERE for all the specials!

BONUS from me! Place an order during the Online Extravaganza and I will send you a special PDF with some fun and easy Christmas craft ideas!

Bonus

******************************

Join Stampin' Up!

Join Stampin’ Up! This Week to Save and Earn!

Get a 25 percent discount on the Starter Kit when you join Stampin’ Up! between November 24  and December 2 . You’ll receive all the same great products AND get five percent cash back on all commissionable orders placed in December. Choose $125 worth of Stampin’ Up! products and only pay $74.25 + tax (no shipping). Regular price is already a great deal at $99.

Trying to remember the last time we had a cash back offer? Here’s a tip: NEVER!

It’s a first-time-ever deal that you absolutely cannot miss!

More details on this limited-time offer are listed below. Can’t wait to get in on the fun? Get started here .  Click the Join Now Button, check off the agreements, and on the next page you will see the special price on the Starter Kit and can get started on your Kit order!

Details:

All orders must be finalized in the month of December to qualify for the five percent cash back offer.

  • A demonstrator must remain active to receive the five percent cash back.
  • The five percent cash back will be awarded in January.
  • Deadlines:
    • Mail: All Starter Kit orders must be received by the end of the business day onDecember 2 .
    • Online: All Starter Kit orders must be finalized on December 2  by 11:50 PM (MT).

Let me know if you have any questions about the Online Extravaganza or the Recruit Special!


Sneak Peek!! Stampin’ Up! Online Extravaganza 2014 – Starts Monday!

Stampin' Up! Online Extravaganza 2014

Get your Wish List ready because the Stampin’ Up! Online Extravaganza begins on Monday! Get Hot Deals Monday, November 24 through Tuesday, December 2, 2014. There will be discounts on select products and bundles, Plus DOORBUSTERS on the first day and again on Monday, Dec. 1st! You don’t want to miss them!

Click HERE to print out or view the Online Extravaganza List!

Stampin' Up! Online Extravaganza page 1

Stampin' Up! Online Extravaganza page 2

Stampin' Up! Online Extravaganza page 3

Don’t let the term “Online Extravaganza” scare you off if you don’t like putting your order in online. Just contact me and I can put it in for you!

Print out your list, think about it over the weekend and be ready to get your deals on Monday! Let me know if you have any questions that I can answer for you!

Click Here:  Karen’s Stampin’ Up! Online Store

Thanksgiving Turkey Candy Favor

Thanksgiving Turkey Candy Favor

If you are looking for a Thanksgiving favor with a candy treat for your dinner table or maybe a little gift for someone, here is a bag of M&M’s made into a Thanksgiving turkey! I filled a Stampin’ Up! Cellophane 4″ x 6″ Bag with candy and tied the top with the Tangelo Twist 3/8″ Satin Stitched Ribbon. I cut off about one inch of the top of the bag and then adhered the turkey head (1 3/4″ Circle Punch) with SNAIL Adhesive. Make the turkey facial features however you like, but I used the Owl Punch for the eyes and just colored with a black marker. The beak is the tip of the Triangle Punch and the wattle is made with the wing on the Bird Punch but trimmed down a little more evenly. You don’t need punches for any of these pieces, just cut them yourself. For the turkey feathers, I just punched with the Scallop Oval Punch. You could also use Oval Punches, and you could emboss the feathers with an embossing folder.  You could also use designer paper for a little more interest and varied colors. So many options!

Pssst!  There’s a Stampin’ Up! Online Extravaganza coming next week!  Be sure to keep in touch! Better yet, make sure you are signed up for my Mailing List as I will probably send out an email with these specials! Sign up in the red box at the top of this page on my blog!

Christmas Mailbox

Shop anytime at my Stampin’ Up! Online Store for all the best in stamping supplies!

Glass Jar with Burlap and Paper Flowers

Glass Jar with Burlap and Paper Flowers

I found this glass jar in my craft stash and decided to add some Stampin’ Up! Burlap Ribbon and paper flowers made with the Originals Flower Spiral Bigz DieThe Burlap Ribbon also has a piece of Venetian Crochet Trim adhered to the bottom of the ribbon. I made the paper flowers with the Flower Spiral Die using the Color Me Autumn Designer Series Paper. It’s the same sheet of paper, just using the other side for one flower.  The center of the big flower is made with a strip of Old Olive card stock, cut with the Fringe Scissors and rolled up and glued to the inside of the flower. For some extra embellishments I snipped a piece of Gold Sequin Trim and attached it with a Glue Dot. Then I took another piece of Burlap Ribbon, pulled off the bound edge and pulled several threads off to fray the edge of the ribbon.  Then I just circled those burlap threads and adhered them behind the flowers with Glue Dots.

There is a white candle inside the jar although it can’t be seen very well in this photo. You could add some candy corn to the bottom of the jar and set the candle on top of that, or add some coffee beans or whatever you can think of to make the bottom of the jar more interesting.  I bet if you look around your cabinets or craft supplies, you can find something like this jar to make into a bit of fall home decor and use it for Thanksgiving! If you don’t own the Flower Spiral Die, just make flowers with punches or simply tearing some circles out of paper, crumpling them up and distressing them a bit and putting them together into flowers. Or attach some paper or real colored leaves, perhaps even a Thanksgiving greeting.  So many choices!

Burlap is so trendy right now.  I was surprised walking around a craft store the other day how they have burlap on just about everything! And mason jars and similar are very popular right now as well.

See what you can find to make a piece of home decor for the Thanksgiving holiday….before it is time for all Christmas decor!

Seasonally Scattered Thanks Fall Thanksgiving Card

rsz_seasonally_scattered_thanks_cardFinally I played with my Seasonally Scattered Stamp SetFunny how some sets can get a little lost in the shuffle sometimes, but then it’s a thrill to “find” that new set one day and play! I stamped the “Thanks” in Versamark Ink and embossed with the Crystal Clear Embossing Powder and the Heat Tool. After the image was embossed, I sponged on various fall colors of ink and rubbed it right over the embossing (which is really fun in itself!). Then to clean it up a bit and make sure the embossed images shows through, I rubbed a tissue over the image to get off any excess ink. That’s it!

I die cut the stamped image and the back layer with the Labels Collection Framelits.
The card base is Always Artichoke and embossed with the Big Shot and the Chevron Textured Embossing Folder. If you are embossing a full card base, you probably need to tuck the back flap under the folder or it won’t fit through the Big Shot.

You might think the Fall Fest Stamp Set is only for Halloween, but the leaves and pumpkins can be used any time. I stamped the leaves and then used the Fun Fall Framelits to cut them out. You can buy the stamp set and the framelits in a Bundle and save 15%!

Make a pretty Thanksgiving card (or several!) and send them out this week to your friends and family!

New Stampin’ Up! Weekly Deals! Great Accessories To Own!

Stampin' Up! Weekly Deal Nov 18 2014

Click to Shop!

Here are the Stampin’ Up! Weekly Deals for November 18 -14, 2014. These deals are available until midnight Monday Nov. 24 so be sure to put them on your order this week!

And don’t forget about this beautiful new stamp set, Banner Blessings Photopolymer Stamp Set, just released last week!

Banner Blessings Photopolymer Stamp Set

Click to Shop!

Banner Blessings Thanks Card

Shop at my Stampin’ Up! Online Store any time it is handy for you!  Or I can always put your order in for you!

If you are reading my blog, are you on my Mailing List??  If  not, sign up in the top right of my blog and receive my next “12 Weeks of Christmas” email tomorrow with another holiday idea you can make!

Christmas Mailbox