Fantastic Stampin’ Up! Weekly Deals!

Stampin' Up! Weekly Deal June 23 2015

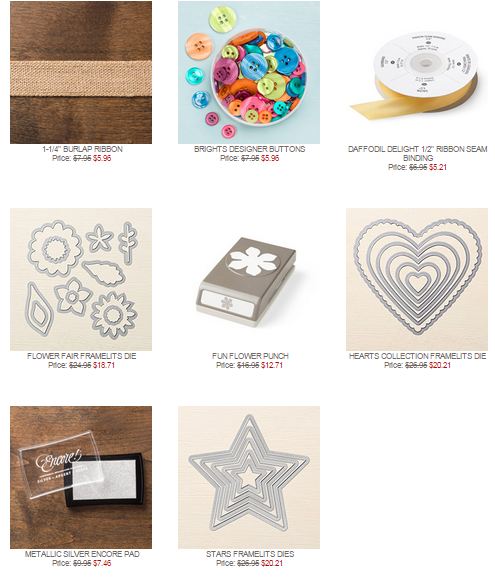
I am SO excited about these Stampin’ Up! Weekly Deals for YOU! I just did a blog post yesterday about the Mini Treat Bag Thinlits Dies and now today they are on the Weekly Deals! Save $!0 on the Mini Treat Bag Thinlits! What’s really great about these thinlits is that not only do you get the ones for cutting the bag, but you get all the other fun pieces that you can use with the bags or any other cards and projects. Love both of the embossing folders, and need I say anything about the two kinds of Glimmer Paper??!  Love it! And then you also have two kinds of ribbon to stock up on and the Vintage Faceted Buttons! I think you need everything on the Deals this week!

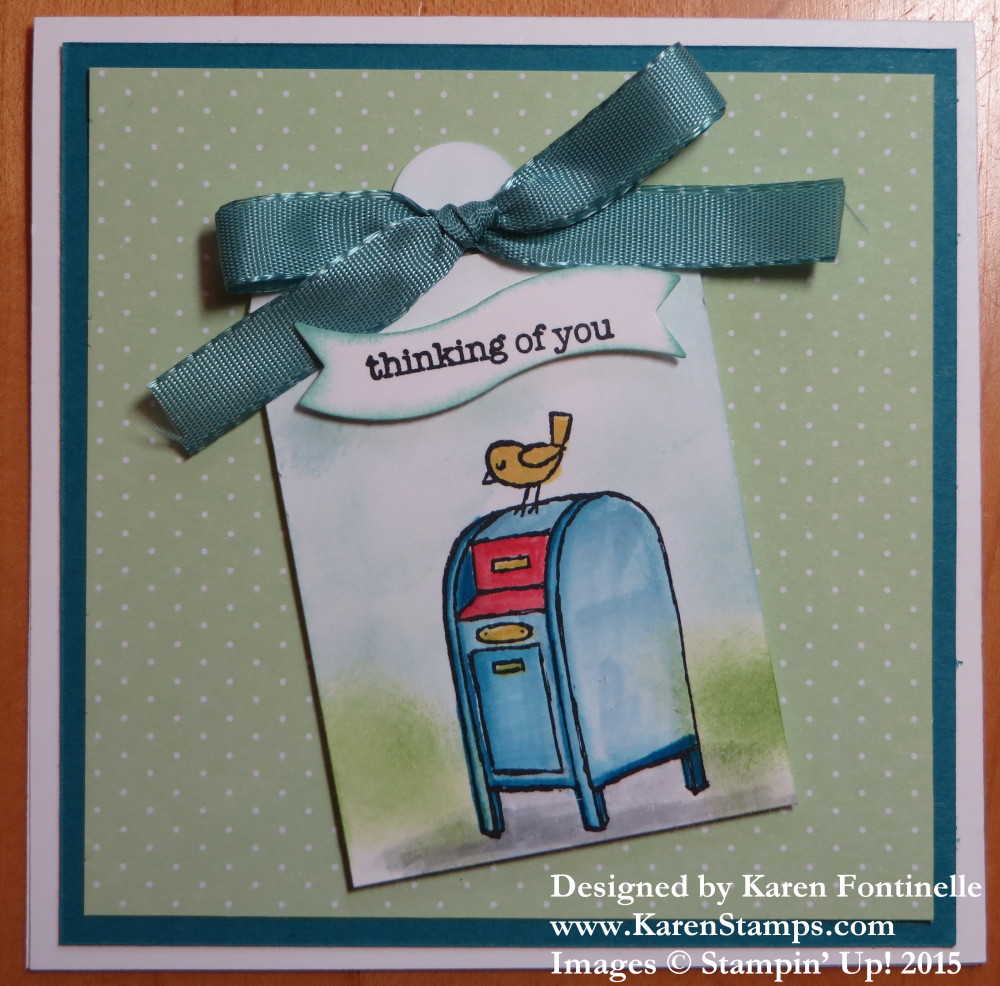
Here are a few other Mini Treat Bags I have made. You can use them as bags to hold a treat or maybe a gift card or cash or just use them as a card. And you can even alter the sizes of the bag. Some people are clever enough to figure all that out!

Mini Treat Bags

And a few more:

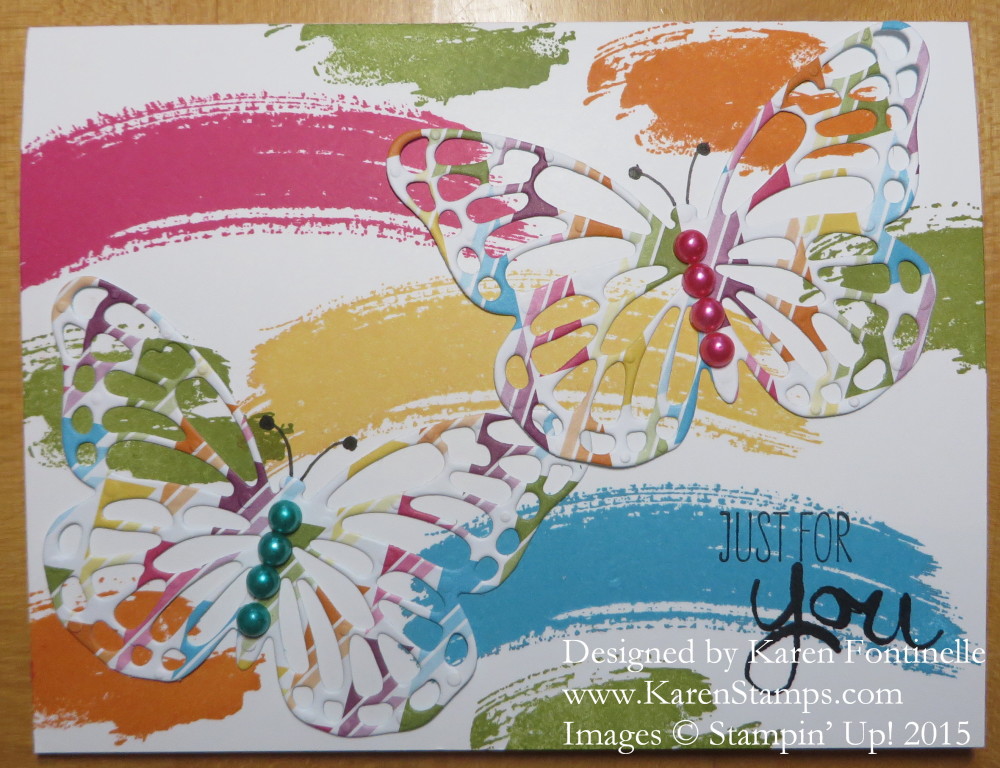
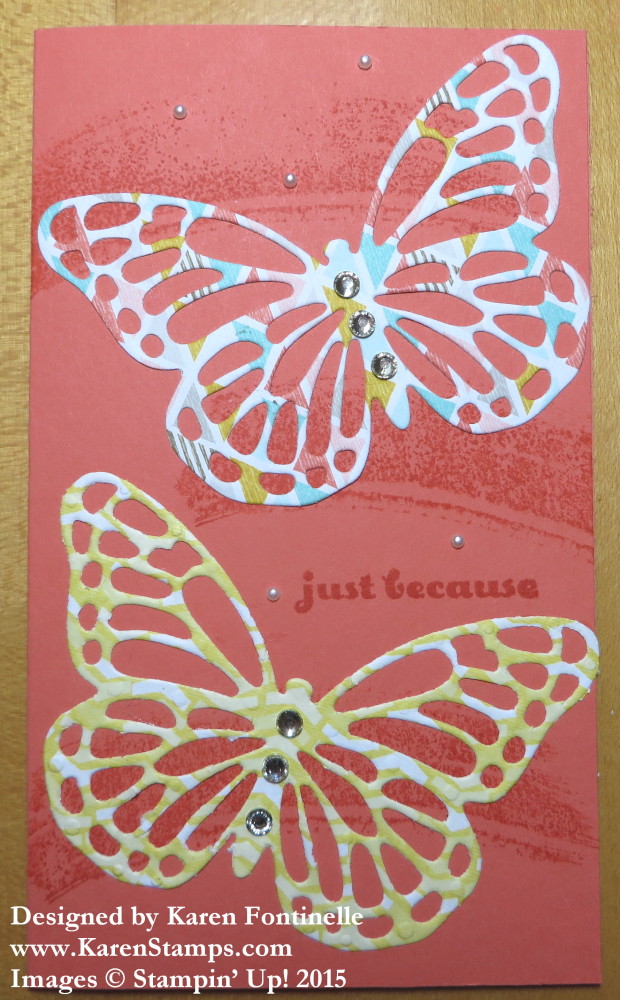
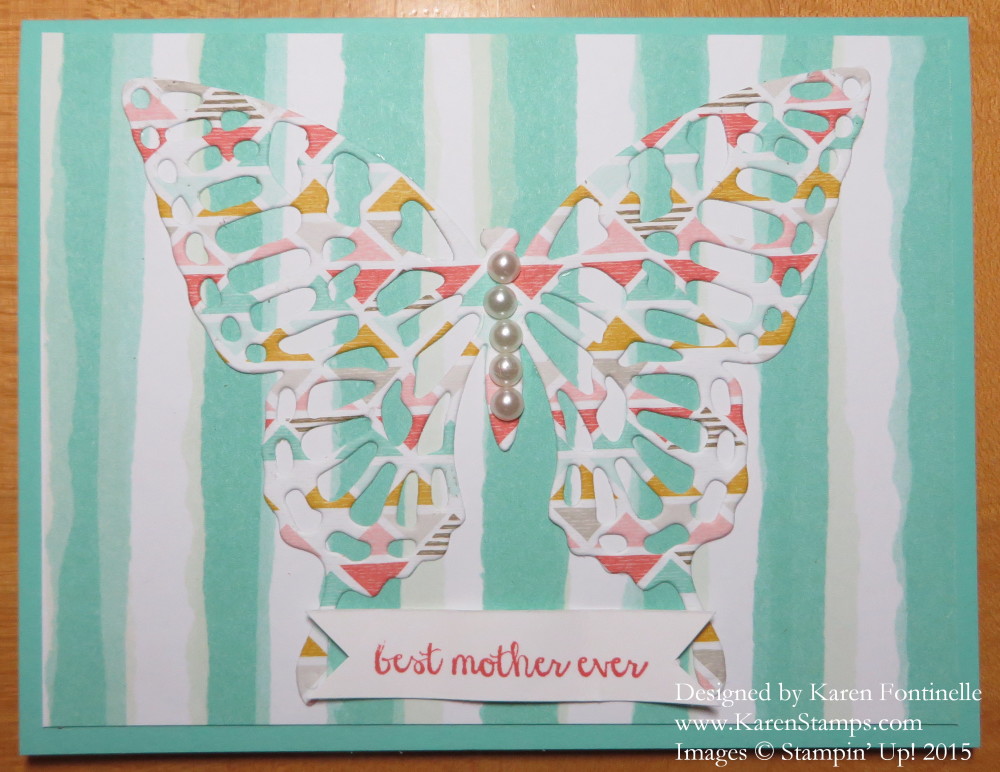
Butterfly Mini Treat Bag Birthday Card Enjoy

Butterfly Mini Treat Bag Birthday Card For You

And only a week left if you would like to join Stampin’ Up! and get two stamp sets in the new catalog FREE!  The Starter Kit is enough of a good deal in itself, but to get to choose two extra stamp sets as well is just icing on the cake! Join by June 30, 2015!  (You can go to the link above, click the Melon Mambo “Join Now” bar, the check off the acknowledgements and THEN you can see what is involved in choosing the Starter Kit.  This way you can get in there and then make up your mind if you want to go through with joining.  No obligation. And there’s never any pressure from Stampin’ Up! (or me) to take your business to any certain level.

ABOUT THE STARTER KIT:
$125 Retail Value

The choice is yours. When you join Stampin’ Up!, what you want is what you get! You choose what goes in your Starter Kit so you know you’ll love each product. And don’t worry about shipping and handling on your kit—it’s on us!Pick your products, pick your pack. It’s so easy: choose the catalog products you want (up to $125 worth) and one business supply pack so you can start sharing Stampin’ Up! your way with friends and family.

Stampin’ Up! has plenty of resources to help you get started in your new stamping business, at whatever level you would like to take it, plus I will be there to help you every step of the way. Email me if you have any questions about becoming a demonstrator at Karen@KarenStamps.com. I’d be happy to talk to you about it!

Let me know what questions you have!

Cherry on Top Cotton Paper Mini Treat Bag

Cherry on Top Cotton Paper Mini Treat Bag

When I broke out my new Cherry on Top Cotton Paper in the new Stampin’ Up! Catalog I decided to make a treat bag with it using the Big Shot and the Mini Treat Bag Thinlits Dies. I love the Mini Treat Bag Thinlits because you get so many pieces with it, and of course other people have figured out ways to alter the size of the treat bags and things you can make with the bag die. So it is a little pricey but you get a lot with this set.

But back to the Cotton Paper! It’s a little heavier, I would say, than tissue paper. It is lightweight but sturdy. I love my treat bag I made with the Cucumber Crush color, but I did find it a little difficult to work with in making the bag. It was a little bit difficult to fold on the score lines since the paper is lightweight.  I found using SNAIL adhesive to not work with it at all – seems the paper was too slick for the SNAIL to catch on to.  But the Fast Fuse worked great and I imagine the new Tear & Tape Adhesive would work great. After making the treat bag, I cut a piece of Whisper White card stock to fit inside and stamped it with Watermelon Wonder ink with a birthday greeting from the Amazing Birthday Stamp Set. (You can also buy a Bundle with the matching Banners Framelits if you like and save 15%.)

To decorate the bag, I punched ten flowers with the Pansy Punch from the Watermelon Wonder Cotton Paper. I could also have used the Floral Frames Collection Framelits Dies. Just stack the flowers together, staple in the center with the Stampin’ Up! Handheld StaplerThen just smoosh each layer up and toward the center to make the flower! The Cotton Paper works well for this! Just smoosh and fool with it and get it to your liking. If you are mailing it, you can flatten the flower and tell the recipient to fluff up the flower when they receive it! I also stamped a banner from the Amazing Birthday stamp set to decorate and applied a piece of Cherry on Top Washi Tape over a strip of Whisper White card stock since the tape is transparent. Then I just adhered it to the bottom of the treat bag. And since I had an already stamped and die-cut leafy image from the other day, I stuck that on behind the flower.  So cute!

Cotton Paper

Cotton Paper Stapled Flowers


Cotton Paper Flower


If you need any of these supplies, you can find them at my Stampin’ Up! Online Store HERE.


Layered Letters Father’s Day Card

Layered Letters Father's Day Card

Father’s Day is tomorrow, Sunday June 21, so if you haven’t already, you better find some time today to make a card for the father in your life, whether it’s your own father, husband, uncle, grandfather, whomever!

I had fun playing with the new stamp set Layered Letters Alphabet. I liked this set from the moment I saw it and I think it will be a great set to use even for cards and projects and certainly for scrapbooking. Can you have too many alphabet sets?!  Probably not! One thing I like about it is the rectangle shape and the circle that you can stamp first and then put the letter inside of it! Of course you can just use the letters plain as well. I guess I just like the font. There’s something very comfortable to me about the letters.

To make this Father’s Day card, I used the new Cucumber Crush green for the card base, layered with Whisper White. I just “eyeballed” the stamping using my Grid Paper and centering the card on the grid, but you could also use the Stamp-a-Ma-Jig if you wanted to be precise. I stamped the rectangles but “stamped off” lightly one time before stamping on the card to make them lighter. Then I stamped each letter with our Tuxedo Black Memento Ink. The Father’s Day words come from the Crazy About You Stamp Set. This stamp set is a little pricey but comes with a lot of useful stamps.  And if you like, there is a Bundle with some Thinlits to choose from and save 15%.

Then for just a little more somethin’-somethin’ I added the top and bottom border from the Tin of Cards Photopolymer Stamp Set. Don’t think this stamp set is only for the Tin of Cards!  I have used it a lot, separately, and you will too!

So there you have it, one idea for a Father’s Day card for tomorrow!

Get your Layered Letters Alphabet Stamp Set at the Stampin’ Up! Online Store HERE!

Jump Into Project Life By Stampin’ Up! With Moments Like These

Project Life Moments Like These Cards

Stampin’ Up!, as you know, has partnered with Becky Higgins and Project Life to provide us with these wonderful kits for memory-keeping! These special kits coordinate with our Stampin’ Up! colors and come with an optional accessory pack plus coordinating stamp set. When you buy the Bundle (the card collection, the accessory pack and the stamp set) you save 15%!

The Project Life by Stampin’ Up! system is easy!  Just gather your photos, insert them into the pocket pages, add some of the cards to decorate or explain, write in some journaling, and you are done!  Now if you like, add some stamping and add some embellishments with any of your stamping supplies or use the too cute accessory pack that coordinates with each card collection. Do as little or as much as you like.

Stampin’ Up! and Becky Higgins featured the new Moments Like These set on their blogs! Check out Becky’s post HERE.

Cherry on Top Washi Tape Easy Card

Cherry on Top Washi Tape Easy Card

I dare you to play with the Cherry on Top Designer Washi Tape and not feel happy! Just the designs and bright colors can put you in a good mood when you are stamping. The same is true with the Cherry on Top Designer Series Paper Stack, although today I only used the Cherry on Top Washi Tape. The card base is the brand new Whisper White Thick CardstockToday is the first day I actually used this thick card stock and I can tell you it really makes a nice card base. I didn’t add a layer or anything. While our regular Whisper White cardstock is very nice, it has always been just a little bit light for using as a card base.

To make this card, all I did was tear off strips of Cherry on Top Washi Tape and applied them on a diagonal. I let them extend over the edge of the card and then cut the excess off with a scissors. That way you don’t need to be exact with measuring, which would be nearly impossible. For a greeting I used “Just Because” from the A Dozen Thoughts Stamp SetThen because it was laying on the table and because I thought it kind of matched, I stamped the squiggly line along the bottom of the washi tape from the Tin of Cards Photopolymer Stamp Set. You can see this stamp set is not JUST for the Tin of Cards Project Kit!

When you need a card in a hurry, try one like this!  Use washi tape and a greeting or strips of your favorite designer paper!

Shop Stampin’ Up! Online HERE!

Tin of Cards Wooden Word Bubble Embellishments

Tin of Cards Wooden Word Bubble Embellishments

This morning before I hoped that I would be able to drive across town a little bit to go to an appointment, I wanted to stamp a few cards from the Tin of Cards in the new Stampin’ Up! Catalog.  This kit, the Tin of Cards, is so special it is featured on the cover of the new catalog! Everyone fell in love with that cute striped tin on the cover as soon as we got a peek at the catalog. I didn’t get very far during my limited amount of time I had, interrupted with bands of rain from the now defunct Tropical Storm Bill that managed to mostly miss the city of Houston yesterday but coming through with a vengeance today. We had some very heavy rain and my power was going on and off, on and off – but, luckily, you can still stamp pretty well in temporary darkness!

Pictured here is just one design of cards in the kit. The card base is already printed with the pretty blue diagonal stripe and then you add the printed strip across the middle. Next you stamp the little line of decoration above and below the strip. Since the stamps are photopolymer, you can pretty much see where you are stamping and just “eyeball it”. And, I discovered, if you mess up on the lines in the right place, the wooden piece is going to cover part of the stamped line anyway!  In fact, my tip would be to just stamp the line from each side of the card because the middle will be hidden. Then you don’t have to match up anything!

The word bubbles are wooden embellishments and really cute.  You stamp the greeting of your choice on them with Stazon Ink. If your stamps are new and you haven’t used them before, stamp several times on scrap paper to get them ready to go! I think they often have a manufacturing coating on them or just need to get used to the ink before they stamp really well. On one of the wooden pieces, my words did NOT stamp very well, so I took a Sharpie pen (it was a pen, not a marker) and filled in carefully. It wasn’t that hard and worked out well. I could have just turned it over, too, and tried again. The little gold glimmer heart is already die cut for you, just punch it out of the paper and adhere it to the wooden piece with Glue Dots or other adhesive.

Easy card to make and looks like you went to a lot of work for the special recipient!

The stamp set that coordinates with the kit is called – amazingly- the Tin of Cards Photopolymer Stamp Set! You may have another greeting stamp set you could use, but I do really like the greetings and font style in this set, so I think you will get a lot of use out of it with or without the kit. You also get the words to use for headings on the divider cards and the little frame that decorates the tab.

Tin of Cards Stamp Set
Get a group of friends together to each order the kit and then you order the stamp set extra as the hostess and all of you can make the Tin of Cards together! Or if you are local, contact me and I’ll bring the stamps and you and your friends order the project kit and everyone will make 16 cards to put in their tin to take home!

Shop at my Stampin’ Up! Online Store!

Stampin’ Up! Weekly Deals & A Tropical Storm!

Stampin' Up! Weekly Deal June 16 2015

Here are the new Stampin’ Up! Weekly Deals for today through Monday, June 22, 2015. Some good tools and accessories, plus three pretty ribbons for your Stampin’ Up! cards and projects. We’ve got the 1″ Square Punch and the Sweetheart Heart Punch, plus the popular Honeycomb Embossing Folder.  Think of the bee stamp in the Garden in Bloom Photopolymer Stamp Set and the English Garden Designer Paper with bees to go with it!

Check out the Weekly Deals and add them to your order from the new Stampin’ Up! Catalog! Just go to my Stampin’ Up! Online Store or contact me to order!

As I write this blog post, we are getting a little bit of rain from Tropical Storm Bill out in the Gulf of Mexico. I woke up to hear a bird chirping so I knew the dreaded heavy rain did not occur during the night. The good thing is that nothing is flooding yet and most people can easily get to work. The bad thing is most people can easily get to work this morning, but then what happens?! I don’t think anyone knows for sure yet, which is often the case with these tropical storms. The weather people can be sure they are moving in a certain direction and forecast heavy rain and flooding for an area, and then the storm moves a bit, speeds up or slows down, and everything changes. So while it seems like nothing is happening, we are getting bands of rain moving through in Houston, and Galveston and coastal areas are getting high surf and big waves.

I spent yesterday gathering storm supplies that we are always supposed to have on hand during hurricane season. I didn’t think much about it for this storm until I saw on Sunday night on the news that some store shelves had been emptied of bottled water! I didn’t have any trouble getting the supplies I needed early yesterday morning, but by later in the day grocery stores were mobbed and bottled water was gone!

Tropical Storm Bill SuppliesHere are some of my supplies I picked up yesterday!  Fresh bottled water, canned soup, tuna, batteries, chocolate of course, paper towels, and why not some chocolate?! I also filled an ice chest with bags of ice to cool it down just in case and bought a power pack to charge my phone in case the power goes off. Usually you don’t need much of this stuff, it’s “just in case”! So far so good, except my bags of ice are probably going to melt before we might need them.

During our lemon of a refrigerator saga a year or so ago, we learned that even with a good ice chest, it really made a difference to insulate it with old blankets covering it. Really helped keep the cold in or the hot out!

So with my preparations made, hopefully I can do some stamping today during these bands of rain and hopefully we won’t get too much until everyone gets home from work tonight. It was only a few weeks ago, on Memorial Day, that Houston flooded from storms that unexpectedly formed right over us and didn’t move for hours. Those people whose homes flooded are just now starting to get them repaired, so it would be horrible for them to get more flooding. I also feel bad for people who rented a beach house in Galveston for a week and this is the week they got!

Check out the Stampin’ Up! Weekly Deals and see if there is anything you need!


How to Make a Piano Birthday Card

Piano Birthday CardIf you know a piano player, you might like to make a piano card for them! It’s very easy to make a card like this in spite of how different and difficult it looks! You will need the Word Window Punch to make the piano keys. And that’s about it – really!

Make a card base with Whisper White card stock. Make a Basic Black layer on which you will build the piano. I heat embossed the greeting with the White Stampin’ Emboss Powder using the Heat Tool. Rub the Embossing Buddy around on the card first to eliminate static and keep the powder from sticking where you don’t want it.

Punch thirteen white piano keys with the Word Window Punch and line them up along the bottom edge of the black layer. When you know you have them fit correctly, adhere them to the black card stock. The back edge of them will be hidden under the ribbon. Punch nine black keys with the Word Window Punch and adhere them as shown over the white keys. Don’t glue down the very back end of the punched piece.  You will need to trim the back end of the black keys to match the back edge of the white keys so they won’t stick out. Just trim them with the Paper SnipsTie a ribbon of your choice around the layer as shown.   Mine is a retired polka dot ribbon but you can use what you like. Make a bow or just tie a knot.

For a little more pizzazz I added some sequins and rhinestones in the sequin centers. Try the Brights Sequins in the new catalog.

Try a piano card!  Make it suit the occasion with the proper greeting and ribbon!

Shop anytime at my Stampin’ Up! Online Store!

Remember the Stampin’ Up! Weekly Deals, good through Monday, June 15.

Stampin' Up! Weekly Deal June 9 2015

Watercolor Bohemian Thank You Card

Watercolor Bohemian Thank You Card

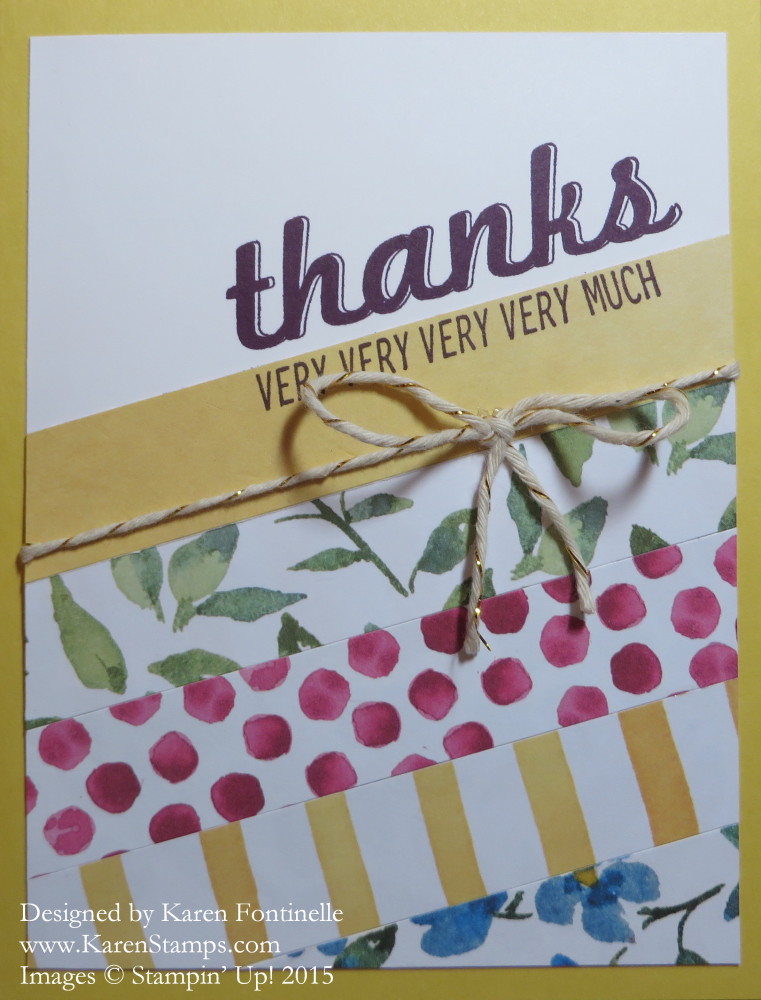
The Bohemian Designer Series Paper has such rich colors, you can use just a small strip on a card and have it be enough if you aren’t really into bold patterns. One of the coordinating colors that goes with the Bohemian paper is Blackberry Bliss so I used that for the card base. For an accent color I used a strip of Island Indigo card stock. For the greeting, I used the Watercolor Thank You Wood-Mount Stamp stamped with Island Indigo ink. Then for something a little fun, I took a strip of the Gold Sequin Trim and tied it. It is adhered to the greeting with a couple of Glue Dots. And then for a final little pizzazz, I adhered a few gold sequins that I pulled off the Gold Sequin Trim and stuck them around on the card with the Multipurpose Liquid Glue.

Easy card, elegant looking because of the deep colors and the sequin trim.  Did you know the Sequin Trim comes in four colors? It comes in Gold, Silver, Bermuda Bay and now Blushing Bride!

You can see a similar card in another blog post I did HERE.

Please go check out the new Stampin Up! Designer Papers HERE in the Stampin Up! Online Store!  I know they are difficult to see, but click on the little magnifying glass in the corner and then you can click the arrows to view some of the patterns better!  And just remember, they are EVEN BETTER in person!

Bohemian DSP

A Few New Stampin’ Up! Products

New Stampin' Up! Products 2015

As a Stampin’ Up! Demonstrator I was able to preorder some of the new products in the Stampin’ Up! Catalog 2015, but then I needed some more catalogs for customers and to have on hand so why not order a few more Stampin’ Up! products as long as the catalogs are coming?!

The Layered Letters Alphabet was something I saw online when Stampin’ Up! streamed a preview of the new catalog from the South Pacific event. I thought it was so cute, yet I didn’t put it on my order right away.  But then I did! I think there will be lots of things to do with it!

The stamp set that looks like lined paper is called Writing Notes and is a large background stamp. I should have ordered it in wood-mount because I think it is easier to use background stamps already mounted on wood. But you have your choice, wood- or clear-mount. Of course it is good to use for journaling in traditional scrapbooking or Project Life, but I think there will be other cute things to use it for, like a background on a card or something. We’ll see what everyone comes up with!

One popular item for sure is going to be the Tin of Cards, which is displayed on the front cover of the Stampin’ Up! Catalog. The tin is so cute in itself and comes with enough materials inside to make 16 cards, 4 each of 4 designs. Of course you can make whatever designs you want if you like to change things up so that you have 16 unique cards. Either way you are being creative! The Tin of Cards Photopolymer Stamp Set is separate but has great greetings to use with the kit and just with any stamping.  Get a few friends together to each order a tin and perhaps the stamp set also and then get together to make all your cards! Or if you are local to me, we can plan something with everyone ordering the Tin of Cards and I will bring the greeting stamp set!

I also stocked up on some black and white ribbon, the 3/8″ Stitched Satin Ribbon, which comes in five colors! And some of the new Gold Metallic Thread for a little pizzazz!  There are also new Metallic Foil Doilies in gold and silver, plus a new accent called White Perfect Accents. Not exactly sure what all you can do with them yet, but they can be colored with Sharpie Markers to match your project. And then there is the new embossing folder, Brick Wall which will be interesting to play with! It’s the new larger size. Oh, and I almost forgot the new Tear & Tape Adhesive which I can’t wait to try! Supposed to be easy to use and have a strong hold for our 3D projects!

If you would like to see the fun little Flipagram video I made of the Tin of Cards Project Kit, check out my Instagram at @stampingwithkaren or my Facebook page HERE.

Paper Pumpkin Special SAVE50

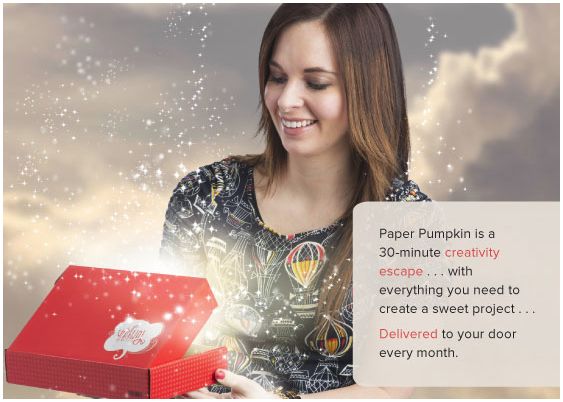
Don’t forget, today is the last day to get the special deal on Paper Pumpkin!  Get 50% off the first two months of your subscription! The kits have only gotten better, so I feel confident you will enjoy whatever kit shows up in your mailbox in about a week, IF you subscribe today! Use Promo Code SAVE50.  Click HERE to join Paper Pumpkin or find out more information! Paper Pumpkin is for new crafters, non-crafters, and super-crafters!  Anyone who likes a surprise in the mail, especially the gift of a little time for yourself for crafting without having to have a ton of supplies or lots of time. It comes in a cute red box just like a gift!  Try it today! Otherwise you have to wait a whole other month to get your first kit!

JOIN PAPER PUMPKIN TODAY AND SAVE 50% First Two Months!

Stampin’ Up! Deals for You!

Stampin' Up! Weekly Deal June 9 2015

Here are the current Stampin’ Up! Weekly Deals for today through next Monday, June 15.  The Alphabet Rotary Stamp can be used to form your own words or short phrases for cards or scrapbooking. Surely you wouldn’t pass up discounted Gold Glimmer Paper to have in your stash!  So pretty! And then there’s Satin Ribbon, Embossing Folders, the Gift Card Envelope Die, and of course the Pansy Punch!  The Pansy Punch coordinates with the Flower Shop Stamp Set.  Actually the Flower Shop Stamp Set and Pansy Punch come in a Bundle and the Bundle is still a little bit cheaper than the stamp set and discounted punch  separately.

ALSO – Tomorrow is the last day, June 10th, to take advantage of the special deal with Paper Pumpkin, the monthly papercrafting kit that comes in your mailbox from Stampin’ Up! Join and get the first two months at 50% off when you use the Promo Code SAVE50.

Paper Pumpkin Special SAVE50

Click HERE to join the Paper Pumpkin fun!!

Then wait just a few more days until your Paper Pumpkin Kit ships and keep an eye on your mailbox! And once you are a subscriber, you can go back and purchase any past kits or refills that are available that you missed previously!

Offer Dates: May 12-June 10, 2015

Offer Details: Use the code SAVE50 to join Paper Pumpkin before June 10, 2015, and get 50% off the first two months! After that, keep the creativity coming for only $19.95 + tax per month (shipping included).

The Fine Print:
For new subscribers only.
Available for month-to-month subscriptions, not prepaid subscriptions.
Discount applied to one kit per month for the first two months of a new subscription. After the first two months, the price for each month’s kit will go to the regular price: $19.95.
Visit PaperPumpkin.com to join.
Enter the Promo Code, SAVE50 when you sign up.
New subscribers must join by Wednesday, June 10, 2015; 11:50 PM (MT).

JOIN PAPER PUMPKIN TODAY! DO IT FOR YOURSELF OR GIVE AS A GIFT!

Gift Bag Punch Board Bohemian Gift Bag

Gift Bag Punch Board Bohemian Gift Bag

One of the new products in the new Stampin’ Up! 2015-16 Annual Catalog is the Gift Bag Punch Board,  With this punch board, you can create many different sizes of gift bags, using card stock or designer series paper. There are three sizes of bags listed on the punch board, based on the size of the bottom of the bag. But then you can make the bag as tall or short as you like. It also punches holes in the top to thread ribbon through to tie closed, but I didn’t make this bag that way. On this bag, I also scored about an inch across the top so I could fold the paper over at the top to see the pattern on the other side. You could also make a decorative top edge. You can bet people will figure out many ways to make different sized bags and who knows what projects with this Gift Bag Punch Board! The sides can be straight and plain, or they can be gusseted to fold in a bit. And then of course, the possibilities of decorating are endless, especially for Stampin’ Up! papercrafters!

This gift bag is made with a pattern in the Bohemian Designer Series Paper. You could use any of the papers, any side. With some patterns of paper, you probably want to pay attention to which way the pattern is going before you cut your paper for the punch board. Don’t score too hard with designer paper so as not to tear the paper. It will probably hold up pretty well, though. The tag is made with the Scalloped Tag Topper Punch and the new Delightful Dijon card stock  and the greeting is from the Bravo Photopolymer Stamp Set.  What a fun greeting set to have on hand!

There are directions that come with the Gift Bag Punch Board and they are even printed on the board itself, But the best bet is to watch this Stampin’ Up! video to really get a feel for it.  Make a bag or two with some scrap paper to get the idea and you will be all set!  Not that hard!

Watch this Stampin’ Up! video!

Then visit my Stampin’ Up! Online Store to order yours today!

Sara Douglass Farmers Market Party Ideas

Sara Douglass Party

Don’t you love these cute party ideas with the Stampin’ Up! Farmers Market Designer Paper , the All About Sugar Stamp Set, and four other products and accessories?! Sara Douglass, Shelli Gardner’s daughter, was featured on a local TV show in Utah, Good Things Utah, and showed how anyone can make a few simple party decorations to jazz things up! These are really cute and super simple to make!  Just change the designer paper to suit the theme of your party or gathering!

Watch the video below, and visit the page HERE.

Here are the products Sara used. Now you can start planning your party decorations!

138684 – All About Sugar Stamp Set
138448 – Farmers Market Designer Series Paper
101650 – Very Vanilla 8-1/2” x 11” Cardstock
138315 – Kraft Tag a Bag Gift Bags
138417 – Hello Honey 5/8” Striped Cotton Ribbon
132708 – Memento Tuxedo Black Ink Pad

To read the article and see a few more photos of the party decorations, visit the Stampin’ Up! website HERE and find the article “Sara Douglass on Good Things Utah”.

When you have your party planned, just visit my Stampin’ Up! Online Store HERE to make your purchases! Looks really fun to me!!

It’s National Donut Day! Celebrate!

National Donut Day Sprinkles of Life Donut Card

You might not have heard but today is National Donut Day!  And you can probably even get a free donut in your neighborhood somewhere!  Just google “National Donut Day” and find a location near you! Dunkin’ Donuts and Krispy Kreme have something going on, Shipley’s here in Houston, but look it up online to see what the conditions are before you go!  Who thinks up these “days”?!

To commemorate National Donut Day, I made this card with three homemade donuts – out of paper! That reminds me, I learned to make my own donuts in Home Ec in 7th or 8th grade out of the canned biscuits. The donut holes were especially good.  I think I made my grandpa a container of donuts for Christmas for a gift!

To make your own paper donuts, you will need a circle punch or two or the Circle Framelits or come circular cutting skills. After all, a donut doesn’t have to be a perfect shape! I cut the two regular donuts out of Crumb Cake card stock and the chocolate donut out of Chocolate Chip card stock.  Then for frosting I did the same, but trimmed it down with my Paper Snips to look like the frosting was spread on top. The chocolate donut has white frosting with Chocolate Chip sprinkles (from the Sprinkles of Life stamp set!). The donut with chocolate frosting was embossed with the Decorative Dots Embossing FolderThe largest donut was punched with the 2 1/2″ Circle Punch and the 3/4″ Circle Punch for the center (punch the center first, then center that hole when you punch with the larger circle punch). I should have just used pink card stock, but I used Whisper White and then colored it with Pink Pirouette reinker and my Aqua Painter. For candies on top I used the Subtles Candy Dots. Love those!  The greeting comes from the Bravo Stamp Set.

Bravo Stamp Set

My card began with a Daffodil Delight card base, but it just needed something. I added a layer of Watermelon Wonder and another layer of a pattern in the Cherry on Top Paper Stack. Such cute papers in there! When you are creating something, if it doesn’t feel right, just keep playing with it and I’m sure you will come up something that feels satisfying and then you know you’ve got it!

Another new stamp set in the new Stampin’ Up! Catalog that would be good for National Donut Day is the Sprinkles on Top Stamp Set. The small images can be candies or donuts!

Go get your free donut, then sit down and do some shopping at the Stampin’ Up! Online Store!  

Happy Donut Day!

Bohemian Watercolor Thank You Card

Bohemian Watercolor Thank You Card

Today is the first day for the new Stampin’ Up! Catalog all by itself! The “old” is gone and the “new” is here! My card today uses the new Bohemian Designer Series Paper along with the coordinating In Color Delightful Dijon and a Bermuda Bay card base. This is a very simple card, inspired by (copied!) by one in the new catalog on page 18.

The Bohemian DSP has very bold patterns that you may or may not like, but you can always use a small piece of it if you don’t like the look of a lot of it on a full size card. You can also turn the paper over for a different and smaller pattern! Remember that amazing fact about stamping and papercrafting – there is always the other side of the paper!

If you are tired of cutting the cute little tail on banner pieces, now you can use a punch! The Banner Triple Punch is designed to snip that little tail on the end of banners that are 1″, 1 1/2″ and 2″ wide. I think you can even slide in a narrower strip, like 3/4″ and just center it yourself in the slot.  I think this punch will be very popular!

For my greeting on the card, I used the Watercolor Thank You Stamp.  It is a single wood-mount stamp and has that watercolor look that is SO popular now.  I love the look of it! Then I punched it out with the 2 1/2″ Circle Punch. It is stamped with Bermuda Bay ink. And as in the card in the catalog that I was copying, I tied on a piece of Baker’s Twine and made a little bow. I used the Gold Metallic Baker’s Twine.

Try making a card similar to this one with what you have! It is a quick and easy card!

On my Stampin’ Up! Store website, you might notice the categories in the left side bar are a little different with the new catalog.  For example, to find punches, you need to click on “Paper Cutting and Scoring”. Then more categories will come up to lead you to what you are looking for. I guess that might be obvious to some, but it took me a minute to wonder what they did with the punches!!

If you are already very familiar with Stampin’ Up! products, then you probably have a Demonstrator you like and work with – but if you do not, I would be happy to be yours! Just email me at Karen@KarenStamps.com  if you would like a new catalog if you prefer a hard copy. Otherwise you can view all the products online at my Stampin’ Up! Store or check out the PDF version of the catalog.

Stampin’ Up! 2015-16 Annual Catalog PDF

Sign up for my Mailing List SOON so you receive my June issue of the Stamping With Karen Newsletter full of projects and the latest Stampin’ Up! news! Put your name and email in the box in the top right!