Mini Muslin Gift Bag Stamped

Muslin Gift Bag

Talk about a quick and easy stamping project! You can’t beat this Mini Muslin Stamped Gift Bag!  Keep some of these Mini Muslin Gift Bags on hand and when you have a small gift that will fit inside, make a unique packaging by stamping or otherwise decorating the front of the muslin bag.

You never know where inspiration will come from, and in this case, it came from a Christmas magazine I was about to throw out! I saw some little bags that looked like this one that held dark chocolate pecans (Yum!) and the printing on the front reminded me of our stamp set Big News. So I got out my Mini Muslin Gift Bagsslipped a piece of cardboard inside to give a stiffer surface on which to stamp and to prevent the ink from going through, just in case. I chose this sentiment from Big News and stamped using Stazon Ink. I also added the little heart in the stamp set.  I thought about coloring it in, but decided I liked the look of just the ink and no color. Then just add your gift inside! If it is food, I would put it in a cello bag first. There could not be a faster way to decorate a gift bag!!!

There are even more packaging supplies and ideas in the Stampin’ Up! Catalog! Check them out! And if you don’t have a Demonstrator and need a catalog, please contact me and I will send you a catalog.

Today is the last day for the current Weekly Deals!  Check them out as well as the Clearance Rack to add to your order.

Shop HERE at the Stampin’ Up! Online Store if you need  the Mini Muslin Gift Bags to keep in your stash! They do come in handy!

Cottage Greetings Card Kit


One of the new Stampin’ Up! Card Kits is called Cottage Greetings. You can make 15 cards, 5 each of 3 designs, with the kit. You’ll want to add the stamp set Cottage Greetings available in wood- or clear-mount. It’s a lovely stamp set, whether or not you buy the kit.  You can use it easily without the kit so don’t worry you won’t get your money’s worth out of it! I love the font and the sayings.

Check out the video and find out all about the Cottage Greetings Card Kit. If you want to order it and the stamp set, just go to my Stampin’ Up! Online Store. It’s a fun and easy way to get a stack of cards made!

Gift From the Garden Card

Gift From the Garden Card

This is the first card I’ve made with the new stamp set Gift From the Garden. I saw a gift set of cards and things that Stampin’ Up! posted one day by a UK demonstrator and decided to get the stamp set. So cute! I haven’t started on the gift set yet but here’s my first card.  Very easy! Use the marker technique to color the flower pots and the plants separately, breathe on the stamp to remoisten and then stamp. I layered with matching colors, Cajun Craze and Wild Wasabi and adhered to the Sahara Sand card base. The greeting is stamped in Cajun Craze ink and comes in the set, of course.  I think the flower pot stamp is cute in itself so I placed it in the photo!
SU Gift From the Garden Gift Box

I love this cute gift set!  Maybe it is the colors! If you have a gardener in your life, maybe you need this Gift From the Garden stamp set!  Place your order today!

Shop Stampin’ Up! Online HERE!

Give Yourself the Gift of Paper Pumpkin! Why not?!

Paper Pumpkin Escape
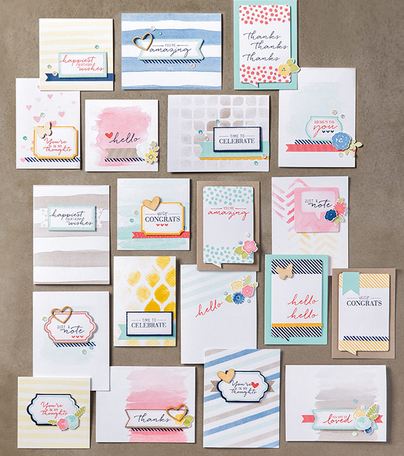
If you are interested in a Stampin’ Up! papercrafting kit that comes to you in the mail once a month, just click here on my Paper Pumpkin page for more information and to join!  Paper Pumpkin would love to have you, and if you join by tomorrow your first kit will go out in another week! Join by July 10th!

Your first kit comes with a clear block to use with the included stamps.  You also receive an ink spot to use in the kit and sometimes even adhesive. Each month the kit is a surprise so it is not always cards, for better or worse. We have also had kits that made gift bags, albums, a framed picture, and other projects. Each kit comes with instructions and a link to a video to see how to assemble the kit. After that you are free to do what you want with the kit! Make everything exactly how Stampin’ Up! shows you or put your own spin on it and use extra materials if you like. Whatever you want to do! After a few days of everyone getting their kits, there will most likely be alternate ideas online that you can copy if you want.

No risk, no obligation.  Try it for a month and if it doesn’t suit you, just cancel.  Too busy or going on vacation?  Just “pause” your subscription that month. You can go into your account any time and set it how it works for you. Just let them know by the 10th of any month if you want to “pause” or “cancel”. That’s why I suggest you sign up today because everyone signed up by July 10th will receive the July kit that goes out around the 15th.

Once you are a Paper Pumpkin subscriber, you can go check out the past kits and whichever ones are available you can purchase along with your regular Stampin’ Up! order.

Paper Pumpkin kits make great gifts as well!  Order more than one and gift one or sit down with your friend or loved one and make your kits together!

If you go to www.paperpumpkin.com please choose me as your Demonstrator or just click HERE to go directly to my personal Paper Pumpkin page.

OR if you prefer, if you are placing a Stampin’ Up! order and want to add to it, just order the prepaid Paper Pumpkin Subscriptions for any length you prefer. Order a subscription for a gift and you will get an email from Stampin’ Up! with a code to pass on to the gift recipient for them to use to activate their account.

Paper Pumpkin Box

Definitely Dahlia Thank You Card

Definitely Dahlia Thank You Card

If you want to make a simple, easy handmade card, then try this Definitely Dahlia Thank You Card. Stamp the card, stamp the greeting, done and beautiful!  The beautiful Definitely Dahlia single stamp will do all the work for you! It is one big stamp, as you can see, and I am sure there are lots of possibilities for colors and creativity. Apparently dahlias come in lots of colors so there is lots of leeway in stamping your flower!

The Definitely Dahlia stamp comes in clear-mount or wood-mount.  My personal preference is wood-mount for large stamps like these and also background stamps. I like having that large stamp already mounted on the wood and I think it is sturdier for stamping a large area like that. Plus the stamp itself, this one, is decorative just as a stamp to set on your shelf!

The card base is Daffodil Delight card stock and the dahlia is stamped on Whisper White with Daffodil Delight ink.  The greeting is from the new stamp set One Big Meaning.  This stamp set contains all kinds of “Thank You’s” and we can all make use of those! The greeting is stamped with Memento Ink.

If you wanted to jazz up this simple card, you could certainly do that with ribbon, with a little bit of glitter and maybe the greeting on a banner or other die-cut shape. Stamp the dahlia on another paper and cut it out and make it a pop up on the card front with Stampin’ Dimensionals.  Lots of possibilities!

Shop Online at my Stampin’ Up! Online Store!

New Stampin’ Up! Weekly Deals July 7 2015

Stampin' Up! Weekly Deal July 7 2015

Here are the new Stampin’ Up! Weekly Deals for July 7 through Monday, July 13. Remember, these products will only be available at these prices while supplies last.  Last week two of the items sold out the first day. There are more items so it is harder to get one big picture to post here!  Just click the link or the photo to go to the store page where you can see each product and get the information!

Also check the Clearance Rack before you finalize your order, just in case you find a bargain you want!

Something new on the Online Store:  Project Ideas from Stampin’ Up! in the left sidebar!  Click on that link when you are in the store (or the photo below!) to see some of the catalog projects and the materials you need for them.

Online Store Home Page Screenshot

Today is July 7th so if you would like to join Paper Pumpkin and get the July kit in your mailbox in just a little over a week, be sure to subscribe HERE on my page! If you would like to add a month or more to your regular Stampin’ Up! order, you can get a prepaid subscription HERE.

Paper Pumpkin Box

Red Mailbox for Mailing List Sign UpAre you on my Mailing List??  If you are reading this blog post, or any of my other ones, I would love to have you sign up for my Mailing List to receive my monthly newsletter plus one other mid-month with the latest Stampin’ Up! news and offers plus exclusive projects you won’t find on my blog or Facebook Page. Occasionally I send out an extra email if there is BIG NEWS or something urgent I wouldn’t want you to miss.  But you won’t be bombarded by emails from me! Just sign up in the box in the top right or the pop up box and you will receive a FREE gift! Do it today so you will be set to get my July newsletter soon!

Coloring For Adults – “You’ve Got This” Flower Card

You've Got This Flower Card

In the Sunday paper, I read an article about how coloring for adults is really a craze right now. Apparently there are all kinds of coloring books for grown-ups out there. The author described coloring as “transporting” because she was just concentrating on the page and what she was doing, not her worries and problems. While that is nice, we stampers have known that for a long time! When we sit down and stamp a card or project or get together in a class with other stampers, life tends to take a backseat and we can relax and just enjoy the creative experience. We often call it stamping therapy or say that all our stamping supplies are “cheaper than therapy”! We don’t even need to spend money on coloring books for grown-ups because we can just stamp an outline image, such as this flower from the You’ve Got This Stamp Set, and be “transported” while we color away!

The only trick to this card is masking.  Stamp the flower on the Whisper White card stock with black Stazon or Memento Ink (I didn’t have any trouble with the Memento ink even though it is not waterproof like Stazon). Then stamp it again on computer paper and cut out with Paper Snips (believe me, they make “fussy cutting” so much easier than other scissors). This cut out flower becomes the “mask”.  Lay it over the stamped image (good to apply dots of 2-Way Glue and let dry so it will be like a post-it note to hold it in place) and then stamp that background right over the mask and the flower! The mask will protect the flower image from the background ink. Remove the mask and then color in! If you are still using your Blendabilities, this flower is perfect for them.  Otherwise, use the Stampin’ Write Markers, in different shades if you like. Use Watercolor Paper and you can really work the coloring without making the paper pill.

You've Got This Flower Card Unmasked

The card base on this sample is Melon Mambo, the layer Blushing Bride. To color in the flower I used Pink PIrouette as the lightest color, Blushing Bride and thought I was using Melon Mambo for a few dark accents but it turned out to be Rose Red!  All Stampin’ Write Markers. The flower stem colors are a couple of greens, Wild Wasabi and Old Olive. The background ink color is Blushing Bride.

If you prefer not to color in, stamp the flower image, then stamp right over it without a mask, with the background image and your flower will automatically be colored in! Looks great that way also!

So if you would like to join the adult coloring craze, just stamp the “You’ve Got This” flower and color! Use Stampin’ Write Markers or use Blender Pens or the Aqua Painter. You have all kinds of choices. Just relax and enjoy the process! In the end you’ll have a lovely work of art!

To get your stamp set and coloring mediums, just shop online at Stampin’ Up! Don’t forget to check the Weekly Deals, too!


4th of July Uncle Sam Scalloped Tag Topper Treat Holder

4th of July Uncle Sam Scalloped Tag Topper Treat Holder

If you are looking for a fun little party favor or table decoration for your 4th of July party, you might have fun making this 4th of July Uncle Sam Scalloped Tag Topper Treat Holder. It’s just a single strip of paper, scored to hold a piece of candy inside, with the top tied together and decorated on the front!  You can use this basic idea for any size or any occasion! But this one will be very cute for a 4th of July Independence Day celebration!

This treat holder is made with a 2″ x 8″ strip of Pacific Point card stock.  I found the center (4″) and then measured equal distance from that to allow room for my single Ghirardelli candy, so I didn’t need it to be very wide. I probably scored it about 1/2″ off the center on each side. Then I used the Scalloped Tag Topper Punch at the top of each end. Next I measured a piece of Whisper White card stock to fit in the space on the front of the treat holder. It looked too plain so I embossed it with the Lucky Stars Embossing Folder.

The Uncle Sam is made with several punches and you could make yours larger. The hat is made with a 1 3/8″ square of Whisper White, and I just cut some narrow strips of Real Red and glued them on the hat. The hat brim is made with the Word Window Punch.  The beard is made with the 1 3/4″  Scallop Circle Punch and the face is Sahara Sand punched with the 1 3/8″ Circle Punch. The Gold Glimmer Paper star is punched with the star in the Itty Bitty Accents Punch Pack.  I tied the package with my favorite ribbon, the Whisper White 5/8″ Organza Ribbon and a piece of Gold Sequin Trim for a little bling!

You have time!  Make a few little 4th of July decorations or treats for your guests or neighbors or kids for your celebration or fireworks viewing!

Don’t forget the Stampin’ Up! Weekly Deals (a couple sold out on the special price already) and the new items (and old) on the Clearance Rack. Also, remember the Watercolor Wishes Card Kit is now available, in the catalog on page 80). Be sure to put THAT on your list!

I hope my 4th of July Uncle Sam Scalloped Tag Topper Treat Holder will inspire you to copy this idea or come up with your own to celebrate the Independence Day holiday!

Flower Patch 4th of July Fireworks Card

Flower Patch 4th of July Fireworks Card

Would you believe this Flower Patch 4th of July Fireworks card is made from flower images? If you look at the Flower Patch Photopolymer Stamp Set, you will find some flower images that can be made to look like bursts of fireworks! All of these stamped images on this card are made from the Flower Patch Stamp Set and then embellished with some heat embossing.  You could also use glitter or rhinestones! If you purchase the Flower Patch Photopolymer Bundle, you will also get the Flower Fair Framelits Dies at a 15% savings on the Bundle!

To make these flowers look more like fireworks, I stamped the flower centers with Versamark Ink and used the Heat Tool and  Gold Stampin’ Emboss Powder.  Embossing is so much fun! You could also use the 2-Way Glue Pen and Dazzling Diamonds Glitter or stick on some Rhinestone Jewels for some bling!

Look through your stamp sets and see what you could use to make a card, decoration, or treat for the 4th of July holiday! If you would like some of the supplies I used to make my Flower Patch 4th of July Fireworks card, you can order at my Stampin’ Up! Online Store HERE.

Watercolor Wishes Card Kit Is Here! Make Quick & Easy Cards!

Watercolor Wishes Card Kit

The long-awaited (well, for a month!) all-inclusive card kit, Watercolor Wishes Card Kit, is finally available from Stampin’ Up! This kit includes supplies for 20 different cards in 3 sizes and a very nice stamp set! Lots of people wished they could buy the stamp set separately while they waited for the card kit to be available. The stamp set has greetings you will use all the time when you make cards and projects in very appealing font styles. You even get a clear block in the kit to use with the stamps. The card kit comes with Stampin’ Dimensionals but you might also like to have Glue Dots and Multipurpose Liquid Glue or some other adhesives such as SNAIL or Fast Fuse (on the Stampin’ Up! Weekly Deals this week!).

Here’s what comes in the kit
* 20 cards total
* Folded card sizes: 4″ x 4″, 3-1/2″ x 5″, 4-1/4″ x 5-1/2″
* 12-piece photopolymer stamp set
* 20 card bases
* Die-cut accents
* Cardstock flag stickers
* Night of Navy and Watermelon Wonder Classic Stampin’ Spots
* Washi tape
* Giftable Kraft box
* 50 sequins
* Wood die cuts
* Stampin’ Dimensionals
*Acrylic stamp block

Coordinating colors: Crushed Curry, Night of Navy, Pool Party, Tip Top Taupe, Watermelon Wonder

This kit makes a nice gift since the stamps, ink, block and everything is included (except the extra adhesives that might be useful) and comes in a nice Kraft box.

Shop at my Stampin’ Up! Online Store today!

Order yours today, and be sure to check out the Weekly Deals and the new products added to the Clearance Rack! Put the Watercolor Wishes Card Kit at the top of your list!

Watch the Stampin’ Up! video below to find out more about the card kit.

Stampin’ Up! Deals! Check Them Out!

Weekly Deal Banner 2015

Stampin Up! Weekly Deal June 30 2015

Stampin Up! Weekly Deal June 30 2015

Check out these new Stampin’ Up! Weekly Deals for June 30, 2015 through Monday, July 6. Click on the photos to see the page in my Online Store.  I see several products I want! For sure you want the 2″ Circle Punch to fit in with some others you might have. If you don’t have the new In Color ink pads yet, get the In Color Markers and you can “marker up” your stamps if you want to use a new In Color. Sequins, ribbon, button and twine – always good for embellishing!  Sometimes it is the little bit of embellishment that makes the card. The Fast Fuse Adhesive, I admit is a little tricky to use, but now that I have the hang of it, I LOVE it. Very good adhesive. Sometimes I have to advance the tape myself a little bit in the dispenser, but otherwise it works great. (Not on the Weekly Deals, but I also love the new Tear & Tape Adhesive.  You should put that on your next order for sure!)

Clearance Rack Banner 2015

Also check out the Stampin’ Up! Clearance Rack.  There are new items on the Clearance Rack, while supplies last. Not quite what I was expecting and I don’t know what they did with the previous stuff, but there you have it. Check it out!

***Apparently Stampin’ Up! is working on some corrections to the Clearance Rack right now!  We’ll see! Check back a little later on.

Get Ready…..More Deals Tomorrow!

Get Ready for More Weekly Deals & Clearance Rack

On your mark –  Get set – but don’t “Go” yet!  You have to wait until tomorrow!  But this is a heads up!

Get ready, because June 30-August 3, Stampin’ Up! is adding more items to the Clearance Rack and to Weekly Deals! This is a hint that tomorrow marks the beginning of Bonus Deals. You will be able to save up to 30% on even more Weekly Deals, or up to 60% on extra items in the Clearance Rack (while supplies last), BUT REMEMBER:  Weekly Deals discounts are available in limited quantities before the items return to retail prices.

What does all that mean??  I don’t know any more than that! We’ll all find out (and see!) tomorrow! But this is your early warning if you want to check the Stampin’ Up! Online Store early tomorrow to see what has been added.

LAST TWO DAYS TO GET FREE STAMPS!

Become a Stampin' Up! Demonstrator

Start your own stamping business and get two free stamp sets to add to your Starter Kit! Having your own stamping business can lead to all kinds of good things such as more income for your family, new friendships, being a part of Stampin’ Up! and having your own business to run the way you like.  No pressure from Stampin’ Up! or from me except for the requirement to have $300 in sales per quarter to stay active. Click HERE for more information and feel free to email me at Karen@KarenStamps.com if you would like to ask me any questions. It can be a big decision and yet it doesn’t need to be because there is no obligation if you find it is not for you. Choose $125 in products from Stampin’ Up! in your Starter Kit and pay $99, plus you get some business supplies in there to get you started! The Starter Kit ships free.

Last Day for these Stampin’ Up! Weekly Deals!

These Weekly Deals are fantastic ones!  I have had so much fun using the Mini Treat Bag Thinlits for make many different sizes and styles of little treat bags for cards or treats inside! Scroll through my blog to see some of my recent posts!

Stampin' Up! Weekly Deal June 23 2015

Making Mini Treat Bags with the Mini Treat Bag Thinlits

Watch Donna Griffith from the Stampin’ Up! Home Office make cute mini treat bags with the Mini Treat Bag Thinlits Dies! She shows some really cute ideas, plus watch for the tip about the little heart embellishment!  I never heard that one before!

The Mini Treat Bag Thinlits Dies are on sale during the Stampin’ Up! Weekly Deals through Monday June 29, 2015.  I also love the Silver Glimmer Paper and the embossing folders on this deal, not to mention the buttons and the ribbon!  It’s all good!

Altered Folded Mini Treat Bag

Altered Folded Mini Treat Bag

One more idea for using the Mini Treat Bag Thinlits Dies, which are $10 off through Monday night on the Stampin’ Up! Weekly Deals. Make the regular mini treat bag, then fold over the top edge. Add a belly band to hold it in place and you’ve got a cute little envelope for a card and/or treat! Don’t forget all the cute embellishments that come in the set of dies, such as the strip of stars, hearts and dots, the heart and star, the words, etc. You can decorate your Altered Folded Mini Treat Bag any way you like!

For this project I just used a 6″ x 6″ piece of paper from the Cherry on Top Designer Series Paper Stack.  No cutting involved.  But you do need to to place the large treat bag die carefully on the paper and make sure it is properly placed as you cover it with the cutting plate before running through the Big Shot Die-Cutting Machine.  The Magnetic Platform helps hold it in place but you can also use some post-it type notes or washi tape to hold the die in place.  As you can see, there is very little paper waste!

Die Cut Mini Treat Bag

Make the mini treat bag, then fold over the top.  You can just do this or you can score first about 3 1/2″ from the bottom edge of the bag. Just figure out what size you want the bag/envelope to be.

Mini Treat Bag Folded

Go to my Stampin’ Up! Online Store and check out all the Stampin’ Up! Weekly Deals! Then if you liked my Altered Folded Mini Treat Bag, be sure to place it on your order before 11:50 pm MT Monday June 29, 2015. All the other items on the Weekly Deals are really great too so be sure to look!

Stampin' Up! Weekly Deal June 23 2015