
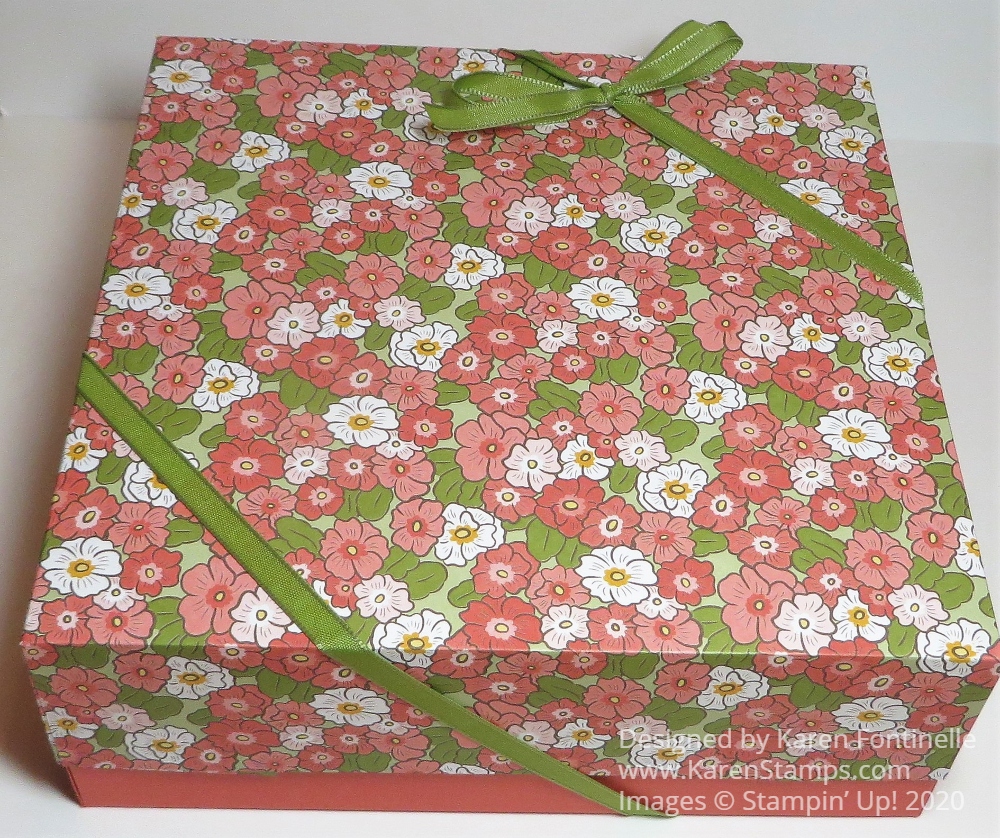
It’s time to give yourself a present, like the paper and ribbon to make this Ornate Garden Handmade Gift Box!
Order new products from the brand new Stampin’ Up! Catalog!
That’s right! The new Stampin’ Up! 2020-21 Catalog went live yesterday and there was certainly a flurry of orders, judging from a few glitches on the website, which usually happens on such an exciting day! Customers and Demonstrators were trying to get their orders in as quickly as possible so they could get their hands on the new products as quickly as possible!
If you have a large order, keep in mind these amounts:
- A $150 or higher order of merchandise earns 10% or more in Hostess Rewards (see page 187).
- June 3-30 a $250 order earns an EXTRA $25 in Hostess Rewards!!
Remember, there are Bundles in the new catalog that will save you 10% if you buy the two items together. Make sure you are putting in the correct number for the Bundle, not just the stamp set. I think it is a little trickier to spot the Bundle on the catalog pages but just look!
There are now a few Collections, such as the Ornate Garden Suite Collection on page 64 or the World of Good Suite Collection on page 24. If you want EVERYTHING that goes together….the stamp set, the dies, the paper, the ribbon, the embellishments…you can just put in that one number for the Collection. You will still get the 10% discount if there is a Bundle involved, but if you don’t like the ribbon or don’t want the embellishments, then just order the individual items you want.
As you look through the back of the catalog, with the tools and accessories, you may notice that the listings are a little confusing. There are numbers on the product photo that you then need to match up with the number of the listing and description of the product. I found that particularly confusing on the page with rhinestones, sequins, dots, etc. You can’t just look across and see what is what, you have to match the numbers.
Watch for the tiny little red “N” symbol on the New products.
Read the “fine print” in the product descriptions to see if there are dies that coordinate and on what page to find them. There are a couple pages of Bundles in the back of the catalog with stamp sets and dies and then there are other pages with just dies, but they aren’t duplicated so you have to look in both places to see all the dies available.
Check out the new adhesives! Snail Adhesive is gone and replaced with the new Stampin’ Seal. Be sure to buy some refills when you order. The other new adhesive is the Stampin’ Seal+ (plus) which is stronger and replaces the old Fast Fuse we had once upon a time ago. And then we still have our other adhesives like the Multipurpose Liquid Glue.
The new Stampin’ Cut & Emboss Machines on pages 170-1 and the Tools that go with them on page 172 are not available YET and we have no date when they will be available. They sure look cute and I hope they hurry up!
So back to my Ornate Garden Handmade Gift Box! After you treat yourself to some “gifts” from the new catalog, maybe you can make a box like this to store some adhesives in or ribbons or whatever.
I made this gift box just like I made THIS ONE recently on my blog.
To begin making the bottom of the box, you will cut the tiniest sliver off the side of two sides that share a common corner. To determine a “sliver” you can just slide your paper the teeny tiniest bit past the cutting track. It might not be even 1 1/16″ wide but you could use that measurement if you want. This makes the bottom just the tiniest bit smaller so that the box lid will fit easily over it.
Next, score at 2 1/2″ on all four sides of the box. Crease well with a Bone Folder to make the folds crisp, like a box should be. Then cut the flaps on opposite sides of the paper on the score lines. If you want, cut a small wedge off all four corners just to make the box bottom a little neater when the sides all come together.
After creasing all the folds really well, assemble the box and use a strong glue to assemble. You could use Tear & Tape but I like to use Multipurpose Liquid Glue to give me that extra few seconds to make sure everything is lined up perfectly.
For the top of the box, I used a sheet of the Ornate Garden Designer Series Paper but you could use cardstock too. The top piece is 10 1/2″ square. Make the top in the same way (except don’t cut off a sliver!). Score 1 3/4″ all around and cut the flaps in the same way. Assemble with glue and put the lid on the box! This allows part of the bottom of the box to show, if that’s what you want. The inside of the lid will also have a lovely paper pattern from the other side of the paper! Usually it is difficult to decide which side of the paper to use! This way both sides are seen!
You can watch a video by Donna Griffith from a few years ago about how to make these boxes and how to resize them to what you want!
I hope you are enjoying the new Stampin’ Up! Catalog! I always say to treat yourself once in awhile and I think this catalog has come out at the perfect time when we need to relax and use our stamping as therapy at times! Just paging through the catalog and getting ideas from the samples is relaxing and fun!
If you plan to be a Stampin’ Up! customer but don’t have a Demonstrator to assist you, I would be happy to be yours and send you a complimentary catalog if you would like one. Just send me your contact information.