
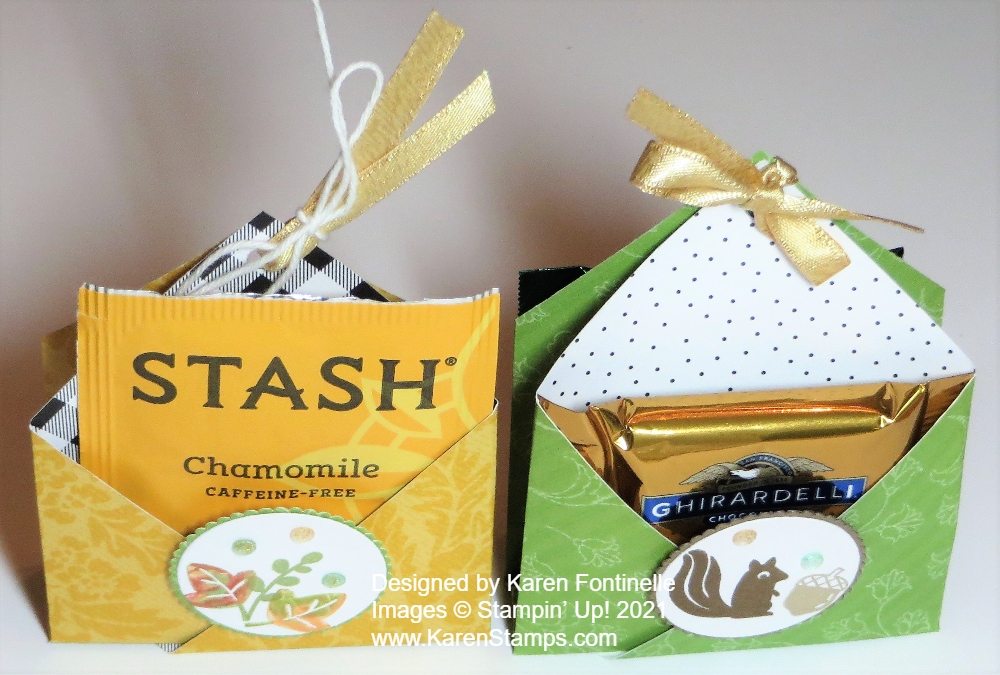
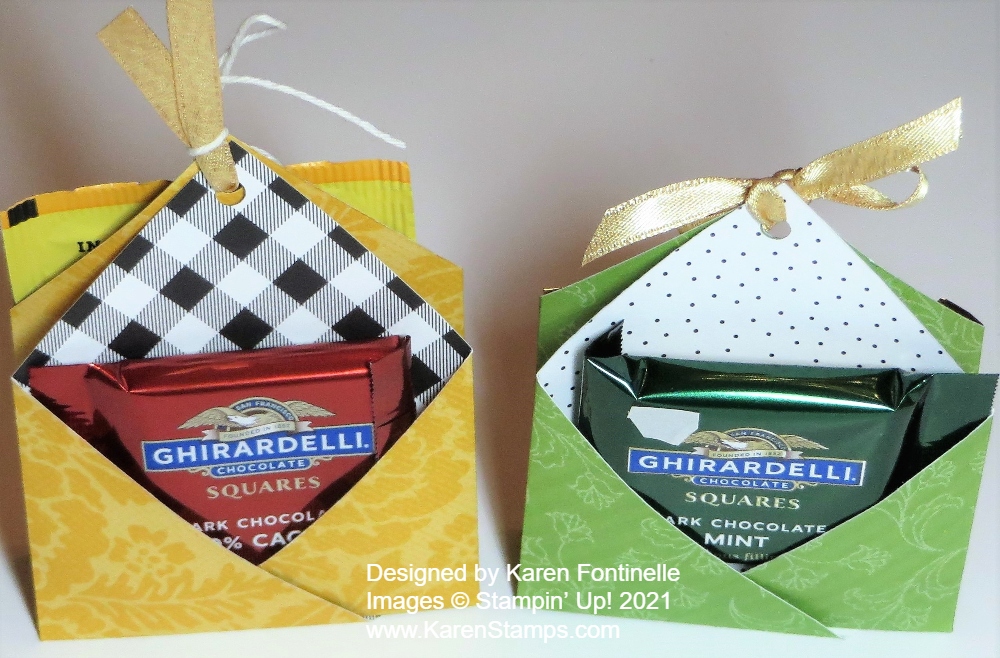
I was looking for some kind of treat holder that could serve as a little favor maybe at your Thanksgiving table and I came across this idea, a Double Treat Holder. I think I first saw this idea years ago at a Stampin’ Up! Convention I attended (in person, back in the day!) and I know I have made some since then. It’s really a cute idea! There is a pouch on each side front and back and if you want to, you can even add a cookie or something in between the two sides! What a great treat idea!!
Oh, I just found a post I made about this first treat holder I saw at a “Regional” Stampin’ Up! event…..shorter and smaller than Convention! The design is a little bit different than this one, but it is the same idea! Check it out HERE.
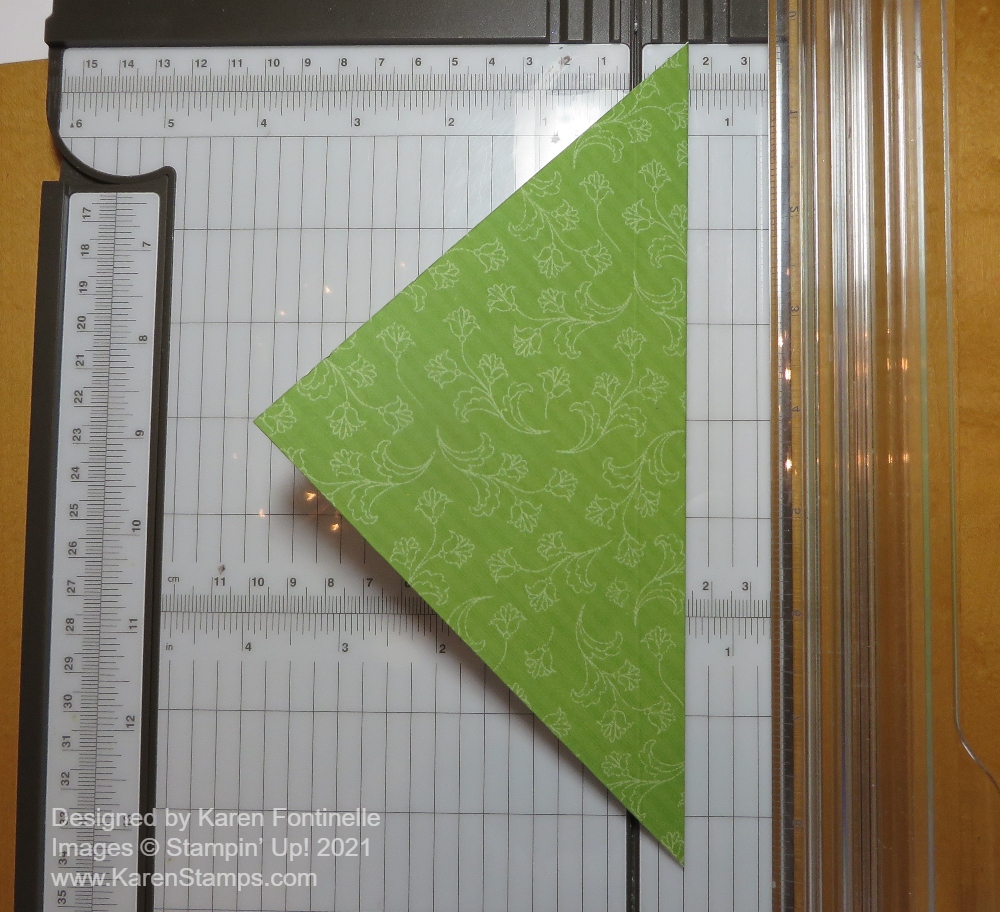
This design is easy and uses a 6″ x 6″ piece of designer paper, or you could use a piece of cardstock. You do need a Paper Trimmer to score the fold lines or the Simply Scored scoring board. It is best if you can find a designer paper that on both sides it doesn’t matter which way the pattern goes. However, the treat partially covers up the paper and the recipient probably isn’t going to care if the pattern goes at a diagonal when it is meant to go straight! Hopefully I can show photos and describe the directions well enough here but you can find lots of videos online, too.
Fold the 6″ x 6″ designer paper in half as you see in the Paper Trimmer to form a triangle. After folding it into the triangle, you will score 1/2″ inside that fold. You can see the fold line is lined up at 1/2″ on the right side of the cutting track. Score and then turn the paper over to score at 1/2″ on the other side unless you can see the scoring well enough from just doing it on the front side. Just don’t tear your designer paper with too much pressure!
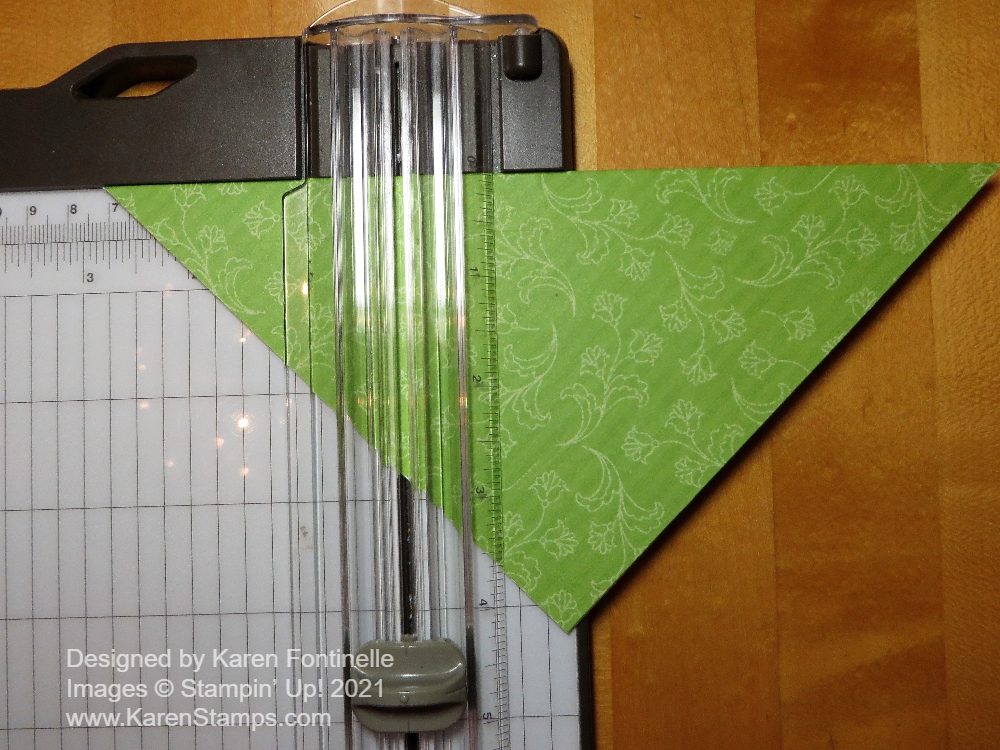
Now turn the paper so the fold line is at the top and score at 2 3/4″ on each end of the triangle and on each side of the paper if you need to.
After creasing all the score lines, open up the paper and fold the side points in as you see below. You can also see three score lines in the middle. The middle one is actually the center fold line. I put my Bone Folder there just to hold it closed, but it is good to use a Bone Folder or whatever you have to get nice, good creases.
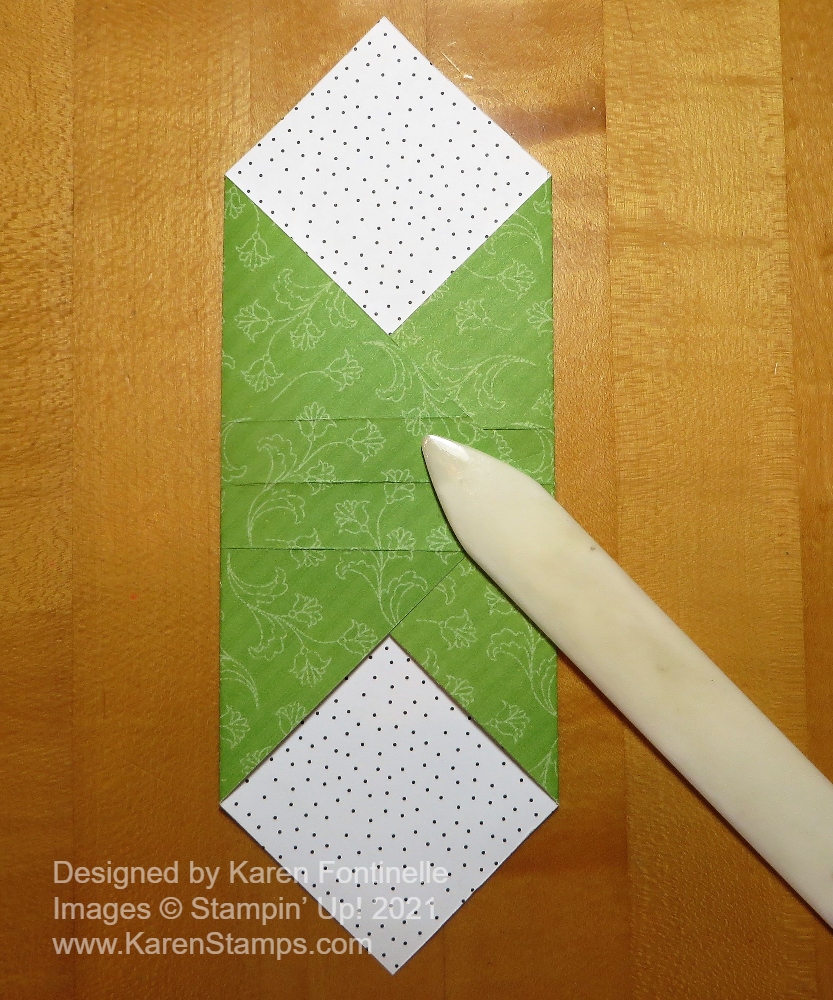
Then just fold the top and bottom of that piece, with the pouches, backward to form the treat holder with the space in the middle. The center line is just flat in the middle and you fold on those outer score lines and match up the point at the top. Hold the top points together and use a hole punch to punch a hole for ribbon or staple or clip or whatever you want to do. No adhesive required until you decorate the front!
This is the backside of two treat holders using two different paper patterns. These were from the Pattern Party Host Designer Series Paper. A chocolate square or tea bag fit nicely in each pocket, front and back!
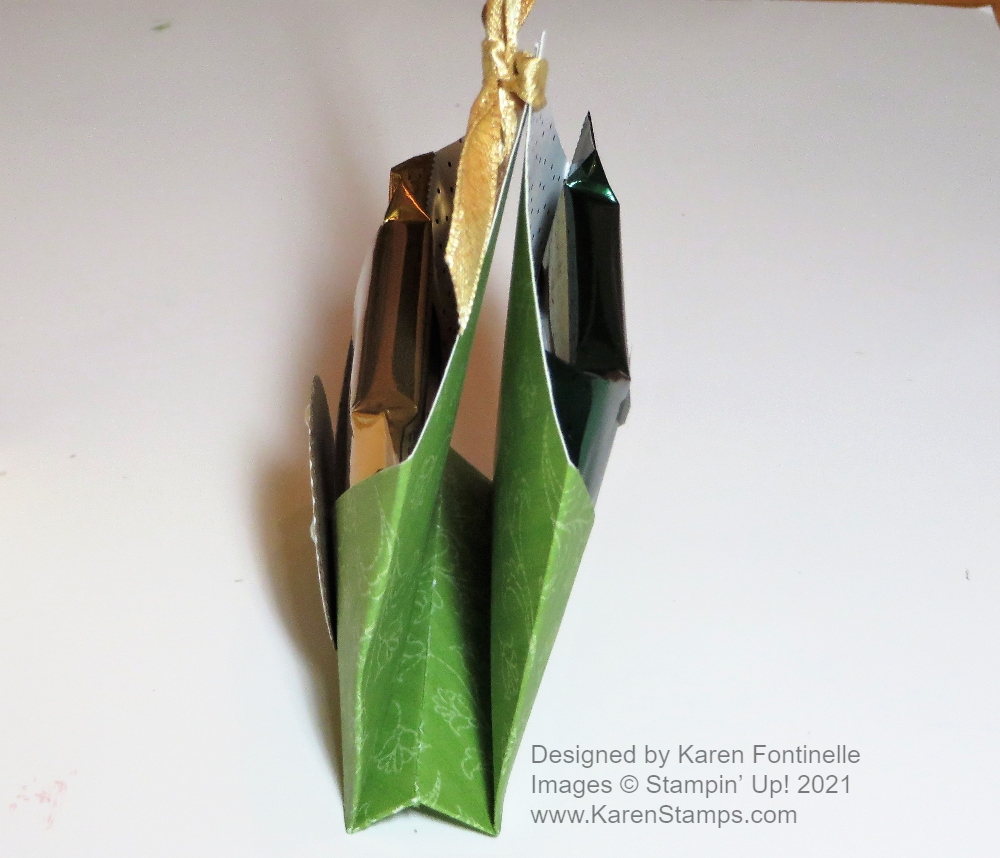
Here is the view from the side where you could package up a cookie or two in a cello bag and stick it in the middle of the treat holder!
And to decorate the front of my treat holder I used images from the Banner Year Stamp Set! Then I die cut a circle and scalloped circle for a layer from the Layering Circles Dies to fit right on the front with a couple of gems! That’s the only place you need adhesive and I used Stampin’ Dimensionals on the back.
So fun! Let me know if you try them! A good way to use up some 6″ x 6″ designer paper or cut up a 12″ x 12″!