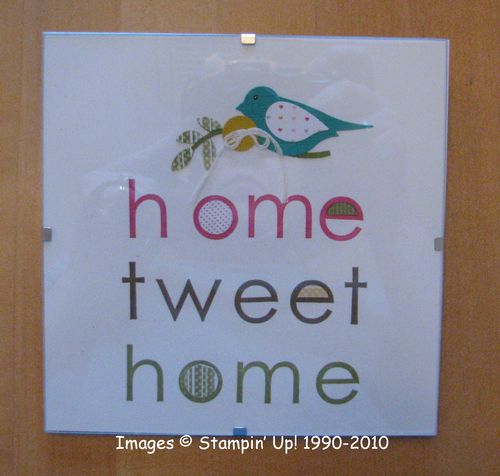
While looking through the new Occasions Mini catalog for the millionth time, this little framed project on page 11 jumped out at me. I needed a birthday gift and thought I probably had a frame in my "stash". Well, I didn't have a wooden frame but I had this clear glass 6"x6" frame held together with clips, just the right size! I should have taken my photo BEFORE putting under the glass frame, but I didn't so you may see some glare.
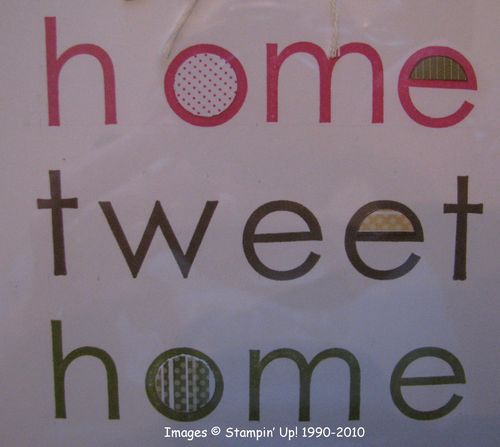
This project was relatively easy to make except for stamping the words! I did use my great Stamp-Ma-Jig and some lightly drawn pencil lines to keep the letters straight and lined up. Even then I didn't do a perfect job (so I suggest a practice run!). This would probably be a perfect thing to make the words and print on My Digital Studio. Then you could add on the other embellishments with your paper and punches to finish the project. Somehow the word "tweet", even though it has one more letter, takes up the same space as "home" so you have to think of that as you are lining things up. Not too hard, but does take a little thinking to make a neat project.
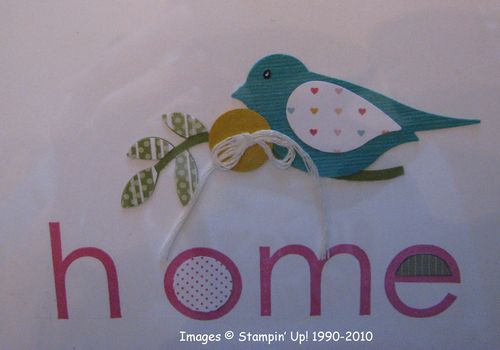
After stamping the words, I used my brand new Extra Large Two-Step Bird Punch (#117191) on page 11 of the Occasions Mini. If you just punch once, you will have all your pieces the same color. So you will have to punch several different times to get a certain color of card stock for the branch, the leaves, the bird, maybe the wing. But the new punch is so great you won't mind! I used card stock for the branch, but then a piece of Designer Series paper for the leaves and textured Bermuda Bay for the bird…and another piece of DSP for the wing. I think most, if not all, the DSP used in this project came from the FREE Sale-A-Bration Designer Series Paper Pad "Welcome Neighbor". (a really cute selection of paper!)
Due to my type of frame, I couldn't use a regular button next to the bird, so I used my Big Shot (#113439) and the Buttons #5 Sizzlits Die (#113440) to make a paper button and threaded in some white floss.
For the little pieces of DSP decorating some of the letters, I just stamped the letter "e" on the DSP and then cut out the area I wanted to use. For the centers of the "o"'s I found the 1/2" circle punch to be the correct size.
The alphabet I stamped with is "Contempo" in Melon Mambo, Soft Suede and Old Olive. You can find the list of supplies used in this project from Stampin' Up! right HERE. To order any supplies, just click the "Shop Now" Button HERE.


