
I’ve spent a lot of time looking for ideas for Halloween treat box ideas, and at some point I was reminded of the Book Treat Boxes that Stampin’ Up! came out with last year. They weren’t retired and now you will find them in the Stampin’ Up! Online Exclusives. I still had a few left in the package so I decided to try my hand at decorating them for Halloween treat boxes. This Halloween Spooky Book Treat Box is really easy to make! The boxes come already scored so all you have to do is fold and crease. They even come with adhesive on them where you need it to assemble the box inside and the book cover that surrounds the box.
To decorate these boxes, I used the Spooky Sweet Specialty Designer Series Paper. You can just put some simple effort into decorating these boxes or you can do a lot extra, like covering every surface that shows with paper, adding extra embellishments, styling the inside of the box in different ways. It’s all up to you and the occasion.
After folding all the score lines on the two pieces of the Book Treat Box, I adhered pieces of the “generic” sides of a couple of the Halloween papers….for the cover, the book spine, the back side and the three sides that show of the box. The cover and back of the cover is 3″ x 4″. You can trim the little rounded corners with a scissors. The spine of the cover is 1″ x 4″. Don’t adhere the paper to the front of the cover until you think about the closure. The box that goes inside is easy to assemble and has adhesive. You can adhere the designer paper before you assemble it or after or even after you adhere it to the cover. The box is adhered to the back inside cover and adhesive is already provided there. Take your time centering the box exactly how you want it. The sides measure 1″ x about 3 3/8″ and 1″ x 2 3/4″ if you want to cover them.
The only “tricky” part if figuring out how to keep the box closed after you decorate it. I forgot that part on the first box I made for Halloween! There are different ways you can do it. You can wrap a ribbon around, but it might disturb your design on the front. But you can slip the ribbon underneath the paper and tie the closure shut. Or you can pop up the cover with Dimensionals so there is space underneath your cover design to slip the closure tab underneath. Or you can put something popped up on the cover, like a layered circle or something and tuck the tab underneath that.
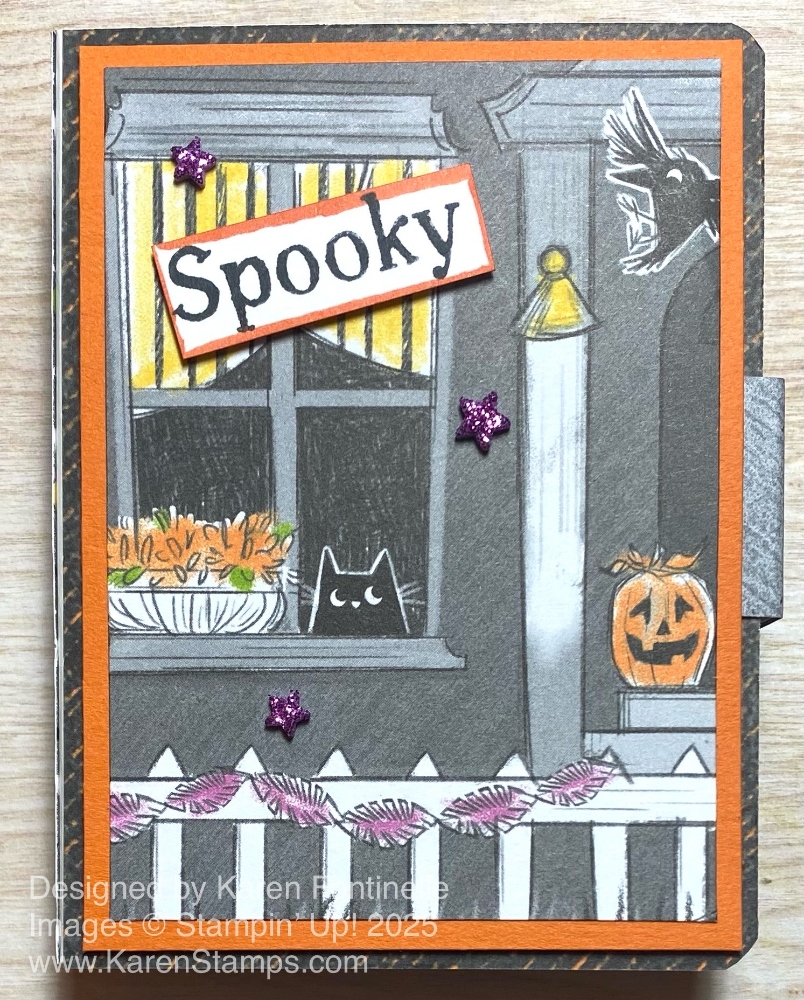
For this box on the top there is a generic paper covering the cover. Then I trimmed down one of the front porch scenes from the Spooky Halloween paper to layer on a piece of Pumpkin Pie cardstock. This whole piece is popped up on Stampin’ Dimensionals so that I could slide the tab of the closure underneath it. Just mind where you put the Dimensionals so they don’t interfere with the tab fitting underneath and not catching on the sticky Dimensional.
To embellish a little bit, I stamped the word “Spooky” from the Spooky Halloween Stamp Set and trimmed it down. I took my Timid Tiger Stampin’ Blend marker that was on my table and just ran the side of it along the edge of the greeting to make it stand out a little bit. That word is popped up on Dimensionals. I also added three purple Shimmer Star Foam Stickers to the scene.
Inside the box, you can add a piece of designer paper or cardstock if you like. And for Halloween you might even like to add a surprise, once the person takes out or eats the candy! You could draw a ghost, cut it out, and adhere it inside, or for this box, I added the diecut image from the designer paper of the hippo. Just add the Halloween candy to the box, secure the closure, and you have a cute little Halloween treat box to give out!