
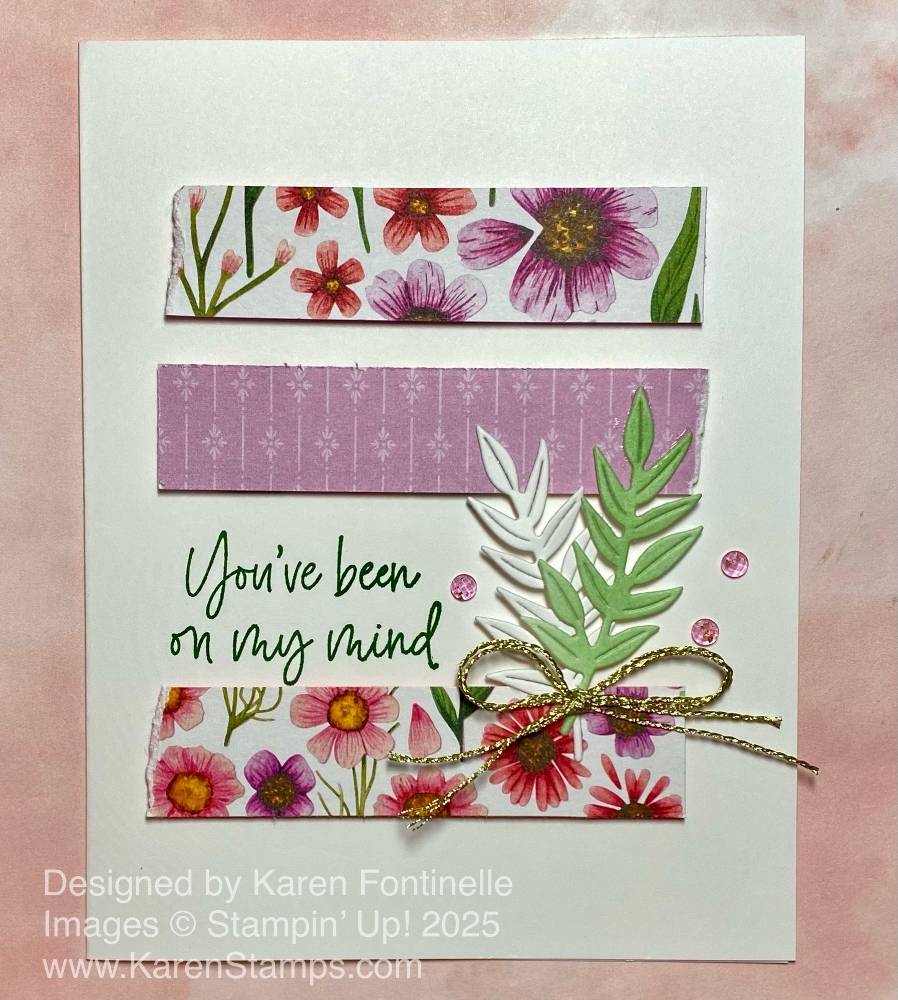
On Saturday I spent a lovely afternoon attending a virtual Stampin’ Up! event called Creativity Now! So nice to get to sit at home and watch people stamp from my computer! In person is better, but this is plenty fine! This Floral Impressions You’ve Been On My Mind Card is my own copy of the first card one of the Stampin’ Up! staff made at the event. Part of the purpose of the event was to showcase a new suite called Peaceful Garden coming in the September-December 2025 Mini Catalog (or Holiday Mini as I like to call it and type it!). Demonstrators had a chance to order this whole suite or any part of it, but it didn’t totally appeal to me and before I spent that much money for a suite I wasn’t sure about, I wanted to see my other choices when the new mini catalog comes out. After seeing the samples they made with the Suite I may have to rethink that! That’s how I am….sometimes I don’t care for a new product until someone makes something with it, and then I love it and want it!
Since I don’t have the new products they used to make this card at the Creativity Now event, I just made the exact same design with the Floral Impressions Designer Series Paper and other products I already have. This card has a Basic White base, the usual size 8 1/2″ x 5 1/2″, scored and folded at 4 1/4″. The strips of designer series paper is a great way to use scraps! You could vary the size, too. Make them longer or wider if you would like more color on the card. These strips are cut at 3/4″ x 3 1/2″. I used two different papers plus the other side of one of the papers. For this card, each strip has a torn edge on the end. The top strip has a torn edge on the left side. The middle strip has a torn edge on the right side, and the bottom strip has a torn edge on the left side. You can see the white core of the paper when you tear it. Online, they used a Blending Brush to lightly add some ink to each torn edge, but I skipped that step on this card.
Tearing paper used to be something we did a lot for a little pizzazz when we made a card way back when. Not that it necessarily ever went away, but I think it has made a resurgence recently! Generally, you want to tear toward yourself. That’s the point to remember.
The designer paper strips are adhered to the card using Stampin’ Dimensionals. Before adhering them, however, decide on what greeting you are going to use in between the second and third strip so you leave enough space. Just lay them out without adhering the strips, especially the bottom one, so you have room to stamp. My greeting is from the Memorable Blooms Stamp Set. You can use whatever you need to say. I used Garden Green ink.
The directions for the Peaceful Garden card said to cut two pieces of Basic White cardstock at 2″ x 3 1/2″. They diecut two sprigs of leaves to add to the card with the die set in the Peace on Earth Bundle. The stamp set in the Bundle has a lot of nice sayings perfect for cards. I just looked through my die sets and found a leafy sprig in the Citrus Blooms Dies. By the way, these dies are in the Last Chance section at a good discount! The directions said to use a Blending Brush on one of the white cardstock pieces. I used Garden Green ink, very light. Then when you diecut the sprig, it is already colored! The other sprig is just white. Adhere each sprig of foliage wherever the backs are going to touch on the popped up designer paper. For mine, I only put Multipurpose Liquid Glue on the top leaves and stems since the middle would not be touching the card.
To embellish the card, they used Linen Thread to tie a bow and adhered it to the foliage. I happened to grab some Gold Trim I had leftover from something, maybe Paper Pumpkin. I do have Linen Thread and have used it lots of times over years and years so it is a good staple you should have. I used a Mini Glue Dot to adhere the bow, but you could use a drop of the liquid glue. Coming in the Peaceful Garden Suite are some little blue flower gems, so instead, I substituted some Strawberry Slush & Pretty In Pink Gems to each side of the foliage. I used the Pretty In Pink color since it was a little lighter.
If you wanted to, you could use a colored cardstock for the card base and then a white panel on which to adhere the paper strips. Lots of possibilities with this card design. It certainly is an easy one to make!
Remember: The Suite BOGO 50% Off Sale only has a week left! Don’t miss out!