
Sometimes you can use one of your own older cards as inspiration for a new one, like this Floral Impressions Yellow Flowers Thank You Card! Everyday in my email I get a few photos from “Memories of this Day”. The other day, one of the “memories” was a card I made like this one and I thought I should try that idea again! After all, we often hate NOT using the other side of the paper when we are using one side! This was a way to show off both sides at once!
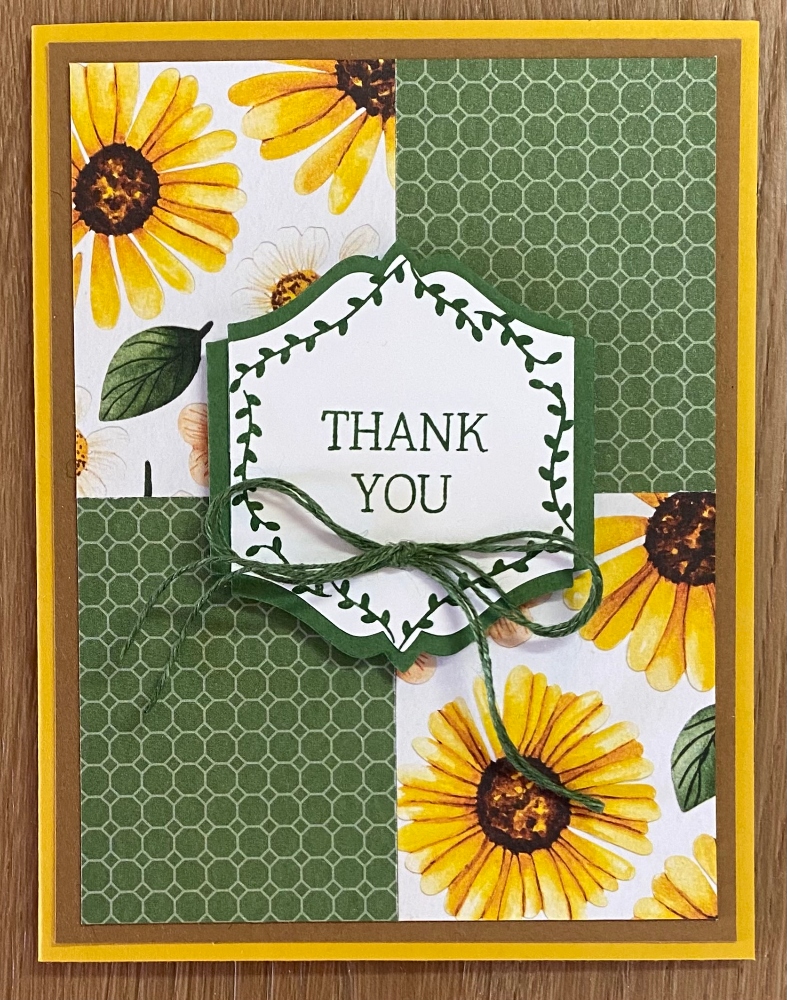
This is the Floral Impressions Designer Series Paper. I have a difficult time not getting it mixed up with all the other floral paper we have! This one is not in the catalog. It was released in May 2025 as one of the Online Exclusives. This month of August you can buy it on sale 15% during the In Colors Sale because some of the coordinating colors are In Colors 2025-2027!
The card base is Crushed Curry with a layer of Pecan Pie. At first I was going to adhere the designer paper rectangles directly on to the card base but I wanted to add a little brown that was in the flowers so I used Pecan Pie as a layer. The designer paper pieces are cut at 1 7/8″ x 2 1/12″. I did glue them down first on a piece of Pecan Pie cardstock cut at 3 3/4″ x 5″ which is what a second layer on the card base would be sized at. Because I glued them down on another piece of cardstock first, I was able to trim off a smidgeon from each side to make sure everything was perfectly aligned. You can vary the sizes of any of these things depending on how you want your card to look.
The greeting is stamped on Basic White in Garden Green ink and is in the Bright Borders Stamp Set. Then use the To the Point Label Punch to cut the stamped leafy image and sentiment. The stamp set is on the Last Chance list and is marked down 10%. It’s a pretty nice stamp set to have along with the punch for a lot of kinds of cards and projects. To help the greeting stand out, I punched out two pieces of Garden Green with the same punch and cut each one in half to adhere behind the top, bottom, and sides of the white piece. This is a good trick to know when you want something layered behind something for which there is not larger punch.
The greeting is popped up on Stampin’ Dimensionals in approximately the center of the card. For a little something to add, I chose this Garden Green twine in the Natural Tones Linen Thread (retired). I cut two pieces the same length and tied them together into a bow to make it a little thicker. The bow is stuck on with a Mini Glue Dot.
All in all, this is an easy card to make and a great way to use your designer series paper. You can show off both sides! Make squares if you like in a smaller configuration. Anything is possible!