Category Archives: Christmas

Winter Woods Red Plaid Christmas Card

Winter Woods Red Plaid Christmas Card

Here’s my Winter Woods Red Plaid Christmas Card that I made with the Winter Woods Stamp Set, the In the Woods Framelits Dies, and the Buffalo Check Stamp. I think it turned out kind of antique-looking or old-fashioned and I think I like the look for something different!

The card base is Garden Green Cardstock. The Real Red layer is stamped with the Buffalo Check Stamp, which is one big background stamp, as we used to call them. I usually find with these background stamps that it is better to lay the cardstock face down on the stamp itself which is laying on the table, stamp side up.  Then I take a scrap of computer paper and place that over the cardstock being stamped.  This way I can run my fingers all over the paper without getting inky fingers and I can make sure every portion of the large stamp inks the paper.  I could also use the Stamparatus and stamp more than once if necessary to make sure everything was stamped well.  If you stamp black ink on a piece of Real Red Cardstock, you get this red plaid design!

The tree from Winter Woods is stamped in Garden Green Ink and then die cut with the Big Shot and the tree framelit die. Of course the die leaves a narrow white border around the die cut tree, which I didn’t like against this red plaid background.  I took a piece of Sponge and Crumb Cake Ink and lightly sponged the edges of the tree and even on top of the tree.  This gave it a antique or aged look, not bright white. I also tied on some 3/16″ Braided Linen Trim to also give it that antique or country look.   I added just three tiny little Red Rhinestone Jewels to the tree.  I thought it needed a tiny bit of pizzazz but not much bling.  These little tiny red rhinestones fit the bill!

The greeting is in the Winter Woods Stamp Set and is die cut with a Layering Oval Die and that layered on top of a scalloped Oval Die.  I stamped it with Real Red Ink and also sponged a bit of Crumb Cake Ink to take away some of that bright white.

If you are looking for an easy card to make, something like this Winter Woods Red Plaid Christmas Card will fit the bill!

SHOP STAMPIN’ UP! ONLINE HERE!

Easy Candy Bar Reindeer Christmas Favors

Candy Bar Reindeer

If you were wondering what to do with any leftover Halloween candy (especially if it rained and stormed and you barely had any trick-or-treaters), here’s an idea to turn the small candy bars into Easy Candy Bar Reindeer Christmas Favors!  It’s almost Christmas anyway, so the candy won’t get old!

These were little snack size candy bars but of course, you could use regular size candy bars if you like. Basically, you just wrap cardstock around the candy bar and then turn it into a reindeer for Christmas!  You can use these for stocking stuffers, party favors, table decorations, whatever you need.

For those who like measurements, for these chocolate bars my Crumb Cake Cardstock was cut 3 1/2″ wide to go around the bar and 3 3/4″ in length.  You can just wrap the paper around and kind of score it with your fingers, or measure your candy bar if you want more precision.  I scored my cardstock at 1″, 1 1/4″, 2 1/4″ and 2 1/2″.

To make the antlers, I used the Sprig Punch and Early Espresso Cardstock. I just put a dab of glue on the end of the sprig and adhered it inside the candy bar cardstock wrapper.  You could even separate the two sides of the sprig if you wanted to.  I liked mine together as punched.  Use whatever you like for the eyes, big or little.  I decided on the two circles in the Cookie Cutter Builder Punch and added pupils with a black marker.  It would be cute to use any “googlie eyes” you might have in your stash.  For the nose, I used the 3/4″ Circle Punch to make a sparkly red nose with some retired red Glimmer Paper, but of course you could just use Real Red Cardstock for the nose.

For more inspiration, here is another reindeer papercrafting project I did.

That’s all there is to this easy candy bar project. You could even tie a little red ribbon around the bottom portion of the reindeer or fancy it up a little more. Make some cute candy bar reindeer Christmas favors for your holiday table!  Just have fun with it!

***Here are some products that are no longer available to purchase due to the fact that they are backordered and cannot be sent in time for the holidays by the manufacturer.  Very sad this beautiful paper is no longer available.

147816: Joyous Noel Specialty Designer Series Paper
147890: Festive Farmhouse Elements
147811: Santa’s Workshop Enamel Elements

BUT Stampin’ Up! is bringing back the Dashing Along Designer Series Paper, a package of old and new paper patterns for a traditional Christmas!

Dashing Along Designer Series Paper

Winter Woods Vellum Trees Christmas Card

Winter Woods Vellum Trees Christmas Card

I can’t believe I have had this Winter Woods Bundle for awhile and only now am I getting around to making this Winter Woods Vellum Trees Christmas Card. You can make all kinds of beautiful cards and projects with this stamp set and framelits dies.

Since I was trying this out for the first time, I used the Holiday Catalog samples for inspiration. The Stampin’ Up! catalogs are always the best places to go when you are looking for an idea! Of course I changed it up a little bit partly by turning the card sideways instead of vertical.

The card base is Garden Green with a Whisper White layer and a couple of snowdrifts made from Sparkle Glimmer Paper.  There is a curved die in the set of framelits that can be used to cut out snow, but I just used some scissors! I made two layers so I could place the vellum trees in between.  The Whisper White layer is first embossed with the Softly Falling Embossing Folder.

The trees are cut from Vellum Cardstock and placed in the snowdrifts. It would have been handy to use the Multipurpose Adhesive Sheets before die-cutting the trees so the adhesive would already be on them, but I didn’t think of it ahead of time.  The next best thing to use with vellum so the adhesive doesn’t show is to sponge on some Multipurpose Liquid Glue very lightly.

Next I stamped the evergreen tree from the stamp set with both Pear Pizzazz and Garden Green inked on the stamp. Then it was die cut with the tree outline in the In the Woods Framelits Dies Set.  There is also a die to cut out a stamped tree with little bunches of branches that you can pop up.

This very nice greeting comes in the set, although I thought it was a little big for the placement on my card. I used the Pretty Label Punch, but I trimmed off the top and bottom portion on the Whisper White.  Then I punched it again in Garden Green and layered the full punched piece under the greeting.  I also added two little Clear Epoxy Droplets.

Check out the Winter Woods Stamp Set and In the Woods Framelits Dies in a Bundle and save 10%!

Shop Stampin’ Up! Online HERE!

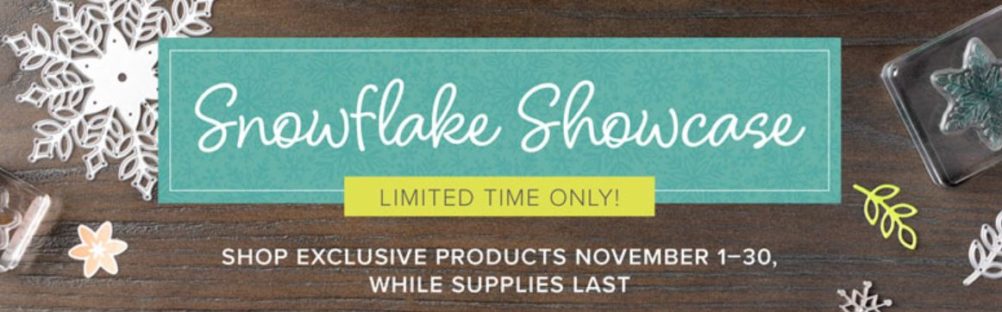
The Snowflake Showcase of New Products Is Here!

Snowflake Showcase Banner

Image © Stampin’ Up! 2018

Today is the first day you can order products in the Snowflake Showcase!  This is a group of exclusive products that you will love that are only available during the month of November! It’s hard to believe we have now passed Halloween and are on the slippery slope to Christmas!!

We did not have a fun Halloween in Houston yesterday!  We knew there was a possibility of rain during the day with a cool front coming through seemingly late at night, looking like there would be plenty of time for trick-or-treating. But it rained lightly all day until late afternoon when the rain got heavy and funnel clouds were sighted and tornado warnings were issued, including one near my area. Then it all let up just long enough for dinner and a bit of trick-or-treating, but I only had 12 kids come by!  So sad! There was a Trunk-or-Treat event, moved indoors, down the street so hopefully, a fair number of kids got to participate in that and have fun.  Now we are all wondering what to do with all the leftover candy!

So now it is November already, but the good thing is you can check out this Snowflake Showcase stamp sets, paper, dies, and velveteen paper. It isn’t even just for the holidays! You can get lots of use out of these products!  I urge you to order as soon as you can just in case any sell out.

Enjoy this Stampin’ Up! video with Shannon West from the Home Office!

SHOP THE SNOWFLAKE SHOWCASE FROM STAMPIN’ UP!

Now Available! Timeless Tidings Project Kit from Stampin’ Up!

Timeless Tidings Project Kit

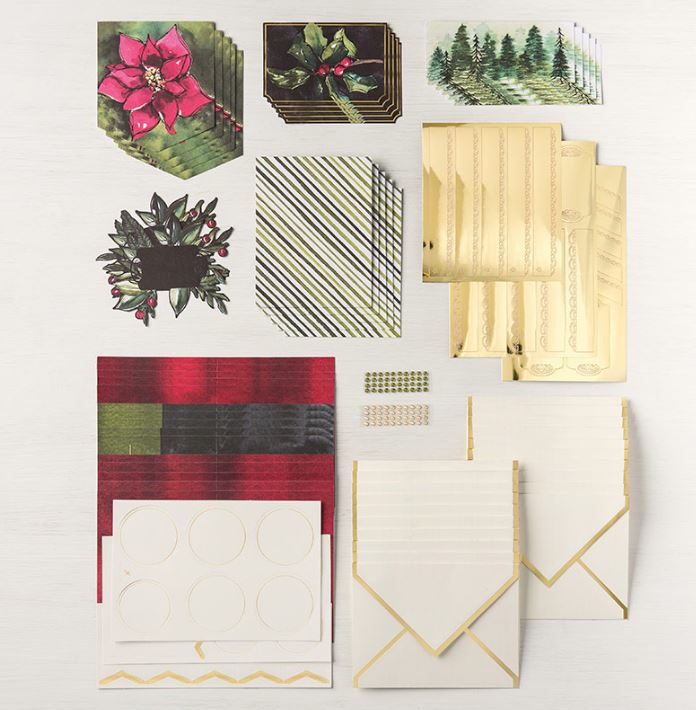
If you were interested in this kit when you saw it in the Holiday Catalog, you will be happy to know that after being so popular it completely sold out, the Timeless Tidings Project Kit from Stampin’ Up! is available again!  Along with the Timeless Tidings Stamp Set, you can use this kit to make holiday cards quickly and easily!

The Timeless Tidings Project Kit makes 20 cards, 5 each of 4 designs.

Kit includes:
* 20 printed card bases
* 20 printed envelopes with gold foil edges
* Cardstock
* Gold foil
* Printed die-cut accents and backgrounds
* 80 green and champagne rhinestone jewels

Watch the Stampin’ Up! video and find out more about the kit:

Whether you are a new stamper or crafter or an experienced one, you might like to have this kit on hand to easily make 20 cards to have on hand even if you have made some cards of your own designs. We often need “just a few more cards” at the last minute and this would solve that problem.

Timeless Tidings Project Kit Finished Cards

If you love the watercolored look, you will love this Timeless Tidings Project Kit. Be sure to order it now in case it sells out again!  You never know!

SHOP STAMPIN’ UP! TODAY!


Get On My Stamping With Karen Mailing List!

JOIN MY STAMPING WITH KAREN MAILING LIST!

Stamping With Karen Mailing List

Join my Stamping With Karen Mailing List and get a FREE GIFT!  Well, besides that, I will keep you up with the latest Stampin’ Up! news and offers and send you free projects complete with supply list and instructions every Tuesday!  You know with the holidays coming, there are bound to be some special offers!  Just sign up in the red box on my blog!

Right now, every Wednesday, I am sending out a FREE holiday email, The 12 Weeks of Christmas, with a new holiday project each week leading up to Christmas!  This is a free gift to my subscribers only!  These projects will not be on my blog, Facebook, Instagram, or Twitter.  They are exclusive to my Mailing List! We start with holiday card ideas, then gift ideas, and also gift wrap/gift bags/gift tags!  Everything you need for the holidays!

Sign up right now in the box below or in the sidebar on my blog or in the pop-up box! No matter where, you will be signed up! If you do it before Tuesday, you will receive my Tuesday newsletter and Wednesday you will receive my 12 Weeks of Christmas email!  I hope you will join us!

Don’t Miss Out! Are You On My Stamping With Karen Mailing List??

Christmas MailboxJOIN MY STAMPING WITH KAREN MAILING LIST!

Join my Stamping With Karen Mailing List and get a FREE GIFT!  Well, besides that, I will keep you up with the latest Stampin’ Up! news and offers and send you free projects complete with supply list and instructions every Tuesday!

AND…..especially right now, every Wednesday I am sending out a FREE holiday email, The 12 Weeks of Christmas, with a new holiday project each week leading up to Christmas!  This is a free gift to my subscribers only!  These projects will not be on my blog, Facebook, Instagram, or Twitter.  They are exclusive to my Mailing List! We start with holiday card ideas, then gift ideas, and also gift wrap/gift bags/gift tags!  Everything you need for the holidays!

Sign up right now in the box below or in the sidebar on my blog or in the pop-up box! No matter where, you will be signed up! If you do it before Tuesday, you will receive my Tuesday newsletter and Wednesday you will receive my 12 Weeks of Christmas email!  I hope you will join us!

Coming November 1st: Snowflake Showcase!

Snowflake Showcase Flyer

Coming soon!  The Snowflake Showcase is coming November 1, 2018 through November 30, while supplies last!  The Snowflake Showcase is a  suite of products with which you can make beautiful winter and holiday cards and projects – just in case you didn’t see enough beautiful products in the Holiday Catalog to tempt you!

The Snowflake Showcase has two stamp sets, white velvet paper, dies and Snowflake Trinkets. Think of the beautiful snowy wonderland projects you can make with these products!

Snowflake Showcase Stamps Etc

If you want these products right now in October, you can buy the Stampin’ Up! Starter Kit and put them on your list and become a Demonstrator! Otherwise, just wait until November 1st and order your products right away to beat the rush!  You will actually be able to use some of these products to make designs other than snowflakes.  Use your creativity!

SHOP The Snowflake Showcase Beginning November 1st!

Joyous Noel Thinking of You Card

Joyous Noel Thinking of You Card

This Joyous Noel Thinking of You Card is made with one of those basic, classic designs that works well almost any time. It’s just the card base, a layer or two perhaps wrapped with ribbon or a strip of paper across the card, and the greeting layered to the side.  So simple, just fine!

I only recently ordered this Joyous Noel Specialty Designer Series Paper. Honestly, I didn’t care for it just looking at it in the catalog.  Then I started seeing some samples of projects that other people made and I started to like it. And of course, we all know it is a fact that ALL designer series paper looks way better in person than it does in the catalog!  So I ordered it and  wow, was so pleased when I opened the package!  It is REALLY pretty paper!  These are the coordinating colors if that helps you to imagine:   Copper foil, Gray Granite, Merry Merlot, Sahara Sand, Soft Suede, Tranquil Tide, Whisper White.  This card is a little difficult to photograph because it has the copper foil accents on one side of the paper, plus I added some Copper Foil.

To make this card, I used a card base of Merry Merlot Cardstock.  The designer paper has a layer of Copper Foil underneath.  I have to admit, I cheated and cut out the center of the Copper Foil piece leaving about a 3/4″ margin so that I wouldn’t waste the copper underneath the paper that wasn’t going to show anyway.  I could also have punched or die cut some pieces out of it to use some of the foil.  The ribbon tied around is the Merry Merlot & Copper 5/8″ Reversible Ribbon.  It’s very pretty!

The greeting is stamped in Merry Merlot Ink on Whisper White Cardstock and die cut with a Layering Ovals Framelits Die.  The greeting is from the Winter Woods Stamp Set. It is layered on a scalloped oval from the same die set.  I adhered it over the ribbon with two Stampin’ Dimensionals. I finished off the card by just tying a knot with the ribbon on the left side of the card.  You could also do a bow.

Check out the pretty designer series paper in the Holiday Catalog!  All of it is beautiful!  And don’t forget the World Card Making Day Sale going on now through October 7 (Sunday!).  Save 10% on select products!  Even if you don’t have this Joyous Noel paper, you can use this basic design that I used on my Joyous Noel Thinking of You Card because it works with almost any paper and greeting!

SHOP STAMPIN’ UP! ONLINE!

My 12 Weeks of Christmas Holiday Emails Begin Today! Sign Up!

12 Weeks of Christmas Begins Today

My 12 Weeks of Christmas holiday emails begin today, Wednesday, October 3 at 1:00 PM! Be sure you are signed up for my Stamping With Karen Mailing List TODAY before 1:00 PM so you don’t miss a single week!  Just add your name and email in the red box on the side of my blog or just below!

Each Wednesday from now until right before Christmas, I will send out a fun holiday project with a complete supply list and instructions. First we start with Christmas cards, then gifts, then ideas for wrapping – bags, tags, and wrapping ideas.  You may copy the idea or get inspired to make something of your own.  The holidays are the best time for stamping and crafting and we should enjoy it!

These holiday emails each week are my annual gift to my mailing list subscribers.  It is ONLY available to them so you MUST sign up for my Mailing List to get these exclusive ideas.  You won’t find them later on my blog or Instagram or Facebook.

Please join us and get inspired and in the mood for the holidays!  We’d love to have you!

Only 24 Hours Until the “12 Weeks of Christmas” Begins!

12 Weeks of Christmas 2018 Is Coming Santa

Tomorrow is the first day of my 12 Weeks of Christmas holiday emails! Can you believe it?!

Once a week, for the 12 weeks leading up to Christmas, I’m going to be sending you an email with a wonderful holiday project that you can make or be inspired by to create something of your own. Each email will have one holiday project, the list of supplies and complete instructions to make it.  You can copy it or use the idea to create something of your own.

There will be cards, gifts, bags, tags, and wraps over the course of the 12 weeks. We will start with cards for the first few weeks. This is absolutely free and I love to share it with you!

This is a special gift to my mailing list subscribers, so in order to receive these holiday emails, you must be on my mailing list. Be sure to sign up by Wednesday, October 3 at 1:00 PM Central Time so you won’t miss the first one!  These projects won’t be shown anywhere else.

Just sign up in the box below or in the box in the upper-right corner of my blog.  You will get a free gift just for signing up!  We’d love to have you!

Check Out These Stampin’ Up! Holiday Catalog Products

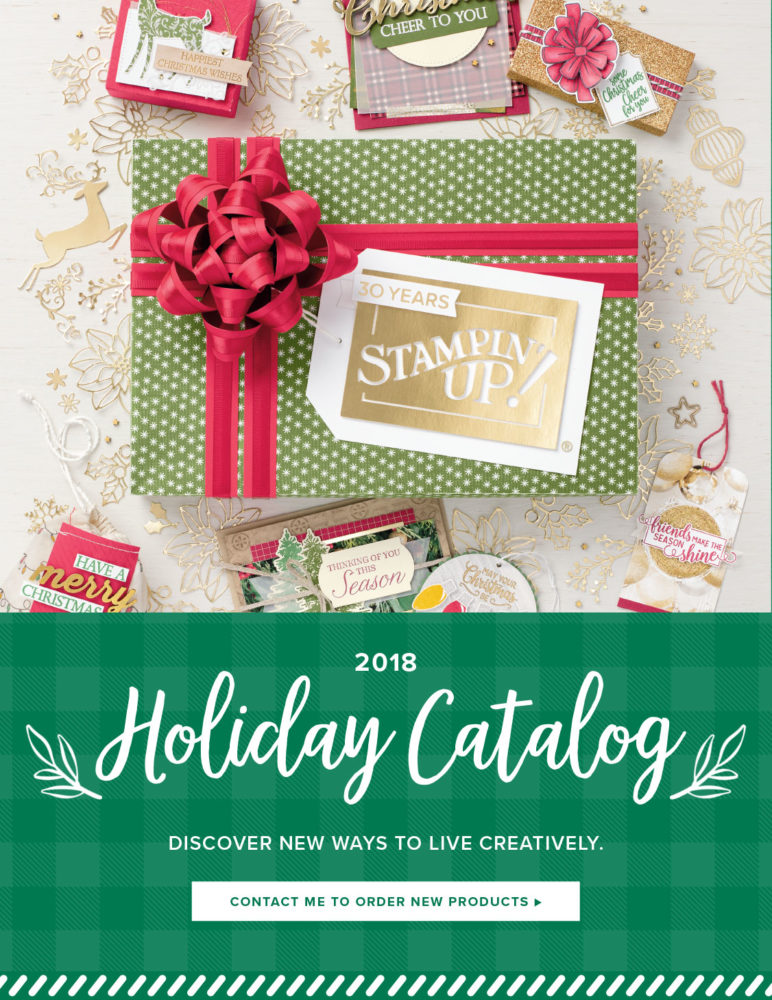
Stampin' Up! Holiday Catalog 2018 CoverEnjoy these Stampin’ Up! videos about some of the new products in the Holiday Catalog!  If you are interested in Stampin’ Up! products and would like your own copy of the catalog,  have a few extras right now that I would be happy to send you.

Note:  If you are interested in the Timeless Tidings Project Kit 148028 order it today (or at least by Monday, October 1st). It has been very popular and is now on backorder for at least 30 days. On Monday it will become unorderable until Stampin’ Up! replenishes the stock.

For more videos, you might like to check out another blog post of mine HERE.  The Holiday Catalog is really awesome this year (yes, we say it every year!) as evidenced by a few backorders, unfortunately!  When there are backorders, you know the products are extremely popular!

CHECK OUT ALL THE GREAT HOLIDAY CATALOG PRODUCTS AND SUITES (SAVE 10%!) HERE!

The 12 Weeks of Christmas Is Coming!

12 Weeks of Christmas 2018 Is Coming Santa

In one week we’re going to start our “12 Weeks of Christmas” email campaign!  For those of you who don’t know what this is, once a week for the twelve weeks leading up to the Christmas holiday, I’m going to be sending you for FREE a fantastic holiday project idea that you can make.  There will be cards, gifts, tags, bags, and wrap ideas over the course of the twelve weeks, complete with a supply list and instructions each week.

This is absolutely FREE and I’m excited to share these project ideas with you! This is my annual gift to my mailing list subscribers, and I love sending out these weekly emails!

The 12 Weeks of Christmas is ONLY for members of my mailing list, however.  Therefore, you need to be on my mailing list by next Wednesday, October 3rd at 1:00 PM Central Time in order to receive all of these fun holiday emails and information. (If you are already on my mailing list, you don’t need to do anything!)

Just sign up in the box below or in the box in the upper-right corner of my blog.  You will get a free gift just for signing up!  We’d love to have you!

All Is Bright Happy Holidays Card

All Is Bright Happy Holidays Card

This All Is Bright Happy Holidays Card is fun and easy to make with just a bit of designer paper and the greeting die cut with the Big Shot. This card could be made a little plainer if you wanted even quicker and easier or you could jazz it up even a little bit more. Most cards are like this, that they can be made very simple and easy or they can have lots of embellishments and bling.

I started with just a card base of Real Red (which I have a hard time remembering that it is not in the “Brights” color family anymore!) and a strip of the Christmas stockings cut from a piece of paper in the All Is Bright Designer Series Paper.  I layered the strip of designer paper on a piece of Garden Green cardstock. The greeting is die cut from Gold Foil Paper with the word dies in the Merry Christmas Thinlits Dies.  Had I been able to find my Multipurpose Adhesive Sheets I would have used these on the back of the Gold Foil Paper before die-cutting. That way no glue is required on the very narrow letters. But since I didn’t have the Adhesive Sheets at hand, I did just use very tiny dots of the Multipurpose Liquid Glue.

I finally decided that the Real Red card base was a little plain, so I embossed it with the Tufted Dynamic Textured Impressions Embossing Folder. I thought this folder gave an elegant look to the card and kind of went with the stockings since sometimes Christmas stockings have that quilted, tufted look. This is one of the “dynamic” folders that is thicker and heavier so it is best to just spritz the cardstock with a bit of water before embossing.  That softens the paper fibers so you get the best embossing.

After embossing the card front and adhering all the pieces, I thought why not add a little bit of Garden Green & White Baker’s Twine to the stocking on the designer paper for a little embellishment.  And that’s all there is to the card!  Like I said in the beginning, the card could have been made with just the plain card front, the greeting and the designer paper and layer adhered to the card front and it would be done and look fine. Certainly if you were making a lot of the same card it would be easier to keep the card simple.

Remember that if you earned any Bonus Coupon Codes in August, you can use them on any purchase in August. And be sure to check out the Clearance Rack since more items were added the other day.  Some are already gone, but get what you can while supplies last!  There are plenty of products on there that you could be using right now for the holidays, maybe with adding new designer paper or new cardstock colors to freshen things up!

Check out this other Christmas card I made using the All Is Bright Designer Series Paper.  This paper has those photographic images as the design which makes it so pretty.  I plan to make more of this card!  I like to make lots of different designs since we have so many great stamp sets and papers to use for Christmas cards, so I make a few cards of each design.  And yes, then it is hard to decide who to send which card to at mailing time!

Be sure to order your supplies early so you won’t have backorders to deal with if you want to make a card like this All Is Bright Happy Holidays Card.

SHOP STAMPIN’ UP! ONLINE!


Are You On My Stamping With Karen Mailing List??

Stamping With Karen Mailing List Sign Up Mailbox

Are you on my Stamping With Karen Mailing List? I do love to invite anyone who is interested in stamping, papercrafting, memory-keeping, and Stampin’ Up! to join my Mailing List and keep up with any Stampin’ Up! news and get exclusive detailed tutorials.  I love to have new subscribers at any time!

But I’m going to give you a hint that you REALLY want to sign up soon so that you will receive my annual free gift to my subscribers, The 12 Weeks of Christmas  weekly newsletters!  Believe it or not, we will be starting that pretty soon!  Each week you will receive a special email with one holiday project. We will do cards, gift ideas, and gift bag & tag ideas. You won’t find these ideas on my blog or Facebook, they will only be for my subscribers!  If you are not on my list, you will miss out!

Feel free to invite your friends to sign up, too!  The more the merrier!  I always have a great response to these holiday emails and I enjoy sending them out!

It’s not time yet, but it won’t be long!  And in the meantime, you will want to keep up with any news about the new Holiday Catalog or any other offers and news from Stampin’ Up!

Current subscribers do not need to sign up again to get the 12 Weeks of Christmas!  You are already on my list!  And my Holiday List!

Just put your name and email in the red box on the right side of this blog page or click HERE.

Thanks for joining us!  Be sure you get your FREE Gift for signing up!