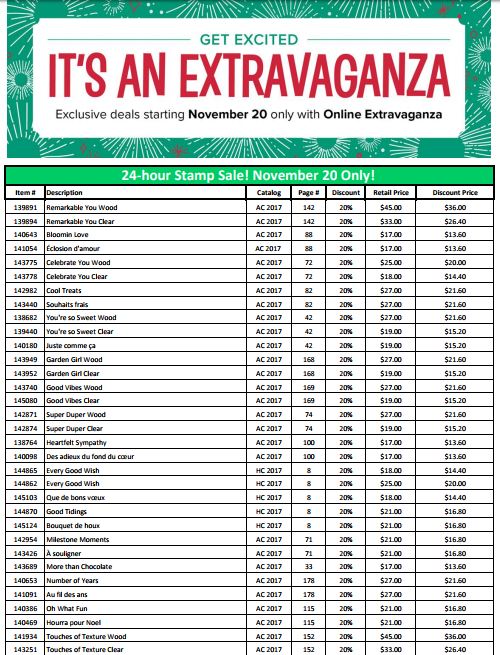
Beginning tomorrow, Monday November 20, 2017 Stampin’ Up! begins their Online Extravaganza! On Monday only, there is a 24-hour sale on select stamp sets! Stamp Sale starts November 20 12:00 AM and ends November 20 11:59 PM. Don’t delay! Choose the stamp sets from the list that you want!
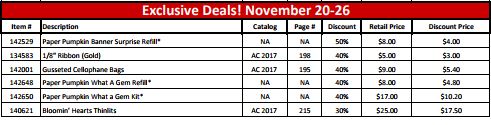
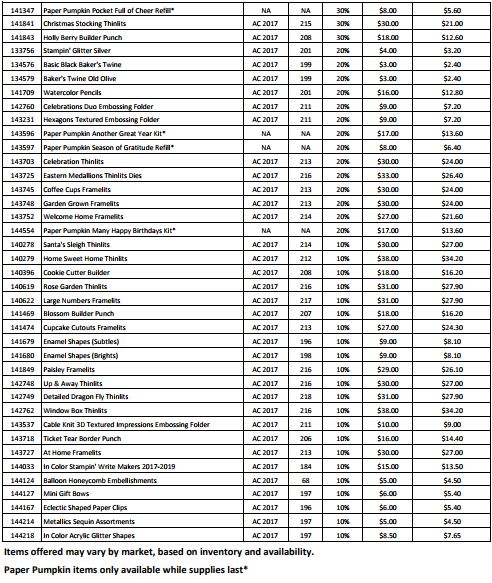
In addition, beginning Monday Nov. 20 – 26, you can choose other items that are on sale! There are ribbons, thinlits, framelits, embellishments, Watercolor Pencils, In Color markers, punches, and more! Check the list! Click on the PDF below to print out the list. Tomorrow you will be able to go to my Online Store and see the sale items in the store.
Today you can look over the list and be prepared to order tomorrow if you want the stamp sale and other things or any other day if you don’t want to take advantage of the stamp sale.
AND – Once this sale ends on November 26, there will be some sort of FLASH SALE on Monday, November 27! Stay tuned to find out what that flash sale will be! Stampin’ Up! has not unveiled it yet!
Tomorrow, Monday November 20 check my Stampin’ Up! Online Store to see all the items on the Online Extravaganza Sale! Remember, the stamp sale is ONLY Monday, Nov. 20, but the other items will be on sale all week through Nov. 26.
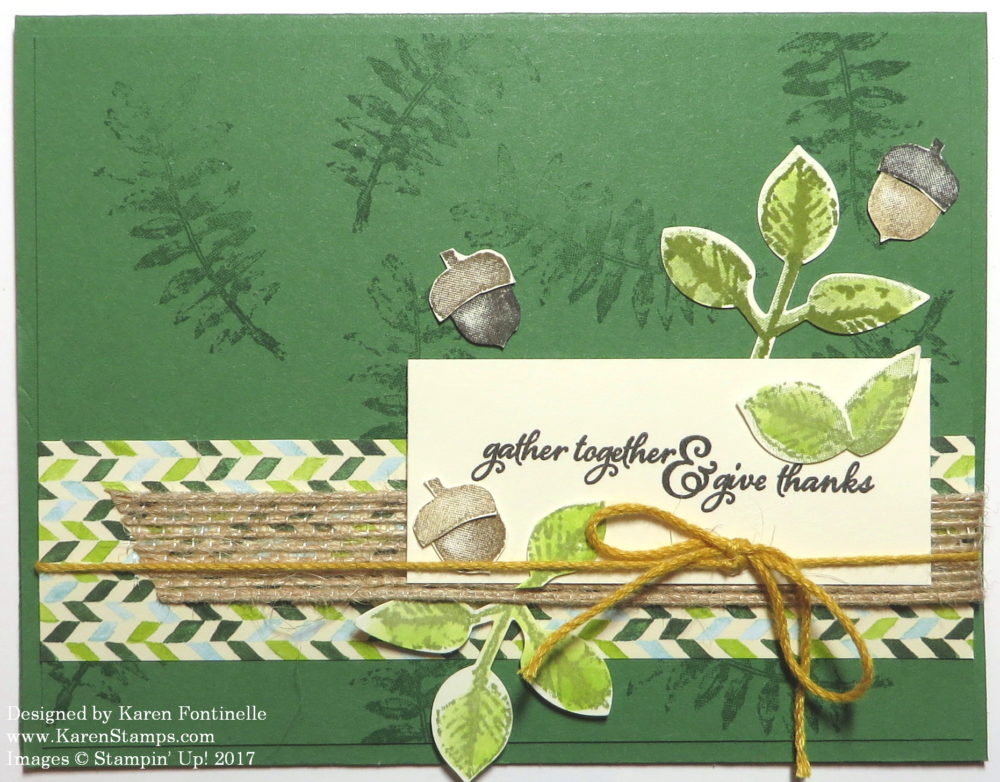
One of the best sources for inspiration when you want some is to look in any of the Stampin’ Up! catalogs, even past ones! This card, however, is from the Holiday Catalog on the page with products from the Painted Autumn Suite. I didn’t copy it exactly, but pretty much! Usually once you get started, even if you think you are going to copy exactly, your own creativity takes over and you see ways that YOU want to create your card or project! I even cut extra pieces for more cards while I was at it. Better to do it as you go along and make cards assembly style than to start over completely each time!
This card base is Garden Green Cardstock, which I would think that I don’t use very often, yet my package is empty and I have a new pack coming in my order today! But any other color of green would be fine too. Some of the other cards I plan to make will be in Old Olive. This card has the Garden Green layered on the Garden Green card base. You could have another color, like Very Vanilla, for the card base.
To begin, I stamped the fern-like image randomly on the card layer in the same Garden Green color. You could also use Versamark Ink. The strip of designer paper is Painted Autumn, some of the most beautiful paper we have had, in my opinion! I hate to see the fall season end.
For some texture, I added a piece of the 5/8″ Burlap Ribbon, which wrapped around the designer paper strip and the card layer. The piece of Baker’s Twine is Crushed Curry.
The greeting is stamped from the Painted Harvest Stamp Set, as well as the leaves and acorns. Although there are no dies to use to cut out these pieces, we do have a fun punch, the Leaf Punch. You can even save 10% by purchasing the Bundle with the stamp set and punch!
I”m sure you have a few people you would like to send or give Thanksgiving cards to in gratitude. Look in the Holiday Catalog if you need ideas for the stamp set you want to use. I’m sure you will get ideas and you can change it up to make it simpler, faster, or easier than the sample in the catalog. Or if you have time, go ahead and take some crafting time for yourself and enjoy making a deluxe card for someone special!
Check out the Painted Autumn Suite for Thanksgiving card ideas!
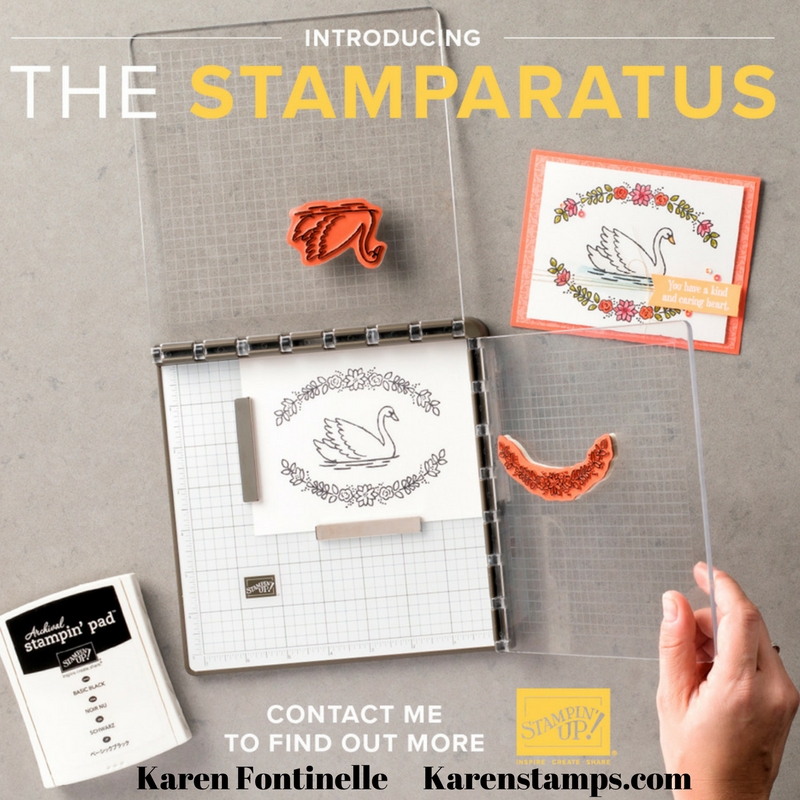
A new tool from Stampin’ Up! that positions your stamps precisely, stamps multiples with ease, easily creates 2-step, 3-step, and 4-step stamped images, compatible with red rubber and photopolymer stamps, and more!
I feel like we should play “Jeopardy”! “What is the STAMPARATUS, Alex!”
Yes, we are getting a new stamp positioning tool called the Stamparatus! How about that name??! As you probably know, there are other similar products out there on the market, but Stampin’ Up! has stepped up all the features in order to be the BEST stamp placement tool on the market!
Watch the video below from Stampin’ Up! to hear and see Carrie explain how to use this new tool coming SOON!
Since this tool is brand new, first announced at the Stampin’ Up! OnStage event over the weekend and announced to the public yesterday, there is going to be a new way to order your Stamparatus! Sort of like a preorder! You will reserve your spot and Stampin’ Up! guarantees shipment as soon as the product arrives in the warehouse.
This is how it will work:
From Nov. 16-30, 2017 you can RESERVE your Stamparatus. There will be a limit of 1. Reservation quantities are while supplies last. I suggest you plan to reserve yours as soon as possible. You will be required to provide your credit card information, but it will not be charged until the product ships from Stampin’ Up! During this reservation window, the Stamparatus will likely ship around February 1st, 2018.
You will go HERE to my Stampin’ Up! Online Store on Nov. 16 (or after) beginning at 2:00 PM Mountain Time. You will click on the banner for the Stamparatus and follow the instructions. These are the steps you will take on the day you RESERVE your Stamparatus HERE.
You will need to have your own Stampin’ Up! online account set up, which is easy to do, if you haven’t ordered from me as yet. Just click HERE to go to my Online Store, then under the Stampin’ Up! logo on the left side of the page, you will click on “Create Account”. That’s all there is to it!
It’s a lot of information to take it all at once, but I think we will all figure it out! Basically, you can order/reserve a Stamparatus beginning Nov. 16 at 2:00 pm MT and it will ship around the first of February. This gives Stampin’ Up! a better way to control inventory since it is a new product.
If you aren’t ready to reserve the Stamparatus Nov. 16-30, the second window is Dec. 5-30 with availability approximately March 19, 2018. The third window to reserve will be January 15-30, 2018 with estimated availability April 15, 2018. The Stamparatus will be available in the new annual Stampin’ Up! catalog for 2018-19 and ordering will be as usual at that point.
When the Stamparatus is available after you have reserved one, the reservation will be put into your shopping cart in your account. At that time, whenever you are ready, you can add other products to your order if you like, just don’t delete the Stamparatus reservation from your account or you lose it! Then you just complete your order as usual and your order will be shipped to you.
Just circle November 16 2:00 PM on your calendar and check it out! If you really want to reserve a Stamparatus, go ahead and do it as soon as you can in that window of Nov. 16-30. Be patient with the website early on, I suspect a lot of people will be on it! I will be one of them!
Let me know if you have any questions! I will TRY to answer them! Watch the video, especially to the end to see the extra special features of the new Stamparatus, the new stamp positioning tool!
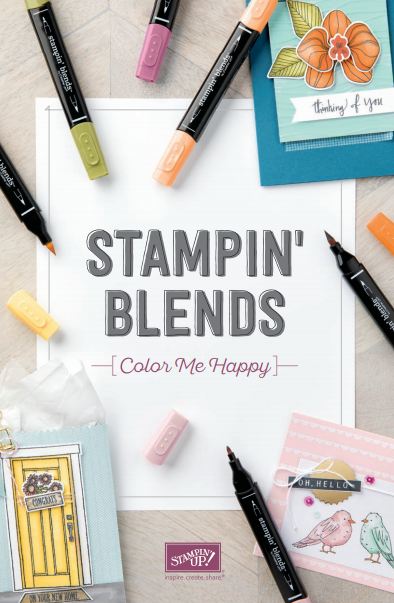
The new alcohol markers from Stampin’ Up!, Stampin’ Blends, are here and ready for purchase! These markers will take your coloring to new heights! Everyone can look like an artist!
The markers have dual-tips and each color has a light and dark shade. You can buy the markers individually or in a complete collection. The Memento ink is recommended to use with the alcohol markers. You can use Whisper White Cardstock, but it is recommended to use the Thick Whisper White Cardstock. The Shimmery White Cardstock also works well and is pretty as well! The ink from the markers is likely to bleed through the paper so you always want to have a scrap piece of paper of some kind underneath your work.
Watch these videos to learn more about the Stampin’ Blends Markers and how to use them! They really have a delightful feel to them when you color!
As you can see in the videos, you can start with the most basic coloring just to get used to the feel of the markers. Then add in blending and even blending different colors together rather than just the light and dark shades of one color. As Brandi showed at the end of her video, she used various colored markers to make different skin tone colors. You can be as basic or as stepped-up as you want! They are your markers to use!
I think you will find the Stampin’ Blends have a really nice feel to them when you color. And we know coloring is good for the soul! Just sit and color and relax, forget everything else for awhile! I remember how I used to love it when I was young if my mother would sit down and color with me because, of course, I thought she did the best coloring in the world! Now you can do the best coloring in the world with the Stampin’ Blends Markers!
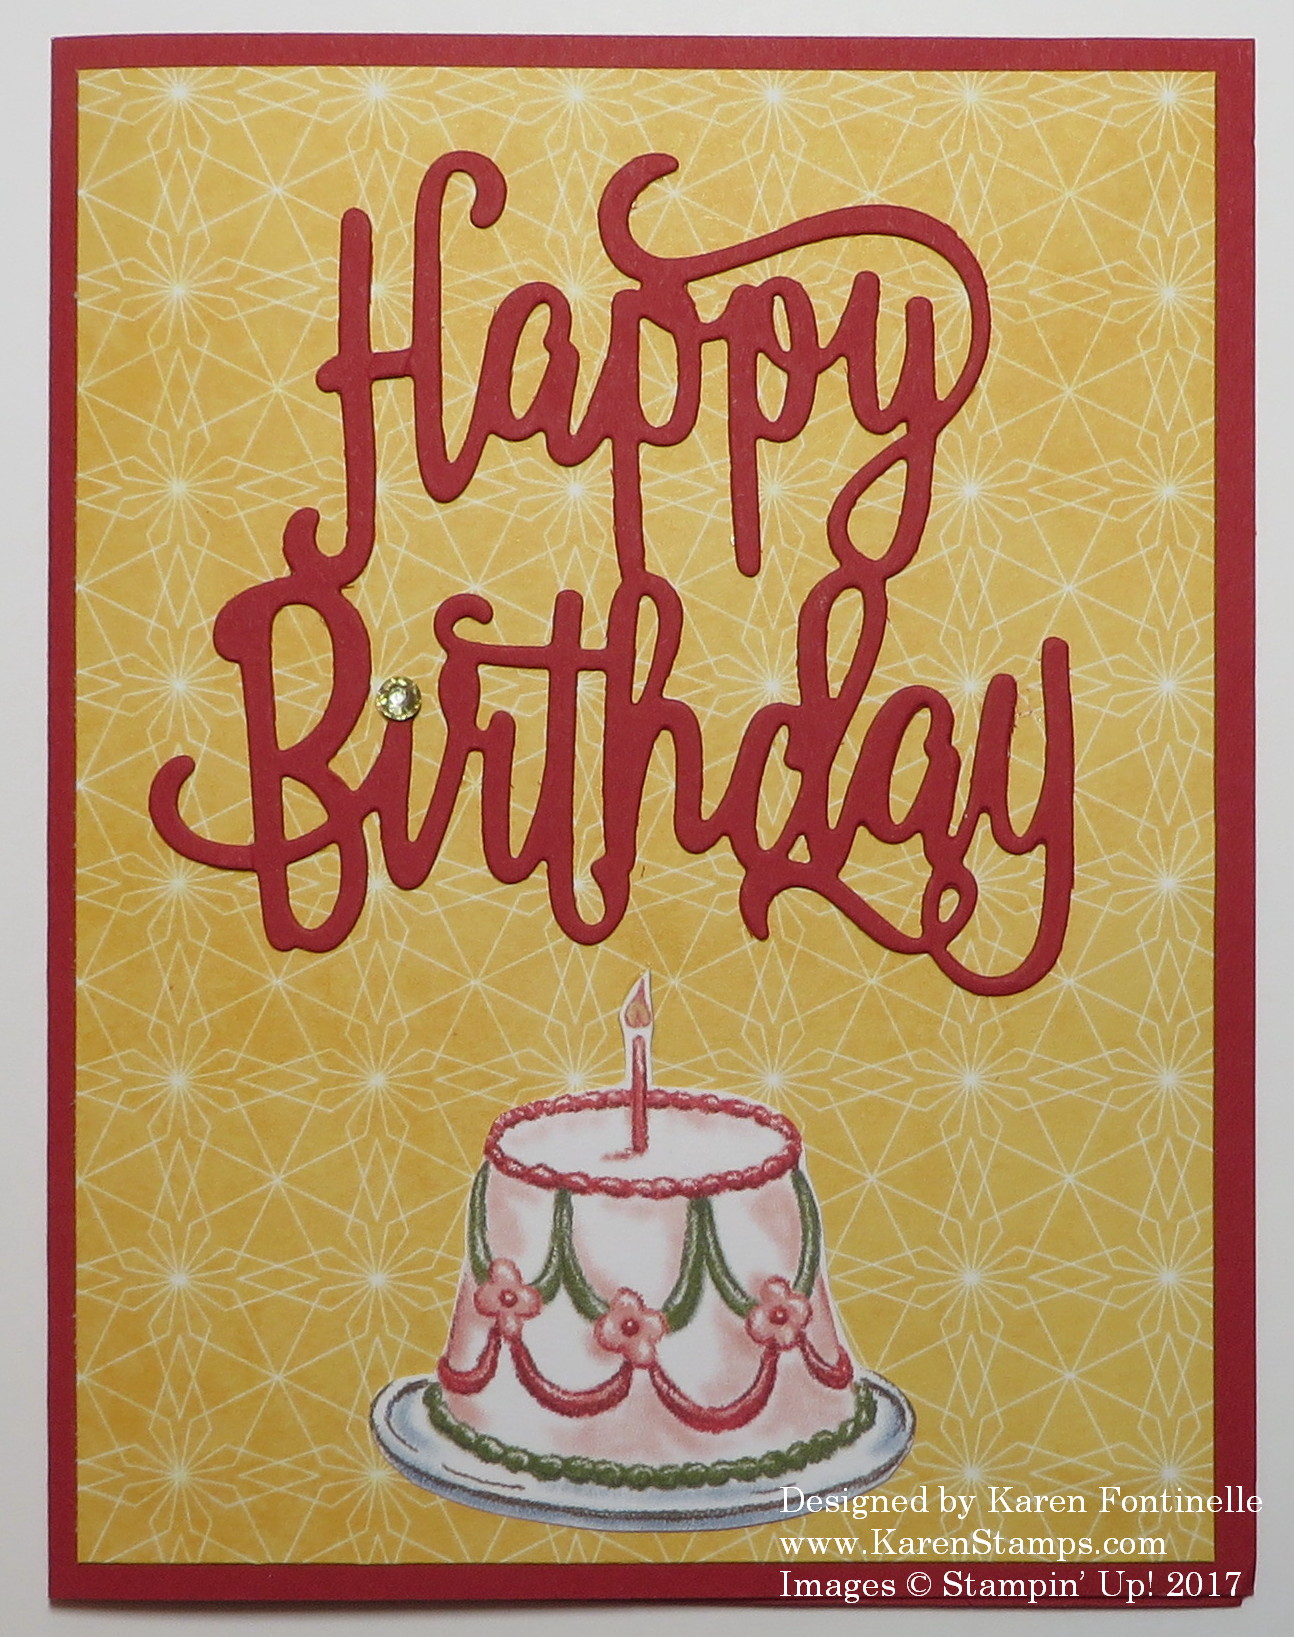
If you want to make a quick and easy birthday card, use the Birthday Memories Designer Series Paper and the Happy Birthday Thinlits Die! I LOVE this die! It is just perfect to put on so many birthday cards.
The card base is Real Red to match the Happy Birthday diecut. Actually I had already cut out this red diecut for another card, but it didn’t look right on that card so I just saved it. To make this card, I looked through the Birthday Memories Designer Paper and picked out this plainer background for this card. Real Red is one of the coordinating colors of this designer paper so it was perfect to use this diecut in red.
For something else on the card front, quick and easy, I decided to cut out one of the birthday cakes from one of the patterns in the Birthday Memories package. I just cut it out by hand, only took a few seconds, and adhered it to the card front with the Multipurpose Liquid Glue.
You have a few options for gluing down the Happy Birthday diecut. This time I just put tiny dots of the Multipurpose Liquid Glue all around on the back. Very tiny. I could have also sponged on some of the glue. Or I could have used the Multipurpose Adhesive Sheets if I would have stuck one onto the back of the cardstock before I diecut it!
If you would like to see the Happy Birthday diecut on another card, there is THIS POST with one of my favorite cards ever because of the beautiful background paper!
That is all there is to this card! Simply make the card base, adhere a plainer piece of designer paper, adhere the Happy Birthday Diecut, and cut out a birthday cake, or maybe some other image from the Birthday Memories Paper. There you have a quick and easy birthday card with the Birthday Memories Paper!
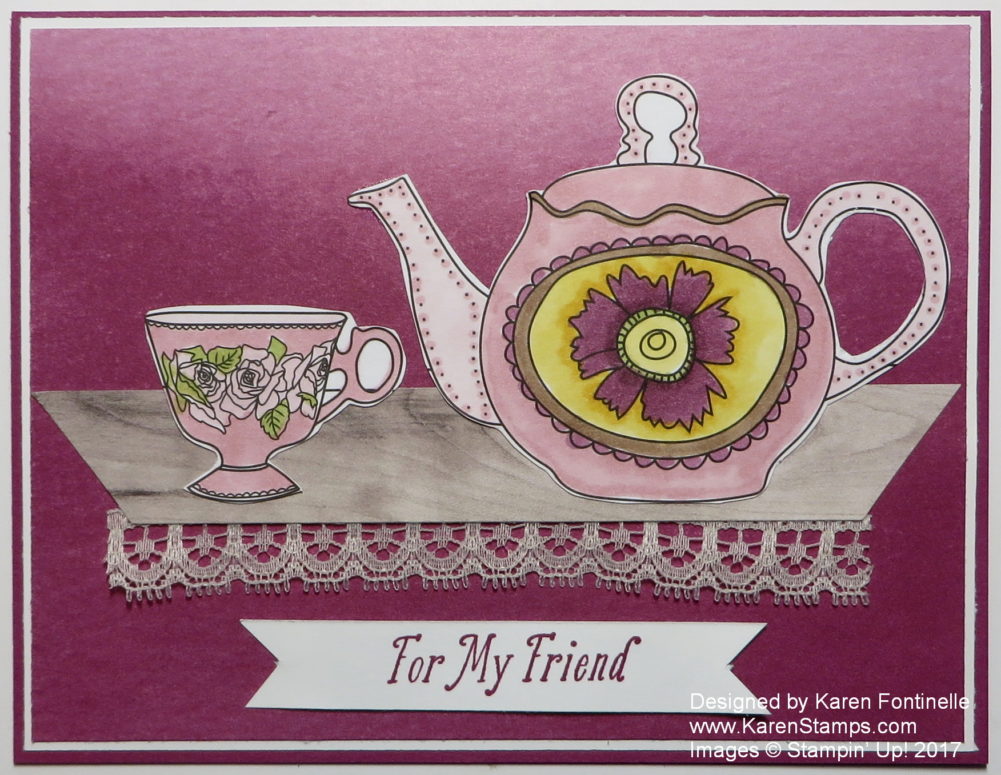
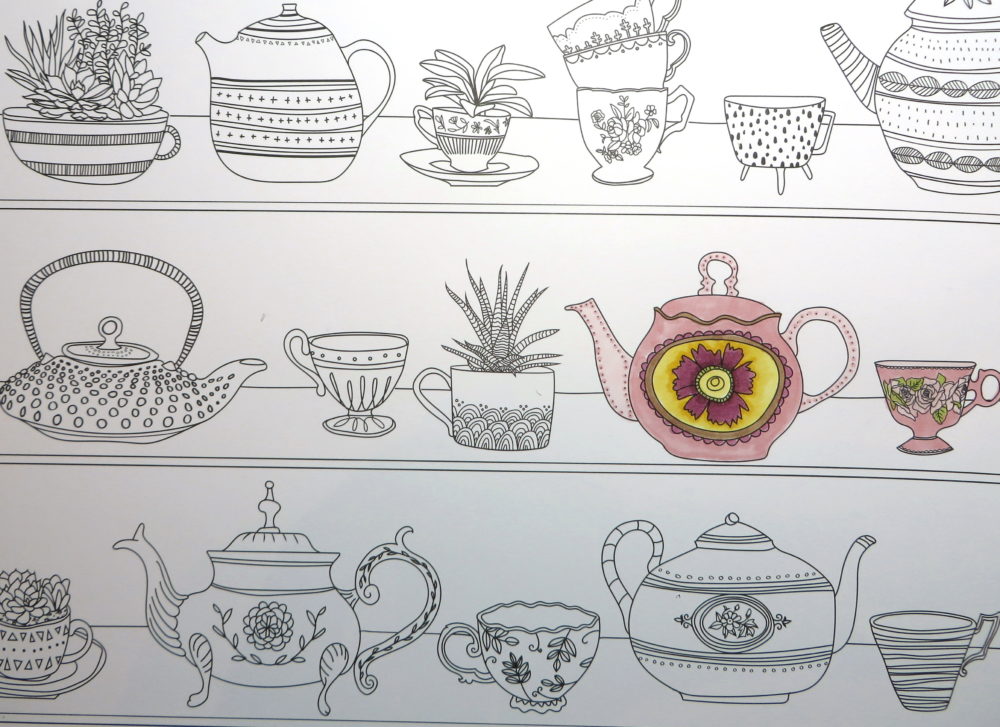
I’ve read many times that coloring is actually very relaxing and good therapy for us, so because I wasn’t feeling well this morning, I decided to get my mind off myself by coloring with the fun new Stampin’ Blends alcohol markers and the Just Add Color Designer Series Paper. One of the patterns in the package have teapots and teacups, and that is what I chose to color.
Do you have teapots or fancy teacups? There seems to be something special about them. Perhaps we don’t use them as much these days, but when I see a nice teapot I think of my grandmother. I also think of all the fancy luncheon plates and teacups I have packed away in the closet because we just don’t entertain with nice things like that these days. My grandmother had a “tier table” with all kinds of tea cups on display. She said some of them my grandpa got as party favors when he was young! That sounds very odd to me, but that’s what she told me. I did get a teacup at a bridal shower a few years ago as a favor!
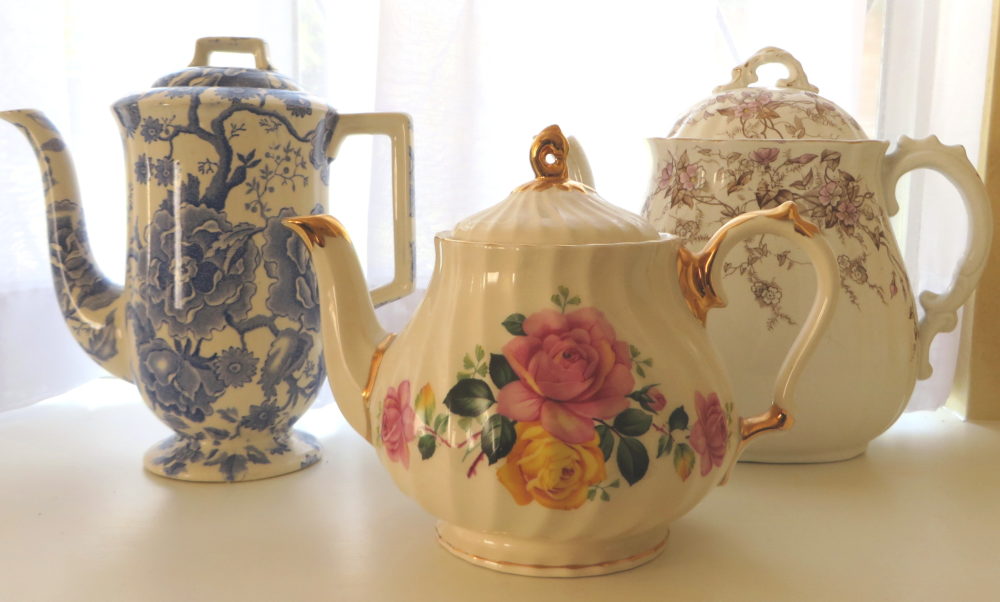
Here are some of my teapots! The one in front is my own from a trip to Canada a million years ago (before kids) and the two behind were my grandmother’s. There are more scattered around my house! So I think there is something special about teapots!
The Stampin’ Blends are the new alcohol markers and so pleasant to color with! You can buy the markers individually or get the whole collection. There is no price difference, so you can choose whatever works best for you! Get at least a few and try them out and see how you like them! For coloring, they do work better than the Stampin’ Write Markers that are always so popular, but they have their advantages and the Blends have theirs! So of course you need both!
If you like my Stampin’ Blends Just Add Color Teapot Card and have a special story about teapots or teacups, please add a comment! Click the Reply button at the top of the post.
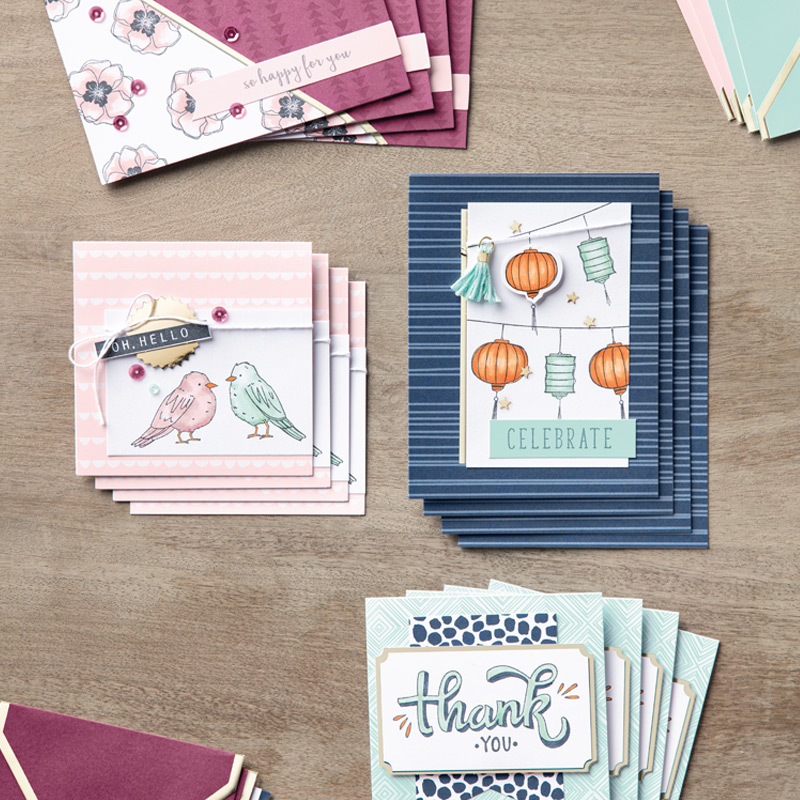
The Color Me Happy Project Kit is perfect to go along with the new Stampin’ Blends alcohol markers! Get some practice using the Stampin’ Blends while making 16 cards. One of my favorite parts of this kit are the foil-edged envelopes that match the cards! Very pretty!
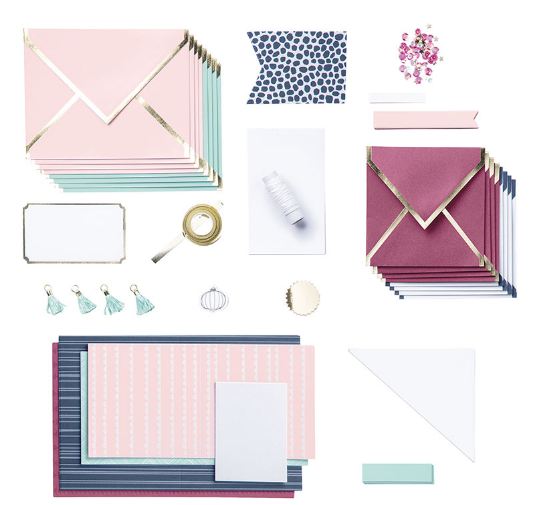
Here are the contents of the kit:
You get the card bases and envelopes plus all the card pieces and embellishments for the cards. These are cute little tassels, sequins and gold foil seals. Opening these project kits are so much fun to see all the pieces you get, all right there ready for you to use!
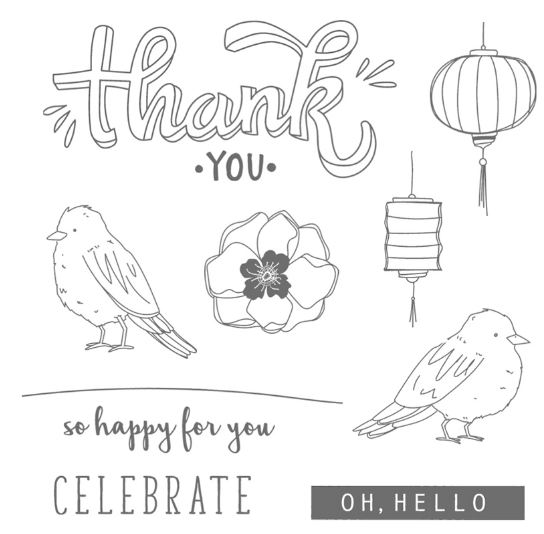
You will also need the Color Me Happy Stamp Set. These are outline images, perfect for coloring with your new Stampin’ Blends! You can buy the stamp set and project kit together in a Bundle and save 10%.
Those two little birds are really cute, don’t you think? And great sentiments to add to add to any of your cards! You can certainly get lots of use out of this stamp set in all of your stamping. Get it while it is still available.
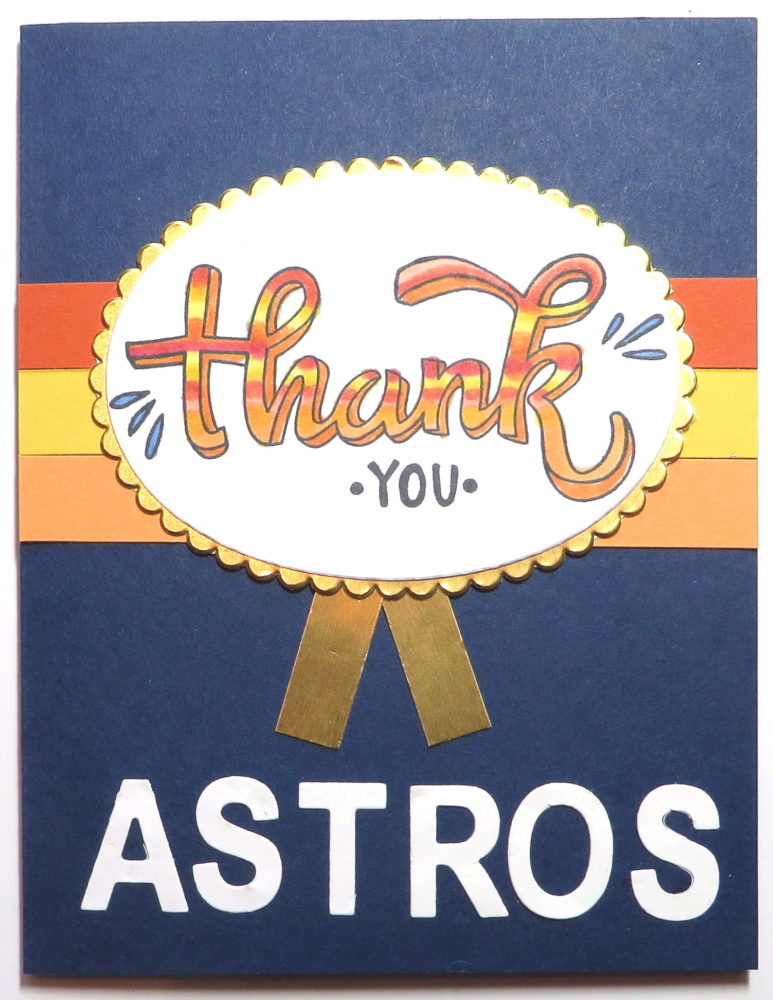
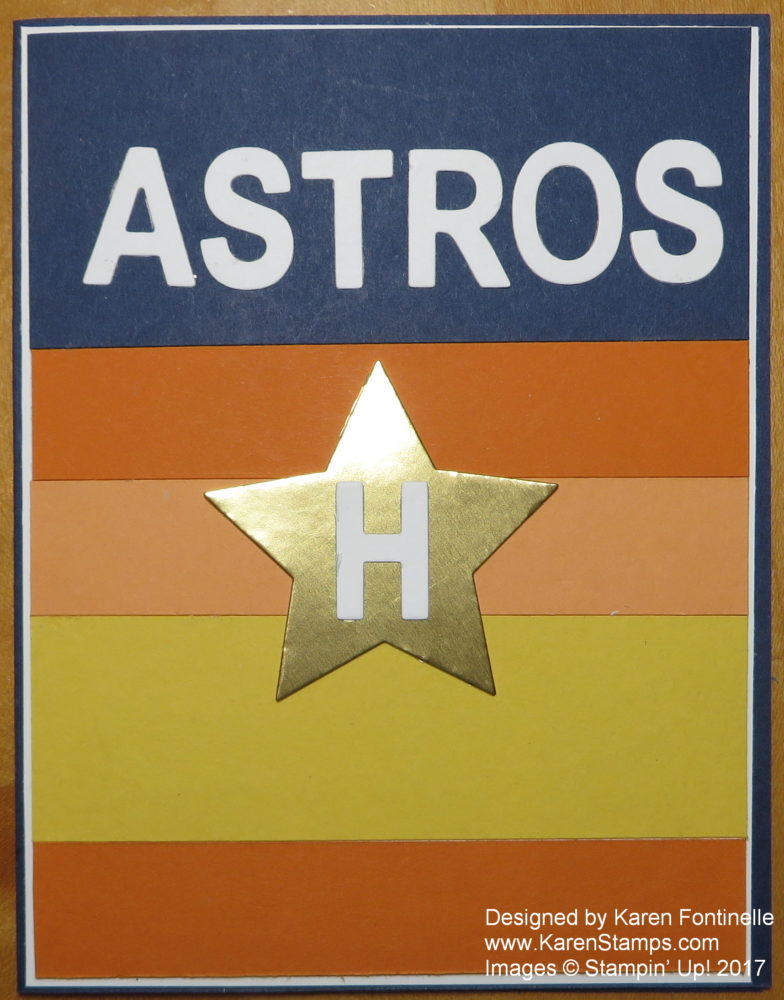
Well, the Houston Astros did it last night, they WON the WORLD SERIES!!! That’s never been done before in Houston so I thought I would also use something new to make this card, the new Stampin’ Up! Stampin’ Blends alcohol markers!
The sentiment is one of the images in the new Color Me Happy Stamp Set, available now to help you get used to the Stampin’ Blend markers and have some good images for coloring to use. This stamp set and matching card project kit are avaiable while supplies last.
I didn’t so much worry about “blending” today making this card. The word was pretty narrow and really I just wanted to emphasize the colors that “sort of” represent the Astros colors. I just love the feel of using these new markers!
The word “Astros” is die cut with the Little Letters dies, which are retired. (Too bad! I like those!)
It’s fun to have my stamping supplies with which to make cards for special occasions like this! Otherwise I would probably have to run to the craft store and buy something or other to use to make some project. As you can see, even though my card is about winning the baseball World Series, there’s not one “baseball” thing on my card! This shows that you can often make cards without having the exact stamp for that occasion. Often you can just get across the idea using colors, stars, embellishments, etc.
Check out the new Stampin’ Blends markers! Order just a few colors to try them out if you like or go for the whole collection!
I thought using the Thank You in the new Color Me Happy Stamp Set was perfect to thank the Houston Astros for all their work this season and all the effort they put into the World Series games. Nobody can deny their heart wasn’t in it. You could probably say that about any teams that make it into a championship, but after Houston and the larger area around us were so affected by Hurricane Harvey and the flooding, the players were really playing for the city of Houston as a whole! One player said he had a picture of a flooded home taped in his locker so that if he thought he had problems if he had a bad game, all he had to do was look at that picture and realize that others had it much worse than him. Many of the players stated in interviews that they were playing to win for Houston after all so many have been through!
Did you see Carlos Correa propose to his girlfriend and give her a ring, on the field, after the game while he was being interviewed?! What a night for him!
Tomorrow is a parade in downtown Houston for the Astros and all the fans! They are even closing schools I just heard! People from far and wide are invited. What a day it will be to celebrate the Houston Astros World Series win for the first time ever!!!
Today is the day! The new alcohol markers from Stampin’ Up! are called Stampin’ Blends and are available for purchase by customers today, November 1, 2017 in the Stampin’ Up! Online Store! I love the feel of these new markers while coloring! Since they make blending easy, you can make the shading on your images look beautiful without even being an artist!
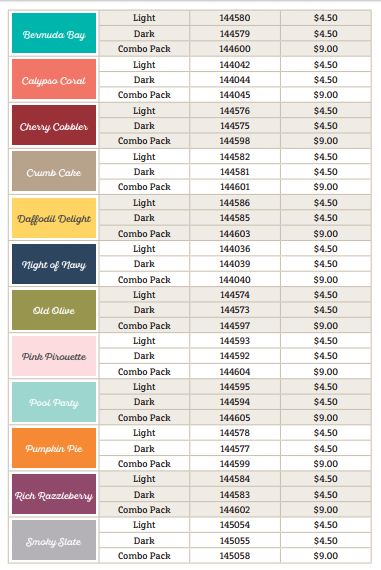
The Stampin’ Blends are being sold singly so that you can easily choose which colors you want or which ones you need to replace down the road. These markers are consumable, which means they won’t have refills or anything like that – the pricing makes it easy enough to simply replace a used marker. To save time, just enter #147475 for the entire collection. The markers will still come singly in your box, but you don’t have to enter each number in order to get all of them!
Images (c) Stampin’ Up!
If you purchase the whole collection, add a little more to your order to reach $150 to get Stampin’ Rewards, which means you will get 10% of the amount to spend on free merchandise!
Make sure you have the Tuxedo Black Memento Ink Pad to use with these markers because of the alcohol. I strongly suggest buying the Refill right away to have on hand. With the introduction of these markers, I think the Memento ink might go fast so I’d suggest ordering as soon as possible.
This Just Add Color Specialty Designer Series Papermight be a pack of paper you would overlook, but now that the new Stampin’ Blends alcohol markers are coming out tomorrow, you might want to consider this paper! You can make something with the paper, or you can just sit down and color! The paper is heavyweight so it is nice to color on. Do a little at a time or a lot! Coloring is good for us!
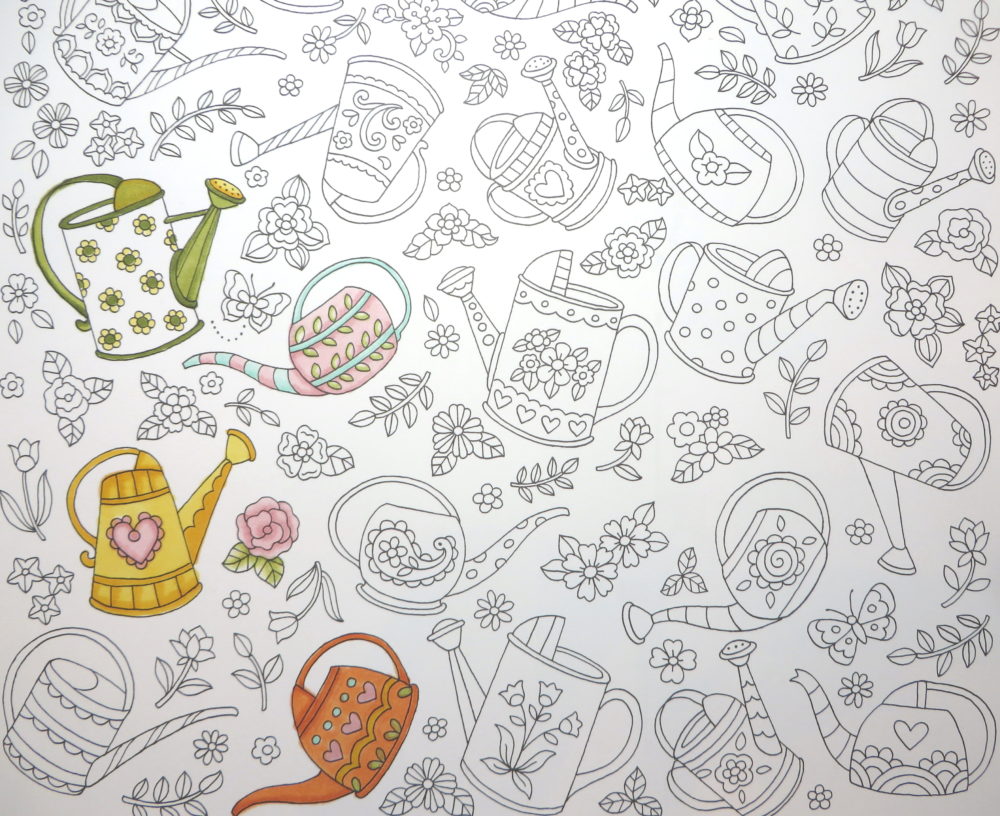
The new Stampin’ Blends alcohol markers will be available for ordering starting tomorrow, November 1st! There will also be a project kit and stamp set available for purchase that goes with the Stampin’ Blends to practice with your new markers and blending! Don’t worry that you have to be an artist in order to use these markers. These markers make YOU look like an artist with ease! You will get two markers, one dark, one light, with which to blend. And if you want, JUST COLOR! You don’t HAVE to do any blending and all that…..just color…..although I bet you won’t be able to resist trying both! Even coloring some of these sprinkling cans on this page, I would think I would “just color” but then I just had to use the other marker and play with that too. These markers are just fun to use, I almost can’t describe it. They do kind of bleed through the paper, even this heavyweight paper, so always have something underneath. On this paper I can see the coloring from the other side, but it didn’t really make any marks on my paper underneath.
Today is the last day for the Designer Series Paper Buy 3 Get 1 Free and this “Just Add Color” DSP is on the list! Buy three packs of paper and the 4th one you enter will be free. So put the most expensive ones first.
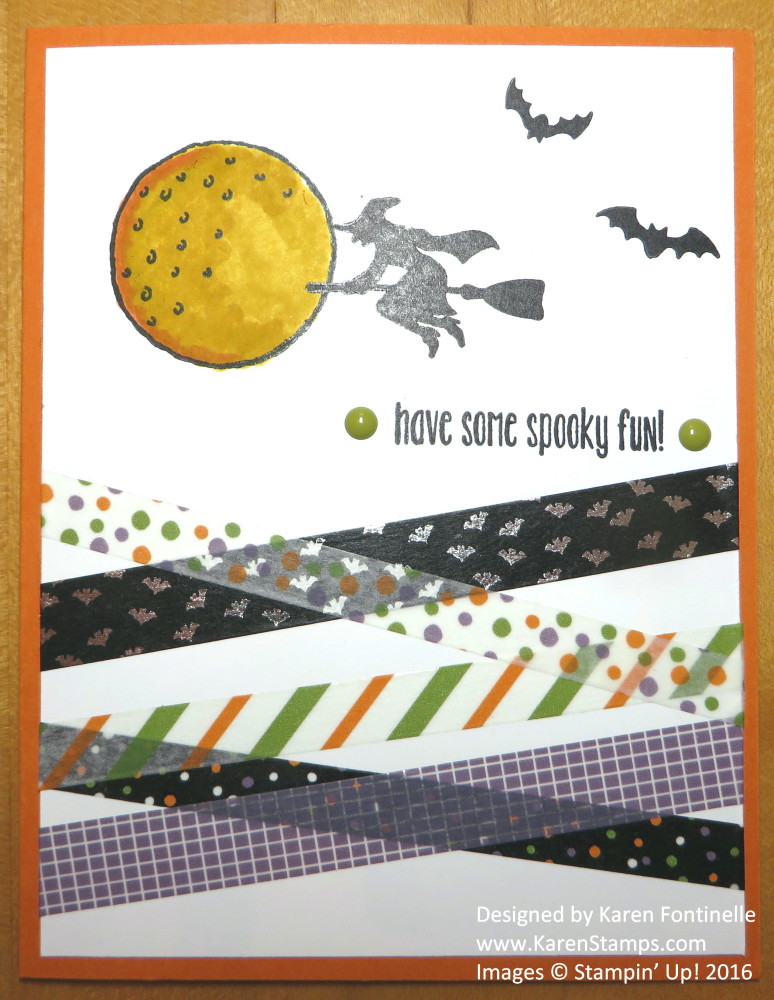
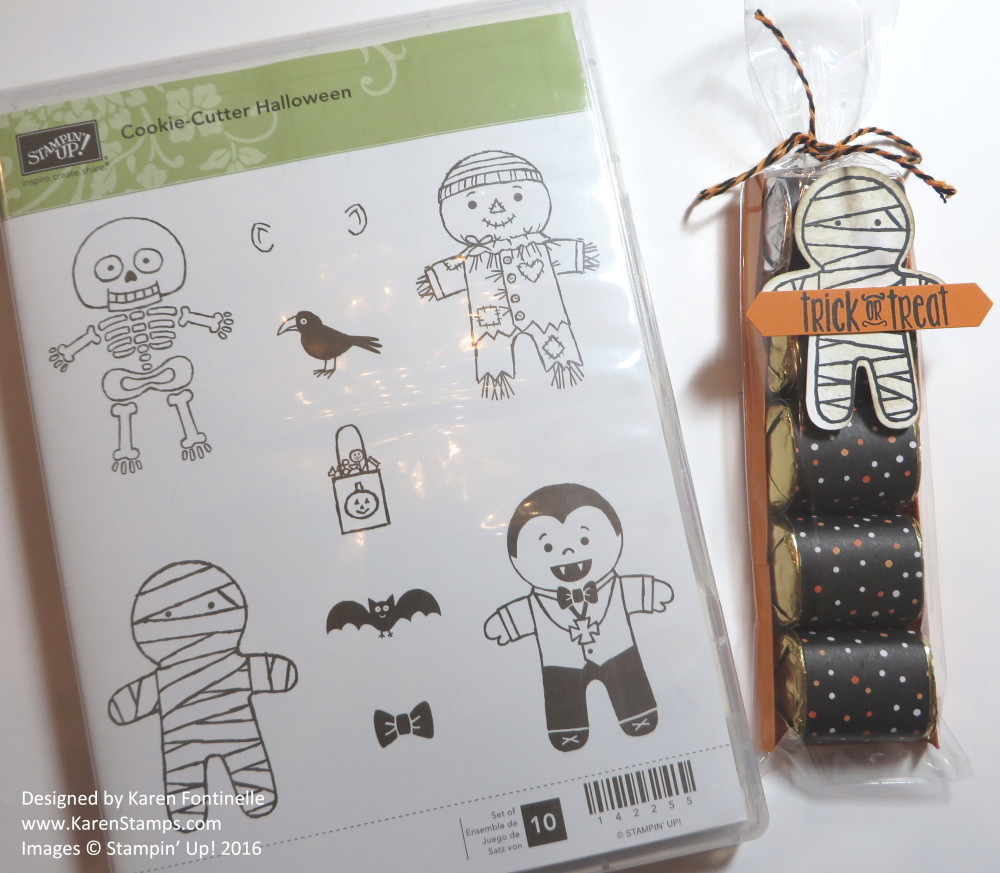
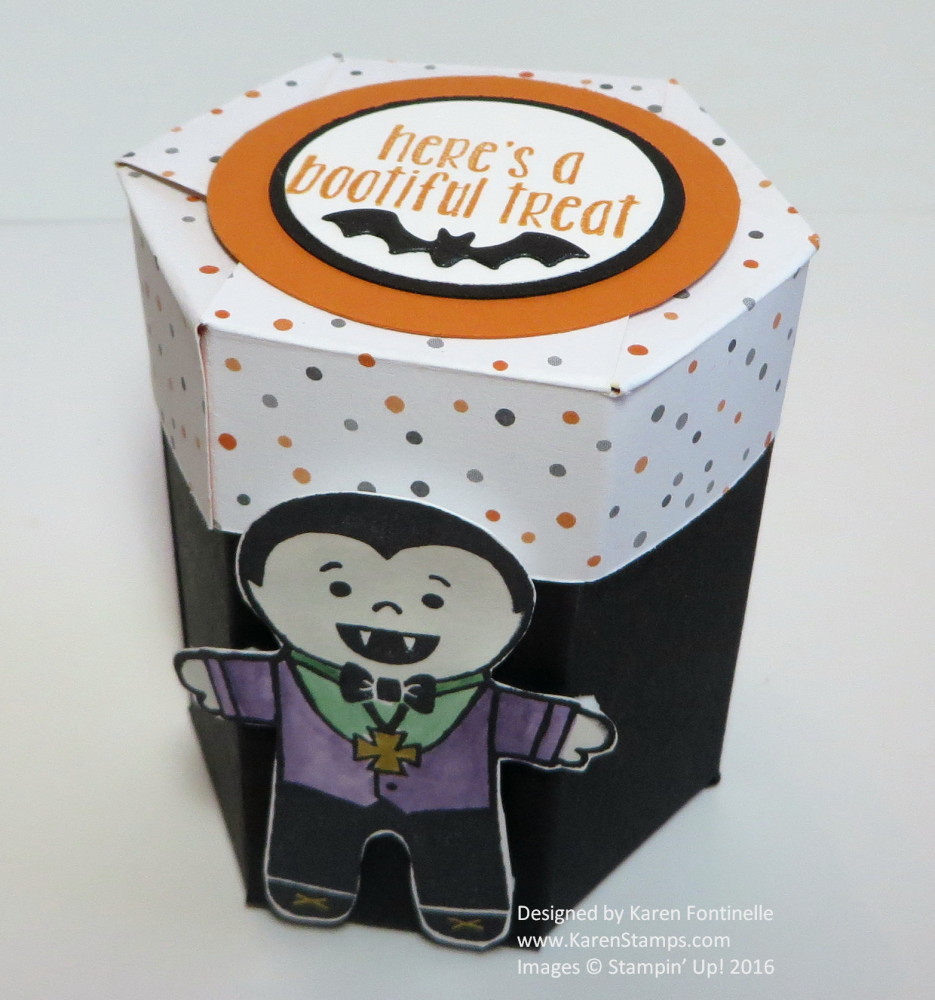
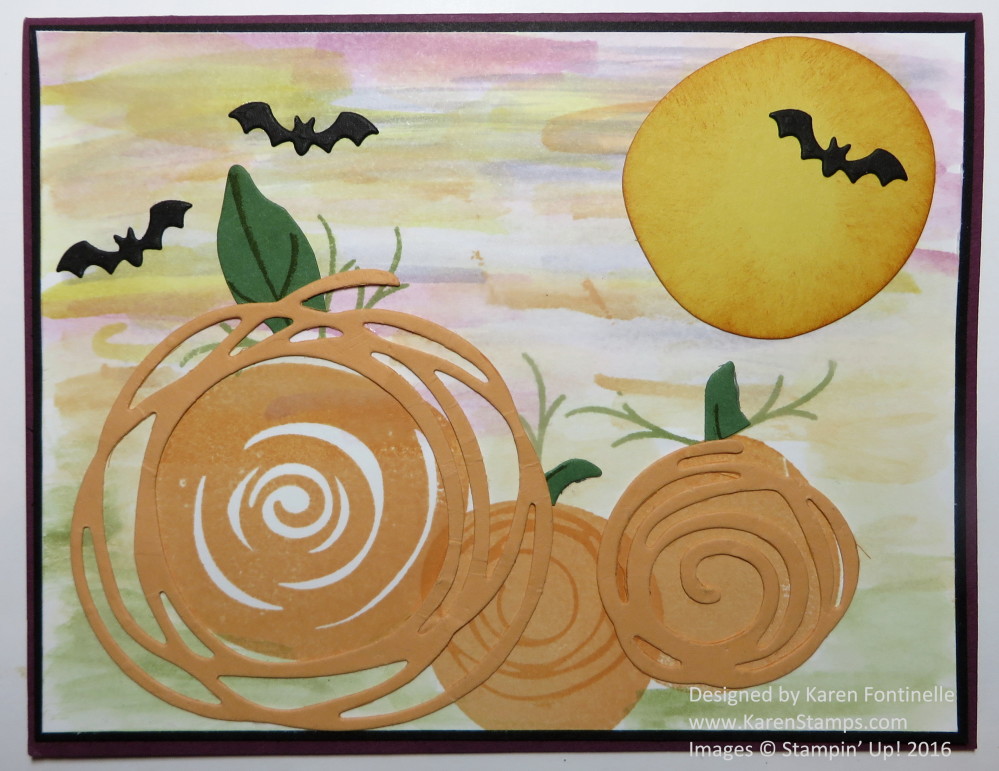
Here are some of my favorite Halloween posts from last year all in one place, if you need some last minute Halloween ideas! If you don’t have this year’s Halloween stamps and paper, perhaps you have ones from last year or you can just use something else. Substitution is easy! It doesn’t always have to be “Halloween” paper or stamps. Just use the ideas!
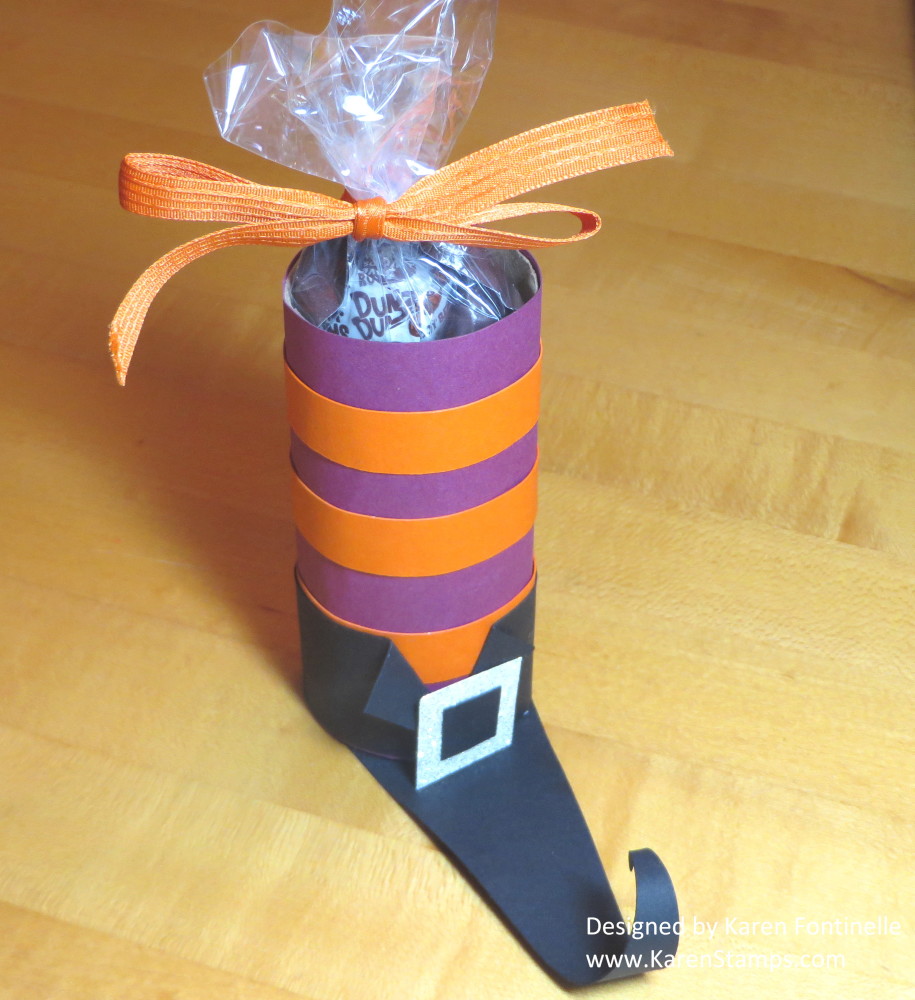
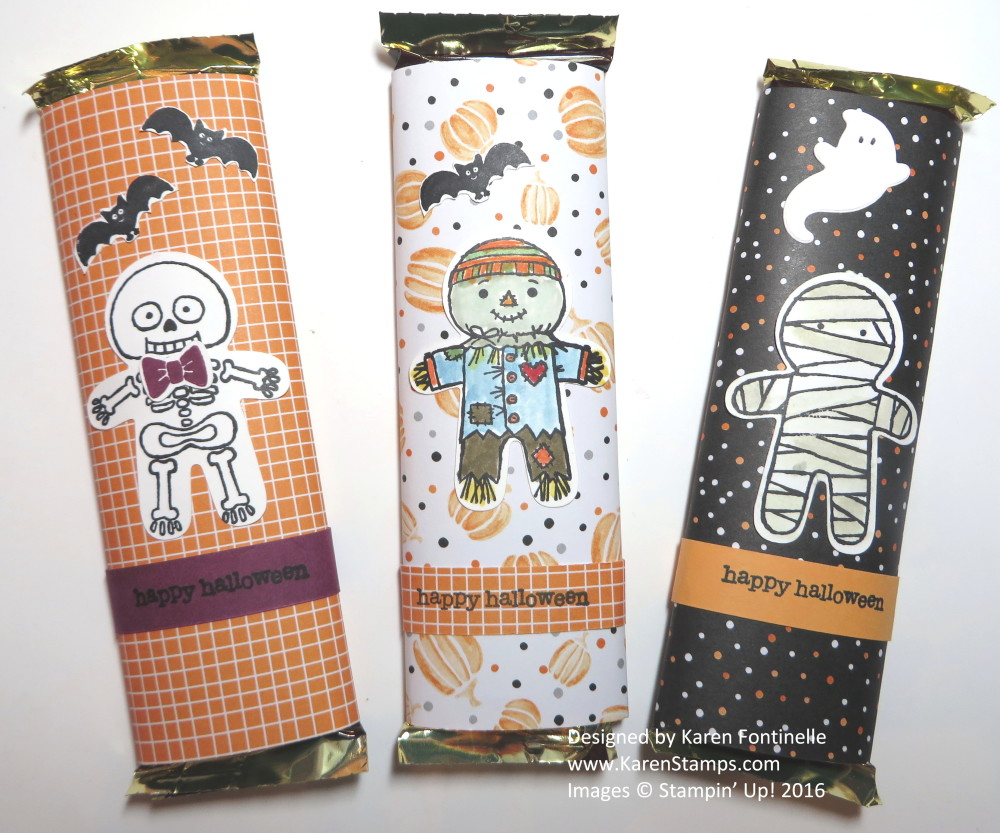
Decorate candy bars of any size with designer paper and Halloween images.
I hope you can use these ideas to inspire your own ideas with the materials you have! Actually most of these could be used as Christmas ideas or for a birthday party. Just change the colors, the paper, the images.
Have fun making some last minute Halloween treats for family, friends, or your trick-or-treaters!
Exciting times in Houston, Texas as the Astros made it into the World Series and last night was Game 3, the first game in Houston after two games in Los Angeles against the Dodgers. Houston is SO excited to be playing in the World Series and to have the game at home for three nights!
After Hurricane Harvey the end of August, this is a great distraction for those who have been dealing with the flooding and aftermath for almost two months. As someone said on TV, Houston deserves to win the World Series!” We’ll see what happens! I’m sure the Dodgers think they deserve to win just as much after a long wait to get in the World Series!
Of course being able to stamp and make cards makes it fun when we have a special event like the World Series going on! This is a card I made sort of looking like a certain vintage Astros sweater that was recently made oh so popular as Kate Upton was spotted wearing it (she’s engaged to one of our Astros pitchers, Justin Verlander!). With all the colors of paper that Stampin’ Up! has, there usually is something to use for most any occasion when you are trying to match colors. The letters I made on the card spelling out Astros were die cut with the Little Letters Thinlits Dies, which are retired…..but they fit just perfectly on my card!
Stay tuned tonight for Game 4! I’m keeping my fingers crossed for another win!
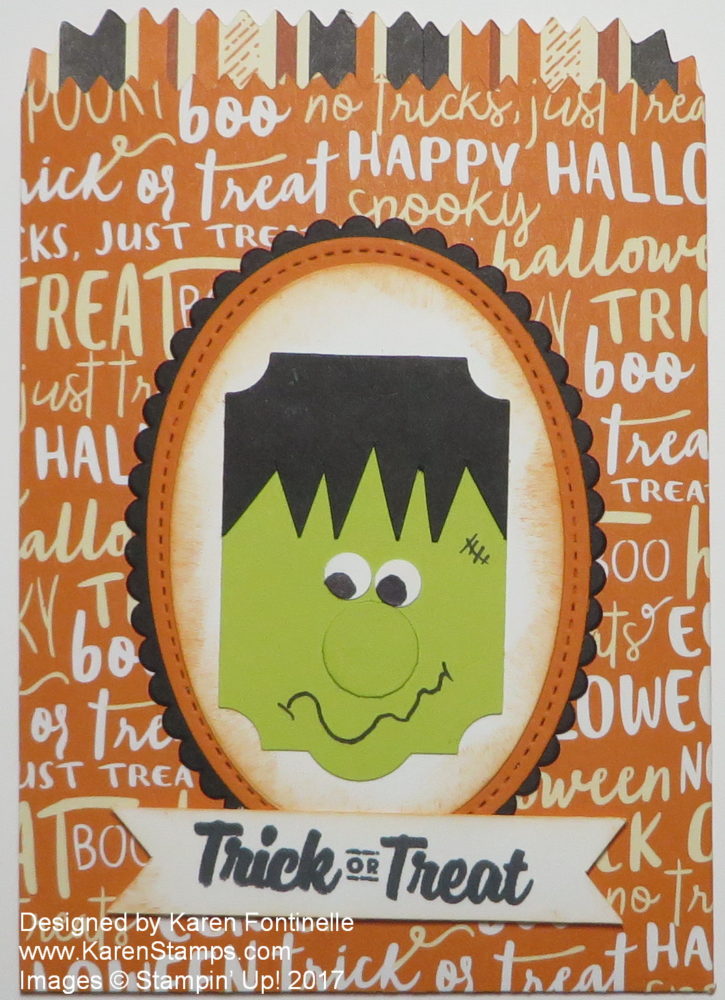
As I was reading something online, I saw a mention of Frankenstein, and I realized with Halloween almost here, I’d almost forgotten about Frankenstein. We used to make lots of fun cards with one of the original steel dies we used to have, the Top Note Die. It was perfect for a Frankenstein head! But as I glanced through some images of Frankenstein to refresh my memory of how his face looked, I noticed people were using various punches to make Frankenstein, perhaps a little smaller though! I saw one candy project using the Everyday Label Punch, and decided to make a Frankenstein face with that punch.
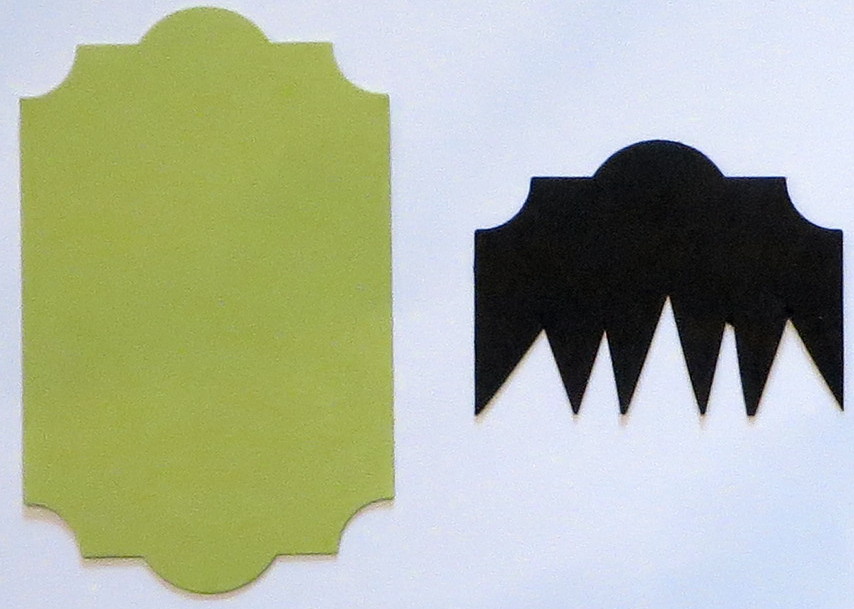
This is how you start using the Everyday Label Punch to make the Frankenstein face:
I punched one label out of Lemon Lime Twist Cardstock and one out of Basic Black. The Basic Black one I cut in a little less than half and then just snipped the bangs with my Paper Snips. Then I glued the black hair piece on top of the green face piece. I suppose you could leave the “lump” on top of his head, but I cut mine off, just following along that straight line on top.
For the Frankenstein face, I used the 1/2″ Circle Punch for his nose and sponged it with a little bit of Lemon Lime Twist Ink. For the eyes, I missed having the Owl Punch and forgot that would have been good to use for the eyes. Use whatever punch that you have to punch out the white eyes. You can punch smaller dots for the eyes, but the simpler thing to do is just color in the black part of the eyeballs with a black marker. I used my 1/4″ Handheld Punch for the white eyes. They are a little small but that’s okay. Just draw on his mouth and scar with a black marker.
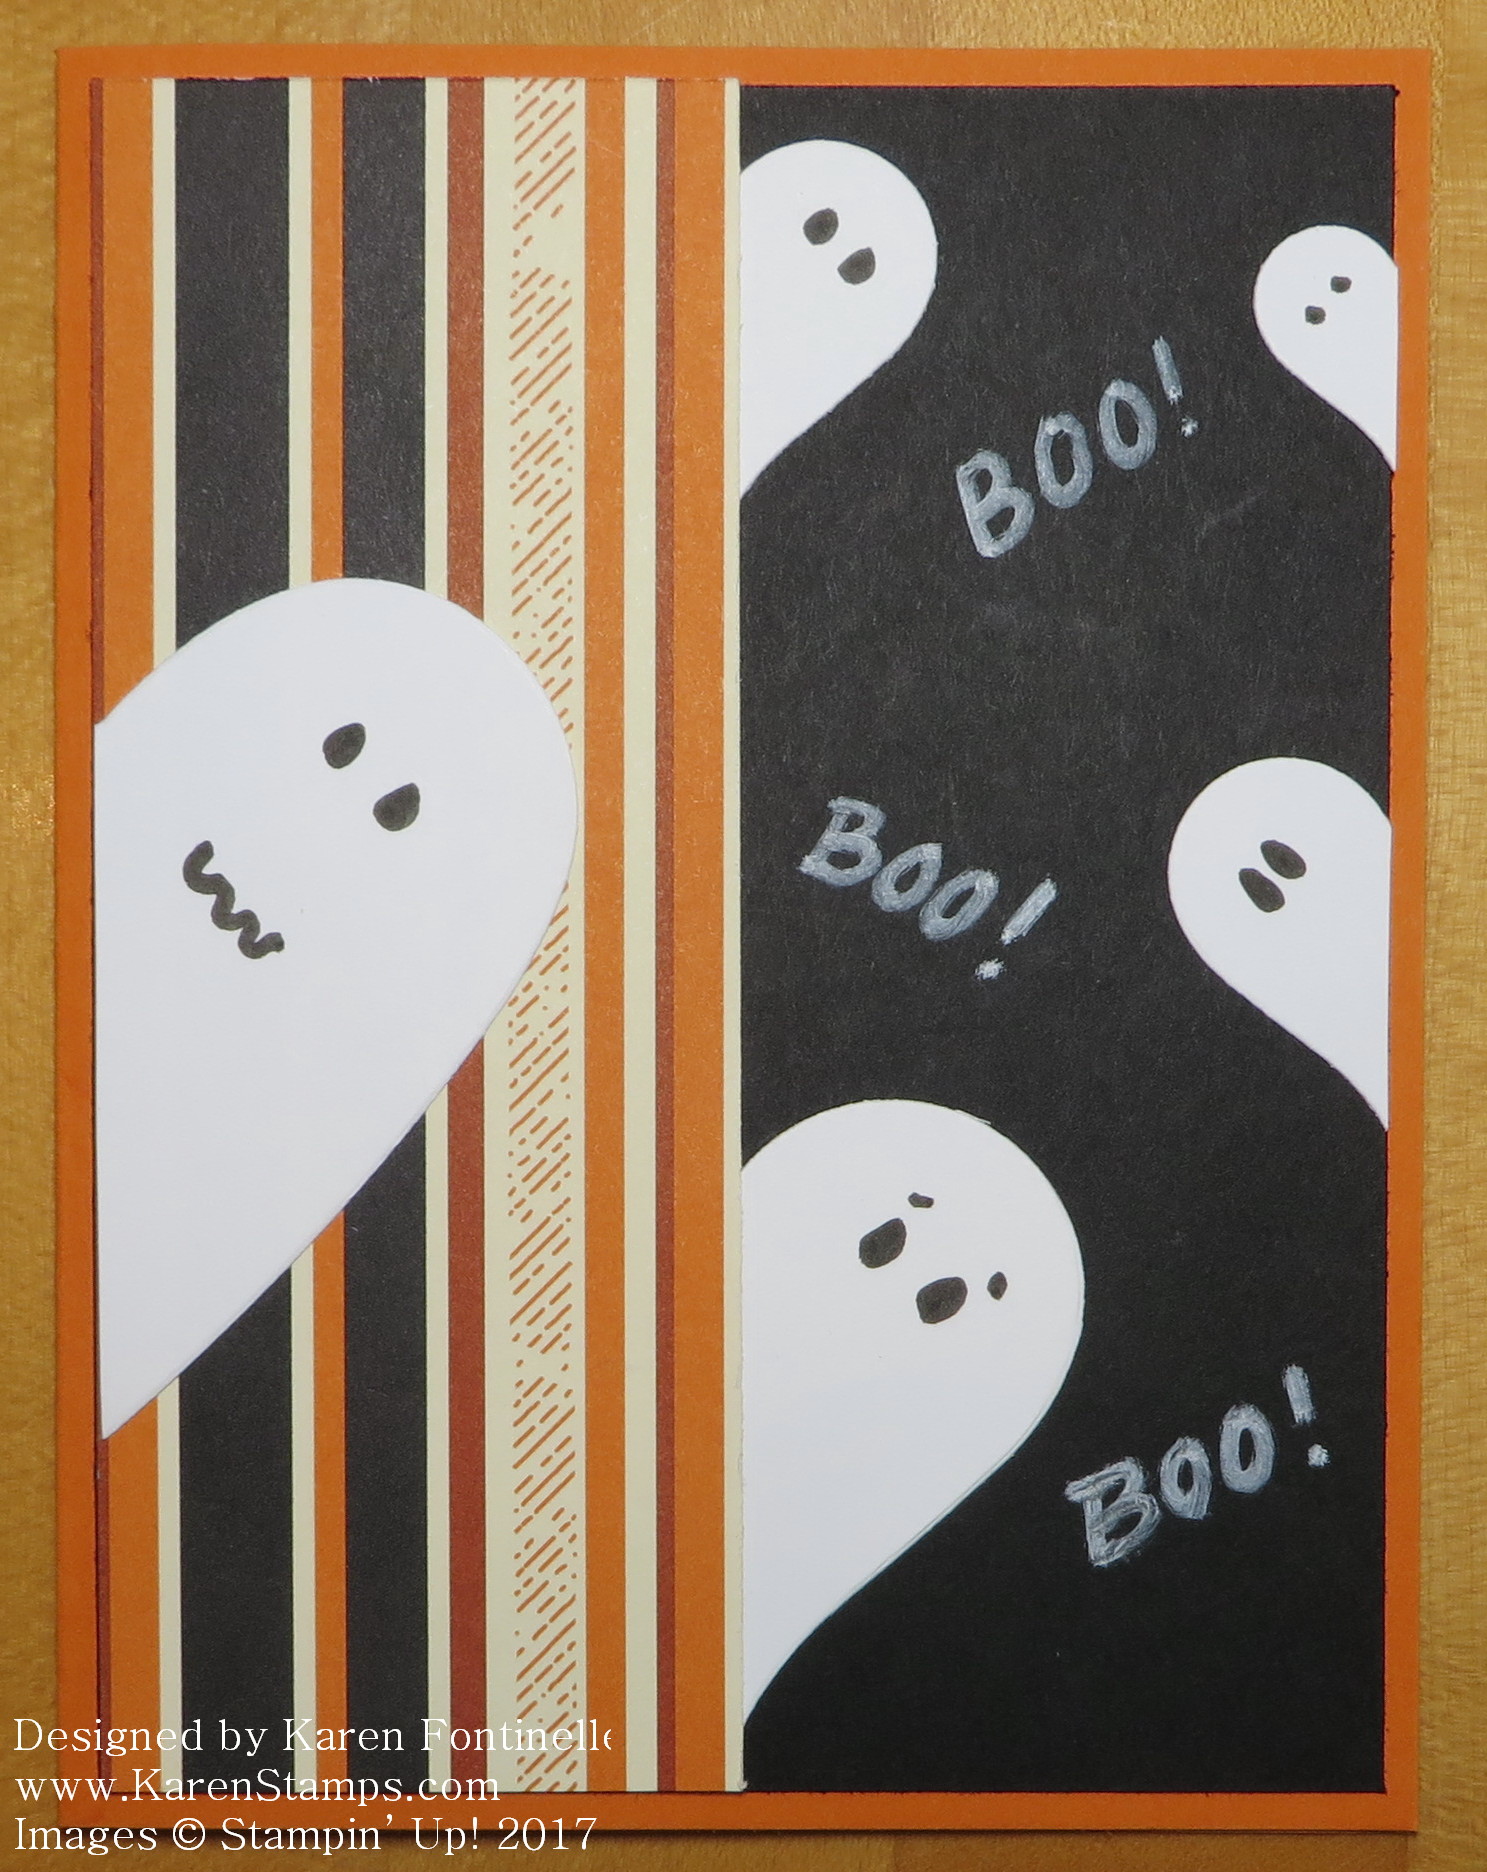
If you want to make a quick and easy Halloween card, this Halloween Ghost Card is it! This creative idea is actually one of the things that made me sign up to be a Stampin’ Up! Demonstrator fifteen years ago this month! Sometimes it’s the little things! I was already buying Stampin’ Up! products as a customer from my friend who introduced me to the company, when she suggested I sign up to be a Demonstrator, partly so we could go to the Convention together! When I visited her in October that year, she took me along to a team meeting of other Demonstrators and I got to see even more samples of cards and projects. I was overwhelmed with all the creative ideas, but when I saw you could make a ghost out of half of a heart shape, I was sold! Who thinks of these things?! And that thrill has never diminished for me as I see what other ideas stampers come up with!
This card base is Pumpkin Pie Cardstock with a Basic Black layer. The designer paper is Spooky Night. The “Boo!” words are handwritten with the White Stampin’ Up! Chalk Marker.
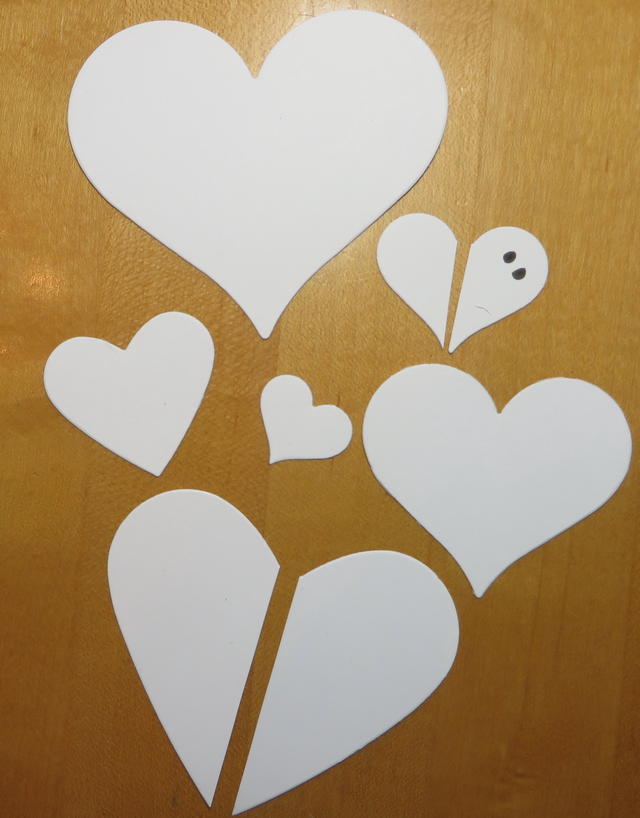
This is all you have to do to make this Halloween card. Die cut various size hearts with the Sweet & Sassy Framelits Dies. Or perhaps you have retired heart punches…..or just cut out some hearts with Paper Snips. After you get the heart shape, just cut it in half! Add some eyes or face or whatever you like to make a ghost! Then put you ghost peeking out from the side of the card or project!
I always love making Halloween cards and projects, but this was one idea, making ghosts out of hearts, was one that really stuck with me! Try it on any Halloween project you want to make!
Tomorrow, October 25, my next holiday email hits Inboxes with a new project! It’s free, but you have to be on my mailing list! This is a special gift each week to my email subscribers each year and I enjoy doing it! I love seeing new ideas as often as possible! Whether these ideas inspire you to create the same thing or change it to your own liking, it’s all for our stamping fun! It’s a good way to “get going” before we really get strapped for time before Christmas!
Sign up before 1:00 PM Wed. Oct. 25 to get the next 12 Weeks of Christmas holiday email!
Join my Mailing List by adding your name and email in the box below!

 Today you can look over the list and be prepared to order tomorrow if you want the stamp sale and other things or any other day if you don’t want to take advantage of the stamp sale.