Monthly Archives: December 2011

Pines & Poinsettias Z-Fold Christmas Card

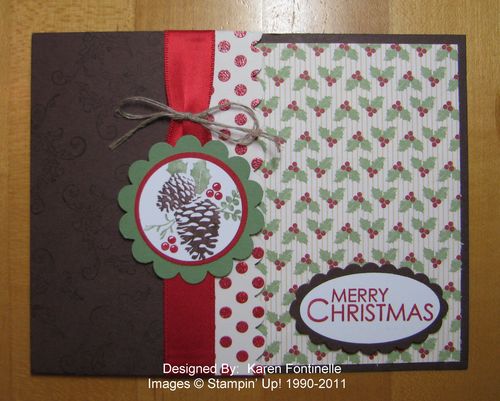
Pines & Poinsettias z-fold Christmas Card

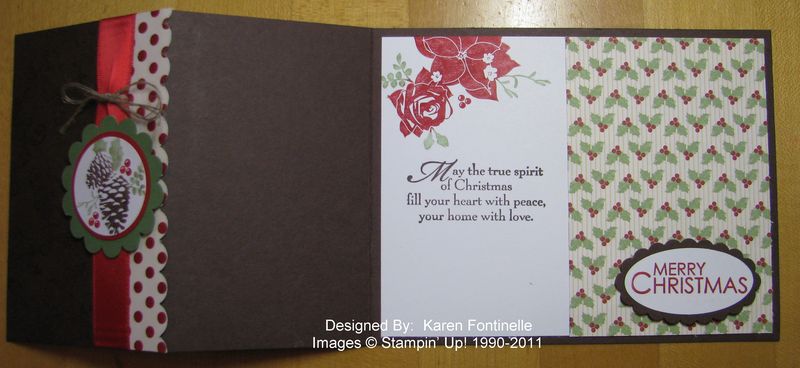
I'm hoping to enjoy stamping some Christmas cards today, so I started with this Z-Fold card using the Pines & Poinsettias stamp set and the beautiful Holly Berry Bouquet Specialty Designer Series Paper. Today is even Christmas Card Day! The day celebrates Sir Henry Cole, who marketed the first commercial Christmas Card in 1843. So jump on board and let's make some Christmas cards today!

Here is the inside.  You can see that the top cover of the card folds back, creating the "z".

Pines & Poinsettias z-fold Christmas Card Open

I got the idea from a card I saw on our demonstrator website and I changed mine a little bit with the design.

Having the Simply Scored Tool made the scoring real easy on this card.

  • Cut a piece of card stock 4 1/4" x 11".
  • Score at 5 1/2" and at 8 1/4".
  • Fold on score lines to make the "Z".
  • Decorate as you like!  Very fun!

If you need any stamping supplies to make some Christmas cards, just visit my Stampin' Up! Online Store.

                           

Stampin’ Up! Holiday Shipping

Stampin' Up! Distribution Center Aug. 2009

The elves at Stampin' Up! are very busy getting orders out as quickly as possible for holiday shipping!  One demonstrator said the other day that her order shipped so quickly she thought the whole distribution team must have been standing there just waiting for her order to come in!

Here is what Stampin' Up! has to say about Holiday Shipping….

We recommend you place your holiday orders by Wednesday, December 14, 2011 to receive your orders before Christmas.  Delivery times will vary depending on where you live; if your personal experience indicates that it takes longer for packages to reach you, you will want to allow a little extra time for shipping during the holidays.

All orders we receive by December 14, 2011, will be picked, packaged, and delivered to our courier in plenty of time to arrive by December 24, 2011.  But as you know, we cannot control delivery times; holiday mail volumes are high, and our delivery services encourage customers to ship as early as possible to avoid disappointment.

Did you know there is also Expedited Shipping available, just in case?  It costs a little extra but sometimes it is what you need.  Ask me about it.


Shelli Gardner on the TODAY SHOW 2011!


Here is the clip of Shelli Gardner on the TODAY SHOW today with Kathie Lee and Hoda! I'm pleased they didn't seem to rush her as much as in the past!  And wait until you hear what they said to her at the very end!! Also, notice her local fan club in the background!!  :) Shelli always makes us proud!

Read about Stampin' Up!'s participation in the Today Show Holiday Toy Drive HERE.


Petal Cone Die Santa….Cute, Cute, Cute!!!!

Petal Cone Die Santa

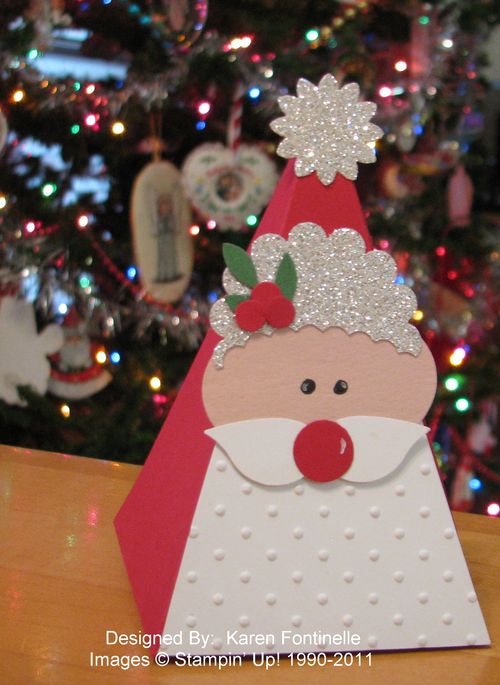
Is this Petal Cone Die Santa not the cutest thing??!!!!  There are many versions online and I copied one of them.  We made this in our stamp camp this past weekend and I think everyone loved it.  Just imagine having one at each place setting at your holiday dinner either as a place card or filled with candy or treats as a Christmas party favor!

The box is made with the Petal Cone Die #121810 with Real Red card stock.  His beard is another cut with the Petal Cone Die but I trimmed just one triangle section and then embossed it with the Perfect Polka Dots Embossing Folder.  I cut it off about half way so that some of the red box would show for Santa's hat.

The moustache is from the Bird Builder Punch #117191 (the wings!) as are the green holly leaves with part of the stem cut off. Just punch some small circles for the berries and a larger one for Santa's nose.

The Silver Glimmer Paper #124005 hat fur is a little tricky.  First punch a little bit out with the Scallop Oval Punch #119856 to get the bottom part, then punch with the Scallop Punch #119854  to get the top edge. Place it on Santa's head where it fits the best.  His face is Blushing Bride card stock cut with the Large Oval Punch #119859. I chose to just color in his eyes with a black marker and add the little highlights with our Signo Gel Pen #105021.

The little pom pom on top of his hat is punched from the Boho Blossoms Punch #119858.

Once you sit down to make this Petal Cone Die Santa, you will see that he is very easy and fun.  You can change up a lot of the design to make it your own or substitute for what supplies you don't have.

If you need any of these supplies, just contact me or visit my Online Store for all your Stampin' Up! supplies!  Still time to get them before Christmas!

Have fun!!!

Shelli Gardner on TODAY today!!

Shelli Gardner, Founder and CEO of Stampin' Up!, will appear on the Today Show December 6th during the fourth hour (check your local listings) to talk about Stampin' Up!'s participation in the Holiday Toy Drive.  Be sure to watch if you can!  Perhaps I will be able to post a video of it later.

I see Shelli says on her blog her appearance will be between 10-11 am ET…so whatever time whichever part of the Today Show comes on at your house!

Don’t Miss Out! Get on My Mailing List Today!

Mailbox I'm so pleased that you are reading my blog, so while you are here, please sign up for my Mailing List in the box in the upper left of my blog.  Do it today and you will receive my December stamping newsletter plus the rest of my 12 Weeks of Christmas emails!

Need some Christmas or stamping ideas, want to keep up with any specials and news from Stampin' Up!, want to find out about fun stamp camps?  Just sign up to get my main monthly email plus usually a mid-month one with the latest news or reminders.

You can follow me on Facebook, too! 

Become A Stamping with Karen Facebook Fan!

Punch Art Snowman Christmas Card

Punch Art Snowman Christmas Card

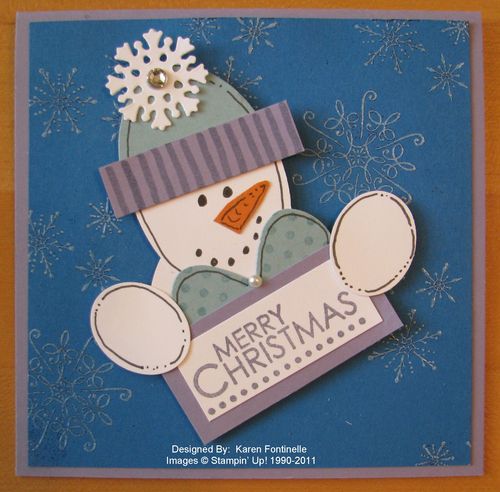
This punch art snowman Christmas card is inspired from one in an old papercrafting magazine. No directions were given but I thought it would be easy to duplicate with our Stampin' Up! punches.  

Punches: Extra-Large Oval Punch #119859:  Snowman face and hat (cut in half); 1 3/4" Circle Punch #119850:  Snowman body; Small Oval Punch #120908:  Snowman hands

  • The card base is Wisteria Wonder, the card layer is Marina Mist card stock. The hat and bow are Baja Breeze
  • The little snowflake on top of his hat is from the Northern Frost die #120901 with a little rhinestone added to the center.  The band on the hat is pretty much hand cut with lines drawn with the Wisteria Wonder Stampin' Write Marker
  • The carrot nose is cut from a scrap.  
  • You won't be able to guess how I made the bowtie I bet!  It's the bottom half of the Butterfly Punch #119848 turned upside down!
  • The greeting is from Season of Joy #110384. 
  • The snowflakes (from Serene Snowflakes #115438) in the background are stamped in White Craft Ink and embossed with Clear Embossing Powder.  
  • The little whimsical lines are just drawn freehand on some of the pieces with a black Sharpie pen.     

All so easy, and what a happy little card!

If you need any of these stamping supplies, I would be pleased if you would order them from my Stampin' Up! Online Store

A Petal Cone Die Snowman

Petal Cone Die Snowman

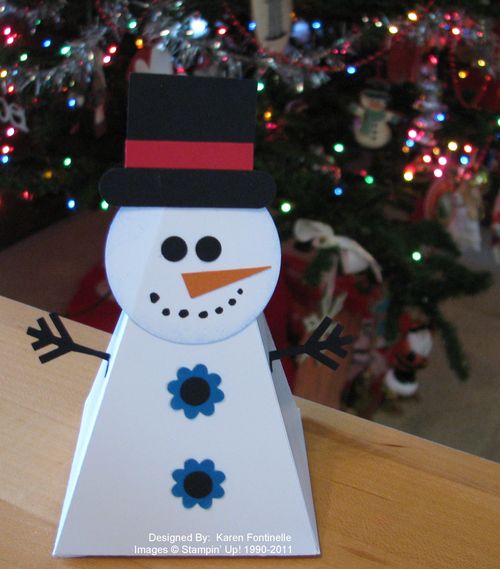
On someone's blog, I saw a Santa made out of the Petal Cone Die #121810, and it made me think that I could make a snowman the same way!  

  • Just glue your two Petal Cone pieces together, close up the bottom and put the point at the top.  
  • Punch out a large  1 3/4" Circle for the face, sponge a little Bashful Blue around the edges and make his face.  
  • For the hat, just punch or cut a square, then use the Word Window Punch for the brim and put a little strip of red.  
  • I fancied up his little lump of coal buttons with the Itty Bitty Shapes flower shape.  
  • The arms are the Snowflake Punch, trimmed.  I folded the ends and glued onto the sides of the snowman.

Really, you don't need directions!  Just use your "snowman imagination" and go for it! Put some candies inside and make one as a Christmas party favor for everybody for your holiday table!

If you need more punches or other stamping supplies to make this Petal Cone Die Snowman, I would be happy to have you order them HERE!  Thanks!

Snow Much Fun—One of Those Days!

Have you ever had one of those stamping days??!  I'm having one today. Every idea I had for this card, I discovered I either did not own the product I was planning to use or I couldn't find it!  We've moved things around for the Christmas tree and lots of my stamping stuff got moved.

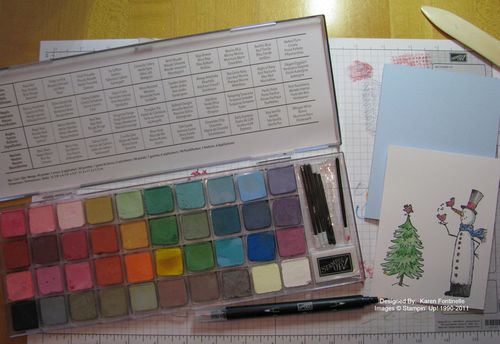
So I decided to just stamp with Snow Much Fun #122562 with Stazon ink and color in with #120962.  When I started stamping, Stampin' Pastels were the thing to have because in one box you had all the colors to use.  I think we have gotten away from pastels a little bit with other wonderful products, but I decided to use them today.  Just touch your Blender Pen to a corner of the pastel and pick up the color, then color as normal.

Snow Much Fun Pastels

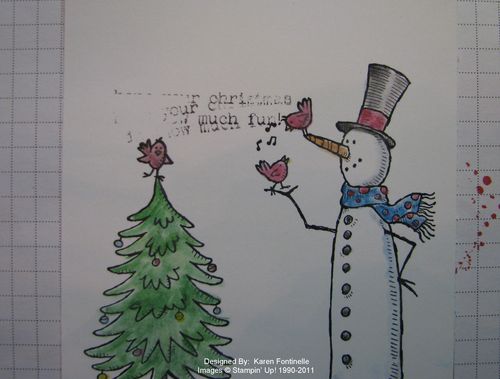
So after coloring in the snowman and Christmas tree beautifully with Stampin' Pastels, THIS happened!  You really shouldn't drop your stamp on top of the card you are working on!

Snow Much Fun mistake

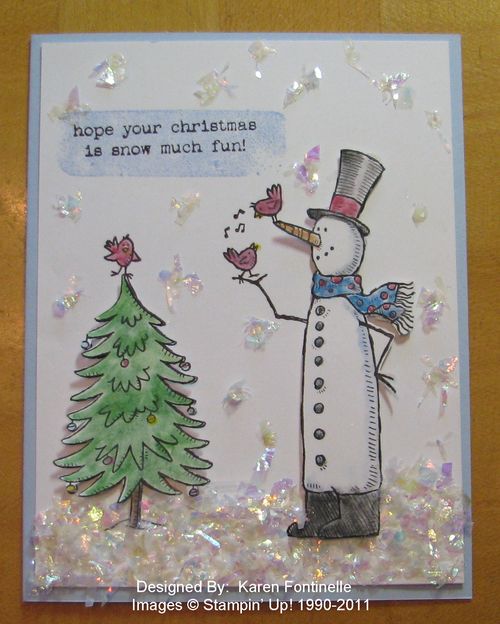
But since "there are no mistakes in stamping!" (really?!) I had to make good on that statement!  I stamped the images again on a new piece of Whisper White and then I cut out the tree and the snowman from this ruined piece!  I mounted them with Stampin' Dimensionals right over the stamped images on the new piece and I LOVED how it looked! I didn't cut out the snowman's one arm nor the birds so that made it easier.

I also used a small narrow clear block to stamp over the greeting to highlight that.

And I added Tombow Multipurpose Glue to the bottom of the card to adhere Mica Flakes #124115.  I should have stopped there, but oh no….needed a few snowflakes!  So I think the snowman is in a blizzard….but that's okay because it IS December!

Snow Much Fun Mica Flakes Blizzard

A bit overdone…..but that's okay!   Somebody might love it this way! It's still fun!  And was fun to make in spite of myself!