Flowering Zinnias Thinking of You Card

Flowering Zinnias Thinking of You Card

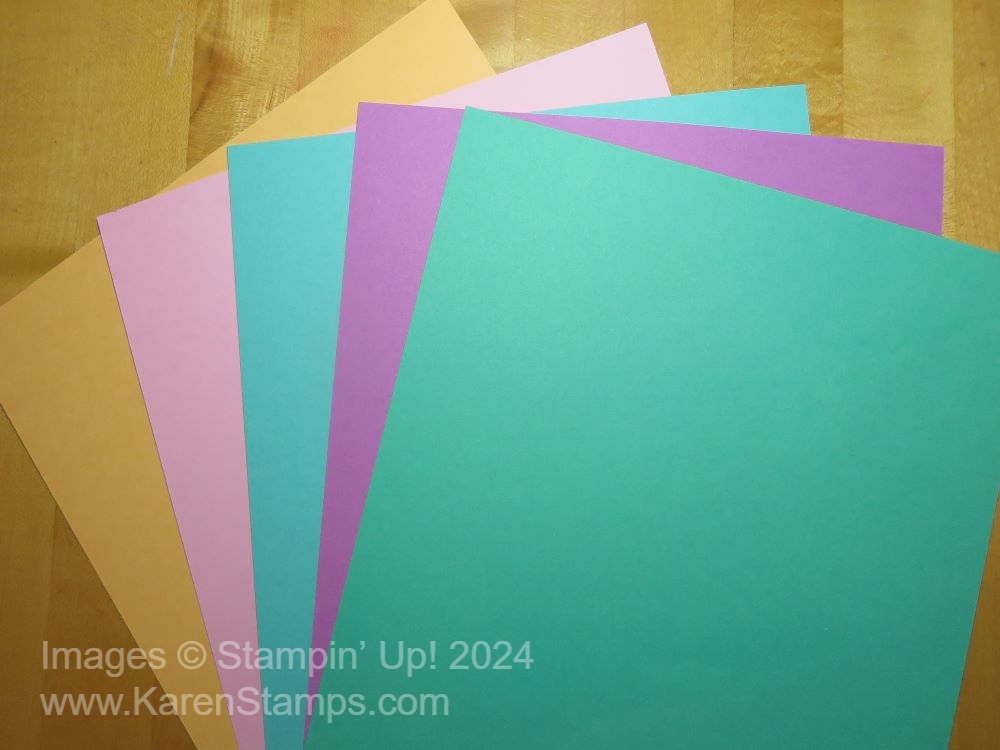
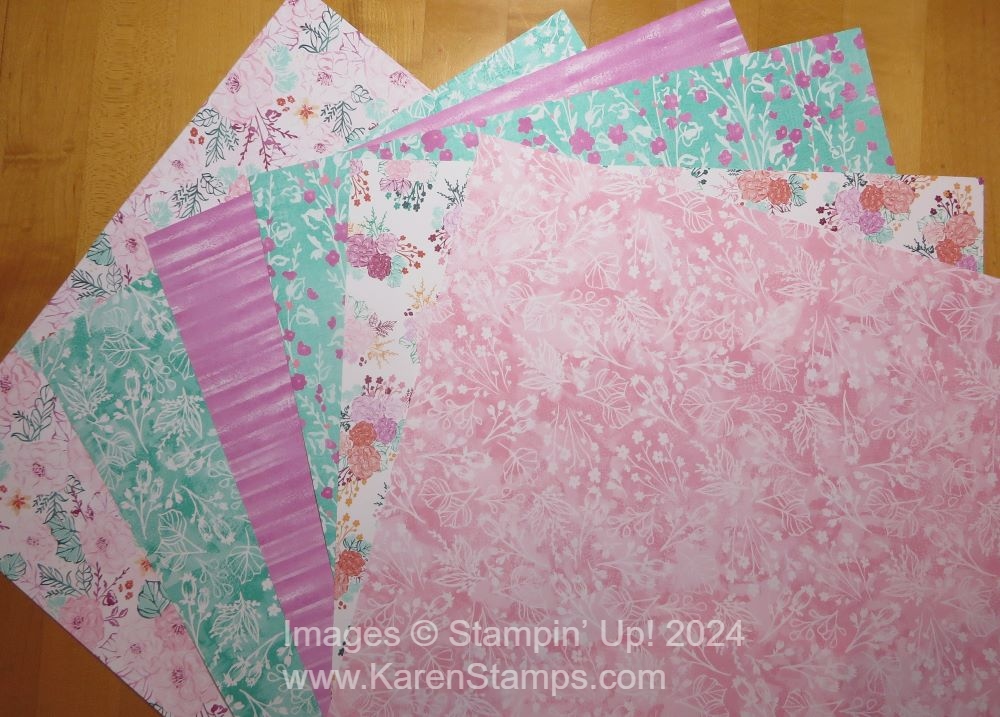
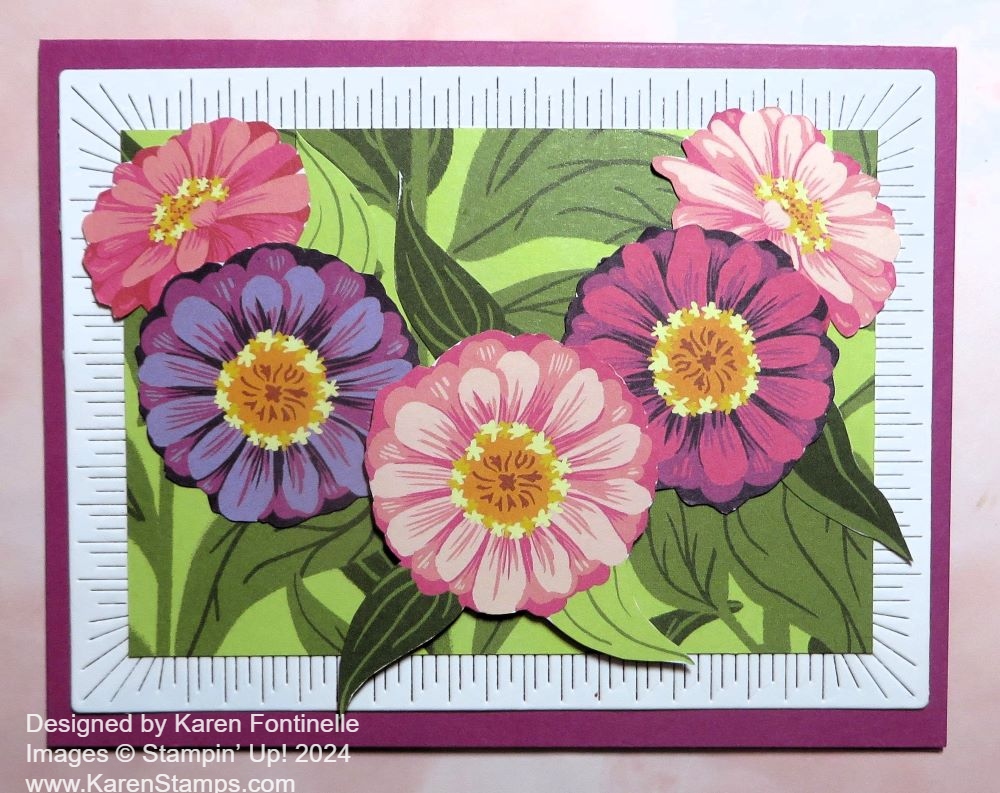
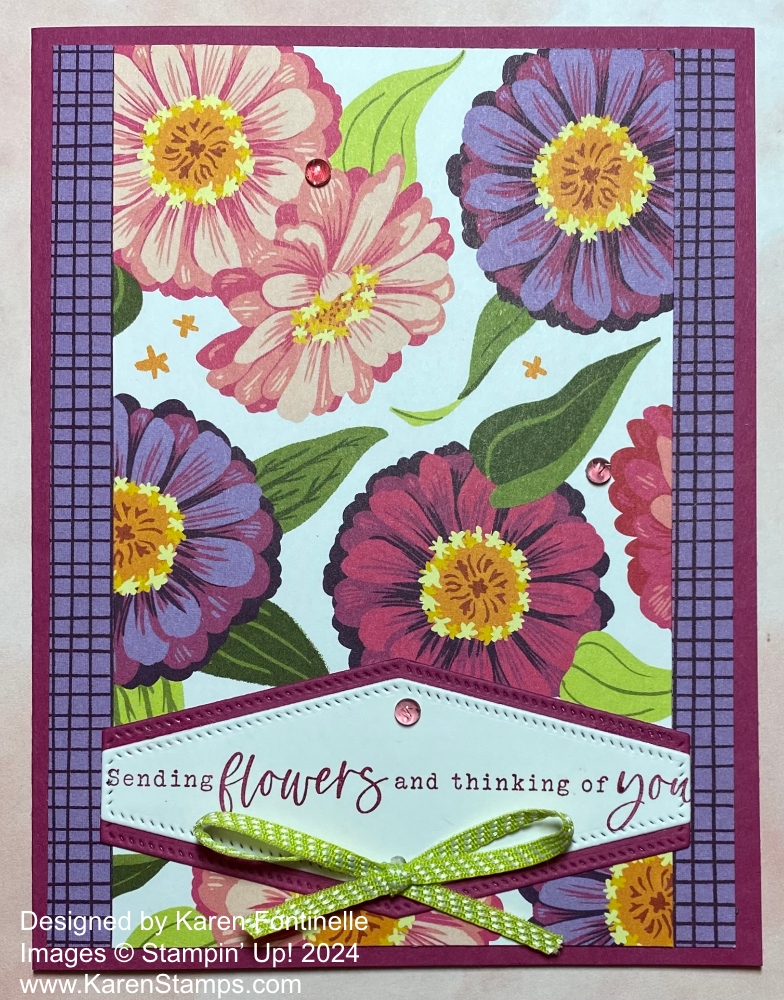
This Flowering Zinnias Thinking of You Card isn’t the card I thought I was going to make when I started! It just goes to show you that anything can happen when you go to make something! When I got out the pack of Flowering Zinnias Designer Series Paper there was a scrap of the paper with the big flowers, which is the opposite side of the purple plaid you see in the background. That piece of paper just made me think of a narrow panel of designer paper down the front of the card with wider-than-usual margins on each side.

The card base is Berry Burst. The layer on the card is the purple plaid pattern I mentioned with flowers on the other side. The flower panel is cut at 3 1/4″ x 5 1/4″. I wanted the purple plaid to show a little bit.

The greeting is stamped from the Simply Zinnias Stamp Set. It’s pretty long but with very careful placement, I was able to diecut it with one of the banners in the Nested Essentials Dies. I wanted the smallest piece with this greeting not to cover up too much of the flowers. I thought I would need to use the next largest die for the greeting but I felt it was a little too large for the space. I got lucky fitting all the letters of the greeting on this diecut piece! I also cut the same size banner out of Berry Burst, then cut that piece in half horizontally so I could use the two pieces to layer under the top and bottom of the greeting piece to help it stand out.

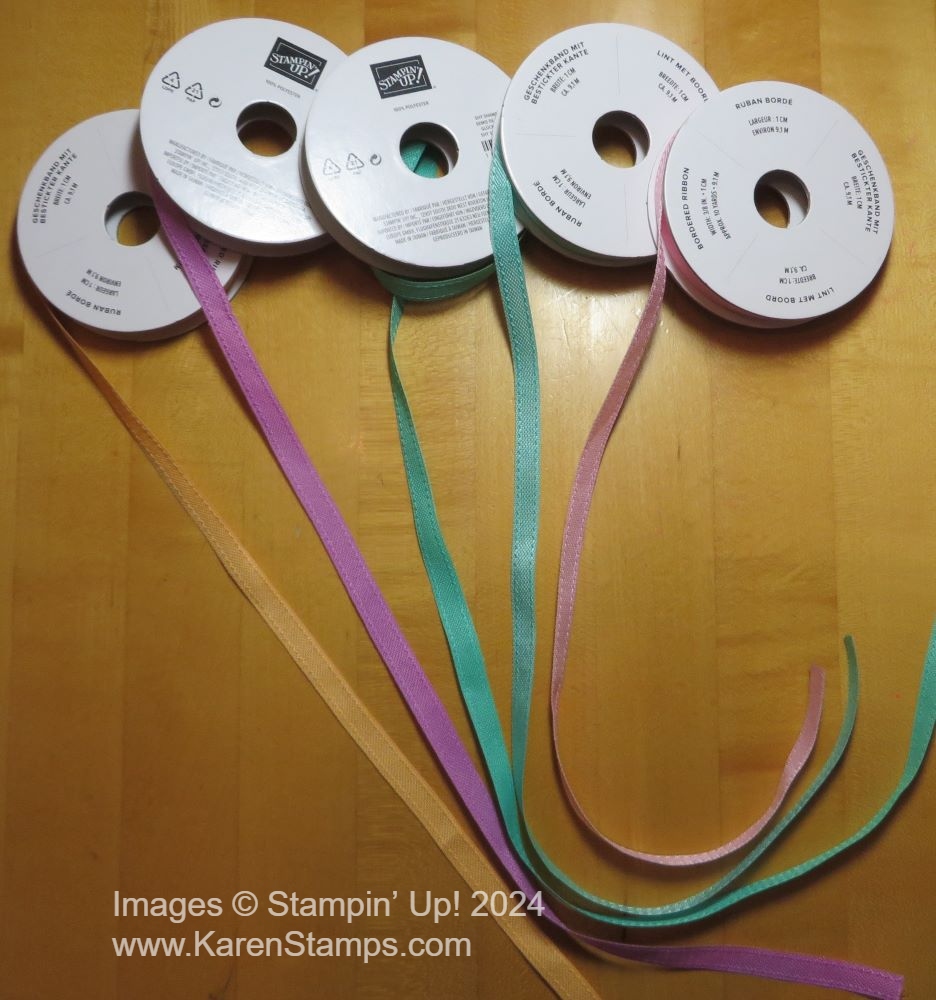
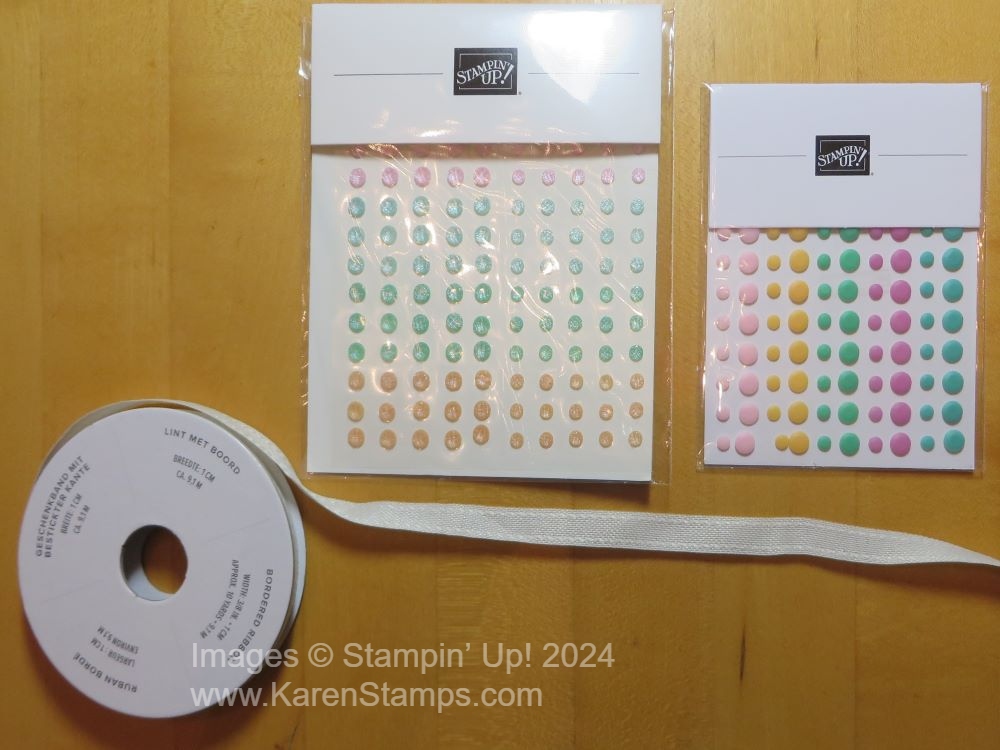
For embellishments, I tied a bow with the Lemon Lime Twist ribbon in the Ribbon Duo Combo Pack with the Petal Pink ribbon also. This ribbon combo pack will be retiring at the end of the month and is discounted by $4.00 so it’s a nice deal! I also added three Berry Burst gems to the card from the Tinsel Gems Four-Pack.

This would be an easy card to duplicate now that you have the design and plan! Try it! Get all the Zinnia products in the Online Exclusives part of the Online Store!

SHOP STAMPIN’ UP! ONLINE HERE!

Zoo Crew Musical Birthday Card

Zoo Crew Musical Birthday Card

As I looked for a card idea to make with a stamp set that was retiring from the Stampin’ Up! Annual Catalog, I had a difficult time finding a set I had that wasn’t already sold out! This is the one I came up with and made this fun Zoo Crew Musical Birthday Card with this retiring designer series paper that I love! I wish this whole stamp set, dies, and designer series paper were sticking around another year! These little animals, doing various things from camping to crafting to playing instruments are just so cute and fun! It may be Tax Day, but these little guys will put a smile on your face!

For this card, I started with the Zoo Crew Designer Series Paper in the Zoo Crew Suite Collection. It was tough deciding which characters to use, but I decided on the musical guys. I used my Paper Trimmer to cut out each animal without getting too much other background. You could use a punch or rectangle die or whatever you like but I find just using the Paper Trimmer to be the easiest. Then I layered each animal on colored cardstock and then onto a narrow piece of black. You could do just one layer. I won’t put all the exact measurements because your cut-out animal might be a different size than mine.

The frog was already colored in, but I did decide to color in the bear and the first animal, whatever he is. Maybe he is a wild boar. I used Stampin’ Blends. Their instruments were already colored, I just colored the animal body. You could use Watercolor Pencils or some ink and a Blender Pen or even leave them blank. I didn’t think about how they weren’t colored at first.

The card base is Basic Black with a layer of Lemon Lime Twist. The background designer paper is in the Zoo Crew paper. You could choose from several different patterns.

Fitting these three musicians on the card was a little tricky, but I finally was satisfied with how I have them placed. I decided to pop all three of them up with Stampin’ Dimensionals. Where the corners overlapped, I did not put a Dimensional.

For the greeting, I chose one in the Zany Zoo Stamp Set and stamped it on a scrap strip of Basic White. I have a lot of these scrap strips of cardstock, and they are often handy for a narrow greeting. Rather than making banner ends on my greeting, I added some Iridescent Adhesive-Backed Discs to each end. These are great because they are flat and didn’t add any more bulkiness to the card.

As I am writing this, you can still get the retiring Zany Crew Suite Collection or the individual products in the Stampin’ Up! Online Store! Let me know if you have any questions about what is available or not available during this Last Chance retirement time!

SHOP STAMPIN’ UP! ONLINE HERE!

Layers of Beauty Anniversary Card

Layers of Beauty Anniversary Card

I thought I would try out this lovely new stamp set to make this Layers of Beauty Anniversary Card. We may have lots of floral stamp sets and dies but there’s always a new one that is so pretty we must have that one, too! This Layers of Beauty Stamp Set and Die is something new coming in the Stampin’ Up! Annual Catalog 2024-2025. There are also Layers of Beauty Decorative Masks in this Bundle that can be used to color this large floral piece.

My other goal with this card was to use some of the new In Colors 2024-2026. The card base is Petunia Pop cardstock. The layer of striped paper is in the Unbounded Beauty Designer Series Paper. I thought it looked good as a background to the floral piece without being too distracting.

The large floral piece fits on the largest acrylic block we have! That’s how big it is! It is stamped with Memento Ink on Basic White cardstock. I stamped it on a piece of 4″ x 5 1/4″ Basic White. Be careful how you place it before you put the stamp down on the paper so you get all the areas of the stamp.

To color in the floral piece, I used my brand new Stampin’ Blends Markers of the In Colors 2024-2026. For the roses, I colored in with Pretty in Pink, both Dark and Light. The daisy-like flowers are colored with Petunia Pop with little Peach Pie centers. The leaves are all colored with Light Shy Shamrock and then highlighted a little bit with Dark Shy Shamrock. Then I went back over the roses with a little bit of the Peach Pie Stampin’ Blend Marker just for fun.

After coloring the floral piece, I used the die to cut it out. It’s not too hard to figure out which way it fits on your stamped image, but take some time to make sure all the edges are lined up properly so you get a good diecut. This was glued down flat on the card but I almost popped it up with Stampin’ Dimensionals.

The greeting is stamped from the Layers of Beauty Stamp Set with Petunia Pop ink. I used one of the dies in the Unbounded Love Dies to cut it out. However, that die was a little big to fit on the card without taking up too much space. I took the die cut piece back to my Stampin’ Cut & Emboss Machine to trim off each end of the label by placing the die right on the diecut piece but sliding it down a tiny bit to make it shorter. I did this on the opposite end also. You can feel that the sides are lined up in the lines on the sides of the die. I only ran the die through just over each end, not across the whole piece. I popped up the greeting with Stampin’ Dimensionals.

Lastly, I added three 2024-2026 In Color Shimmer Gems in the Shy Shamrock color. It was hard to stop at three, but I did it!

Right now you can shop the Last Chance Sale at Stampin’ Up! to get select products at a discount or to stock up on your favorite papers, stamps, dies, and embellishments before they retire (or before the prices go up in the new catalog!). This sale lasts until April 30, 2024. And then the new Annual Catalog begins on May 1st!

SHOP STAMPIN’ UP! ONLINE HERE!

May Paper Pumpkin Kit!

Paper Pumpkin May 2024 Kit You're the Best There Is

It’s time for the next Paper Pumpkin Kit! The next Paper Pumpkin Kit is for May and is perfect for Father’s Day! Just join or subscribe to Paper Pumpkin by May 10th! It’s called “The Best There Is Kit” and will fill in the gap we sometimes feel when we are looking to make masculine cards.

Subscribe 11 April–10 May

  • Make cards for Father’s Day and more to express your gratitude and admiration!
  • Makes 9 cards: 3 each of 3 designs with 9 coordinating envelopes
  • Precut paper accent pieces and labels
  • Woodgrain textures and masculine earthy tones
  • Coordinating colors: Wild Wheat, Pool Party, Misty Moonlight (Classic Stampin’ Spot), Early Espresso, Crumb Cake, Basic Beige

And, the Kit coordinates with the Country Woods Designer Series Paper (item 163393), coming in the new Stampin’ Up Annual Catalog!

I always say Paper Pumpkin is the gift you give yourself! Once a month you get a fun Paper Pumpkin box in your mail. All you have to do is sit down, open the box, and start crafting. If it is your first kit, you will receive an acrylic block for the stamps. Maybe you will need scissors to cut some ribbon or twine. Otherwise, everything you need is included in the kit, including an ink spot and an exclusive stamp set. You can subscribe, try it out, skip a month if you need to, or cancel if it’s not for you. No risk, no obligation! Just try it out! If you tried it years ago, I urge you to give Paper Pumpkin another try because I think the kits have only improved through the years! The holiday kits are always my favorite!

You can subscribe by the month or you can add a Prepaid Kit to your regular Stampin’ Up! order. You can purchase different subscription lengths to your order, then set up an account and apply the code that Stampin’ Up! will email you to get credit in your account for the 3-months or 6-months of kits you ordered, for example.

JOIN PAPER PUMPKIN TODAY (or at least by May 10th!)

Last Chance Sale Begins Today!

Last Chance April 2024 Banner Info

The Stampin’ Up! 2023-2024 Annual Catalog and the January – April 2024 Mini Catalog (Spring Mini) will soon be retiring.  Some products will carry over to the new Annual Catalog, which I always like so I get to use some stamp sets some more.

Starting TODAY, April 9th you will be able to get discounts on select products. There are only a few in the Spring Mini and lots more in the Annual Catalog List.  Keep in mind that ALL Bundles will be retired, but that doesn’t necessarily mean the components of that Bundle won’t still be carried.  They just break up the old Bundles and make Bundles of new products.  So a Bundle might be retiring, but maybe you can still buy the stamp set or dies or punch or whatever in the new catalog separately.  You will just miss out on the 10% discount on a Bundle if you don’t buy one you want before the new catalog goes into effect.

  • All products are available while supplies last, and there are no purchase limits.
  • Discounted items can be added to a Starter Kit and redeemed as a 50% off item or with Stampin’ Rewards.
  • Only orders opened and closed during the promotion period apply. 
  • Stamp sets are not guaranteed during this promotion and are while supplies last.

SHOP HERE AT THIS LINK!

Annual Catalog Last Chance List of Retiring Products

Spring Mini Last Chance List of Retiring Products

A Card For the Total Eclipse of the Sun 2024

Today is the big day! The day of the Total Solar Eclipse 2024 that many people have been looking forward to! We are here in Central Texas hoping for at least a little parting of the clouds so that we can see the actual eclipse with our fancy glasses we bought months ago!

Of course, I had to make a card to commemorate the big event! This is my vision of the moon coming between the sun and the earth on this day at just the right time to line up and perfectly cover the sun. This will be the last total eclipse across the United States for another twenty years!

For this card, I had to have darkness so I started with a card base of Basic Black. I used two inks and Blending Brushes on Basic White for the dark sky. I used Pebbled Path first and then Starry Sky. Of course, I could have just used Basic Black cardstock but that wouldn’t be as interesting. I just colored and colored with the Blending Brushes until I had a dark enough color.

For the eclipse representation, I used the Deckled Circles Dies. I thought they were perfect because they say the sun will peek out behind the mountains of the moon and the corona of the sun will have an uneven edge. So the Deckled Circles Dies were better than punched circles!

I chose this one in the Color & Contour Stamp Set (sold out) for a greeting. I first thought I would cut out the word ‘amazing’, but I decided the whole sentiment was fine. Because the total eclipse is “absolutely amazing”. I stamped it with Versamark Ink and used Gold Embossing Powder to make it special.

I’ll have to let you know later how the eclipse turned out! It seems a lot quieter here than we expected. Perhaps a lot of people changed their plans when it turned out the forecast was for clouds obscuring the eclipse and maybe some storms afterward. We expected massive traffic jams everywhere but we haven’t seen that so far although there are more popular places to see the eclipse than where we are. We’re keeping our fingers crossed that we will have a break in the clouds at the right time and that we have the full experience of this magnificent event!

Fresh As a Daisy Hello Card

Fresh As a Daisy Hello Card

If you like a quick and easy card, this one is it! The pretty designer paper with the daisies is part of a panel of all different designs on one sheet of paper. All you have to do is cut it apart and make it into a card.

This Fresh As a Daisy Designer Series Paper has been a favorite the past year that we have had it in the Stampin’ Up! Annual Catalog. But now it is time for it to retire, although the Cheerful Daisies Stamp Set and Dies are returning to the new catalog! If you want the Bundle, order it before the catalog retires and save 10%.

For this card, I made the card base Boho Blue, the In Color from last year, so it will be sticking around another year. Under the designer paper panel, I added a layer of Basic White which helps it stand out a little bit with the white flowers.

Before adhering the designer paper to the layer of Basic White, adhere a piece of the Boho Blue Ribbon around the lower portion. I tied a separate bow and adhered it with a couple of Mini Glue Dots.

The greeting is stamped from the Irresistible Blooms Stamp Set. It is cut out with a die in the Something Fancy Dies. This little hexagon shape fit perfectly. For a little interest, I used a Light Boho Blue Stampin’ Blend Marker to add some dotted lines around the edge of the shape since there is not layer to help it stand out. It is popped up on Stampin’ Dimensionals.

That’s all there is to that card! Very pretty with very little effort! Let the designer paper do the work!

Shop the Last Chance Products SOON, April 9th!

New Things From the New Catalog!

Stampin' Up! Annual Catalog Cover 2024

One of the best parts of my week was the new Stampin’ Up! 2024-2025 Annual Catalog arrived! This was the complimentary copy I got as a Demonstrator, but hopefully, the ones I ordered for my customers will arrive in a couple of weeks as well! You can’t see the inside yet, but here are some of the goodies I got in my Demonstrator pre-order that arrived yesterday!

New In Colors! At first glance I thought two of the colors looked exactly the same – Summer Splash and Shy Shamrock! But as I got used to them a little, I can tell they are different.

In Color Cardstock 2024-2026

Peach Pie, Pretty in Pink (a returning color from years ago!), Summer Splash, Petunia Pop, Shy Shamrock

In Color 2024-2026 Ribbon

The In Color ribbons are really nice, I think!

In Color 2024-2026 Embellishments

New In Color Embellishments AND the new Basic Beige Ribbon. (I forgot to order the cardstock and ink!)

Unbounded Beauty Designer Series Paper

The thing we always say about Stampin’ Up! designer series paper…It is SO much prettier in person than you think looking at the photos online! I wasn’t too thrilled looking at the online photo of this paper, Unbounded Beauty Designer Series Paper, but once I opened the package I thought it was really beautiful paper! You’ll like it! Very pretty colors!

Stamp Sets

The three stamp sets I ordered. I’m always looking for more greeting choices. I thought the Simply Said Stamp Set and the Unbounded Love Stamp Set had some useful choices. I just couldn’t pass up the Layers of Beauty Stamp Set (plus the dies and the decorative masks for coloring in the flowers!).

Dotted Circles 3D Embossing Folder

This embossing folder is a “WHOA!” It’s giant size! Looks rather interesting. I put a piece of cardstock inside so you could see the design.

Ephemera Pack

This is the Saying Something Ephemera Pack. You get two of the same sheets. There are three other ephemera packs to choose from! Great for scrapbooking but also for making easy cards!

Unbounded Love Dies

The Unbounded Love Dies! I think these will be useful dies to own for making frames and labels!

Layers of Beauty Dies

The Layers of Beauty Dies for that big bouquet of flowers that you can color with the Layers of Beauty Decorative Masks which I didn’t photograph and haven’t played with yet.

I also got the new Stampin’ Blends in the In Colors, the Ink Pads, the 12″ x 12″ cardstock because sometimes you want a 12″ x 12″ piece of paper! Maybe there’s something else. And I do know I forgot to order some things but there is plenty of time to catch up! Now to find some time to play with all these pretty new things!

Only 3 more days until the Last Chance Sale begins at Stampin’ Up! on April 9th for the retiring products in the Annual Catalog and the Spring Mini! Not everything is discounted, of course, but a lot of things are in the Annual Catalog. Be sure to check it out as early as you can.

Flowering Zinnias Note Card

Flowering Zinnias Note Card

I’m calling this the Flowering Zinnias Note Card, not because it is of the Stampin’ Up! Notecard size, but because I didn’t add a greeting to the front. Either a greeting can be added or it can just be a card in which to write a note with no special occasion in mind!

Don’t forget about the new products in the Online Exclusives, like the Flowering Zinnias Designer Series Paper and if you like, the Simply Zinnia Bundle with stamp set and dies. The Online Exclusives is going to be an ongoing thing with Stampin’ Up! so that we can continually get new products to purchase without waiting for a new catalog. So always remember to look in the Online Exclusives when you are shopping!

The card base for this card is Berry Burst cardstock. Then I used the Radiating Stitches Dies to diecut a frame out of Basic White cardstock for a frame around the flowers. It is the largest one in the set. The background inside that white frame is a leafy pattern of paper in the Flowering Zinnias DSP. Mine is cut at 3 1/8″ x 4 1/2″. Then I just cut out assorted flowers from the designer paper plus a few leaves. The two flowers on each side of the center are adhered flat on the card and the center flower is popped up on Stampin’ Dimensionals. Those leaves are already attached to the flower in the paper.

This Flowering Zinnias Designer Series Paper is so bright and cheerful, I know it will brighten up the day of the person you send the card to!

SHOP STAMPIN’ UP! ONLINE HERE!

Don’t Forget About Paper Pumpkin!

Paper Pumpkin April 2024 Kit Delicate Wings

Most everyone loves butterflies so most everyone will love this Paper Pumpkin Kit! Now that April is here, it’s time to get serious about signing up for the April Paper Pumpkin Kit and maybe purchase the Add-On dies that work for three months’ worth of kits!  Paper Pumpkin is the papercrafting kit that comes to you in the mail once a month!  I say it’s a gift you give yourself….or maybe even others, especially if you would like to craft with a family member or friend!

This April Kit is called Delicate Wings. Send elegant words of encouragement and support to those you love.  The photo above shows you one card design with a pop-up butterfly and champagne foil behind it. It’s very elegant looking! Lots of champagne foil in this kit!

Kit Details:
· Makes 9 cards: 3 each of 3 designs with 9 coordinating envelopes
· Precut paper pieces and butterfly designs
· Champagne foil images, sentiments, and labels
· Coordinating colors: Lost Lagoon, Moody Mauve, Basic Beige, Basic Gray (Classic Stampin’ Spot), Basic Black, champagne foil
· Partial pop-ups to make your cards shine!


Express your gratitude and add something special to each of your crafting projects with the Thanks & Beyond Dies! Cut out a butterfly outline and a separate detailed piece that nests inside to create a partial pop-up feature. You can also add the sentiment to any card front or use the hexagon label for whatever you need. We love how these dies offer more options for not only April, May, and June Paper Pumpkin kits but also any other crafting projects. 

Paper Pumpkin Add-Ons Apr May June 2024

The Add-on details:
· Item number: 164397
· Name: Thanks & Beyond Dies
· Price: $12.00
· Availability: available for purchase on the online store starting March 11 and while supplies last.
· Includes: 4 dies

Cheerful Daisies Brightest Birthday Card

Cheerful Daisies Brightest Birthday Card

This Cheerful Daisies Brightest Birthday Card is one that I made because I haven’t used this set in a long time. There’s always something new to try out and use, and lots of times, the sets we have had for a while get buried in the pile of forgotten stamp sets! If you love this stamp set and dies, you will be happy to know it is carrying over into the new Stampin’ Up! Annual Catalog (not an April Fool’s joke!) coming in May! They have included a section called “Encore” of stamp sets returning from previous catalogs. I love new things but I’m always happy to see some of the stamps, dies, and other products returning in the new catalog.

This card uses the Cheerful Daisies Stamp Set and Cheerful Daisies Dies. Until the new catalog comes out, you can buy the Cheerful Daisies Bundle and save 10%. When the new catalog comes out, the stamp set and dies will be sold separately and you won’t get the discount. There will be new Bundles of new products but not the carryover ones.

The card base is Basic White because I thought that would look good with the white daisies. The background paper is a pattern on the other side of one of the daisies papers in the Fresh As a Daisy Designer Series Paper. This paper is retiring soon even though the stamp set and dies are returning. Beginning April 9th, this paper will be discounted by 20% so if you love daisies, this paper is for you!

The group of daisies on the card is from a whole die in the Cheerful Daisies Dies. The three daisies and two leaves together are all on one die. Of course, they are all white being cut out from the Basic White cardstock, but then you can color in the flower centers and the leaves. I used Daffodil Delight and Granny Apple Green Stampin’ Blends. Then because I wanted a little more, I cut out the skinny foliage piece from Granny Apple Green cardstock that I adhered under the one diecut daisy. The extra leaves are the bottom of the large daisy are diecut from Granny Apple Green cardstock although perhaps I should have done those on Basic White and colored them with Stampin’ Blends as I did the attached ones. I cut the two leaves apart so I could adhere them where I wanted to.

The greeting is stamped from the Cheerful Daisies Stamp set on Basic White and diecut with a label in the die set. It is stamped in Boho Blue to match the background. Since I wanted a bright layer underneath it, I also diecut a Daffodil Delight label and cut it horizontally in half. Then I adhered it top and bottom to the white greeting and even though it doesn’t extend out to the sides, it looks like it was made perfectly to layer under the greeting.

For some embellishment, I added some Iridescent Rhinestones sprinkled around the card. These have been some of my favorite embellishments, but they are retiring. These will be discounted 40% beginning April 9th so be ready to grab some of those before they go away!

You could make this card for other occasions, just change the greeting! Daisies are almost always perfect for a card! Here is another card using the pretty Fresh As a Daisy Designer Series Paper and stamped and diecut daisies and leaves. Check out these products!

SHOP STAMPIN’ UP! ONLINE HERE!

Easy Easter and Spring Treat Bag

Easter Treat Bag and Card

Here’s one last Easter project for you if you need something last minute, maybe to put some candy or a small gift inside! Or make it and keep it for your own Easter decor! You can even leave it out for Spring and really, summer. Leave off the Easter Bunny! To make this Easy Easter and Spring Treat Bag, I used the Flowering Zinnias Designer Series Paper. I used the sheet that has flowers at the top and bottom with a white space in between. You can vary the height of this project if you want to make it a little shorter or cut the paper in half at 6″, right in the middle of the white portion.

I cut the designer paper at 12″ x 6 3/4″. Of course, you can use any kind of designer paper or even cardstock. I like the idea of the beautiful flowers right there on all sides of the bag. The piece of designer series paper is scored at 1 3/4″, 5 1/2″, 7 1/4″ and 11″. Make sure your pattern is going the correct direction, then score the bottom flaps at 1 3/4″. Optional: If you like the pattern on the other side of the bag, score at the top of the paper about 1/2″ so you can fold that down for a nice pattern on the front of the bag at the top. Or, you can glue an extra strip around the outside of the top of the bag if you prefer.

Cut the score lines for the flaps, up to the horizontal score line. Cut off that little corner piece as you see in the photo. Then crease and fold on all the score lines and see how your bag will go together.

Easter Treat Bag Scoring and Cutting

Here’s what the other side of the paper looks like which will be the front of the bag.

Easter Treat Bag Scoring and Cutting Front

Pay attention to what will be the front of the bag. If possible, keep the side seam that you glue together to form the bag in the back and also fold in the flaps so the last flap you fold and adhere will have the fold line on the front of the bag and not the edge of the back flap. That doesn’t sound very clear, but if you look as you make your bag you will see what I mean. You want the front to look as smooth and professional as possible.

If you want to, cut a strip of cardstock or designer paper for a handle. You don’t need to do this. I used a strip of Lemon Lime Twist cardstock that was about 3/4″ wide and I covered it with a narrower strip of the “other side” of the paper I used for the bag. That way it matches the front lip that I folded over on the bag. I just adhered it to the inside sides of the bag with Stampin’ Seal but you could use brads or staples if you wanted to.

I wanted my treat bag to have an Easter look so I stamped a bunny in the Easter Bunny Stamp Set and cut him out with the Easter Bunny Punch. I colored in his ear and his nose with a Flirty Flamingo Stampin’ Write Marker just for a little color. For a little sparkle, I added some Iridescent Rhinestones Basic Jewels. These will be retiring so make sure you stock up because I use them all the time!

Just in case you would also need one last Easter card to go with this treat bag if you were giving it as a gift, I used another piece of the Flowering Zinnias DSP for a card front, layered on Lemon Lime Twist Cardstock to match the bag. I wanted to keep it simple so I just added a ribbon about the Zinnia paper and adhered it to the card base. This is the 3/4″ Herringbone Ribbon, retiring soon! I also tied a bow with it around the handle of the gift bag!

For a greeting, I stamped “Happy Easter” in Lemon Lime Twist ink on Basic White and cut out with a label die in the Something Fancy Dies. These were a good choice for the size and opportunity to cut out a layering die in Lemon Lime Twist. I popped up the greeting with Stampin’ Dimensionals. I added two Lemon Lime Twist gems on each side of the greeting in the Tinsel Gems Four Pack.

Now all you have left to do is maybe put a little tissue paper or shred in the bottom of the bag and add some Easter candy or a small gift! You are all set with a card and gift! Or put some candy in the bag and set it out for your own Easter decoration or maybe at your Easter place setting!

Happy Easter! Happy Spring!

Diorama Excellent Eggs Easter Card

Diorama Excellent Eggs Easter Card

This diorama card is one that I have made for many years. It looks pretty dramatic, right, being a 3D kind of display for a card? Of course, with most projects in stamping, it is pretty easy once you know the basics! The basis of this Diorama Excellent Eggs Easter Card is that you score the ends of two pieces of cardstock that are the same size, cut some kind of hole in the top piece of cardstock, make some kind of scene on the back piece of cardstock that will show through the opening on the front, then crease the score lines and adhere the end sections together. This type of card can be folded flat for mailing so that is not a problem!

This card base is Bubble Bath cardstock. Cut two pieces of cardstock at 5 1/2″ x 4 1/4″. Of course, you can vary your measurements if you want a similar card in a larger or smaller size. Score each end of each piece of cardstock at 1/2″ and 1″. See the photo below for the side score lines and then whatever type of opening you want in the center.

Diorama Easter card diagram

Score those ends first and then you can more easily place the opening on just the top piece of cardstock so that it is centered. Crease and fold those score lines back and forth so that when you hold them together they will make the card into the diorama shape. You can see from the top view on this photo below. Don’t glue them together yet so you can more easily make the scene in the center of the back piece.

Diorama Excellent Eggs Easter Card Top

Decide if you want another piece of cardstock or designer paper for the background. I chose Boho Blue. Measure your space and see what size you want to cut the background paper. You may have to trim tiny bits off the sides to accommodate the score lines. Mine is 4 1/4″ tall and just a “smidge” less than 3 1/2″ wide.

I stamped three of the Excellent Eggs with Memento ink and colored in with Stampin’ Blends markers. They are easy to cut out by hand if you don’t have the dies, which is what I did. The one farthest back is glued flat to the card, the other two are popped up on Stampin’ Dimensionals.

The front opening for the diorama card is cut out with one of the Scalloped Contours Dies. You can use any shape or size.

The greeting is stamped in Boho Blue ink from the Excellent Eggs Stamp Set and then diecut with one of the banner shapes in the Stylish Shapes Dies. Since that cute little bunny was also in the Excellent Eggs Stamp Set, I stamped, colored, and cut him out also in hopes I could use him somehow. Luckily, he seemed to fit just fine at the end of the banner in the corner of the card!

For some sparkle and to fill in the empty space in the background, I added three Pastel Adhesive-Backed Sequins in gold, Balmy Blue, and Petal Pink. Remember, a lot of these embellishments can be used even if the colors are not exactly the same. My background is Boho Blue but the one sequin I used is Balmy Blue. The recipient is never going to notice or be critical of that! We are often too hard on ourselves trying to make everything perfect when we make a card!

Here’s another Diorama card I made for Easter a few years ago.

This Diorama card will fold flat to mail and fits in a regular size Stampin’ Up! envelope, but you may want to make one and use it for your Easter decor!

SHOP STAMPIN’ UP! ONLINE HERE!

Diorama Excellent Eggs Easter Card Full View

Easter Bunny Happy Easter Card

Easter Bunny Happy Easter Card

I’ve been into Bubble Bath the last few days and I can’t say I was before now, but I guess it is a good color for Easter! I didn’t even have a grand plan for making this Easter Bunny Happy Easter Card but it just came together when I already had the package of Bubble Bath cardstock out along with the Lighter Than Air 6″ xx 6″ Designer Series Paper. Since this paper got lost in my stash for a while, I have missed out on using it on other spring cards. The colors are so pretty and it’s not all about hot air balloons!

The card base is Bubble Bath, a very soft pretty pink. At times it looks like it has a purple tone to it. I simply took a strip of the diagonally striped designer series paper and laid it across the card. Then I saw that the Balmy Blue pattern would look good with the stripes at the top and bottom. The striped pattern is cut at 5 1/2″ x 2″. The blue strips are about 3/4″ inches wide and 5 1/2″ long. That gives you space for glue to adhere the blue pattern to the top and bottom of the striped paper with about 3/8″ showing. If you remember to tie some ribbon around the striped pattern before adhering to the card base, then you won’t have to adhere it down and cut off the ends on the edge of the card! On the other hand, now that I look at it, once I adhered the two bows to each side of the bunny, you can’t see the ribbon anyway! If you copy this and put bows on each side, you don’t need a ribbon going across the center of the card! The ribbon is the Bubble Bath color in the 3/8″ Sheer Ribbon Combo Pack.

For the focal point of the card, I cut a scalloped rectangle in Bubble Bath pink with the Scalloped Contour Dies. By hand, I cut a Basic White rectangle to ft inside the scalloped rectangle. It’s a “smidge” less than 2″ wide and 3 1/4″ long.

On this Basic White piece, I stamped one of the bunnies in the Easter Bunny Stamp Set and colored him in with gray Stampin’ Blends (I think I used Smoky Slate.) and Bubble Bath pink for the inside of his ears. For the background, I just used a Pool Party Stampin’ Blend marker to just scribble in some blue-like sky. The carrot is stamped, colored, and cut out. I thought the bunny needed to be sitting in the grass, so I just lightly drew in blades of grass with the Light and Dark Granny Apple Green Stampin’ Blend Markers. This piece is popped up with Stampin’ Dimensionals.

There wasn’t much room for the greeting but I solved that problem! I stamped “Happy Easter” from the Excellent Eggs Stamp Set in Bubble Bath ink on Basic White. Then I just fussy-cut around the letters without trying to be perfect and adhered it to the card with tiny dots of Multipurpose Liquid Glue.

If you’d like to see another card I made last spring with the bunny and LOTS of carrots from the Easter Bunny Stamp Set, click HERE.

Both of those Easter/Spring stamp sets will be retiring in April. The Easter Bunny Stamp set will be discounted at 50% off starting April 9th. The pretty ribbon combo will also be discounted at 30% off. Be sure to check out the bargains on April 9th, but if there are products you really really want, it might be best to buy them right now lest they sell out!

SHOP STAMPIN’ UP! ONLINE HERE!