Have a Wonderful Thanksgiving Day
With Your Family & Loved Ones!

Have a Wonderful Thanksgiving Day
With Your Family & Loved Ones!
We’re almost out of time because tomorrow is Thanksgiving! If you are still looking for some inspiration for a treat to take to someone, table decorations or favors, a card, or something else, here are some of my past ideas from the archives! You can update with the paper or stamps you have now or dig around in your stash and find something you have that will work! Just click the title below each photo to go to the blog post!
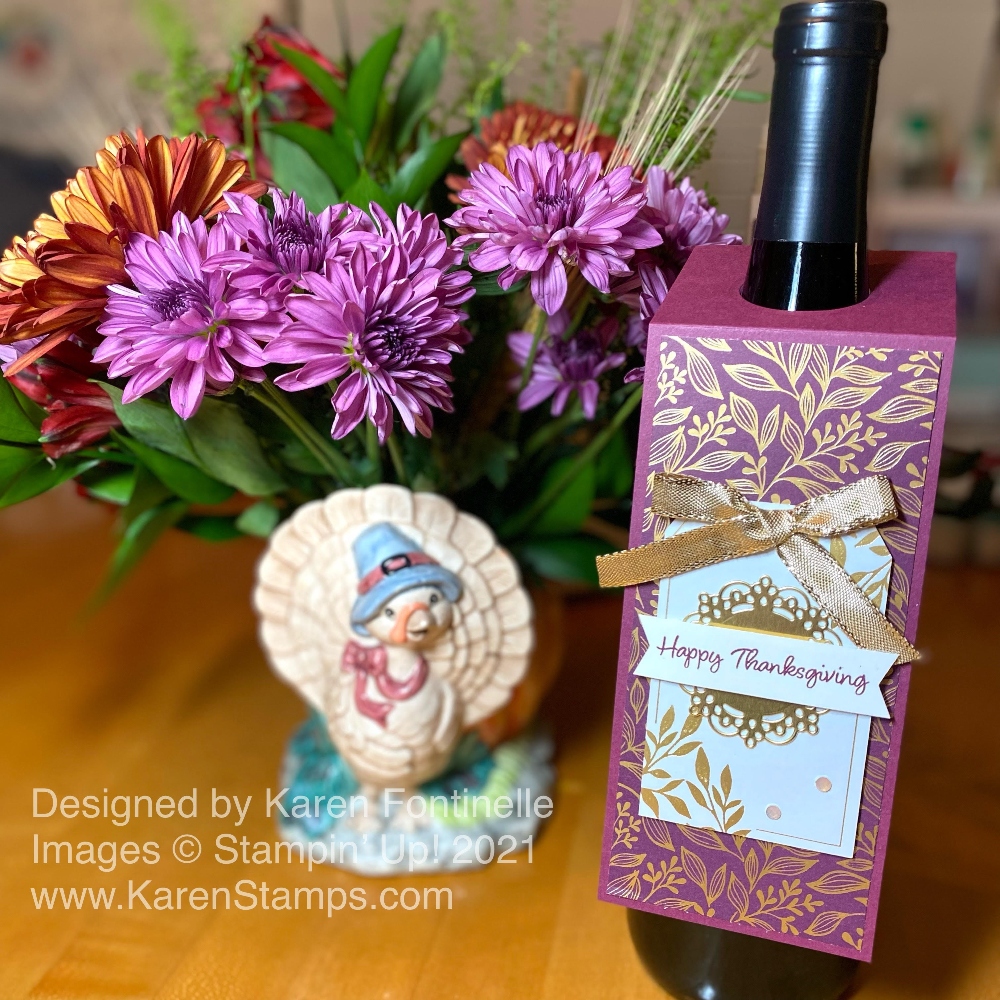
Thanksgiving Wine Bottle Label
Maybe you are taking a bottle of wine or some other drink to a Thanksgiving dinner or just want to decorate your own bottled beverage. Make a simple decoration to hang over the neck of the bottle. It’s almost like a giant tag with a hole in the top! Check out my blog post for the measurements and details to get your started making your own!
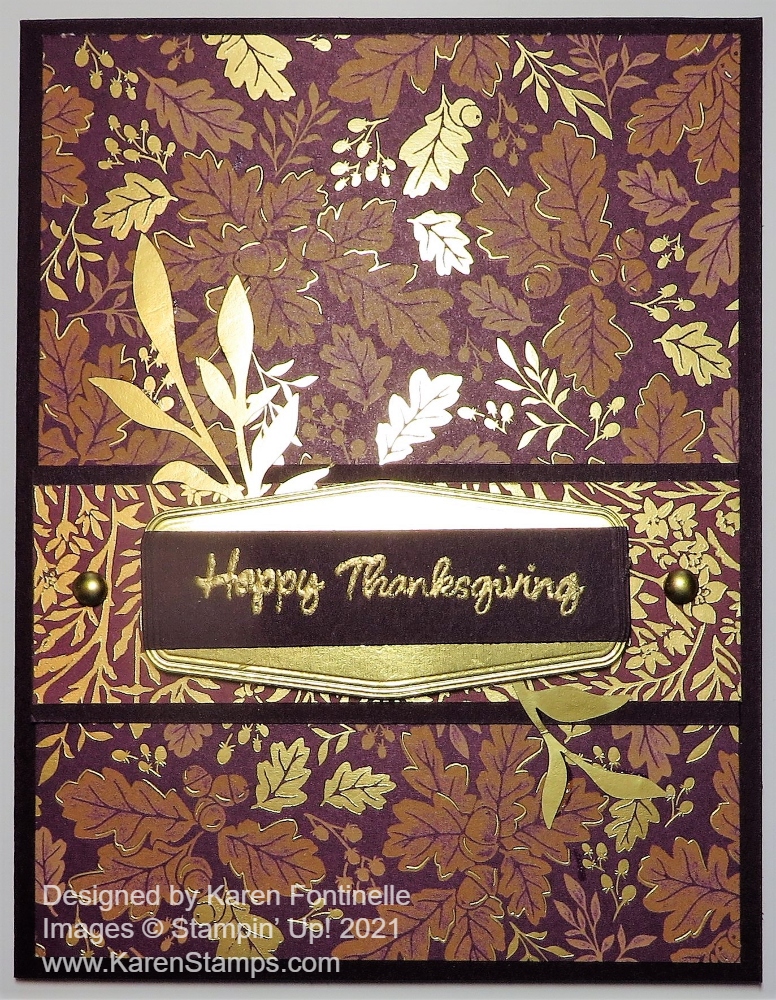
Blackberry Beauty Thanksgiving Card
This card really caught my eye as I was looking back for past projects! It certainly is the gold foil accents that makes the card so beautiful! You don’t need to use this exact same paper, just use some other paper you love with a Thanksgiving greeting (or something generic) across the front with a little glimmery embellishment.
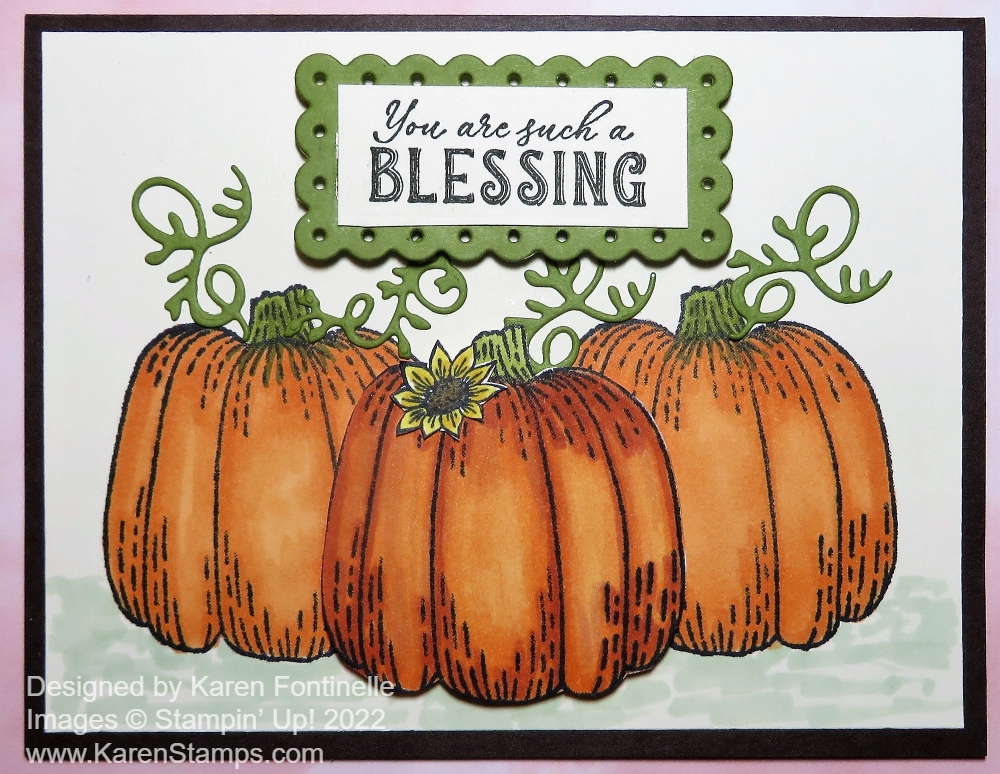
Oh, how I loved this Hello Harvest Stamp Set from last year! You can make a similar card with the Pick of the Patch Stamp Set we have currently, or go look for the Hello Harvest Stamp Set from last year’s Holiday Mini Catalog! I loved coloring in the pumpkins with Stampin’ Blends.
Turkey Sour Cream Treat Holder For Thanksgiving
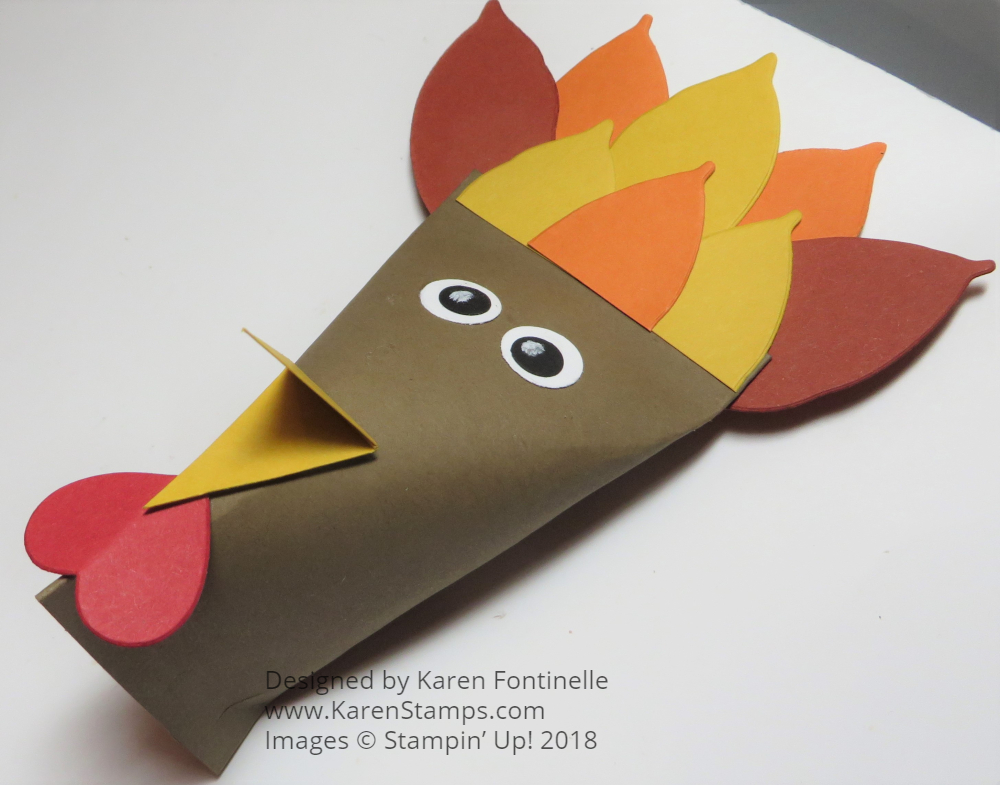
This is one of those “sour cream holders” that we have probably all learned to make from the time we learned about stamping! Put some candies inside and put one by everyone’s place at the table! Read the blog post for the directions if you aren’t sure! Then decorate your turkey with whatever punches or dies you have for feathers!
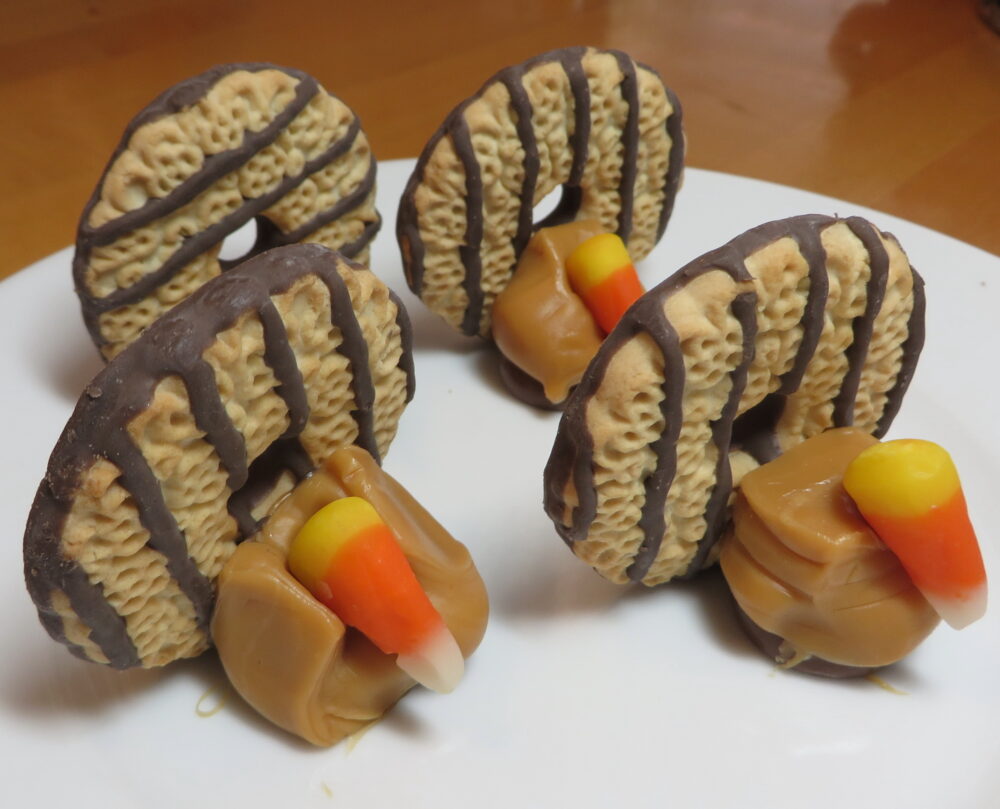
I can’t resist! You may not have the ingredients on hand but maybe you’ll remember for next year! I learned how to make these from a friend back when my kids were little and in preschool! I made them lots of years to take to school for treats or to simply have as place setting decorations at our Thanksgiving table at dinner. I don’t know why, but I love them! Just soften a few caramels at a time in the microwave, stick the cookie on the back end, then smoosh in a candy corn on its side!
Enjoy Your Thanksgiving!
It’s down to the wire for Thanksgiving, as hard as that is to believe, but there’s still time if you want to make some little Thanksgiving Candy Holder Favors. These are really easy and will hold two chocolate kisses or a chocolate nugget. Think how cute these would be by everyone’s plate at Thanksgiving dinner for a little favor!
To make these little candy holders, cut a strip of cardstock approximately 5″ long by 1 3/4″ wide. You can change up the measurements depending on what kind of candy you want to put inside. Score these strips at 2″ and 3″. Crease and fold on the score lines. You can use different colors and images on the front or make them all match.
After you have your candy inside, you can punch a hole in the top and tie a ribbon through the hole or use a couple of Mini Glue Dots to hold them closed. If you have any kinds of clips you could use those to hold them closed. You can also attach a greeting or a guest’s name to use each favor as a place card. I used to love to make place cards when I was young for family dinners!
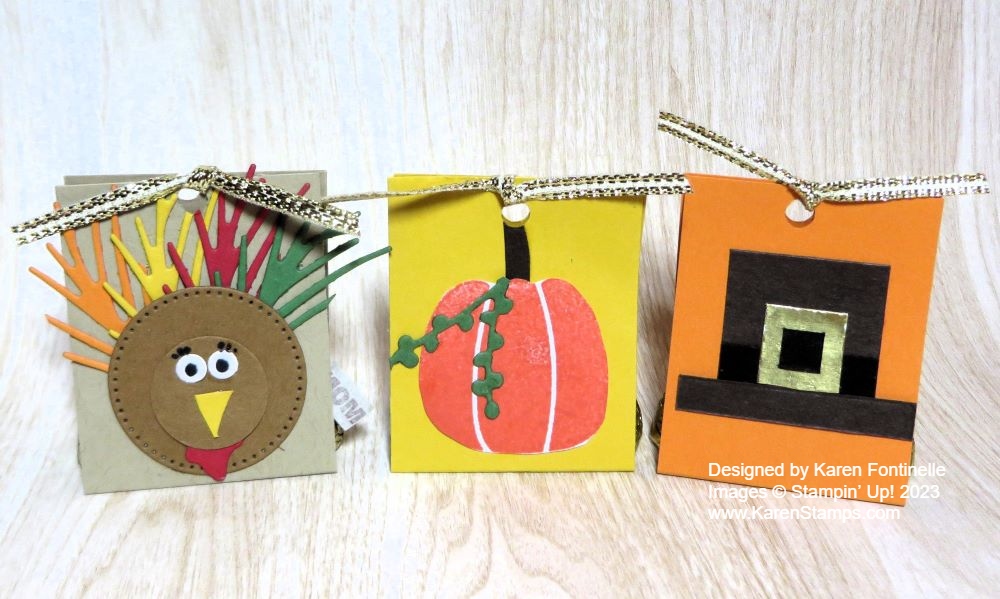
I started with the pumpkin and the Pilgrim hat but I got a little carried away with the turkey! The pumpkin is stamped from the Pick of the Patch Stamp set and just a little diecut greenery that was already in a pile of scraps on my table.
The Pilgrim hat is made with Early Espresso for the hat and the brim. The hat is a 1″ x 1″ square and the brim is 1/4″ x 1 1/2″. The Basic Black band on the hat is 1/4″ x 1″. The buckle is made with a 1/2″ x 1/2″ square of Gold Foil with a center of Basic Black 1/4″ x 1/4″ to look like the band going through the buckle.
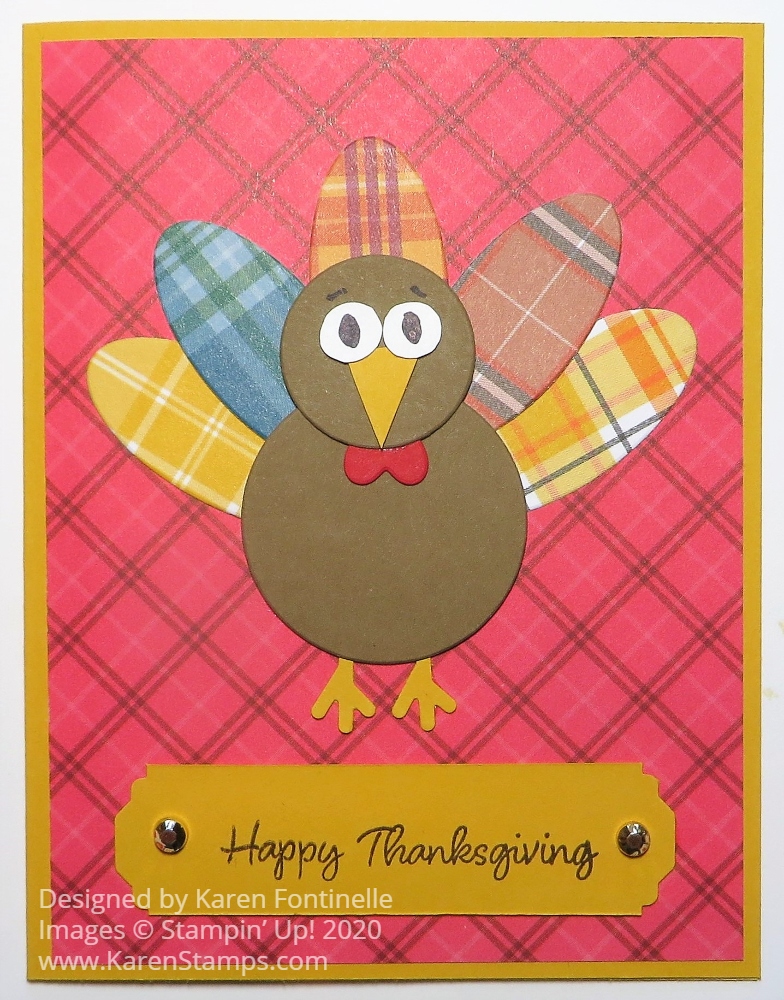
The turkey is made with two circles of Pecan Pie cardstock. The feathers are die cut greenery in the Joy of Noel Dies! Just use whatever you have or come across! The red turkey waddle is a diecut holly leaf from that set! The eyes are punched with my old Crop-a-Dile and colored in with black.
These are just fun little candy favors, so unless you want to, you don’t need to go to a lot of trouble making these!
Happy Thanksgiving!
Happy October!! Now that it is officially October, it feels much more like the fall season, even if it still doesn’t feel like fall here in Houston! This Layering Leaves October Fall Card commemorates the beginning of October which really makes us think of fall, colored leaves, and all the upcoming holidays and seasons! Once the fall and Halloween decorations go up in my house and my regular home decor is put away, it won’t get pulled out again until January! Halloween decorations are starting to go up in the neighborhood. While I absolutely love all my Halloween decorations, I’m not quite ready for full-blown Halloween decorating quite yet. Maybe in another week or two for sure!
This card base is Pumpkin Pie and is cut at 11″ x 4 1/4″, scored at 5 1/2″ and the fold is at the top. I could have put the fold on the left and the card would be in a landscape position rather than our usual cards at 5 1/2″ x 8 1/2″.
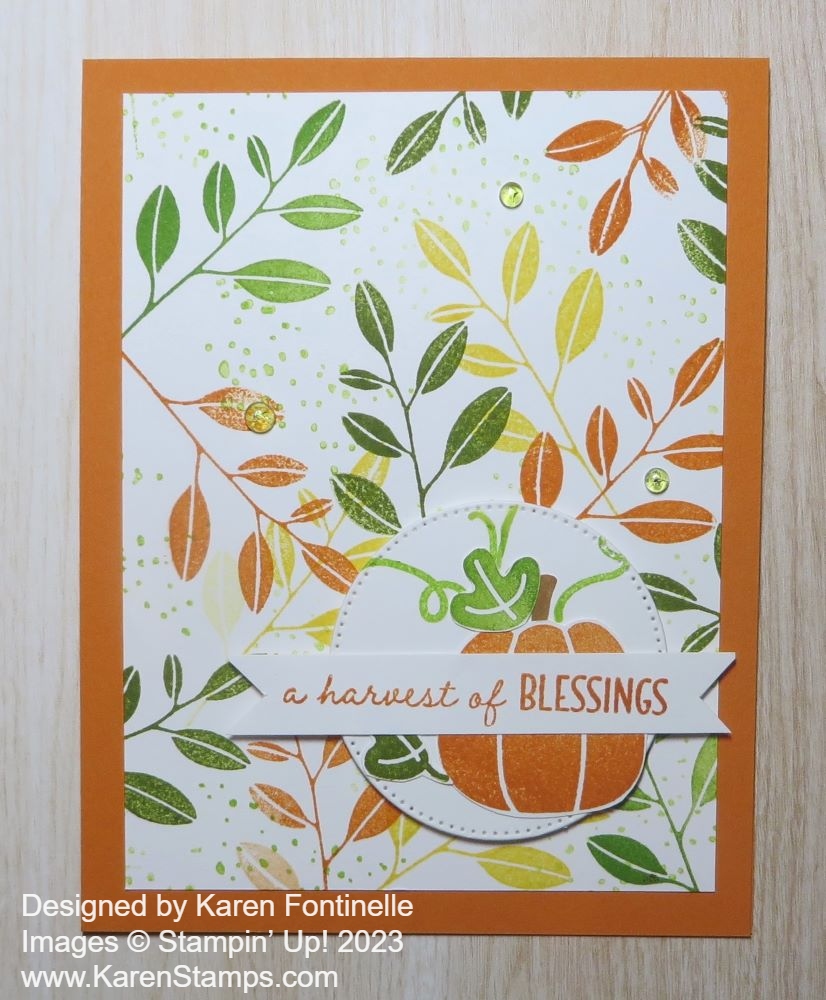
I made my own designer paper, so to speak, by stamping the leaves from the Layering Leaves Stamp Set. I used these inks: Pumpkin Pie, Daffodil Delight, Granny Apple Green, and a little bit of Old Olive. I love to do this random stamping all over the paper! To fill in the empty spaces I used a stamp in the set with just little dots. Those kinds of stamps just add a little something lots of times! Those dots are stamped with Lemon Lime Twist.
Next, I used the Pick of the Patch Stamp Set to stamp and cut out a pumpkin, some leaves, and a stem. I also stamped some vines on the die-cut circle on which I adhered the pumpkin and leaves. It is from the Stylish Shapes Dies. This circle is popped up on Stampin’ Dimensionals.
The greeting is also from the Pick of the Patch Stamp Set and is stamped in Pumpkin Pie. I always have a bunch of narrow strips of Basic White so it makes it easy when you want to stamp a narrow greeting. I just stamped the greeting on the scrap strip and then flagged the ends to make it look like a banner.
For a finishing touch, I added a few Lemon Lime Twist gems from the Tinsel Gems Four-Pack. Sometimes it is hard to stop at adding only three gems! I would have liked more by the pumpkin and/or the greeting…..but sometimes you have to know when to stop!
Get out your fall colors and do some fall stamping!
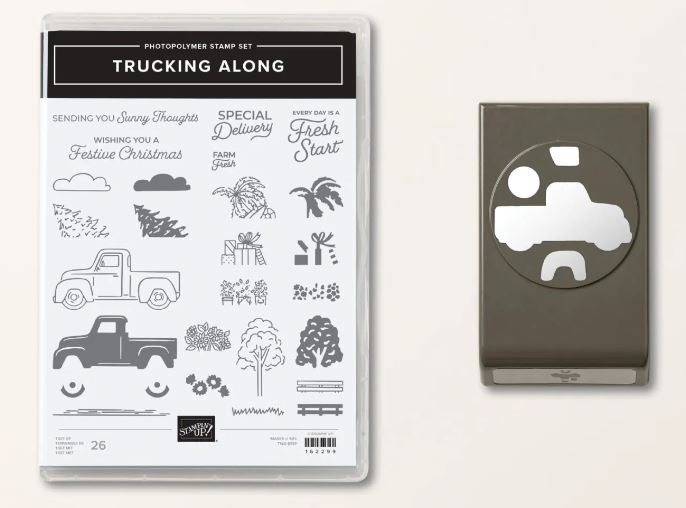
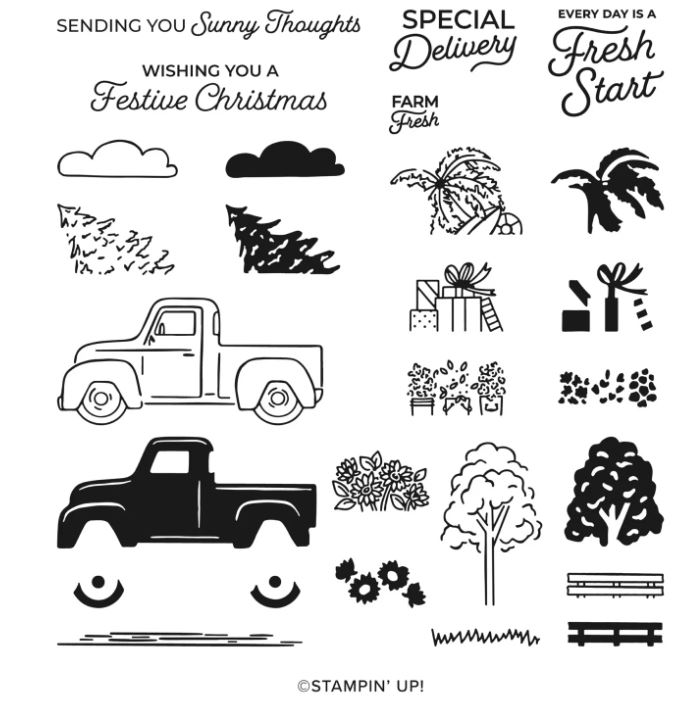
This Trucking Along Bundle has proven so popular that it has sold out quickly from the beginning and every time Stampin’ Up! got more in stock. There has been a long wait but finally, it is back, even earlier than expected!
As I write this, you can purchase the Bundle with the stamp set and Trucking Along Builder Punch and save 10%.
You can use this Trucking Along Bundle for all seasons! Just load up the truck bed with different colors and different objects! Put fall leaves, Christmas trees, or spring flowers in the truck! Whatever you like. You will have fun with some of your other stamp sets finding little things you can add in the truck I’m sure!
Or you can purchase just the Trucking Along Stamp Set alone.
Or maybe the most popular of all, the Trucking Along Builder Punch.

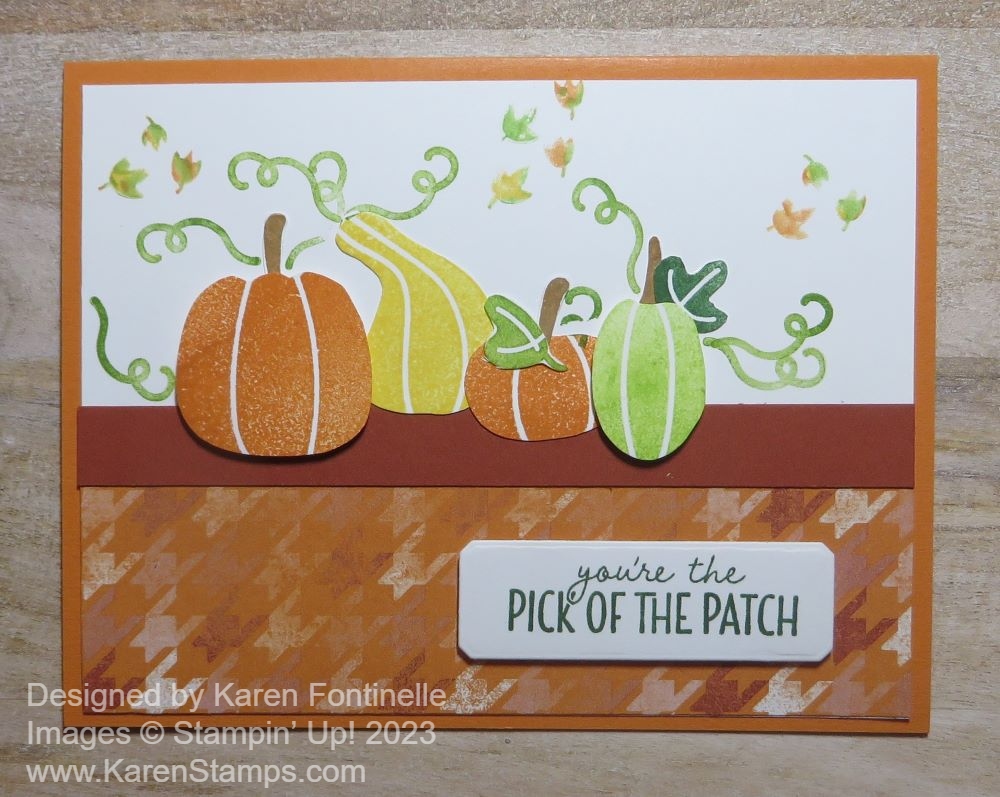
This You’re the Pick of the Patch Fall Card may have gotten lost in the shuffle and never got posted but if you’ve already seen it somewhere, it’s a replay! Making fall cards makes me hopeful that it might feel like fall here in Texas someday! Usually, it is December until the leaves turn to fall colors but hopefully, we get much cooler temperatures before that! The colors on this card make me feel a little cooler!
This card is made with the Pick of the Patch Stamp Set and the Them Bones Designer Series Paper. The card base is Pumpkin Pie cardstock with a layer of Basic White. You wouldn’t have to use a whole piece of Basic White if you are going to put a piece of designer paper at the bottom but you want them to overlap a little bit probably. Then cover the seam with ribbon or a strip of paper as I did here. It’s a little easier to use a whole layer of Basic White and then just cut a strip of the designer paper to whatever size you want instead of figuring out the math for the two pieces to be the right size for the card layer. In this case, I used a 5 1/4″ x 4″ piece of Basic White and then a layer of patterned paper that is 5 1/4″ x 1 3/4″. The strip of Cajun Craze is 5 1/4″ x 1/2″. You could also use a strip of ribbon or another patterned paper.
The pumpkins and gourds are stamped with the Pick of the Patch Stamp Set in various colors. You can use any colors that you like and even “stamp off” if you want a lighter shade. I used Pumpkin Pie, Daffodil Delight, and Granny Apple Green. There is a Pick of the Patch Builder Punch that you might like for pumpkins. I don’t have it so I just cut out my images by hand with my Paper Snips.
Here’s a tip for using the Builder Punch. Take any piece of cardstock that fits in the punch (not too large, not too small. Punch the paper. Then use that punched-out paper as a template so you can stamp all the images that match the punch that will be lined up perfectly. Lay the template on the paper you want to stamp on, then stamp each image inside the template. Remove the template, then punch. Everything should be lined up for the punch! Or you can always just punch individual pieces with the punch.
Before adhering the Basic White cardstock layer, lay out all the pieces of the card and see where the pumpkins and gourds will go. Then stamp the vines so that they will line up with the stamped pumpkins and gourds. To fill in some empty space, stamp the little leaves around the background. To make them look like fall leaves, use Stampin’ Write Markers (not Blends). Apply the marker directly on the leaf stamp, starting with the lightest color and adding another color or two to the same stamp. Breathe (huff) on the stamp to remoisten, then stamp and you will get the multicolored stamped image!
Assemble your card, popping up some of the pumpkins if you like and adding some stamped leaves in the set. The greeting is in the Pick of the Patch Stamp Set. What a cute greeting to send to someone special! I die-cut it with the narrowest die in the Countryside Corners Dies.
The Pick of the Patch Bundle is a great set of products to have for this time of year. The stamp set even includes a jack-o-lantern face if you want to make your pumpkins for Halloween!

Pick of the Patch is one of the new stamp sets I just got from the Stampin’ Up! Holiday Mini Catalog and this Pick of the Patch Pumpkin Card is my first play with it! I had no particular plan in mind and I’m not saying this is the best I could do with the set, but I got a card made! While I only ordered the stamp set, there is a Pick of the Patch Builder Punch you can also order for punching two different pumpkins, a leaf, and a stem. If you get both the punch and the stamp set together in the Pick of the Patch Bundle, you can save 10%.
I didn’t need the punch for this card because I only did stamping with the pumpkins and gourds. This will be a stamp set where you might need to use the masking technique. If you are unfamiliar with masking, it means covering up one stamped image so you can stamp another one to look like it is behind the first one or if they overlap on the sides. It is handy to do this with something like a sticky note. Stamp the images, such as a pumpkin, on the sticky note so that when you cut out the pumpkin you will have some of that adhesive to hold the mask in place. Now Stampin’ Up! sells Masking Paper that has adhesive on the paper that you use for a mask. So you stamp your image on the masking paper (take a peek and make sure that the side of the paper you are stamping on is the sticky side!), cut it out, them use it as a mask when you need it. Just keep it in your stamp case because you can use the masking image over and over.
The card base is Pumpkin Pie cardstock with a layer of Basic White. I stamped an assortment of pumpkins and a gourd, in Pumpkin Pie ink and Crushed Curry for the gourd and added some stems and vines. Then I stamped the leafy plants all around the pumpkins in two different colors of green. There is a stamp with three little leaves on it so I pulled out some Stampin’ Write markers (NOT Blends!) in Pumpkin Pie, Granny Apple Green, and Crushed Curry. I colored directly on the stamp with two or three of the marker colors and then stamped to give them a little fall multi-color.
For a greeting, I chose one in the Pick of the Patch Stamp set and stamped it with Pumpkin Pie ink. Then I used a rectangle die in the Timeless Arrangements Die to cut out the greeting. I cut out another rectangle of the same size in Mossy Meadow cardstock. Since it is the same size, I can’t use it as a layer, but I went about it another way. I cut the green rectangle in half horizontally and just adhered the two pieces to the top and bottom underneath the greeting to help it stand out a little better.
That’s all to this card. As I said, I may have just been trying out the pumpkins but it did turn out to be a card in the end! I look forward to using this set a lot more during the fall, for Halloween, and for Thanksgiving, anything fall! And while I’m stamping and cutting out pumpkins, I can pretend like it’s not still 100 degrees outside!
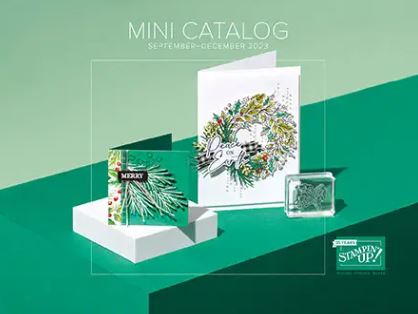
Finally, the day has arrived when everyone can order to their heart’s content from the new Stampin’ Up! September-December 2023 Mini Catalog, otherwise known as the Holiday Mini! It’s the second-best catalog next to the Stampin’ Up! Annual Catalog if you ask me!
Here are some products that are currently unavailable and dates when they will be back in stock. But you can always check back earlier and see!
The Stars At Night Hybrid Embossing Folder: Week of October 2
Adhesive Backed Star Trinkets: Week of October 25
Shining Brightly Designer Series Paper: Week of September 11
Copper & Natural Ribbon Combo Pack: Week of October 23
Bag of Bones Dies: Week of September 11
All About Autumn Designer Series Paper: September 11
***If a Suite or Bundle is unavailable, it means one or more of the products in the Suite are unavailable but you can still order the products separately that are available. And probably a good idea to do that!
And there’s MORE!!
In the Online Exclusives, Stampin’ Up! is offering a special release of five beautiful new Designer Series Paper options! These papers include fabulous holiday prints, gorgeous seasonal styles, and some spectacular timeless designs. These papers are available while supplies last! Check out the interesting and fun new designs to add to your collection! They’re not just for Christmas! Watch the video below.
AND a new Kit in the Kits Collection available today!
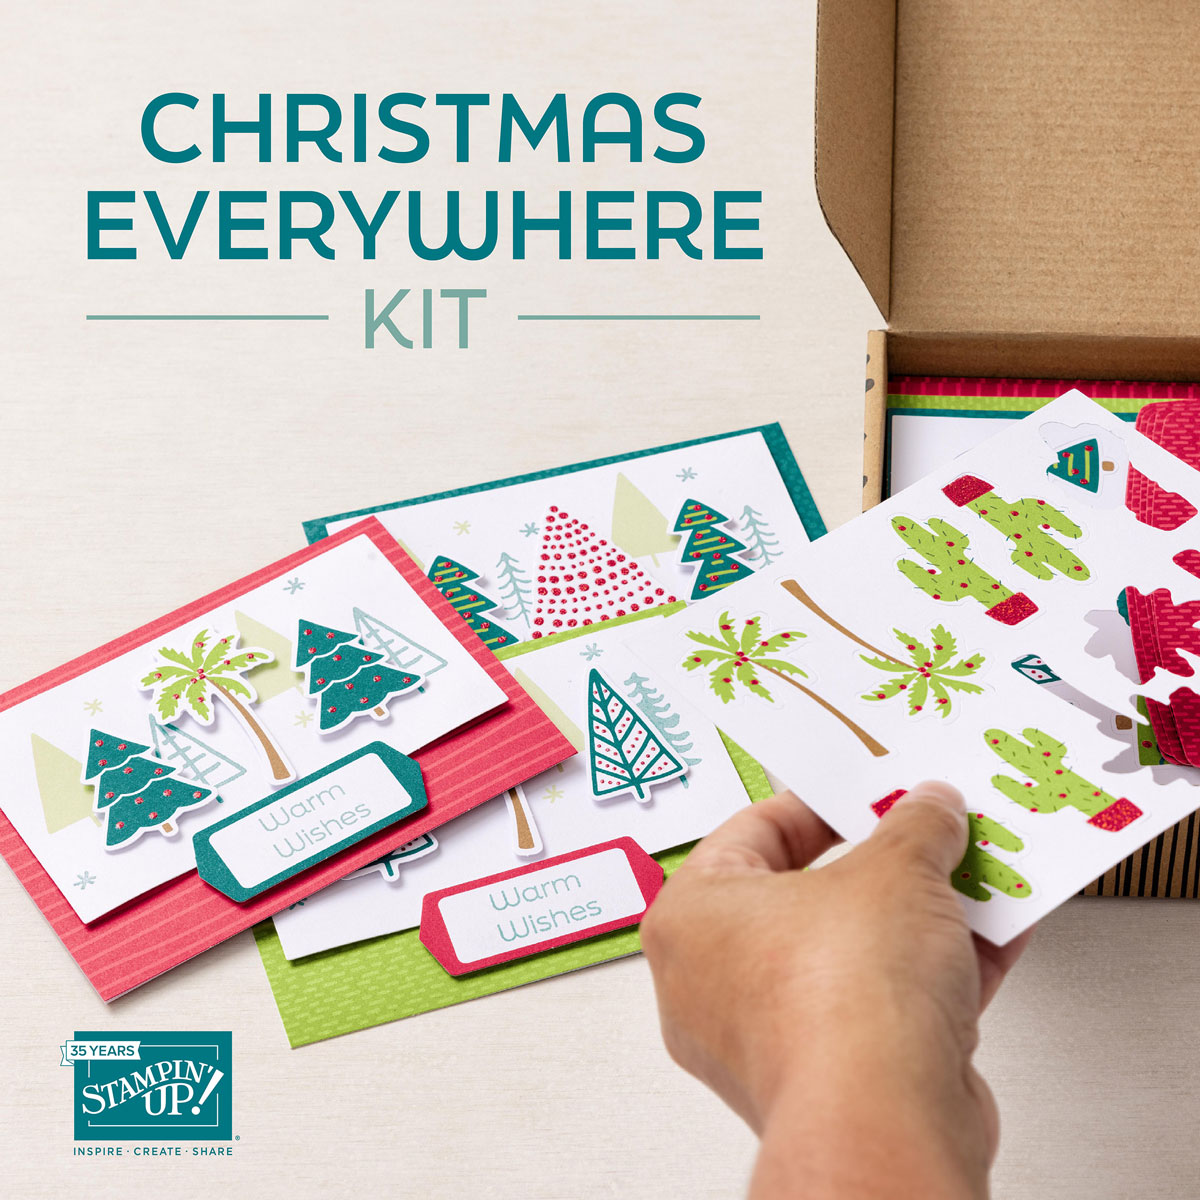
“Celebrate Christmas with everyone, everywhere with the Christmas Everywhere Kit by Stampin’ Up! It comes with everything you need to create 9 Christmas cards in 3 festive designs featuring trees from around the world. Get an early start on your Christmas crafting and send some holiday cheer to friends and loved ones wherever they are!”
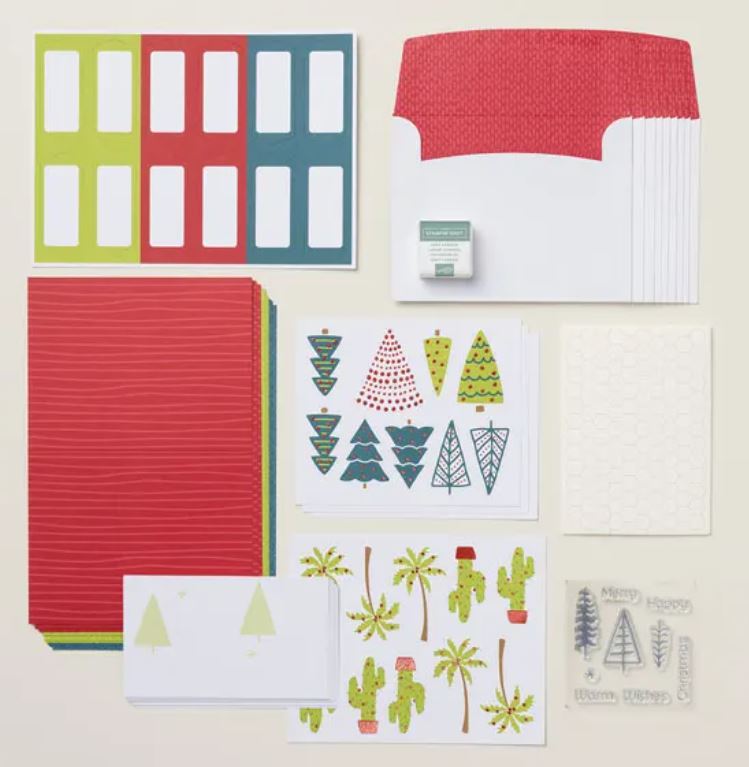
This kit includes:
-Enough supplies to create 9 cards—3 each of 3 designs
-9 coordinating envelopes
-Christmas Everywhere photopolymer stamp set
-One Lost Lagoon Ink Spot
-Printed card bases, printed die-cut labels and images with red glitter, adhesive, and a clear block
-Finished card size: 5-1/2″ x 4-1/4″ (14 x 10.8 cm)
-Coordinating colors: Granny Apple Green, Lost Lagoon, Pecan Pie, Pretty Peacock, Real Red
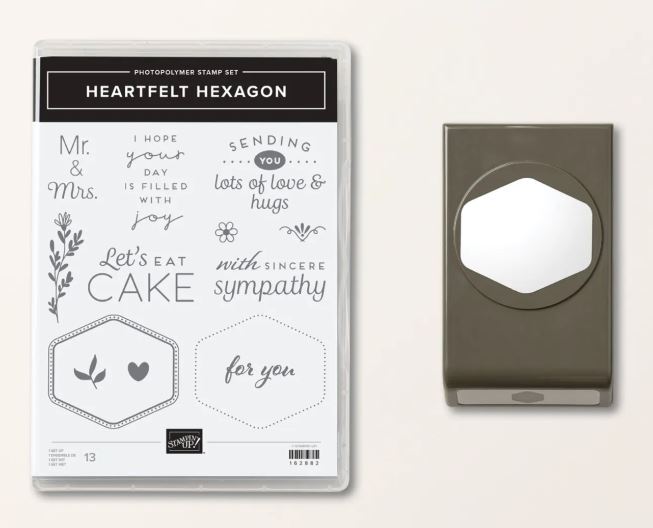
One more surprise Bundle released today for World Card Making Day October 7! You can register for the FREE Stampin’ Up! event! It’s the Heartfelt Hexagon Bundle!
If you are looking for some last-minute Thanksgiving ideas, here are a few you can copy or use as inspiration! Click the title above each photo to go straight to my post with the information!
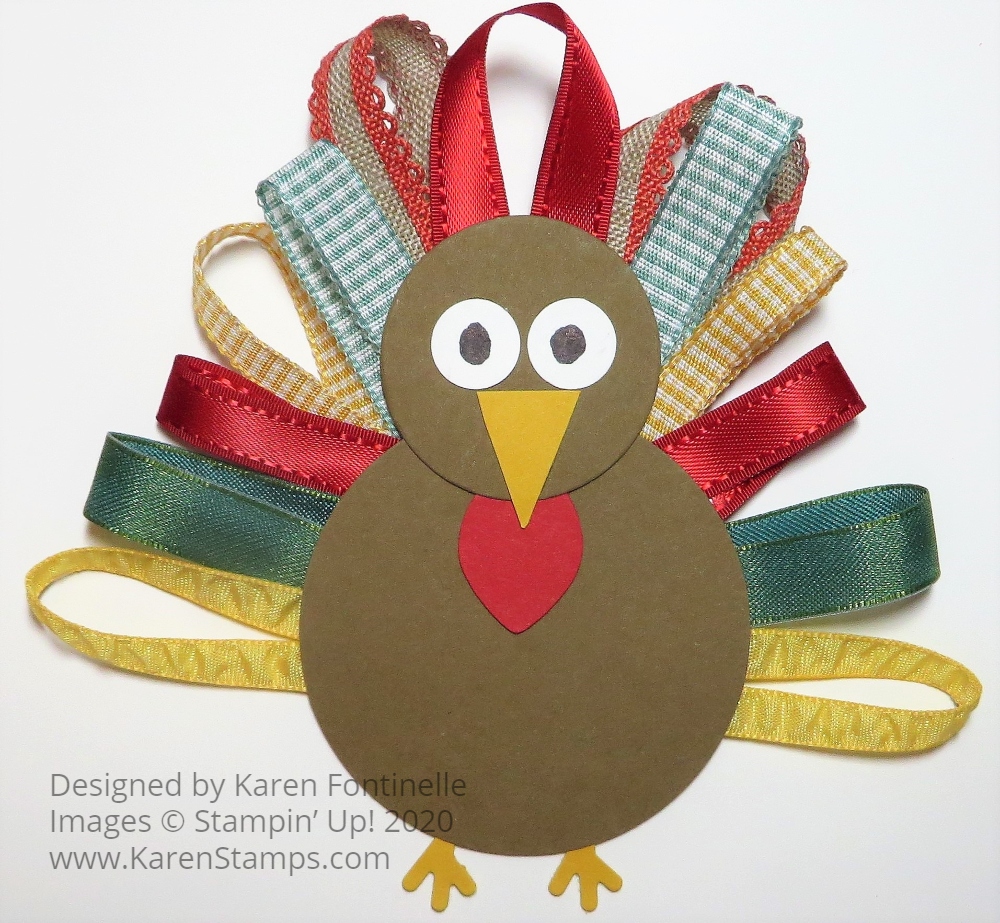
Make a Ribbon Turkey For a Favor or Decoration!
Plaid Tidings Turkey Thanksgiving Card
Make a Gather Together Fall Wine Bottle Tag

Gather Together Fall Votive Holder

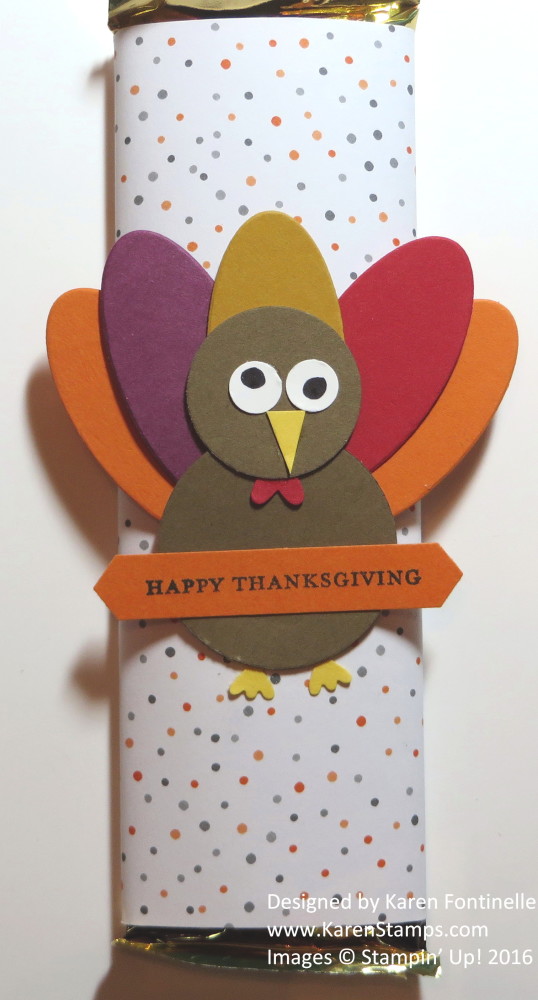
Thanksgiving Punch Art Turkey Candy Bar Wrapper
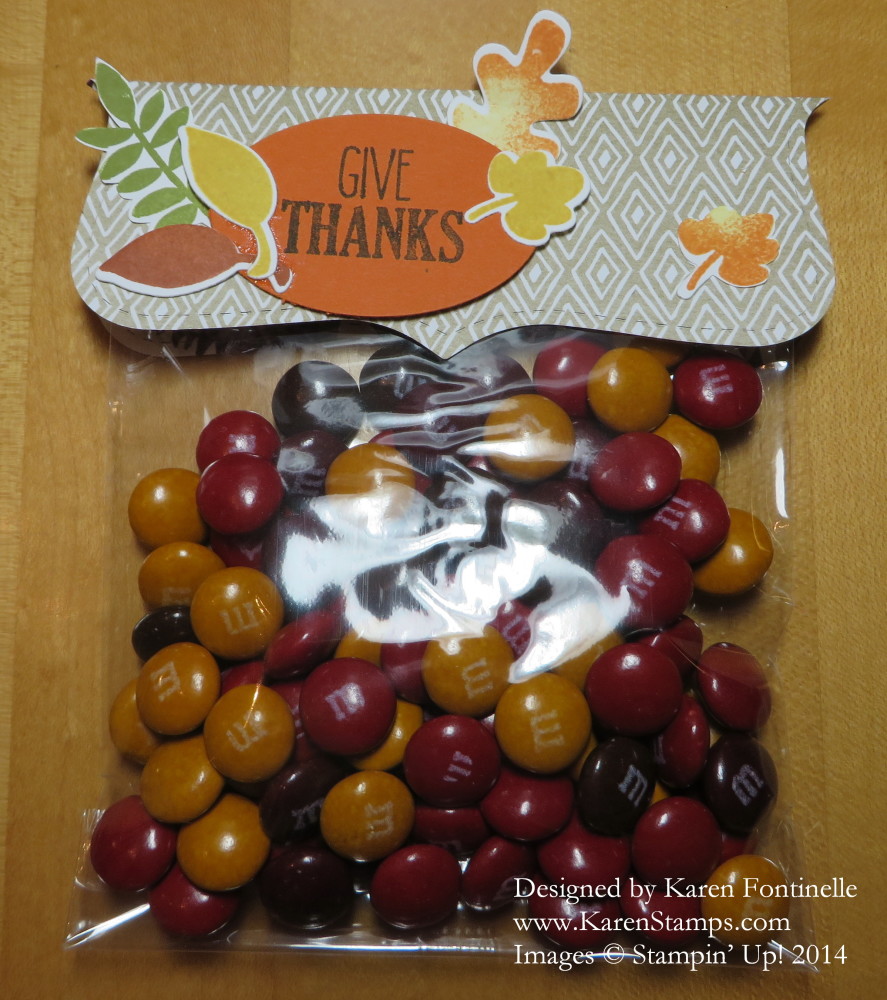
Top Note Thanksgiving Cello Bag Treat
I hope these ideas, some very old!, will give you some ideas that are helpful!
HAPPY THANKSGIVING!!
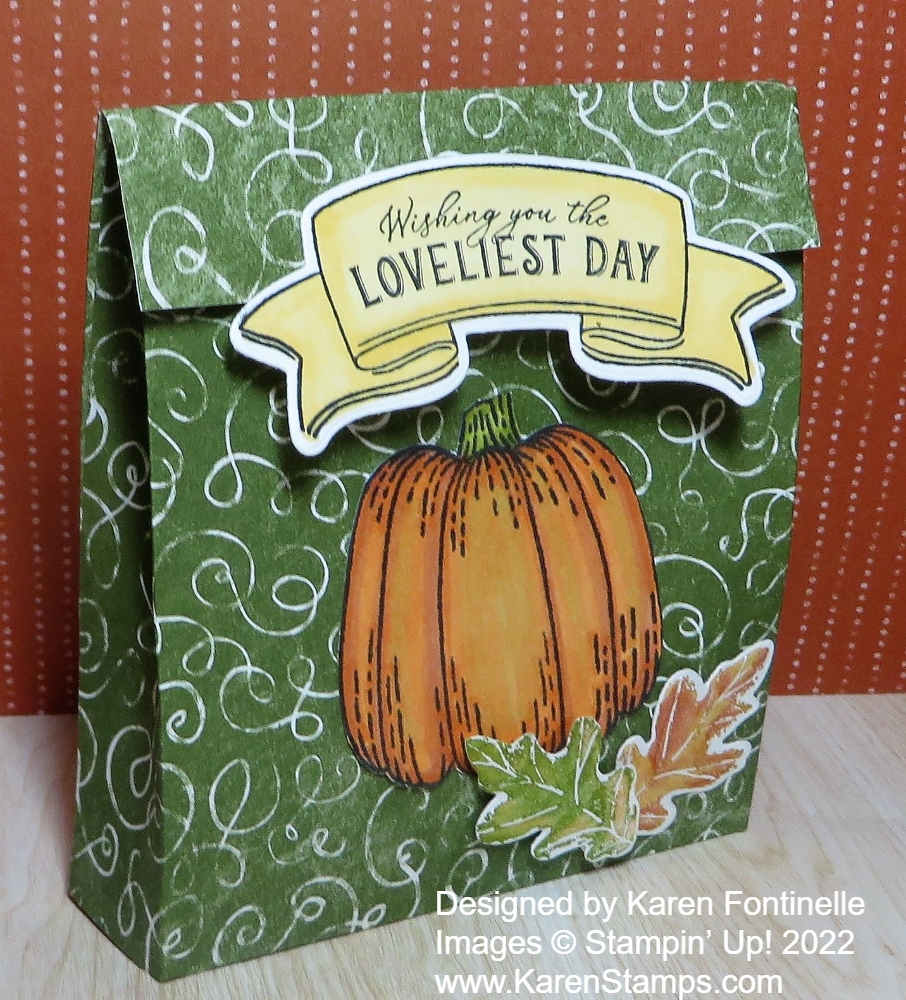
I hadn’t made a little treat or gift bag for awhile so I thought it was time for one for fall. You could give it to someone for Halloween because it has a pumpkin or it would be great for Thanksgiving. Maybe a little treat or party favor for Thanksgiving dinner!
Start with a piece of cardstock or designer paper cut 6″ x 11″. Score it on the long side at 1″, 5 1/2″, and 6 1/2″. Turn and score on the short side at 1″ x 5″. Check the photo below to see how to cut off two corner squares and snip on the sides on the score lines up to the vertical score lines. You can angle your cuts just a little if you like so they fit a little better. Crease all the score lines and play with folding everything together so you see how it goes together.
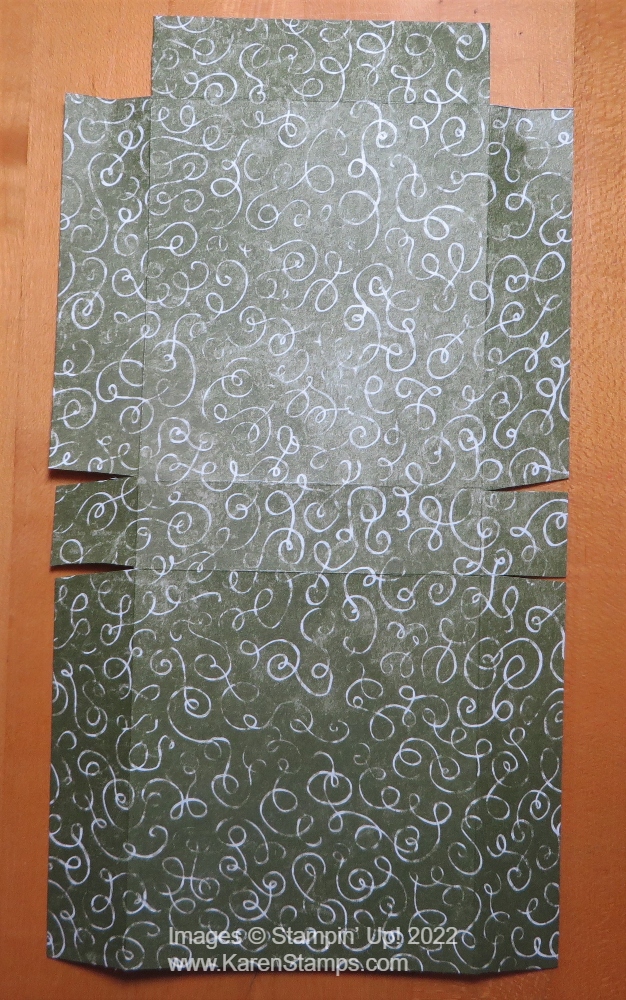
I used a pattern in the Rustic Harvest Designer Series Paper to make this bag, but you could use a Garden Green cardstock or any color you like if you prefer. You could also make the bag with cardstock and add some layers or pieces of designer paper to decorate it.
Before you assemble the bag, it’s easier to have the pumpkin adhered to the front panel first. I used the Hello Harvest Stamp Set to stamp the pumpkin on Basic White Cardstock with Memento Ink, then colored in with Light and Dark Pumpkin Pie Stampin’ Blends. I added a touch of green also. You can play with whatever combination you like.
I also stamped two leaves with fall colors in the same stamp set. To ink up those stamps, I used Stampin’ Write Markers using fall colors like green, orange, yellow, and maybe some Cajun Craze. Just lightly color those markers on random areas on the stamp, breathe on the stamp to moisten it, then stamp.
The banner is also in the stamp set. I stamped it on Basic White and colored it with So Saffron Stampin’ Blend.
For all these elements, I used the Rustic Pumpkin Dies to cut out these pieces. You can glue down the pieces flat or pop some or all of them up with Stampin’ Dimensionals. Since the top flap of the bag folds over, you need something to hold it closed. You could punch two holes and tie a ribbon through or use some kind of clip, whether an old Stampin’ Up! one or one in your desk supplies. I adhered just the top of the banner to that top flap and just used a Stampin’ Dimensional to hold the flap shut. It wouldn’t be too hard for the recipient to open it.
After you assemble the bag, just push in the sides, especially at the top a little bit to get it to close. Or cut off the flap and just have an open top.
Make this little bag even if you don’t plan to put anything in it or give it away! It will make a pretty decoration for fall sitting out in your home!
Remember to check the Clearance Rack, refreshed yesterday! Some great bargains you can be using now!
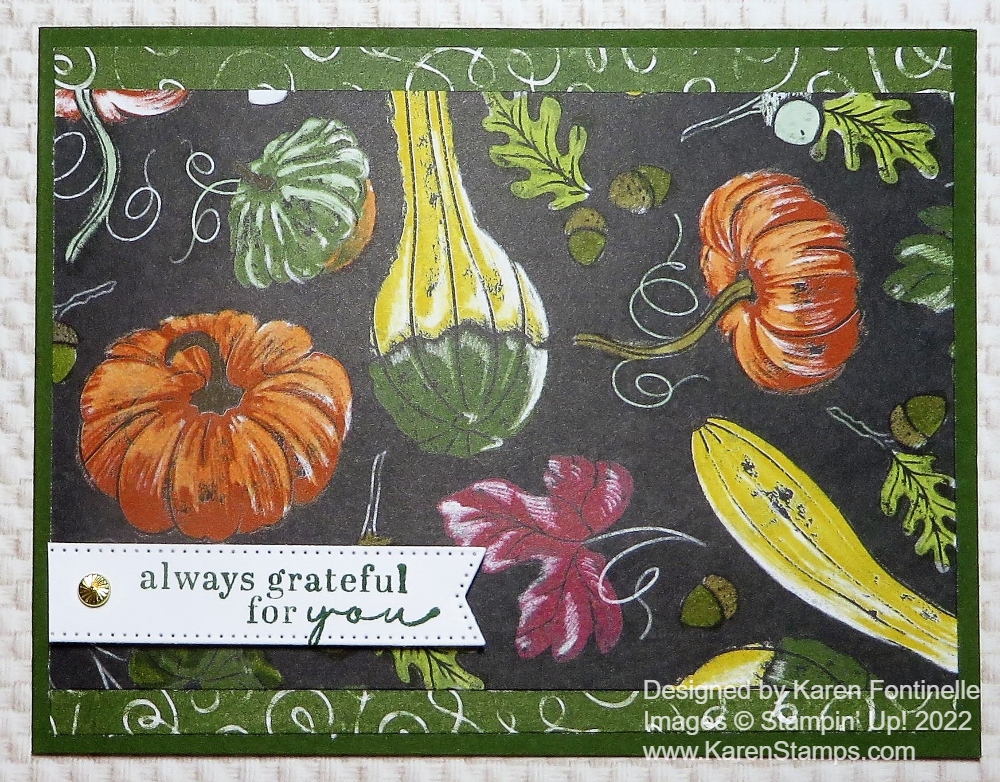
If you are looking for an easy card to make for fall or even Thanksgiving, this Rustic Harvest Fall Gourds Card is a little different with the fall gourds and pumpkins. Change the greeting for whatever sentiment you want to express.
The card base is Garden Green cardstock. This card was cut at 4 1/4″ lengthwise down the middle of a full sheet of cardstock, then scored at 5 1/2″. I intended to make it a top-fold standing card, but the design on the paper seemed like it should go horizontally so I just gave in! The horizontal card opens on the side instead of the usual vertical style.
I loved the gourd design and hadn’t used it yet. I chose the green swirly paper as a margin on the top and bottom of the gourd design. Both patterns are in the Rustic Harvest Designer Series Paper. I cut the green swirly designer paper at 1″ x 5 1/4″. The gourd paper is 3 1/2″ x 5 1/4″.
In my Tuesday newsletter, I talked about a tip to color designer paper, shared by Patty Bennett, if you weren’t entirely happy with how it looked as is. So on this gourd paper, I added some more orange color to the pumpkins and some green to the leaves, plus a little green and brown to the acorns. I used my Stampin’ Blends alcohol markers to add this color. I’m sure you could use Watercolor Pencils or some other coloring method if you wanted to. I thought it was pretty as it was, but I like the added color even better.
To assemble this card, I first adhered the green swirly DSP to the top and bottom of the card leaving a normal margin, then I adhered the gourd paper on top of that.
The greeting is stamped from the Full of Love Stamp Set in Garden Green ink. I die-cut it with a small banner in the Stylish Shapes Dies. I designed it so the greeting would be way over to the right side of the banner so I could have it even with the left side of the card and I cut that side straight off. I popped up the greeting with Stampin’ Dimensionals. For a finishing touch, I added one of the new embellishments, available starting Nov. 1st, in the Fitting Florets Collection. They are the Gold Adhesive-Backed Swirls. I thought this one gold swirl was just perfect to add in this space and great to be flat for easier mailing.
This Rustic Harvest Designer Series Paper is perfect for fall for any cards in general but especially if you wanted to send cards for Thanksgiving or cards in this season of gratitude.
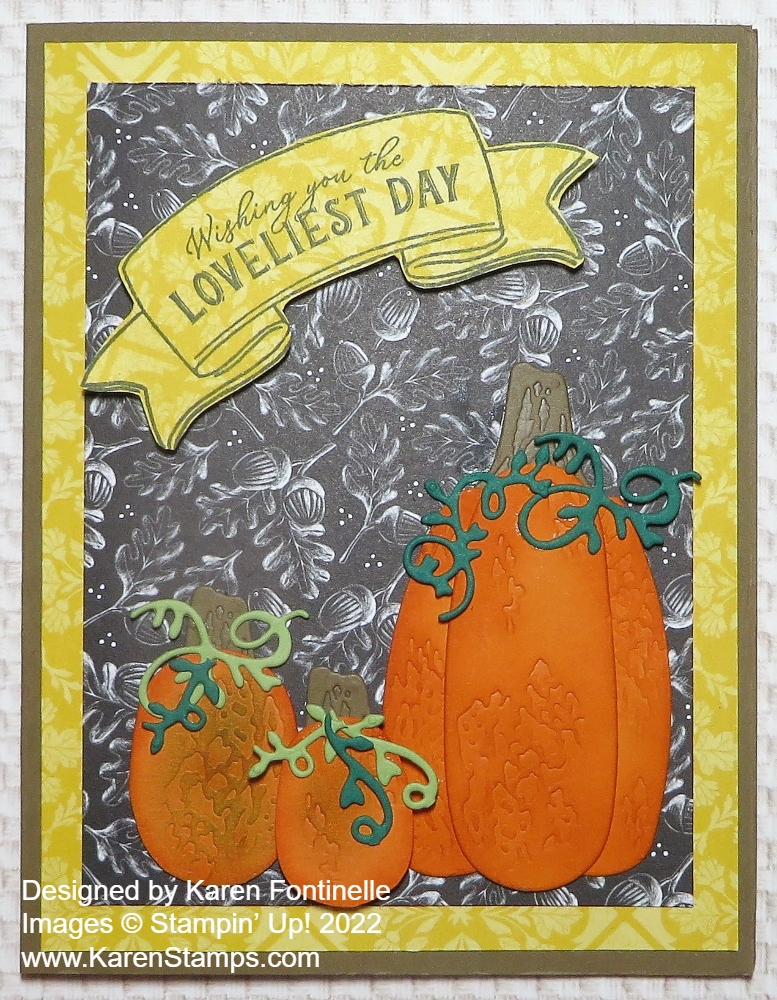
This Hello Harvest Pumpkins Card with Banner turned out differently than the idea I had in my head when I started, but that’s what happens when you start looking through designer paper or different colors of paper or stamp sets. You never know for sure what you will come up with!
The card base is Soft Suede, after trying a multitude of different colors of cardstock! Then there are two layers of the Rustic Harvest Designer Series Paper. The yellow Crushed Curry pattern adhered to the Soft Suede card base is the reverse side of the layer of black and white acorns pattern! I had another black & white striped paper picked out to be the background layer but I liked this acorn pattern better. The acorn layer is 3 1/2″ x 4 3/4″ because I wanted more of the yellow to show.
The pumpkins are made with the Rustic Pumpkin Dies using Pumpkin Pie cardstock. These dies have a texture that transfers to the cardstock. I found that the texture would show better if I ran them through twice. The large pumpkin is made with the extra narrower piece adhered to the center of the large pumpkin piece. I also sponged some Pumpkin Pie ink around the edges of the pumpkin pieces and on top of the textured areas. For the little pumpkins, I die cut a narrow piece and then just trimmed it down, top and bottom, to make the two little pumpkins! The stems are diecut from Soft Suede. The vines are diecut from Shady Spruce and Granny Apple Green on the small pumpkins. I also sponged the little pumpkins but added some green ink because sometimes pumpkins have some variations of color on them.
The banner is stamped on the Crushed Curry Rustic Harvest paper, the same as the card layer. I first stamped the banner on Pumpkin Pie and sponged it but it was too much. The Crushed Curry banner looked better. Normally I don’t like things placed cockeyed, but since the large pumpkin is kind of tall and the banner is kind of large, I decided to place it at an angle in the corner! Sometimes you have to craft dangerously! Try something new!
Here is another fall card I made with the Rustic Harvest DSP with pumpkins. So many pretty patterns of paper for fall.
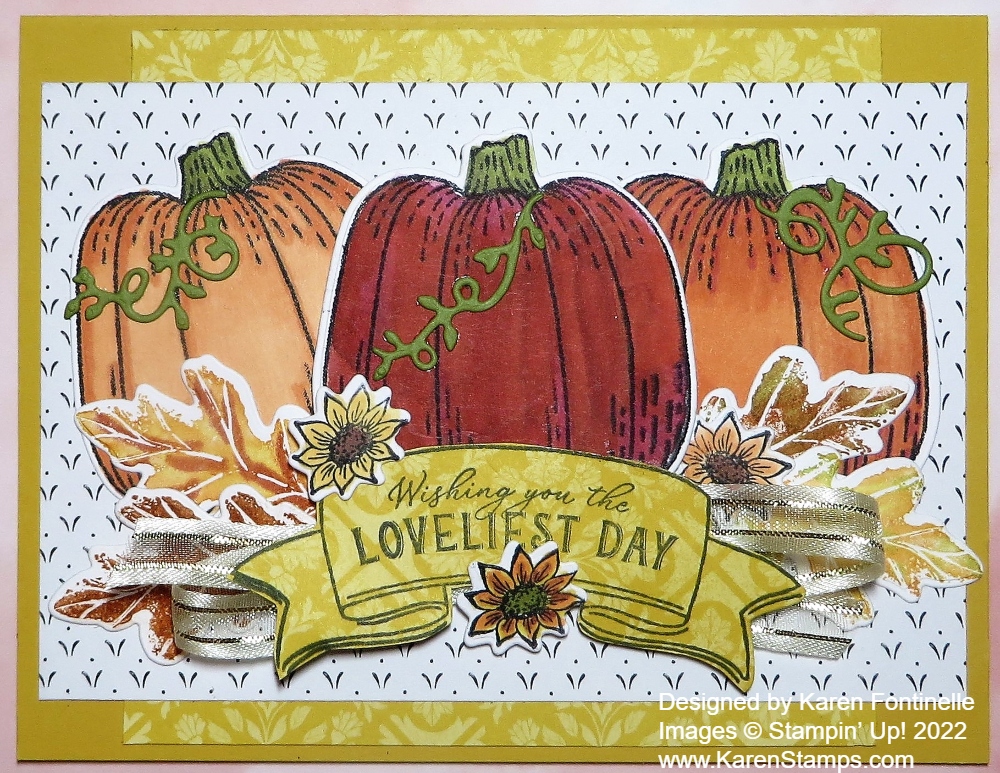
Today is the first day of fall so I thought I would make this Hello Harvest First Day of Fall Pumpkin Card, possibly with the hope that it would feel like fall where I live! No such luck, it’s still as hot as almost any summer day here. I’m ready to see colored leaves and wear a jacket in cool weather so I hope this card will bring us a weather change soon!
I used the Holiday Mini Catalog for the idea for this card. I pretty much copied one of the samples on page 50 in the Rustic Harvest Suite. But I did change some things!
The card base is Crushed Curry with a layer of a piece of the Rustic Harvest Designer Series Paper. At the top and bottom of this black and white piece of designer paper, I added just a narrow strip of a different pattern in the Rustic Harvest paper.
The really fun part of this card was stamping the pumpkins in the Hello Harvest Stamp Set, die-cutting them with the Rustic Pumpkin Dies, and then coloring them! The two orange pumpkins on the sides are colored with Stampin’ Blends, mostly the Pumpkin Pie Combo but I also used tiny amounts of some other colors. Just play with the markers and see what you get! The center pumpkin I tried to copy from the catalog but I got it a lot darker than I would have liked. The sample in the Holiday Catalog uses watercolor paper and the pumpkin is colored with a Water Painter and Merry Merlot ink. I had to be careful because I was only using Basic White cardstock which, of course, doesn’t handle water as well as watercolor paper! But it worked out all right except I like the lighter-colored pumpkin in the sample.
For the fall leaves, I used the stamp in the Hello Harvest Stamp Set. Rather than using an ink pad, I used various colors of Stampin’ Write Markers. You can apply color directly to the stamp with one color and then just dab on other fall colors. If you get a darker color on a marker just scribble with it on scrap paper to get the excess ink off. Then “huff” on it with your breath and stamp. There is also a die to cut out the leaves. I really had fun making assorted leaves to add on at the base of the pumpkins.
To assemble the card, after adhering the designer paper piece, I adhered the two side pumpkins with Multipurpose Liquid Glue and popped up the middle one with Stampin’ Dimensionals. I very carefully added some glue to the back of little pumpkin vines to adhere to the pumpkins.
The greeting is stamped on the same designer paper that I used for the strips at the top and bottom of the black & white paper. It is in the Hello Harvest Stamp Set. Behind the diecut greeting, I added some Gold & Vanilla 3/8″ Satin Edged Ribbon going back and forth. Then I placed the little die-cut flowers around the card as well.
Here is another card I made with just a single colored and diecut pumpkin.
If you want to get in a fall mood, be sure to order the Hello Harvest Bundle and maybe the Rustic Harvest Designer Paper and have fun!
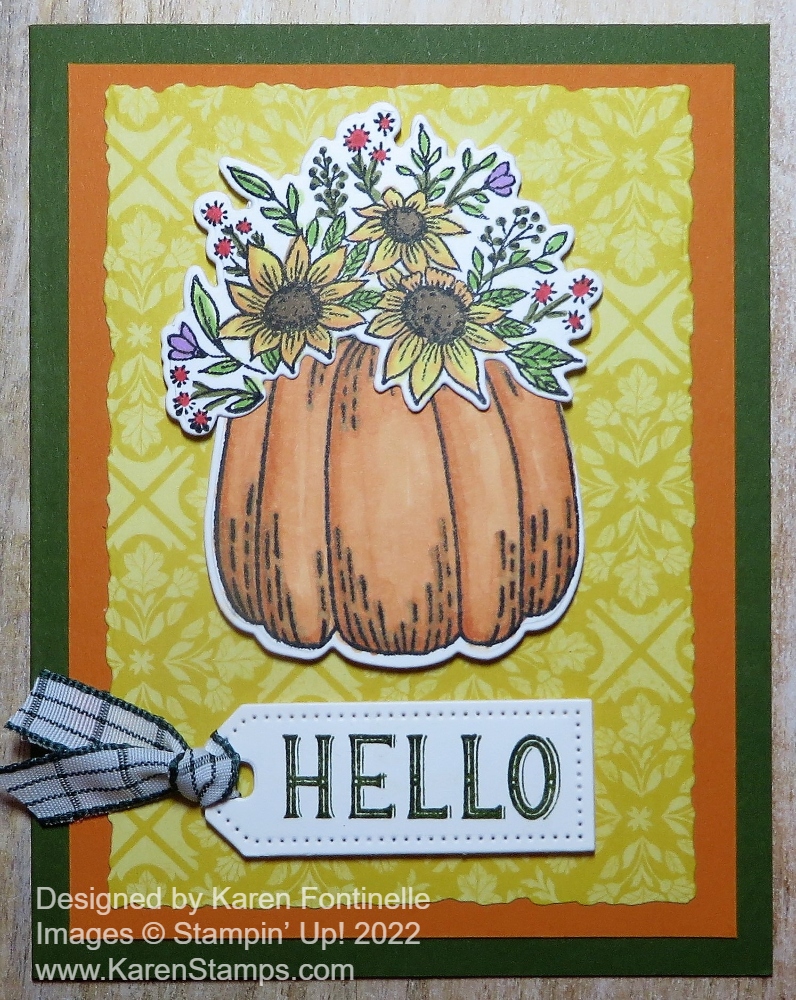
I feel as if I should be saying, “Hello Fall!” with this Hello Harvest Pumpkin Fall Card, but it’s not fall yet, just the day after Labor Day! Put away your white shoes and slacks! That used to be the rule in the olden days at least! And the day after Labor Day was always the first day of school when I was a kid. We usually bought new “fall” clothes for the start of school even though it was still pretty warm and not really fall yet so you couldn’t exactly wear the new clothes right away!
This card is made with the Hello Harvest Bundle in the July-December Holiday Mini Catalog. Almost anything “fall” I think is just beautiful! That’s why this Bundle and the coordinating Rustic Harvest Designer Paper is one of my favorites in the Holiday Catalog!
The card base is Mossy Meadow cardstock. It has a layer of Pumpkin Pie with a piece of the designer paper die cut as the layer on top of that. I had recently purchased the Deckled Rectangles Dies and then forgot I had them! So I used them on this card to cut out the Rustic Harvest Designer Paper. In the olden days of stamping, we just tore the paper edges if we wanted the deckled edge look, and we wanted that a LOT! But now, thanks to the Deckled Rectangles Dies, we don’t have to tear edges anymore!
The pumpkin and flower garland were stamped on Basic White with Memento Ink and then colored in with Stampin’ Blends Markers. I love to color with those markers! I didn’t keep track of every color I used so just play and use what you like! I did color the pumpkin with Pumpkin Pie (of course!). The flowers and leaves are quite a few different colors. The sunflowers are mostly So Saffron with a little Pumpkin Pie and Daffodil Delight thrown in and a brown #300 in the flower center. Remember those natural tones markers aren’t only for skin color and animals! You can use them for anything! The leaves are mostly Granny Apple Green with some Mossy Meadow. One of the little flowers is colored with Fresh Freesia and the bright “red” flowers are Light Sweet Sorbet. That’s pretty much what I used but you can blend other colors together or change it up.
To put the card together I die cut the pumpkin and flowers and popped those two pieces up on Stampin’ Dimensionals. The greeting is in the Hello Harvest Stamp Set. It is stamped in Mossy Meadow and die cut with one of the Tailor Made Tags. I added a piece of the Evening Evergreen 3/8″ Windowpane Check Ribbon. I think it adds a little extra pizzazz to the card.
It’s time to start making cards you can send around Thanksgiving time or for Halloween! You’ll find all kinds of card ideas using the Rustic Harvest Suite of products!
This Hello Harvest Bundle in the new Holiday Mini Catalog is right up my alley because I love fall, pumpkins, and Halloween! This Hello Harvest Pumpkins Card is not for Halloween necessarily but you could make it look that way. For now, this is just a pretty fall card that you could send anytime during the fall for a birthday or just a “thinking of you” kind of card and certainly for Thanksgiving. Not to mention using the pretty pumpkins for fall or Thanksgiving treats and favors if you like to make those!
This card has a card base of Early Espresso cardstock and a Very Vanilla layer. I don’t use Very Vanilla that often but this card idea seemed to call for it. I stamped two of the pumpkins directly on the Very Vanilla card front and spaced them apart a little bit. If I had spaced things a little better on this card, I would have stamped the pumpkins a little lower on the card to allow more space for the greeting at the top. But it is still okay as is.
The middle pumpkin is stamped on a Very Vanilla scrap and die cut using the Rustic Pumpkin Dies. I colored the pumpkins with Light and Dark Pumpkin Pie Stampin’ Blends and the middle one with a bit of Cajun Craze. Then the middle pumpkin is popped up on Stampin’ Dimensionals®. I also die-cut the little curly-cue stems in Old Olive cardstock and adhered those to the pumpkins plus a little flower that is in the stamp set.
The greeting is stamped from the Hello Harvest Stamp Set. There are some nice greetings in that set. It is stamped in Early Espresso ink on Very Vanilla then diecut with the little banner piece in the Scalloped Contours Dies. Next, I trimmed off the scalloped edges and die-cut another banner piece in Old Olive and layered the greeting on that. It is also popped up on Stampin’ Dimensionals.
For a little grounding for the pumpkins, I very lightly scribbled in some Light Soft Sea Foam Stampin’ Blends under the pumpkins across the bottom of the card. It is literally scribbled lightly, not heavy-handed coloring. On the inside of the card I would suggest putting a layer of Very Vanilla maybe stamped with a little something from the stamp set since the Early Espresso is too dark of a color on which to write.
If you like fall, you will really like this Hello Harvest Bundle and maybe even the entire Rustic Harvest Suite Collection!