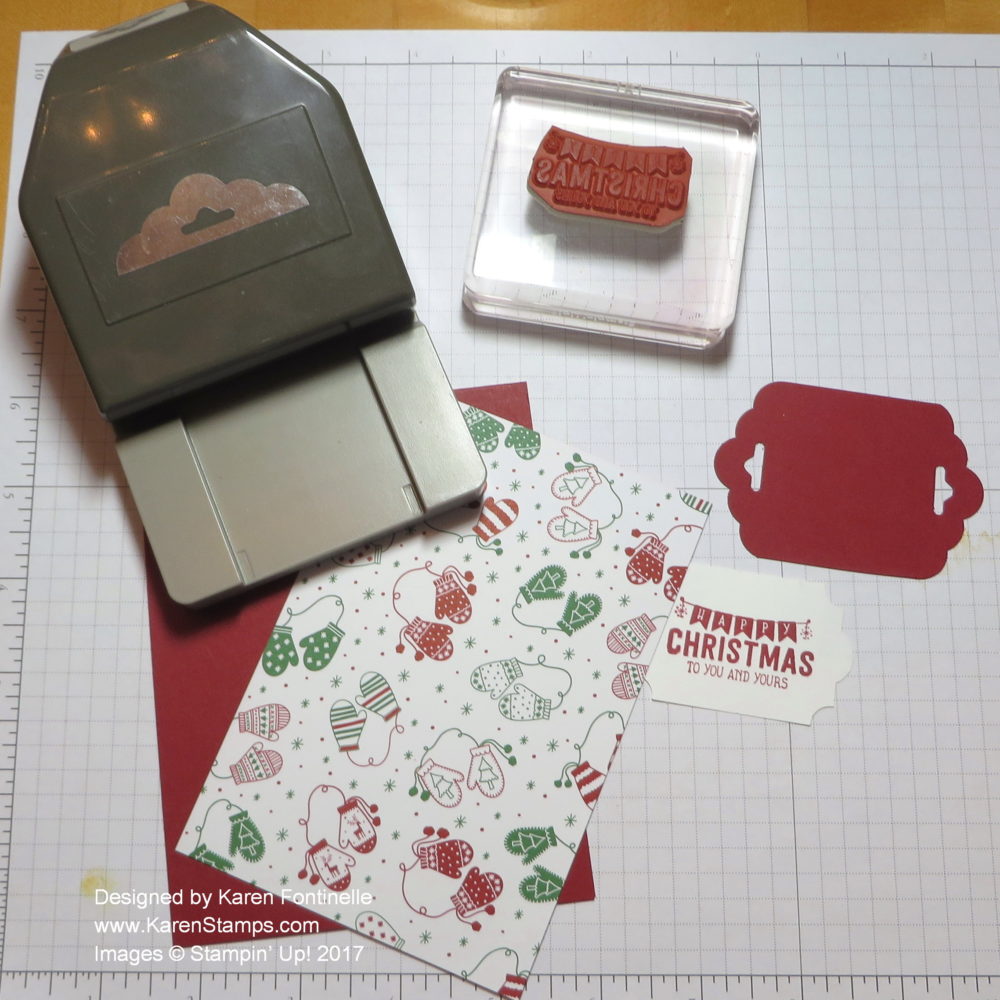
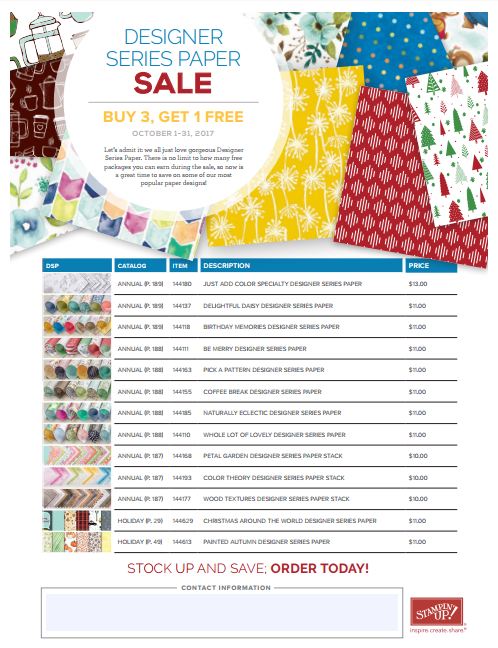
I wanted to make a quick and easy Christmas card with the Be Merry Designer Series Paper, and as I went along I realized I had several tips to share with you. I like this Be Merry Paper. It seems like a traditional, nice little unassuming Christmas paper that will do the job! It’s mixed in with all the designer papers in the Stampin’ Up! Annual Catalog on page 188 so you might have overlooked it. When the catalog came out, none of us were thinking about Christmas just as summer was coming on. If you like this paper (and some of the patterns can be used any time of year, not just the holidays) take advantage of the Designer Series Paper Buy 3 Get 1 Free Sale going on right now!
Back to the card. The card base is Cherry Cobbler, cut at 11″ x 4 1/4″ so the fold will be at the top. The patterned paper is cut at 5 1/2″ x 3 3/4″. The greeting from the Labels to Love Stamp Set is stamped on Whisper White with Cherry Cobbler ink and punched with the Everyday Label Punch.
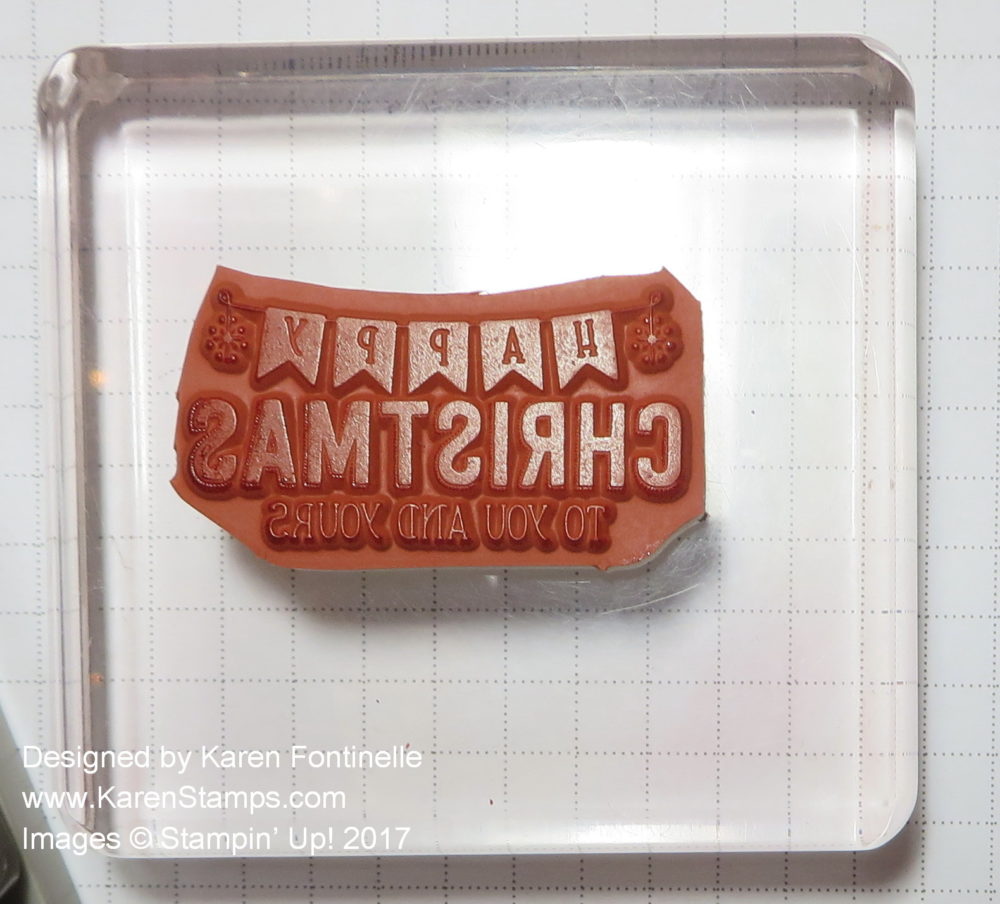
Tip #1: I was catching the edge of the greeting stamp every time when I stamped, so I just trimmed the rubber around the words carefully, like we used to have to do in the “olden days” with our little Craft & Rubber Scissors or whatever they were called. Just be careful you don’t cut into the image. I don’t normally do this but this stamp just seemed to have quite a large border around the edge, and since I was having trouble stamping, I just trimmed it.
Tip #2: Somewhere online I saw something about using the Scalloped Tag Topper Punch as a layer for the Everyday Label Punch. I didn’t even find out about all the details, but I thought I would try it today. I cut a piece of Cherry Cobbler Cardstock 2″ wide and punched one end, then estimated where I wanted the other end, cut it, then punched that opposite end. You can see that tag in my first photo. It’s not an exact match with the Everyday Label Punch but the curved ends so match up nicely and I think it provides an easy way to layer this punched piece!
Next I wondered how to use the Cherry Cobbler 1/4″ Double-Stitched Ribbon. I’d already glued down the patterned paper onto the card front, so I would have had to wrap the ribbon around the inside of the card, which would be okay. But then I got the idea to punch a hole in each end of the greeting and just tie some ribbon through those holes. Then the greeting is popped up with Stampin’ Dimensionals.
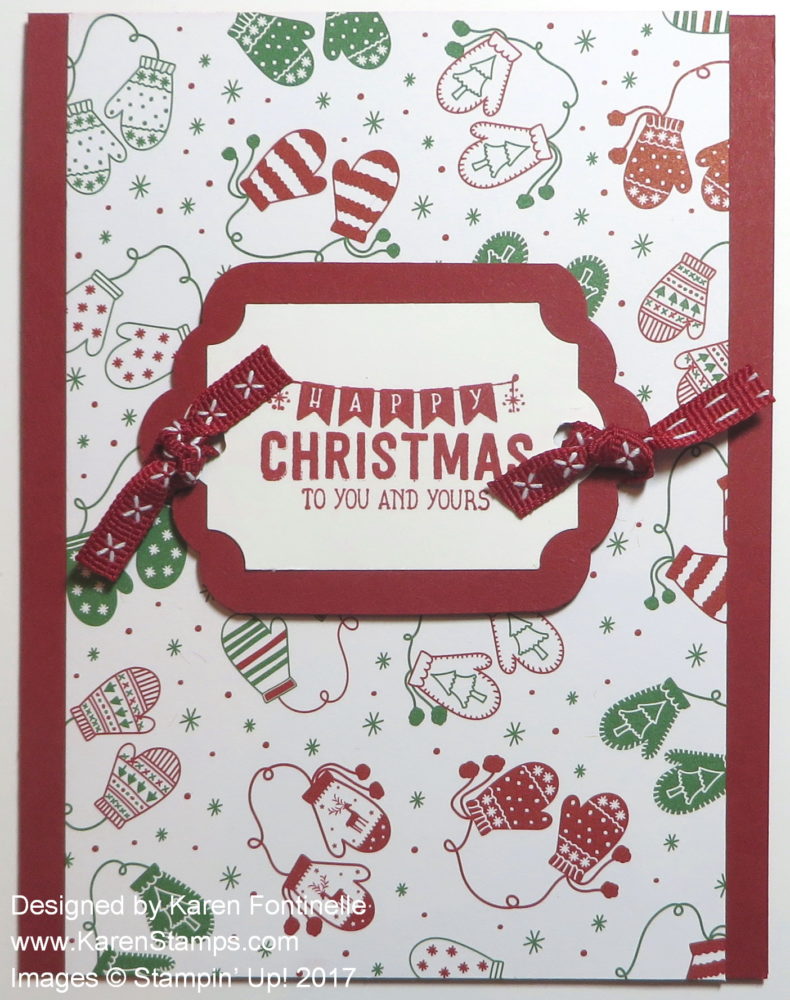 Really, if you have the materials and tools handy, this card takes no more than a couple minutes to make! And there are other variations you could try as well!
Designer Series Paper Buy 3 Get 1 Free Special Offer
Stock up on some of your favorite designer series papers during the month of October! ONLY THESE SELECT PAPERS ARE INCLUDED IN THE OFFER! Purchase 3 packages of paper and THEN choose the 4th package that you want to get FREE. When entering your order, enter the 3 packages you want to pay for and then the 4th package will come up as $0.00. In other words, don’t order the more expensive one first and expect to get that free.
WORLD CARD MAKING DAY SPECIAL OFFERS
 Check out the flyer for World Card Making Day with select stamp sets and Note Cards & Envelopes on sale for 15% off just for the first 10 days of October! These stamp sets coordinate with the designer series papers offered for sale. Note that Fast Fuse is no longer available on this sale, but will be offered again when Stampin’ Up! replenishes their stock. It sold out faster than they ever could have predicted!
SHOP THE SALES AT STAMPIN’ UP!

