They say “presentation is everything” and that was true yesterday when I opened a box of skincare products I had ordered! I was probably more excited about the packaging than the products! Within the mailing box was a blue gift box and inside lots of that “shred” with my products plus a very nice kraft box (like you get jewelry in) filled with samples with the company name embossed in gold on the top. I knew I was going to save it in case i needed it for a gift, especially at Christmas.
Today, I looked at that box and thought, I might as well decorate it in a quick and easy way and it will be ready to go for the holidays and really won’t need any other giftwrapping. Consider looking for gift boxes like these I know you have around your house and get some ready for Christmas or a birthday or any occasion!
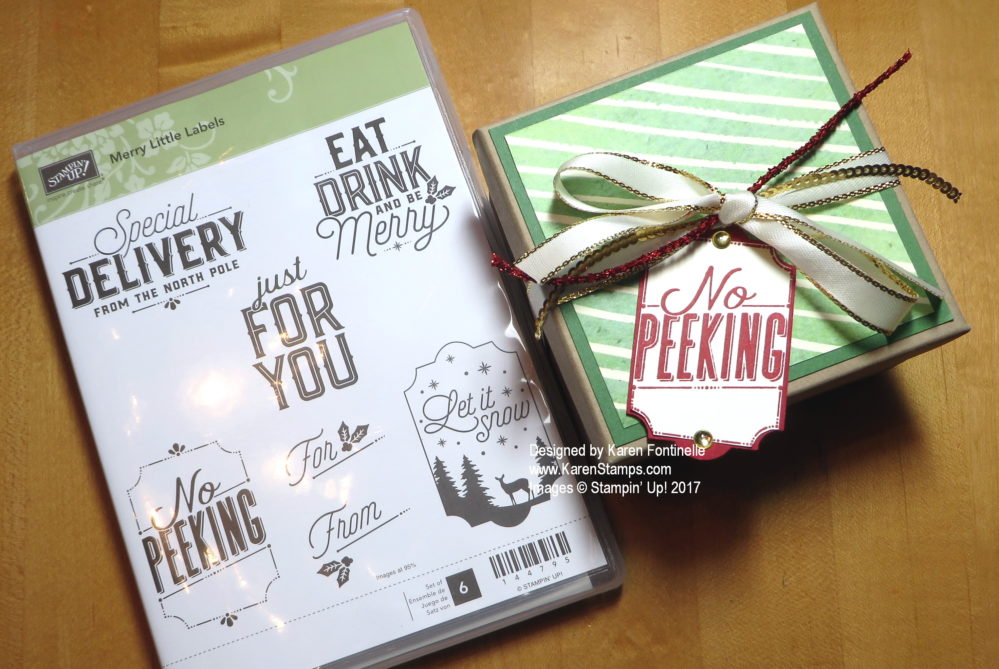
Even though I made this into a Christmas box, I used the fallish paper, Painted Autumn Designer Series Paper, but I used a side that just has green stripes and could be used for any project. Nothing seasonal about it. I layered it on a piece of coordinating Garden Green Cardstock. I used the Gold 3/8″ Metallic-Edge Ribbon, which is a beautiful ribbon with that gold edge. I tied that around, laid on pieces of the Mini Tinsel Trim in Red and the Gold Mini Sequin Trim, made a knot, and then tied a bow. Actually, it looked pretty enough with just the knot and the trim pieces. So if you feel you are not good at bows, just tie a nice knot!
The tag is stamped in Real Red Ink from the Merry Little Labels Bundle. With the Bundle, you get the stamp set and the coordinating Everyday Label Punch. You’ll want this punch to make this nicely shaped tag. Might as well save 10% on the Bundle if you like the stamp set! To layer the tag on a piece of Real Red Cardstock punched with the Everyday Label Punch, I just trimmed down the Very Vanilla stamped piece, even though I cut off the cut little design at the top and bottom of the tag. That makes it fit on the layer, and then I added two round gold Metallic Enamel Shapes.
All in all, it took just a few minutes to make this quick and easy decorated gift box!
(Don’t order any designer paper until Sunday! Just sayin’!)
But when you are ready to order some stamping and papercrafting supplies, just go to my Stampin’ Up! Online Store and shop! It’s easy to set up an account and then you are ready to go any time you want to order! It’s time to get started on those holiday craft projects and cards!
And if you need ideas, you will want to sign up for my Stamping With Karen Mailing List! Beginning next week, I will be sending out a special email every week with a new holiday project and tutorial and the only way you will be able to receive this is to be on my mailing list! This is a special gift to my wonderful subscribers that I love doing every year! (If you are already on my mailing list, no need to do anything, you will receive the holiday emails, too!)
Sign up for my Mailing LIst HERE to receive the “12 Weeks of Christmas” Emails! Sign up before Wednesday, October 4 at 1:00 pm in order to receive the first issue. You don’t want to miss out! I have that email and project ready to go! It’s just waiting for your name and email to be included!!
