Category Archives: Baby

Cookie Cutter Christmas Bear Baby Cards

Cookie Cutter Christmas Bear Baby Cards

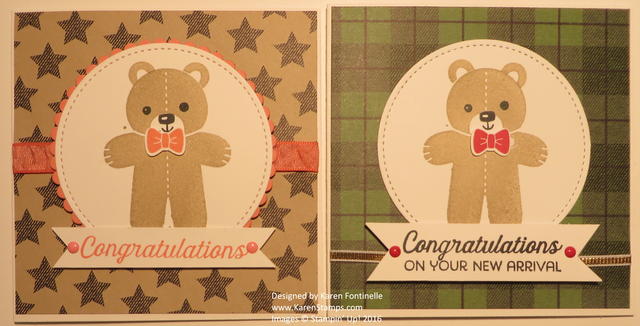
Would you guess you could take a Christmas stamp set and make a baby card with it? Take a good look at your holiday stamp sets and see if you can get some other uses out of the stamps during the year before you put them away! For example, these Cookie Cutter Christmas bear baby cards are made with the bear in a Christmas stamp set and even with holiday or wintery designer paper. But if you don’t use the holiday patterns in the Warmth & Cheer Designer Series Paper Stack, there are plenty of generic patterns you can use at other times. While the Cookie Cutter Christmas Stamp Set is obviously for the holidays, once you notice the cute bear stamp, face, and ears, you can see that you can use that stamped image for other occasions!

These cards are square, 4 1/4″ x 4 1/4″, with a Whisper White Thick Cardstock base. The designer papers are from the Warmth & Cheer Paper Stack.  The bear is stamped on Whisper White and then the circle is cut out with the Stitched Shapes Framelits DiesLove these!! If you put them on your order now, even though they are backordered, you will be in line to get them sent to you as soon as they are available again. They have been so popular that Stampin’ Up! will have to turn the number off until they have sufficient supply again.

On the card on the left, I added a Flirty Flamingo scalloped circle layer die cut with the Layering Circles Framelits DiesI also added a strip of Flirty Flamingo 3/8″ Ruched Ribbon across the middle of the card.  The greeting is from the Flourishing Phrases Stamp Set. I added two In Color Enamel Dots because I LOVE these little dots!

The baby card on the right is very similar.  I added a strip of 1/8″ Gold Ribbon underneath the banner greeting.  That greeting is from the Better Together Stamp Set.  Once I looked at these two cards side by side I noticed the word “Congratulations” looks exactly the same even though they are two separate greetings from two different stamp sets! Hmmm!

So look at your stamp sets a little diffferently and see if you can get even more use out of them that they seem intended! This is very difficult for me until I see someone else’s idea!

If you want to make a Cookie Cutter Christmas Bear Baby Card and need some supplies, please click this link below to order your Stampin’ Up! products!

Stampin’ Up! Online Ordering HERE!

Something For Baby Card

Something For Baby Card

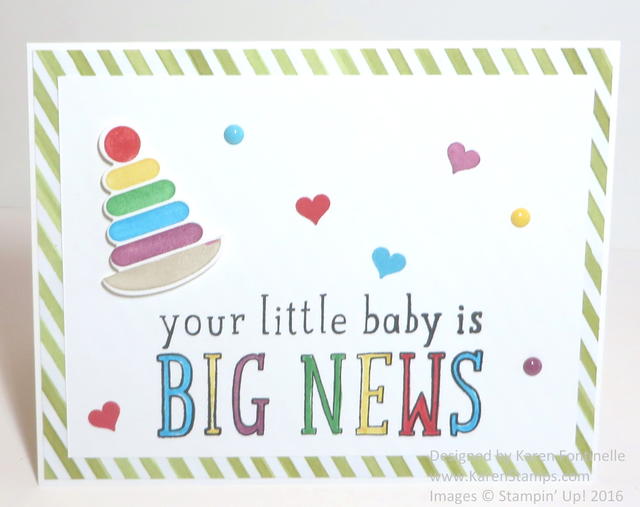
I needed a baby card so I turned to the Something For Baby Stamp Set in the Stampin’ Up! Annual Catalog. If you look on page 59 you will see the sample that I copied.  I loved the little stamp that looks like the stacking colored rings that I’m sure we all had for our babies to play with! However, I did use a greeting from a retired stamp set, Big News. I also used a piece of retired designer paper on the front of the card,

To make the ring stack, just color each ring with a different colored Stampin’ Write Marker. I used several Brights colors plus Crumb Cake. Just color with the markers but then breathe (huff) on the stamp before stamping to remoisten the ink. Then cut out with the Big Shot and the Baby’s First Framelits DiesI popped it up on a Stampin’ Dimensional or two.

The little hearts are stamped from the Big News stamp set. I couldn’t resist using some of the Brights Enamel Shapes.

Don’t forget to use your Stampin’ Up! catalog for ideas and inspiration for your cards and projects!  There are more ideas than you can possibly use!  Even if you tried to follow each one, you would change it up some of the time and make something different. It’s an easy way to find ideas.

If you need some supplies for making cards, please visit my Stampin’ Up! Online Store HERE!

Big News Baby Card

Big News Baby Card

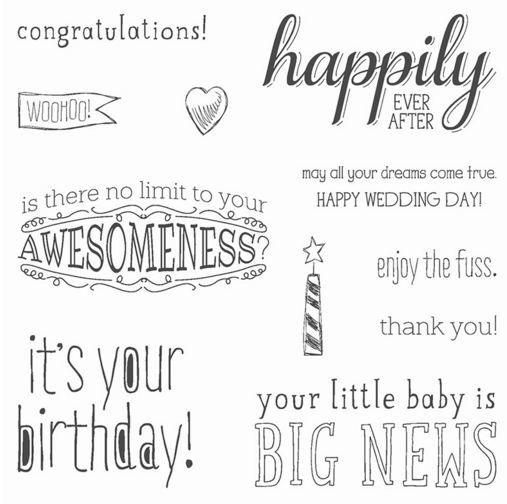
Make a Big News baby card for that new arrival with the Big News Stamp Set! It’s on the Stampin’ Up! retiring list so you only have a few weeks to order it. But this stamp set is not just for babies, it has greetings for several life events, such as birthdays and weddings, as well as good old “awesomeness”!

Big News Stamp Set

I hate to see this stamp set retire. It made me happy just to see it!

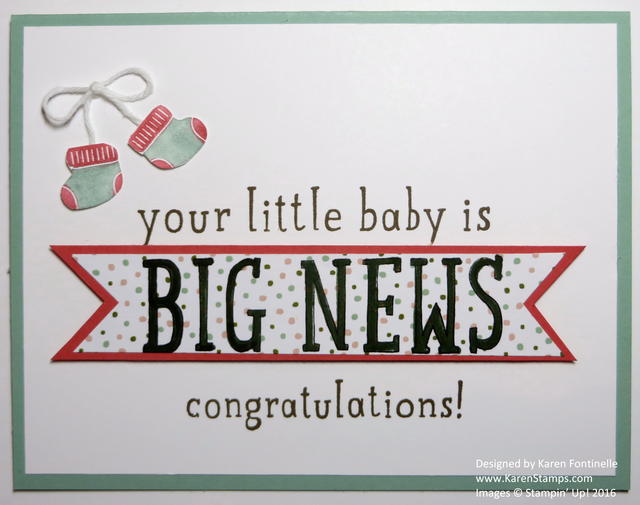
I used the Birthday Bouquet Designer Series Paper on this card so I used the colors that coordinate with the paper.  The card base is Mint Macaron layered with Whisper White Card Stock. The words are stamped in Soft Suede ink.

I stamped the outlined words “Big News” right on a scrap of the Birthday Bouquet Paper with Stazon Black Ink so it wouldn’t bleed when I colored in the letters.  You can stamp the whole stamp on a larger piece of designer paper and then cut it accordingly rather than trying to stamp it precisely. I  cut the banner ends and then layered it on a piece of Watermelon Wonder card stock. You might not be able to tell from the photo, but I colored in the outline letters with the Mossy Meadow Marker from the 2014-16 In Color Stampin’ Write Markers. This set of markers is one of the retiring In Colors and the pack of markers is discounted, so be sure to check that out!

The baby booties are from the stamp set Something For BabyI colored the stamp with two markers, Watermelon Wonder and Mint Macaron, and stamped and then cut out. I tied a small bow with Whisper White Baker’s Twine and adhered the booties to the ends of the twine. You can also get coordinating framelits for this baby stamp set in a bundle with the stamp set, the Something for Baby BundleSave 15% with the Bundle!

We always need more words and greetings for our stamping projects so check out the Big News Stamp Set (both the clear- and wood-mount stamp sets are discounted!) and see if you should add it to your Stampin’ Up! order, and make sure you get all the retiring accessories you want while they are still available.

Shop the Stampin’ Up! Retiring List Online!

See the products that are still available right here in the Online Store!


Card For a Baby Shower

Baby Shower Card

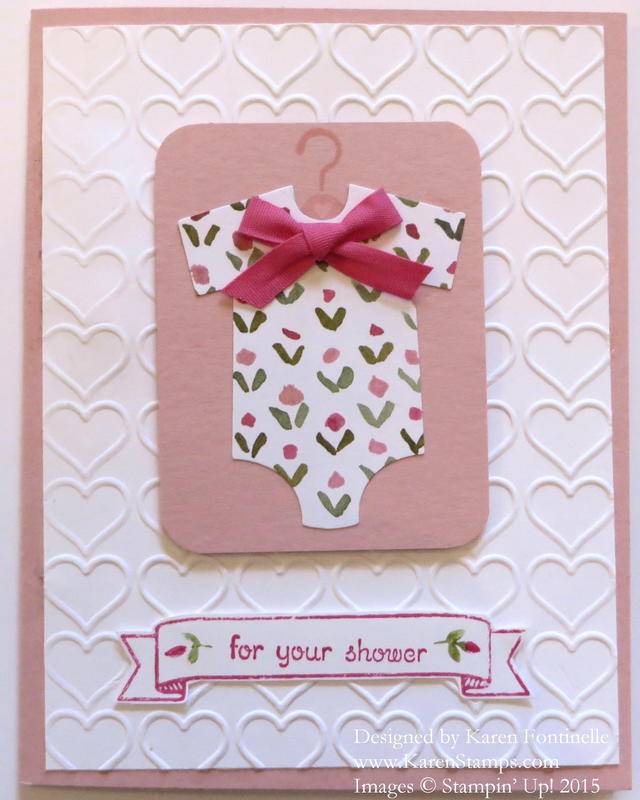
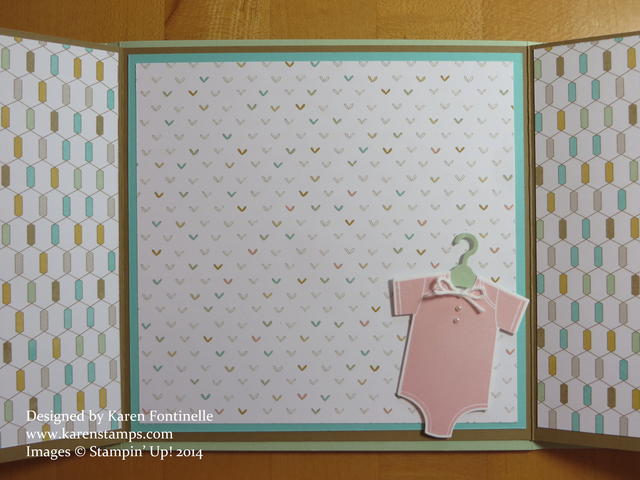
There’s a little bit of the new mixed in with the old on this baby shower card. The other day I had a fun afternoon stamping with a friend, and she wanted to make a baby shower card for a friend. Normally I would search online for at least 100 ideas and then look for 500 more just to be sure I had all the cutest ideas floating around in my head or one to copy. But this day, immediately the Something For Baby Stamp Set and the Baby’s First Framelits Dies popped into my head along with this cute paper, part of the English Garden Designer Series Paper. I love that simple but cute pattern on the paper! I think it reminds me of a comforter I bought for my daughter many moons ago.

The card base is Blushing Bride, which I seem to have used a lot recently! The Whisper White background is embossed with the Happy Hearts Embossing Folder.  The baby onesie is diecut with the Baby’s First Framelits, as I mentioned before. The little hanger is stamped with a hanger stamp from the Something For Baby stamp set. The bow is the Melon Mambo 1/4″ Cotton RibbonThe banner is from the new stamp set in the Occasions Catalog, Bloomin’ Love Photopolymer Stamp Set. I just colored it with markers so I could make the little leaves Old Olive and the rest Melon Mambo. The words come from Teeny Tiny Wishes, one of my favorite and most useful stamp sets of words.

Although I don’t have a photo of the inside of the card, my friend stamped the inside with the “Your little baby is big news” from the Big News Stamp Set. And she also grabbed the little heart from the Bloomin’ Love set and stamped that below the greeting.  We laughed about whether or not she should stamp more hearts randomly on the inside – you know, how you can go from something that is perfectly fine and then go crazy with a little too much stamping! Suddenly you have way too many hearts! As another friend who I used to paint with always said, “Know when to stop!”

All in all, my friend and I were pleased with this baby shower card we came up, just out of our own heads!
Shop Stampin’ Up! Online for all your stamping and papercrafting needs!
Making Lullaby Baby Cards for Gifts

Baby Gift 3x3 Cards

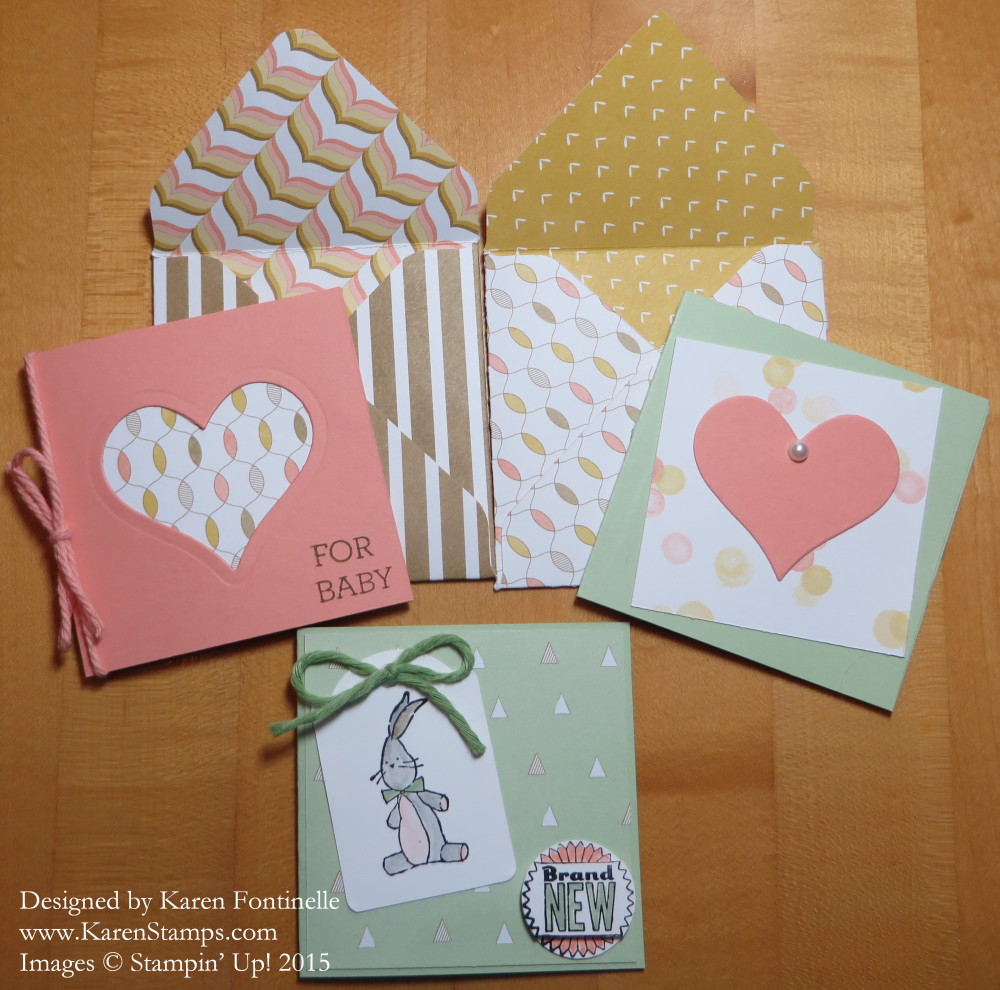
This is what I had planned to make the other day, little 3″ x 3″ cards that could be used for a gift enclosure or tag – or even made into a larger card for baby. I used the Lullaby Designer Series Paper, which is retiring and is also on the Stampin’ Up! Weekly Deals. The papers are just soft colors and patterns that you could use for anything, not strictly baby.  But they are lovely for babies!

The little bunny is my favorite stamp in the Baby We’ve Grown stamp set! This stamp set is also retiring so check it out. The greeting on the other card is from the set Crazy About You.  I think that one is sticking around. Lots of words to choose from to use singly or in combinations.

And I had fun making matching envelopes the correct size with my Envelope Punch Board.  Easy peasy once you use it!

If you need any of these supplies, just visit my Online Store.

Celebrate Baby Ombre-Look Card for the New Parents

Celebrate Baby Card

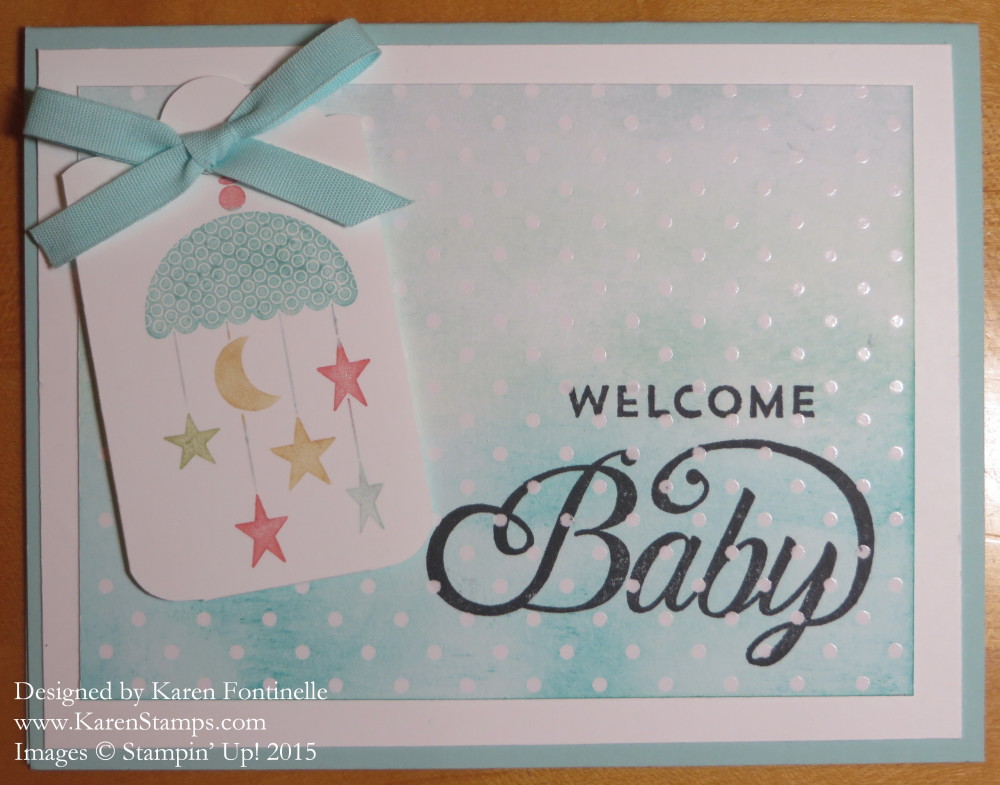
New parents may get lots of baby cards, but yours will be extra-special if you give them a handmade baby card with a good baby stamp set like this Stampin’ Up! Celebrate Baby Stamp Set. It comes with many stamps with which to compose a greeting and then the cute little mobile stamp! I colored mine with Stampin’ Write Markers and turned it into a tag with the Tag Topper Scalloped Punch. You can round the bottom corners of the tag like I did with the Project Life Corner Punch The Pool Party 1/4″ Cotton Ribbon is just tied into a bow and adhered to the tag with a couple Glue Dots rather than tying it through the tag. The card base is Pool Party card stock with a Whisper White layer.

The dotted ombre layer starts with the Irresistibly Yours Specialty Designer Series Paper which you can earn FREE with a $50 purchase of any Stampin’ Up! merchandise right now during Sale-A-Bration. For the “ombre” look, which means graduated colors or tones of colors, I used three different ink colors starting with the darkest at the bottom. I don’t remember what I used so you can make your own choices! I may have started with Bermuda Bay, maybe Coastal Cabana and Pool Party. I just sponged on each color, blending them together where they met. The fun effect is using the Irresistibly Yours Paper which is embossed, so when you apply ink over it, the embossed design stands out! Then you take a tissue and rub over all the inked area just to clean off the embossed design to make it show up even better and get rid of any excess ink.

Since I stamped the greeting using two stamps in the set right on the card layer, it hit the embossed polka dots so has a look that you either like or you don’t. I think it makes the word “Welcome” look a little broken up, but I like the way the polka dots show up on the wider word “Baby”. You get two sheets each of six designs in the Irresistibly Yours pack of paper so you have a lot of creative potential there!

With a $50 Stampin’ Up! purchase during the month of March, you can choose a free product from the Sale-A-Bration Brochure HERE or  choose from the newest products Stampin’ Up! just released for Sale-A-Bration HERE.

Have fun shopping with Stampin’ Up! If you are new to Stampin’ Up! and need a catalog, please email me a Karen@KarenStamps.com.

August My Digital Studio Downloads! Check Them Out!

My Digital Studio Downloads Aug 2014

Check out these new digital downloads for My Digital Studio! You might notice you can get the Love Story Digital Project Life Cards and print out as many as you need! Instead of weekly, new downloads will come out monthly.

Today is the last day for Weekly Deals!  Great day to buy some ink pads!!

Stampin' Up! Weekly Deal Aug 5

Click on the link above or the photo for more information about the products. Let me know if you have any questions!

And of course, don’t forget about the Big Shot & Bundles opportunity!  Buy a Big Shot, choose a free Bundle. Or if you have a Big Shot, purchase a Bundle (or more than one!) for 15% off. Check the Bundles and prices HERE in my Stampin’ Up! Online Store.

Big Shot Bundle Promo Ad

A Handy Baby Shower Gift for the New Mother

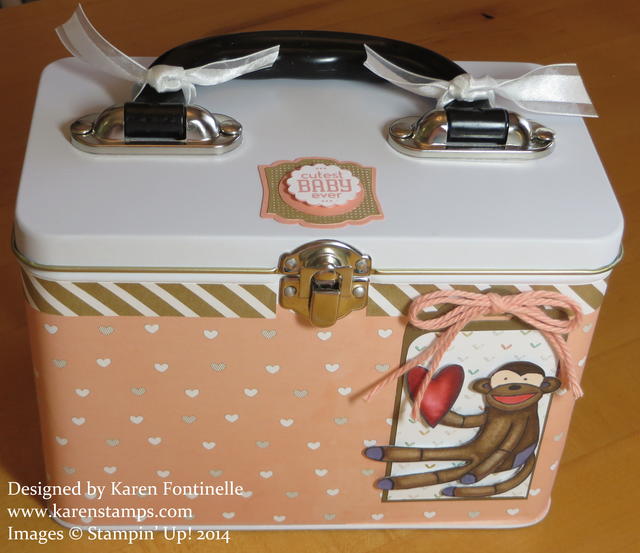
Sock Monkey Baby Memory Tin

Hopefully this will be a handy baby shower gift for the new mother. I used to use a (clean) paint can that I wrapped designer paper around and decorated, but since I had these “purse tins” in my stash, it will serve the purpose just as well. While the new mother can use this for anything she wants, the purpose of it is for the mother to write a little note to herself about the baby – a milestone, a funny story, a baby first, etc. – and just stick it in this can to remind her to write it down in the baby book later when she has more time! Someone came up with a poem (YEARS ago!) and I’ve saved it and printed it out on a tag that I enclosed in the tin (but didn’t take a photo of). I also decorated a little notebook and pen with the Lullaby Designer Series Paper for her to write the notes to herself.

The tin is wrapped in the Lullaby Designer Paper in two pieces.  One strip doesn’t completely wrap around. I started by adhering the back piece, using the Liquid Multipurpose Glue (in the green bottle). In the past, I have used Stampin’ Glue Sticks on both the paper and the container on these kinds of projects and they worked well. Right now I don’t have any new glue sticks to use so I better put them on my next order! But I like using the Tombow Glue because it gives you some “wiggle room” to get the paper placed exactly how you want it. Sticky Strip works but you have to be very careful adhering the paper so that it goes in the right place or things become very “sticky” and difficult to move! So if you adhere the paper on the backside first, when you apply the paper on the front, the edges on the side will overlap facing the back which just looks a little nicer. I used to try to cover the top with paper, cutting out around the handle and on the front cutting out around the latch – but that is all too much trouble!  Now I do it the easy way! Just decorate the lid some other way!

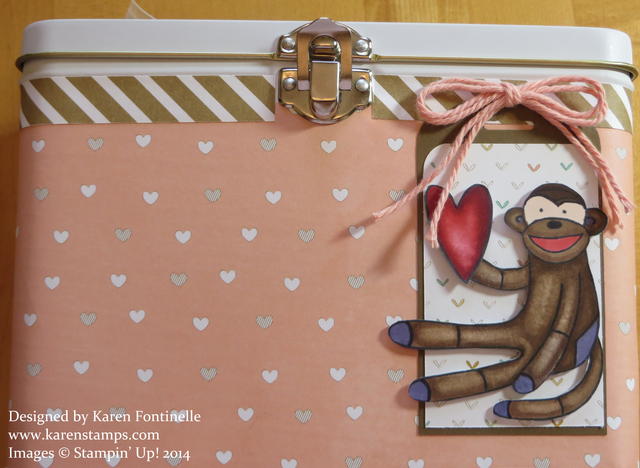
I used my retired Sock Monkey stamp because it sort of matched the expectant mother’s nursery decorations. I even kind of altered the Sock Monkey to color it like the nursery decoration. And I used my new Blendabilities to color him. The tag on the front has a bow made with the Crisp Cantaloupe Thick Baker’s Twine. 

The decoration on top of the tin is from the stamp set Label Love. Just tying some ribbon on to the handle adds a nice touch, like my favorite ribbon, Whisper White 5/8″ Organza Ribbon.

Sock Monkey Baby Memory Tin

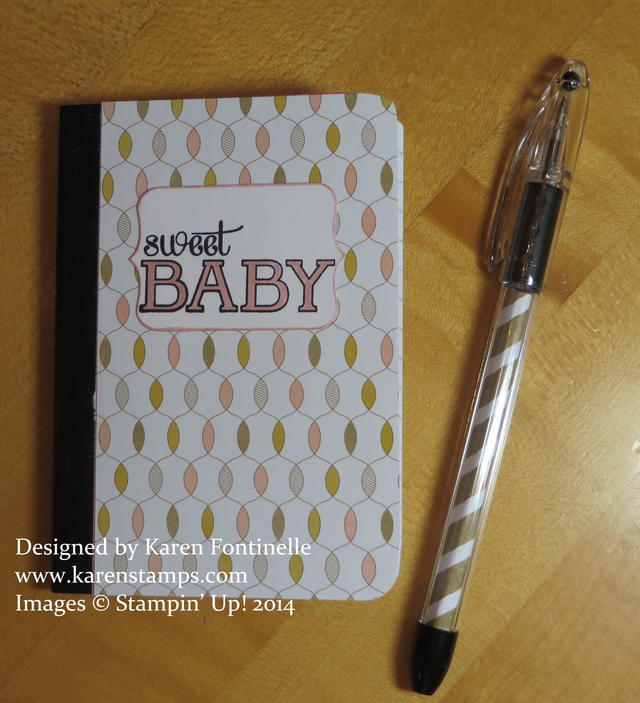
Here’s a photo of the little notebook I covered with designer paper and stamped a little title for Baby, We’ve Grown. The pen is another oldie but goodie:  Use an RSVP pen that has a clear barrel and you unscrew the top part and insert a small rolled up piece of designer paper to show through the barrel.

Altered baby notebook and matching pen

Take advantage of the special offer on designer series papers this month of July, Buy 3 DSP, Get 1 Free. Visit my Stampin’ Up! Online Store 24/7. If you have any trouble, I’m happy to put your order in for you.

Make a Special Baby Shower Gift

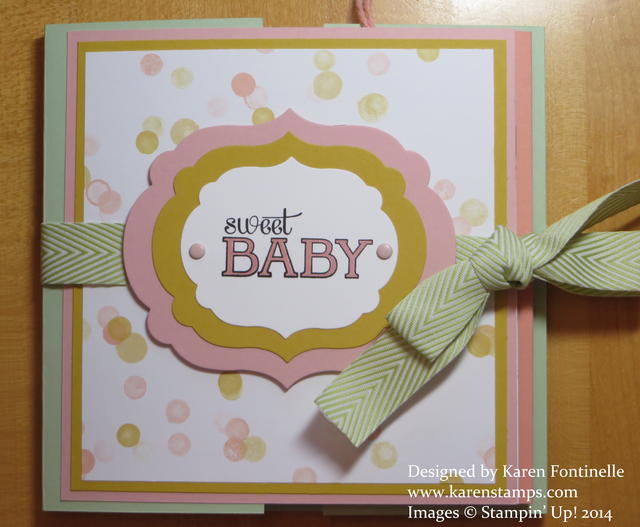
Baby Flip Album Lullaby DSP

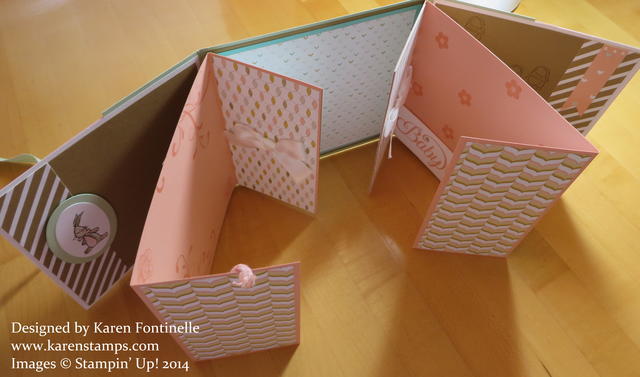
This weekend I was invited to a baby shower so I thought it would be fun to make a baby flip album for the mother-to-be! Hopefully she will get some baby photographs printed out so she can put a few in this mini album. I absolutely LOVE making these albums. Even though they look fantastically complicated when flipping through them, they are basically very easy. The only time-consuming part is in how they are decorated and embellished, and that you can do as detailed and fancy as you want or as simple and plain as you want.

Baby Flip Album Lullaby Pages

You do need 12″ x 12″ card stock for the pages (hmmm, might be interesting to figure out the measurements to make a small version out of regular size paper). I knew I would be working with the Lullaby Designer Series Paper so I just used card stock that coordinated with the colors in the Lullaby paper. Whether you order this paper for a baby project or not, notice that it is just pretty patterned paper – there is nothing that says “baby” on any of the pages. Each paper is just a pretty design so you can use it for any occasion or project. The album is tied together with the Pear Pizzazz Chevron Ribbon.

Baby Flip Album Lullaby Pages

I used the new baby stamp sets in the Stampin’ Up! Catalog plus had a few retired stamp sets in the stack to choose from as I worked. As always, the Big Shot was put to use with several of the framelits and embossing folders!

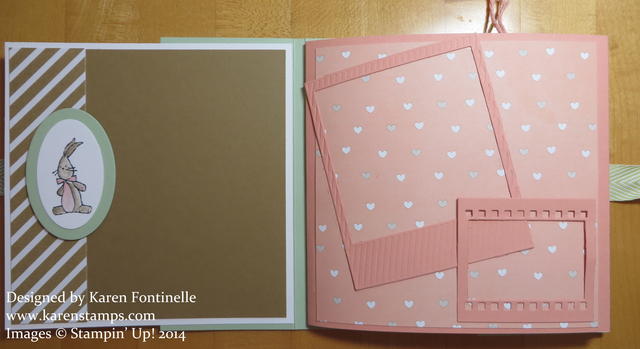
This little bunny is in the Baby, Grown stamp set. The photo frames are cut out with the On Film Framelits Dies.

Baby Flip Album Lullaby Pages

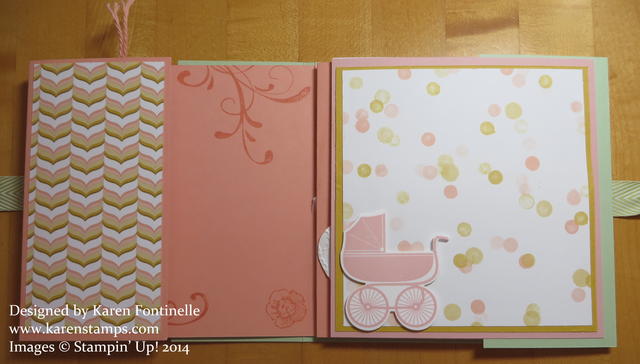
A few stamped flourishes from Everything Eleanor on one page and a baby buggy from the new set with coordinating framelits that you can purchase in a Something for Baby Bundle.

Baby Flip Album Lullaby Pages

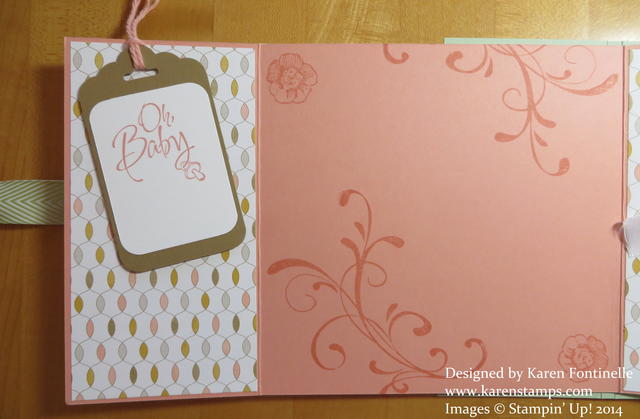
The tag is made with the Tag Topper Scalloped Punch and stamped with the Baby, We’ve Grown stamp set.

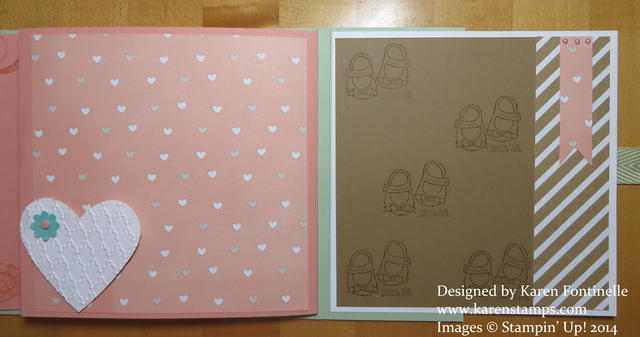
Baby Flip Album Lullaby PagesThis heart is die cut with the Hearts Framelits and then embossed with the Fancy Fan Embossing Folder and has a little Boho Blossoms punched flower with a Candy Dot on it.

Baby Flip Album Lullaby Pages

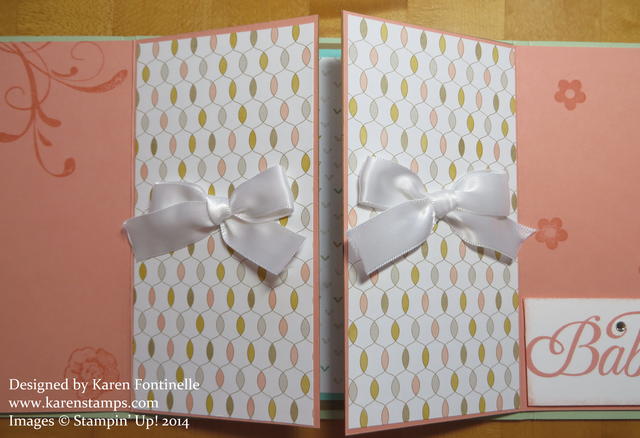
Here I used the new Stampin’ Up! Whisper White 5/8″ Satin Ribbon on the center pages.

Baby Flip Album Lullaby Pages

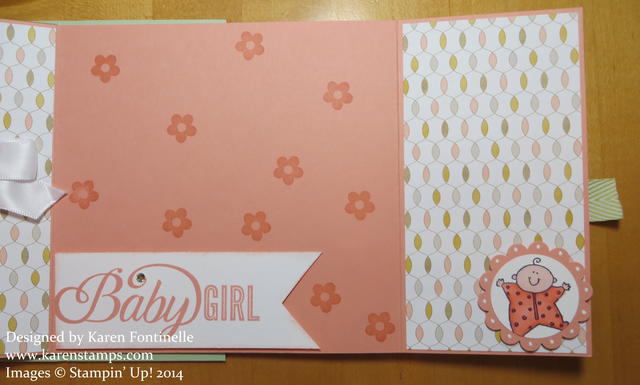
Here is a mix of old and new! The page on the left side is stamped with words from Celebrate Baby and the flower from Something For Baby stamp set. The little baby on the right is from an old retired stamp sets, one of my favorites, called Baby Firsts. I colored her little outfit with Calypso Coral Blendabilities (coming in the next batch of Blendabilities August 1st!).

Baby Flip Album Lullaby Pages

Another stamp and die-cut with the Something For Baby Bundle. I added a little bow with Baker’s Twine and some tiny Pearl Jewels.

It’s so fun to make these flip albums! Even if pictures were never added, they would still be fun to flip the pages back and forth and all different ways! You can make them for any occasion and decorate however you like. Every time I make one I almost hate to give it away!

If you need some 12″x 12″ card stock to make an album like this, just visit my Stampin’ Up! Online Store! Don’t forget about the Buy 3 Get 1 Free Designer Paper Special going on during July!  Great time to stock up on some Lullaby DSP in case you might be making some baby gifts!

Circle Thinlit Makes the Cutest Birthday Card!

Birthday Thinlits Circle Card

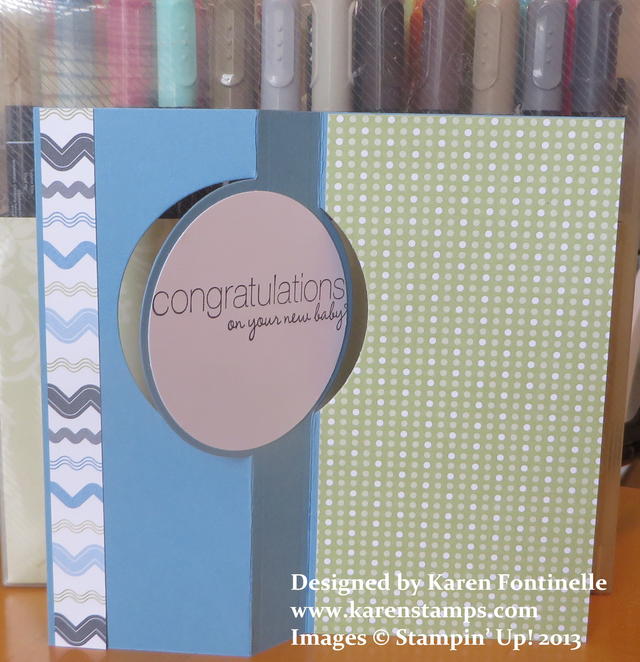
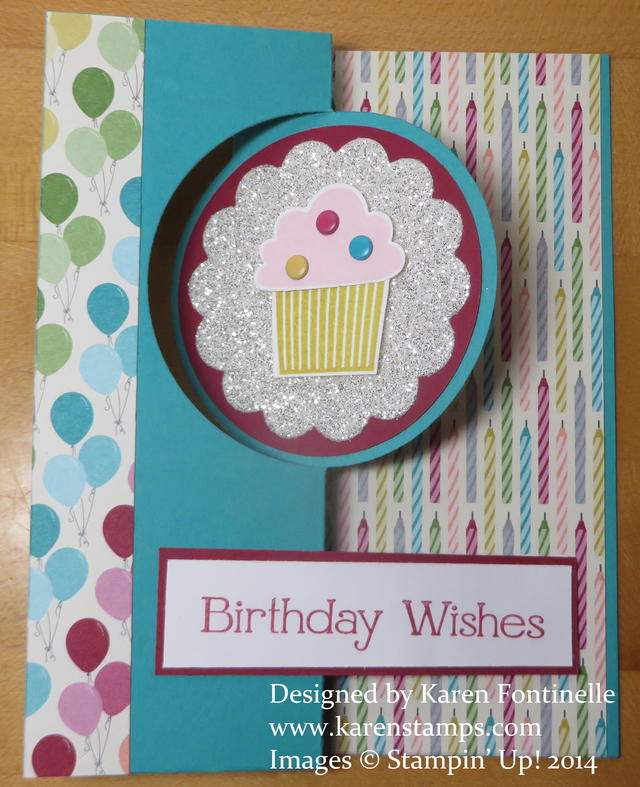
I’ve loved this Circle Card Thinlit Die from the time I got it after the Stampin’ Up! Convention last summer!  That’s where the thinlits dies were introduced! I think it makes the best cards yet is so easy! It just uses a half sheet of card stock for the base and then you can embellish any number of ways!

This is a card I made for our great-niece’s first birthday! She got her first plane ride on her first birthday and spent her first birthday in Texas! We were thrilled we got to meet her and spend her first birthday with her over the weekend all wrapped up in one trip! Of course she had more fun playing with the gift bag and tissue paper than the gift, but that’s fine, that’s how it is supposed to be with little ones!  All they need is the bag or the box the gift came in! She was such a cutie!

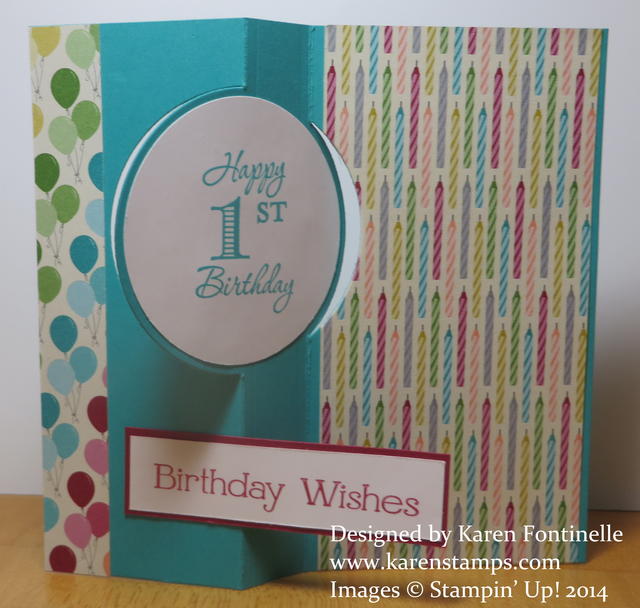
Birthday Thinlits Circle Card Inside

Here is the inside of the card when opened up. I used the Birthday Basics Designer Series Paper which I have always LOVED! I think it is still available as I am writing this, but it is on the Retirement List, so if you want some, you better not procrastinate any longer! The cupcake on the front is stamped with the Create a Cupcake Stamp Setwhich at this moment is available in wood-mount (clear-mount sold out) but is on the Retirement List for Stamps. The stamping is punched out with the Cupcake Punch.  The greeting is stamped on the inside of the circle with the stamp set Memorable Moments. That’s a great set because you can make it say what you want with the choices of stamps!

Don’t forget, if you want any of the Weekly Deals, that ends tonight for this past week!

Check out the Retiring Stamps and Accessories HERE in my Stampin’ Up! Online Store. Some are already sold out and more will be. Even the stamps are only available WHILE SUPPLIES LAST!

Decorating a Baby Gift Bag

Decorating a baby gift bag

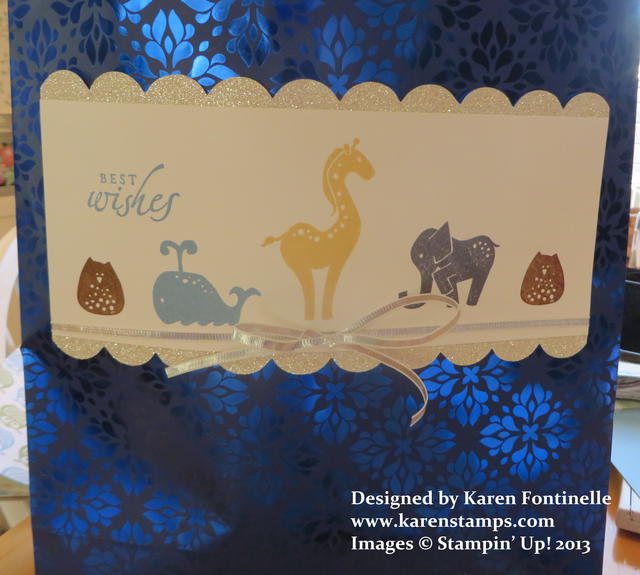
While I had this shiny blue gift bag, it needed something to be appropriate for a baby gift.  I just stamped a panel to put on the front of the bag. The animals are from the retired stamp set “Animal Stories” (do you have it in your stash?). Even the greeting is retired but from one of my all-time favorite, how-can-we-live-without-it stamp sets, “Sincere Salutations”. Of course the panel still needed some jazzing up. I used some pieces of the Silver Glimmer Paper die cut with the  Tasteful Trim Bigz Die for the top and bottom edges and tied some Silver 1/8″ Ribbon in the Holiday Catalog around the panel.

You can do this with any plain gift bags you have.  I like to save the handled gift-bag-type bags you sometimes get at stores or you can buy at the craft store. Then you can use those for gifts after you decorate them!

If you are looking for a similar cute animal stamp set, perfect for baby cards and gifts, try Zoo Babies available in wood- or clear-mount.

Baby Circle Flip Card

Baby Circle Flip Card

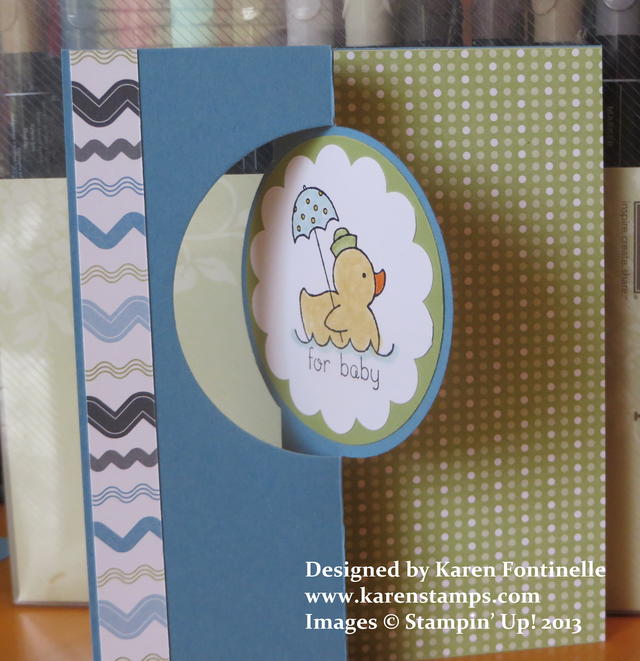
Have I said before that I think you will love the Circle Card Thinlits Die for making cards?  I needed a baby card for a little boy and thought the Thinlits Die would make a cute card! The paper I used is retired (Nursery Nest), but of course you could use any paper of your choice.  The stamp set I used is also retired, unfortunately.  I loved the Easy Events stamp set because it was so versatile for many occasions. I loved the little duck so I had to use it for this card.

The Thinlits Die practically makes the card for you!  Just decide what to put for the focal point on the front of the card in the circle and probably a greeting for the circle on the other side inside the card.  Add a little designer paper if you like or do some stamping on the plain card stock.

Baby Circle Flip Card Inside

If you are game to try the new Thinlits Dies, just contact me or shop online at my Stampin’ Up! Online Store HERE.

Teddy Bear Baby Card on Teddy Bear Day

Teddy Bear Punch Art Baby Card

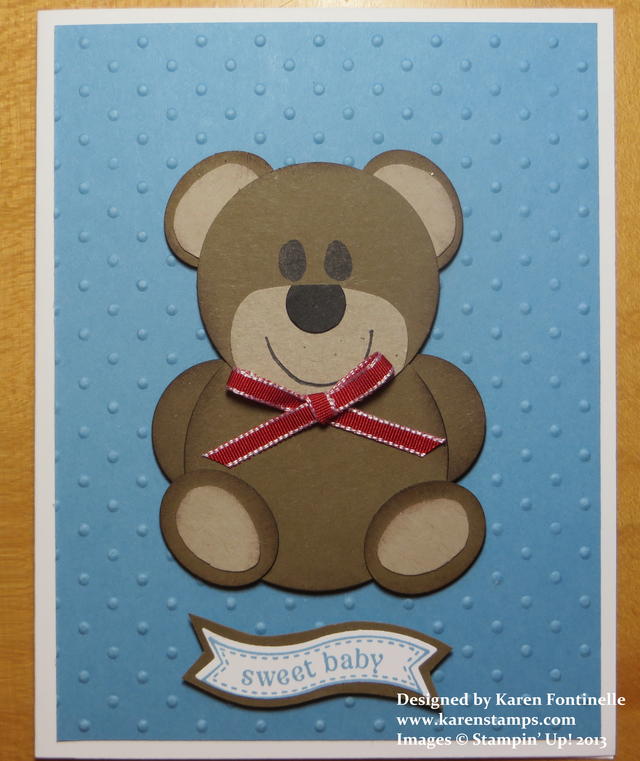
Today is Teddy Bear Day so here is a Teddy Bear punch art baby card. Teddy bears are named after President Theodore “Teddy” Roosevelt.  The name supposedly came after a 1902 hunting expedition where Roosevelt was offered the opportunity to shoot a young bear but refused.  A cartoonist illustrated the incident and the larger bear was later redrawn as a cuddly cub. The whole story became famous and a toymaker brought out a cute stuffed bear and named it “Teddy’s Bear”. The teddy bear, of course, has become a staple with babies and children and even adult collectors.

My teddy bear is made with some punches, but also some hand-cutting was involved! Actually, I also used some of the new Circle Framelits.  It’s good to sponge the edges of the pieces with ink before you assemble so that they stand out more. My bear is made with Soft Suede and Crumb Cake card stock and adhered to a layer of Marina Mist on a Whisper White card base. The Marina Mist is embossed with the popular Perfect Polka Dots Embossing Folder.

Do you have a favorite teddy bear?  Get it out today and celebrate Teddy Bear Day!

Going to Miss the Two Tags Die

One of the many Stampin’ Up! products that I will miss when it retires next week is the Two Tags Die. You can make cards, tags, even little bags and boxes for treats and little gifts. Today I have used my Two Tags Die for two projects as well as two retiring stamp sets, retiring designer paper, and retiring colors, Regal Rose and Baja Breeze.

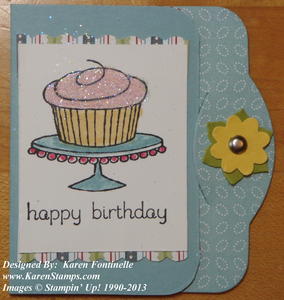
Two Tags Die BirthdayThere are actually two tag shapes on the Two Tags Die.  This one pictured above had a score line so can be folded in half and tucked under the little slit, which the die also makes.  I cut out the Twitterpated Designer Paper at the same time as the card stock so it fit perfectly. I stamped the cupcake image from the retiring Easy Events stamp set (a great set for all-occasions, especially for the beginning stamper!) and colored it in with Stampin’ Write Markers. For a little pizzazz I had to add some Dazzling Diamonds Glitter to the frosting with my 2-Way Glue Pen. And for a little trim above and below the stamped image, I used the versatile Dotted Scallop Ribbon Border Punch with only the scallop edge showing. The little flower on the edge is made with the Boho Blossoms Punch.

Two Tags Die Word Play Card
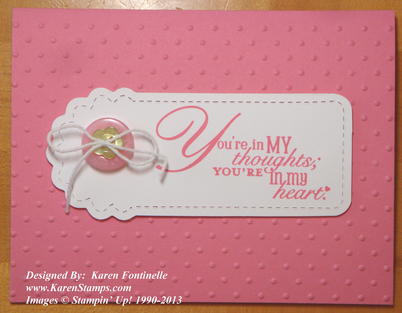
This card I made using the discontinued Regal Rose card stock (admittedly not one of my favorite colors in all these years, but it’s okay) and embossed with the Perfect Polka Dots Folder. The Two Tags Die is stamped with a greeting from the Word Play stamp set (another stamp set I hate to see retire) and decorated with a couple of Subtles Collection Designer Buttons tied with
White Baker’s Twine.  I made a similar card back in this post.

The Two Tags Die is a fun and handy die to own if you also own the Big Shot.  If it is still available, I would add it to your list of must-haves before the retirement period is over.

Remember, the new Stampin’ Up! catalog goes live at Noon Mountain Time on Friday, May 31.  Ordering will be down that morning and the night before so they can make the change to the new catalog.  You will still be able to order from the old catalog until June 3.  The Spring Catalog ends May 31.

Place your order today before time runs out at my Online Store or email me with your order at Karen@KarenStamps.com if you prefer.

.

Using the Stampin’ Up! Owl Punch for a Baby Card

Owl Punch Baby Boy Card

The Stampin’ Up! Owl Builder Punch can be used for way more than owls! If you need to make a baby card, just get out your Owl Punch and get to work.

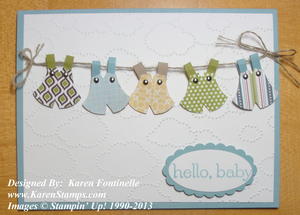
On this card, I made cute little baby clothes hanging on the clothesline with the Owl Punch. Use the piece that would be the front part of the owl. Then make a little triangle snip in the bottom with your Paper Snips to make the piece look like legs. Add some thin strips of card stock for the outfit straps (or pieces of ribbon) and secure with Mini Brads. Thread some Linen Thread through the outfits to “hang” on the clothesline. Adhere the outfit to the card using Stampin’ Dimensionals.

For the background, I used the Cloudy Day Embossing Folder and Big Shot Die-Cutting Machine to make it look like the sky.  The greeting is from Sweet Essentials stamp set.

If you don’t already own the Stampin’ Up! Owl Punch, you’ll want to add it to your order! You can order online at any time at my Stampin’ Up! Online Store here.  Big discounts on some retiring products right now!