Monthly Archives: January 2015

It Doesn’t Have to Be a Card

Love Is Kindness Stamp

I’ve been watching the live streaming Stampin’ Up! provided for us demonstrators at home and not in Orlando during the Stampin’ Up! Leadership Conference 2015. I have to say, it’s been ALMOST as good as being there, and I really appreciate that they did that.  There really aren’t too many things more fun than attending any Stampin’ Up! event! And getting to watch the General Sessions on my home computer has been great!!

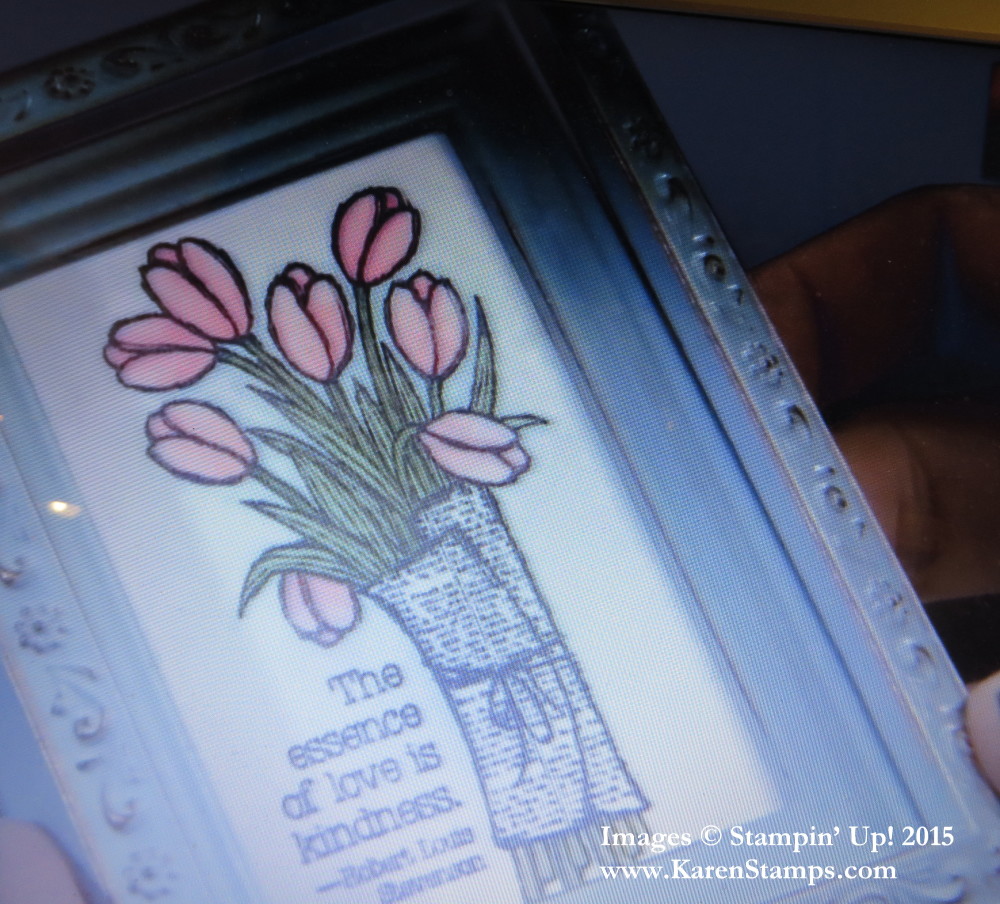
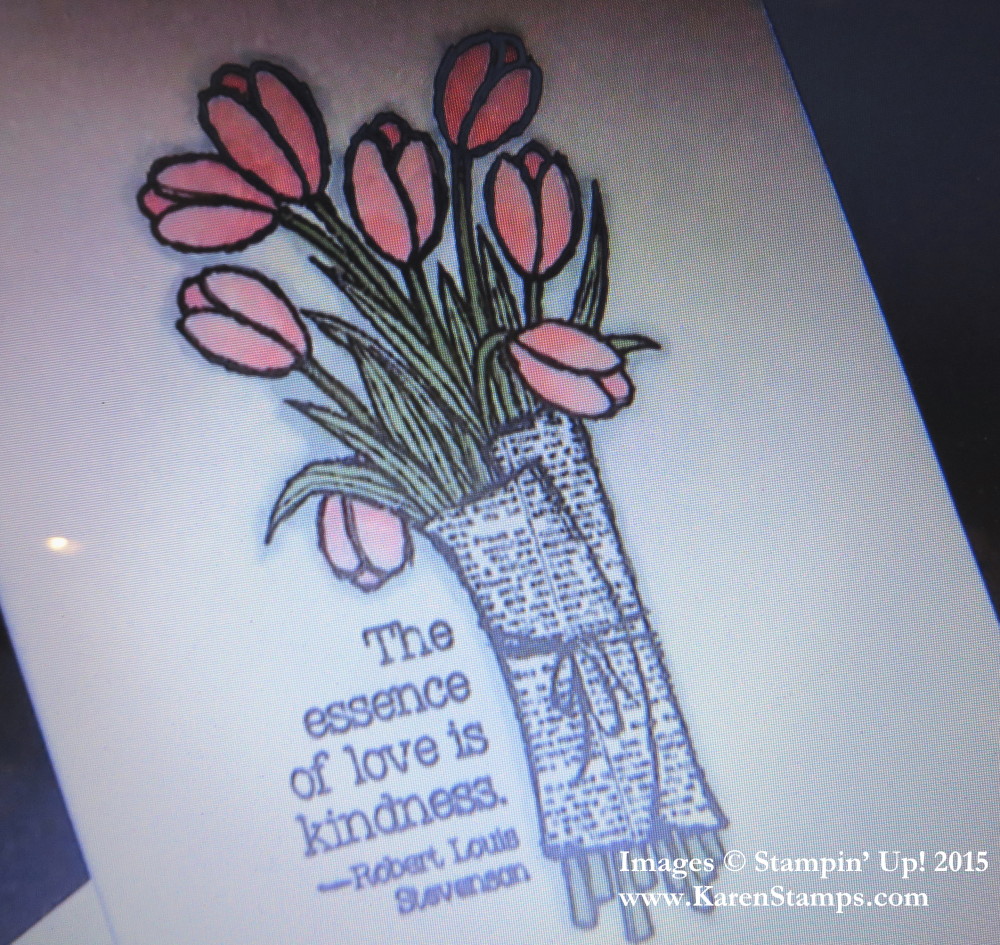
Last night they had several different people on stage doing numerous stamping projects!  So many ideas and so many good tips! It’s always amazing! Here is the Love Is Kindness stamp from the Occasions Catalog, a single stamp. The presenter, Alisa, talking about ink, stamped this with Memento Ink and colored in with Blendabilities. She used lighter and darker shades of (perhaps) the new Pink Pirouette on the flowers, Wild Wasabi on the leaves and a little bit of Soft Sky as shading around the outside of the image. If those aren’t the correct colors she used, they certainly could be!

The photo isn’t great because I took it of my laptop screen, but you get the idea! But she didn’t make this into a card – she framed it! Isn’t that just beautiful and so simple! So we don’t always have to make a card with our stamping.  Try framing a few things as gifts or home decor for yourself!

Love Is Kindness Framed

Look through your Occasions Catalog again and see what you missed the first or second time around!  And if you need an Occasions Catalog, just send me an email at Karen@KarenStamps.com.

To order any supplies you need, either contact me or just shop at your convenience at my Stampin’ Up! Online Store!

Want To Make a Valentine Treat Bag?

Valentine Treat Bag

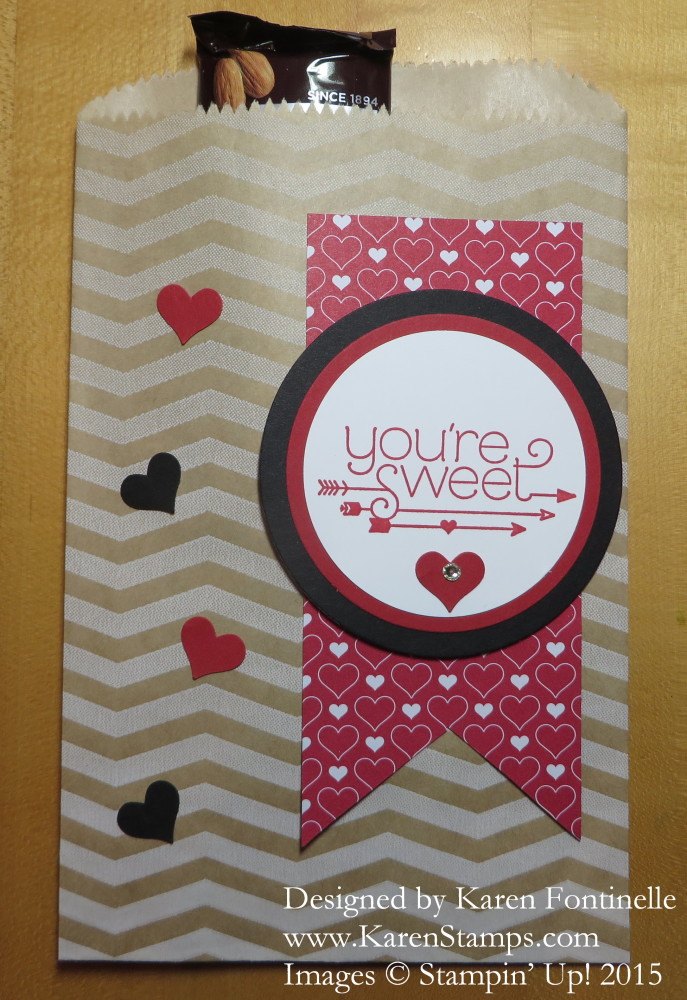
Want to make a quick and easy Valentine treat bag? Just grab a Chevron Tag a Bag Gift Bag and decorate for Valentine’s Day! These bags are a nice size for plenty of treats or perhaps even big enough to enclose a small gift.

To embellish this gift bag, I found a pattern in the Stacked With Love Designer Series Paper Stack that I liked and cut the little tail at the end like a banner. I also used the You Plus Me Stamp Set.  You can purchase the paper stack and the stamp set together in a Bundle and save 15%! I stamped the greeting from the You Plus Me Stamp Set and punched with the 2 1/2″ Circle Punch. That is layered on circles cut from the Circles Collection Framelits Dies. Extra little hearts were punched with the heart punch in the Itty Bitty Accents Punch Pack.

So easy! You could even fold down the top for a flap and tie with a piece of ribbon or staple the top. The bag is large enough you could even enclose a valentine card inside!

If you need any of these supplies (the Chevron Gift Bags are really good to have on hand!) please visit my Stampin’ Up! Online Store!  I’m always happy to put your order in for you with a credit card or other payment. Shipping usually does not take very long so you do have plenty of time to receive your order and start making valentines and valentine treat bags before Valentine’s Day!

Wood You Be Mine Valentine Card

Wood You Be Mine Valentine Card

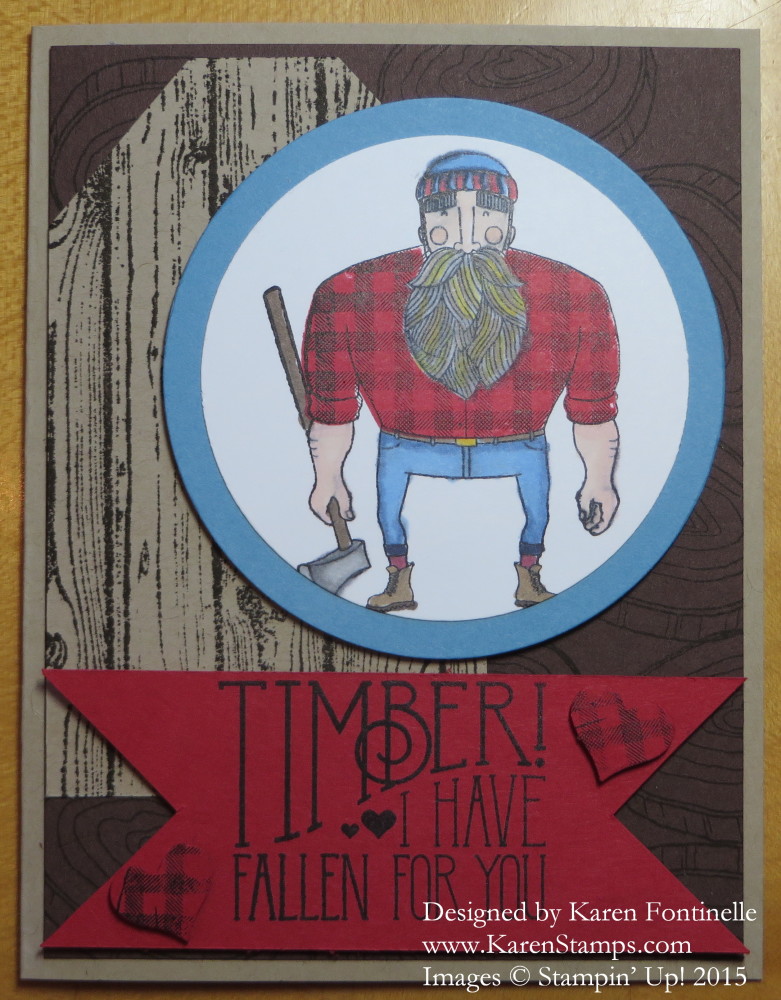
Maybe I AM going to like this Wood You Be Mine Stamp Set! It will be great for making masculine valentine cards or really valentines for anyone.  This is the stamp set I WON during Prize Patrol during the unveiling of the Occasions Catalog that Stampin’ Up! held in a livestream to various movie theaters around the country.  I was watching it at home and I still won!! I hadn’t played around with it yet, for some reason, so today was the day! Once I stamped the guy and overstamped his shirt with Real Red to make it plaid, I loved it! Since you can see through the photopolymer stamp you can easily eyeball the stamping of the color of the shirt. The greeting is from the stamp set as well as the wood slices stamped on the background Early Espresso. I did use the Hardwood Stamp to stamp on Crumb Cake to look like a piece of wood or fence post.  The woodman and the Marina Mist circle are cut out with the Circle Collection Framelits Dies.

*** Here’s a bonus tip I thought of!  I was playing around with some punched out hearts with the Itty Bitty Accents Punch Pack and couldn’t quite decide how to place them or if I should put them on the card at all.  THEN I thought of putting them on the plaid shirt part of the inked up woodman stamp to get that plaid look to the hearts!  And then they seemed to work!  Loved it!

Go get your Wood You Be Mine Photopolymer Stamp Set at my Stampin’ Up! Online Store HERE and make some valentines!

Class Valentines for Girls & Weekly Deals

Two Hearts 3 x 3 Valentine

It’s about time to start thinking about class valentines for school parties! Over the weekend I had two moms come over and get an early start on valentines for their three school classes. Since I knew we would be making LOTS of valentines, I needed to keep them simple and doable. That meant we probably wanted to punch rather than crank the Big Shot fifty times, make sure I had enough supplies for that many valentines, and basically keep them fairly simple to make and remember that it would be little children receiving these who weren’t going to care how creative we were, who might only barely look at them before tossing aside.  YET we were making them and enjoying doing that so we didn’t mind putting in a little work!

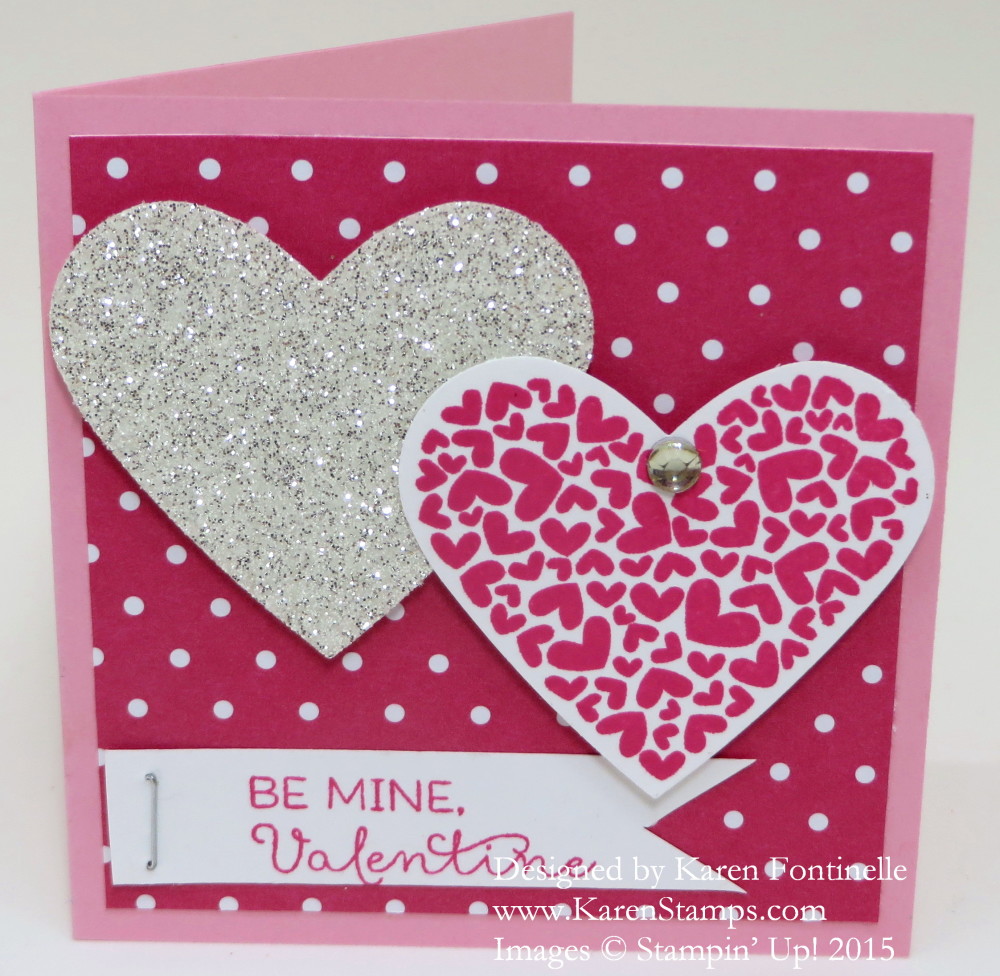
I knew Elsie liked pink and would want some bling and shine on her valentines for her all-girl 2nd grade class! I had some retired Pretty in Pink 3″ x 3″ notecards in my old stash so that saved cutting and scoring and were just the right size. Melon Mambo is a color that goes with Pretty in Pink so I made the layer from Melon Mambo paper in the Brights Backgrounds Designer Series Paper Stack.  The hearts are punched with the retired Heart Punch. One is made from the Silver Glimmer Paper and the other heart is stamped with a retired stamp set P.S. I Love You. The greeting is stamped on a little 1/2″ wide banner from a stamp in the January Paper Pumpkin Kit! The little staple from the Stampin’ Up! Handheld Stapler adds a cute little touch. And for some bling, we added a little Rhinestone Jewel to the heart. The hearts are popped up on Stampin’ Dimensionals.  The inside of the card is stamped with the “You’re the Best” stamp in the Just Sayin’ Stamp Set  that Elsie chose herself to use.

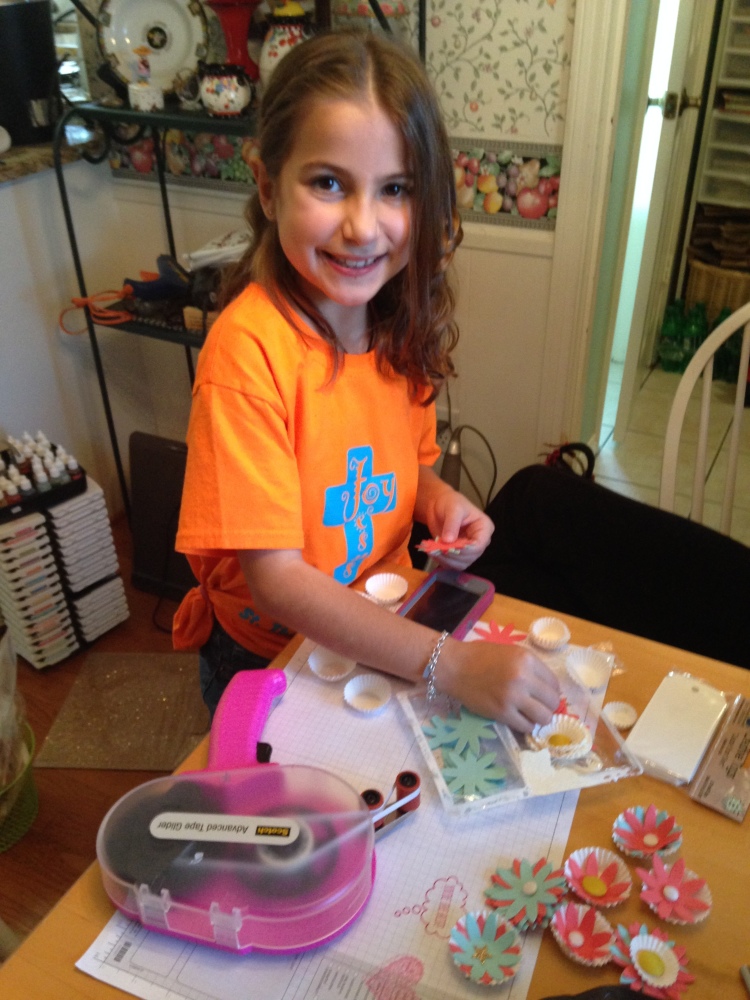
After the valentines, Elsie wanted to play (not with toys but with stamps!), and I had already spotted this past kit that I thought she might have fun with. In just a few minutes she had a whole bunch of flowers made! I have no doubt she can now use these flowers to embellish some other projects at home! She also made the popular rubber band bracelets for everyone in her class to give out with her valentines! Elsie is quite the stamper even at her young age.  She knew exactly what she was doing when she was helping us with the valentines, and I loved having a child’s touch to all the valentines for herself, her brother Wyatt, and her friend Carl. Isn’t she the cutest thing?!

Elsie

Don’t we all have the best memories of elementary class valentine parties, of decorating the shoe box or the bag, cutting hearts out of construction paper, using doiles, maybe even some glitter and glue?! I think I remember having a kit to assemble my own valentines rather than the typical store-bought valentines. So maybe it has all come full circle!

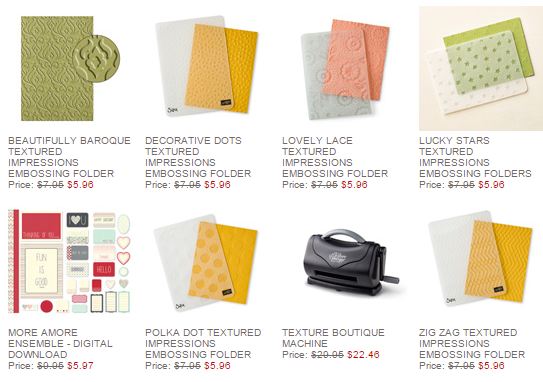
Here are the new Stampin’ Up! Weekly Deals for January 27 – February 2. If you like embossing with the Big Shot or the Texture Boutique, you will LOVE these deals!  Stock up on some embossing folders! The Texture Boutique is way less expensive than the Big Shot, but remember, you can only emboss with it. To do more, get the Big Shot, some paper, some embossing folders, whatever you like to total $150. Then get $25 in Hostess Dollars to spend on anything, plus 3 Sale-A-Bration items FREE!

Stampin' Up! Weekly Deal Jan 27 2015

Click to Shop!

Making Class Valentines

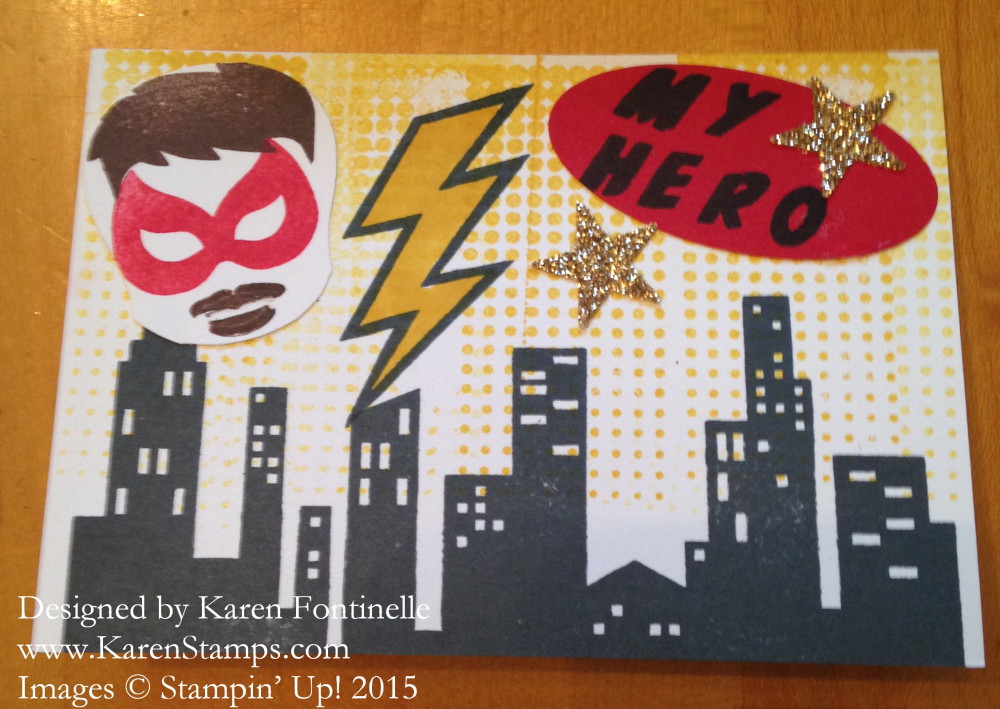
My Hero ValentineThis weekend I had the pleasure of having two moms come over to make class valentines for their three children’s classes. One daughter came along to help make the valentines for her class and her brother’s and the other mom brought her teenage goddaughter along to help out. We all had so much fun! That’s what happens when you stamp with nice people!

I designed the superhero valentine in the photo above using the Calling All Heroes Photopolymer Stamp Set, and we made fifty of these for the boys to give out to their classes. You can easily make female superheroes as well with this set if you want. I found some retired small notecards to use that were just the right size so that saved time cutting and scoring paper. There were quite a few steps involved but we didn’t mind the time because it’s what we enjoy doing.

We made quicker work of cutting out the faces by punching them out with the Stampin’ Up! Owl Punch. Just trim off the owl feet from the top of the superhero’s head and round off the chin area which was the top of the owl! You can do it before or after stamping, depending on what works for you. With the photopolymer stamps, you might be able to combine the hair and the mouth on one block and stamp once and then add in the mask.

Tomorrow I will show you the “girl” valentine! So pretty!

Don’t forget, today is the last day for the current Stampin’ Up! Weekly Deals!  Order before midnight MT tonight if you want any of these products.  Remember, with a $50 purchase you also choose a FREE Sale-A-Bration product. Note the Skin Tone Blendabilities Markers on sale!  

Just shop at my Stampin’ Up! Online Store!
Stampin' Up! Weekly Deal Jan 20 2015


Chocolate Inspiration Card

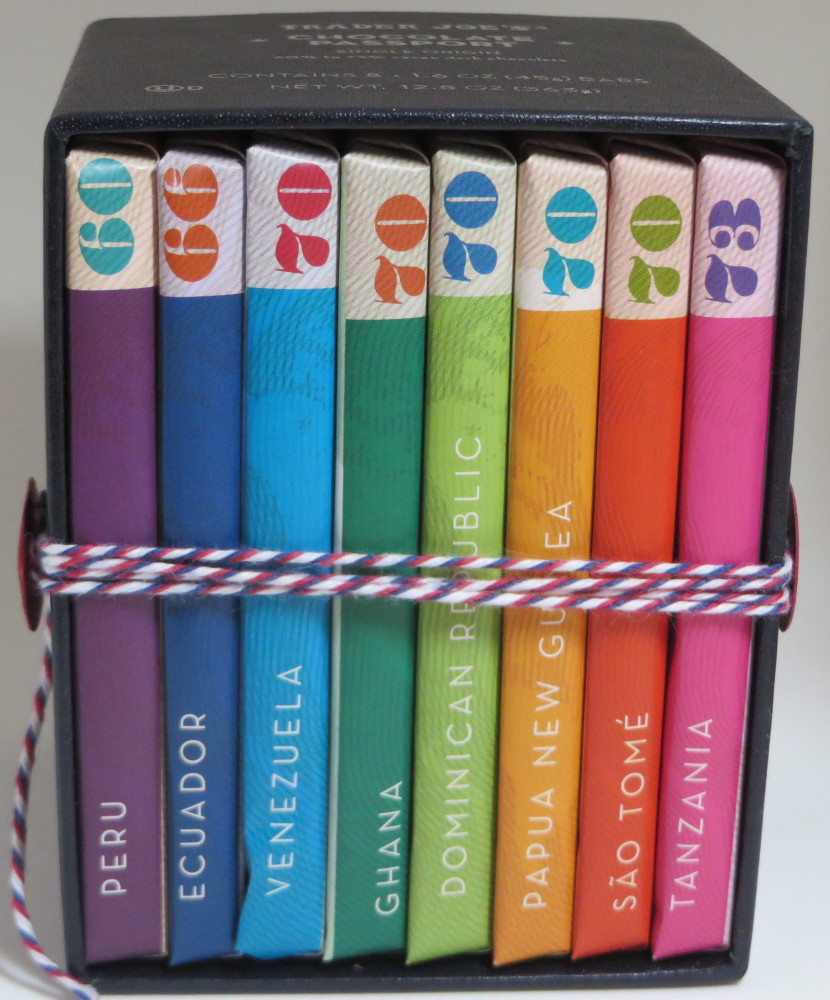
Chocolate Box

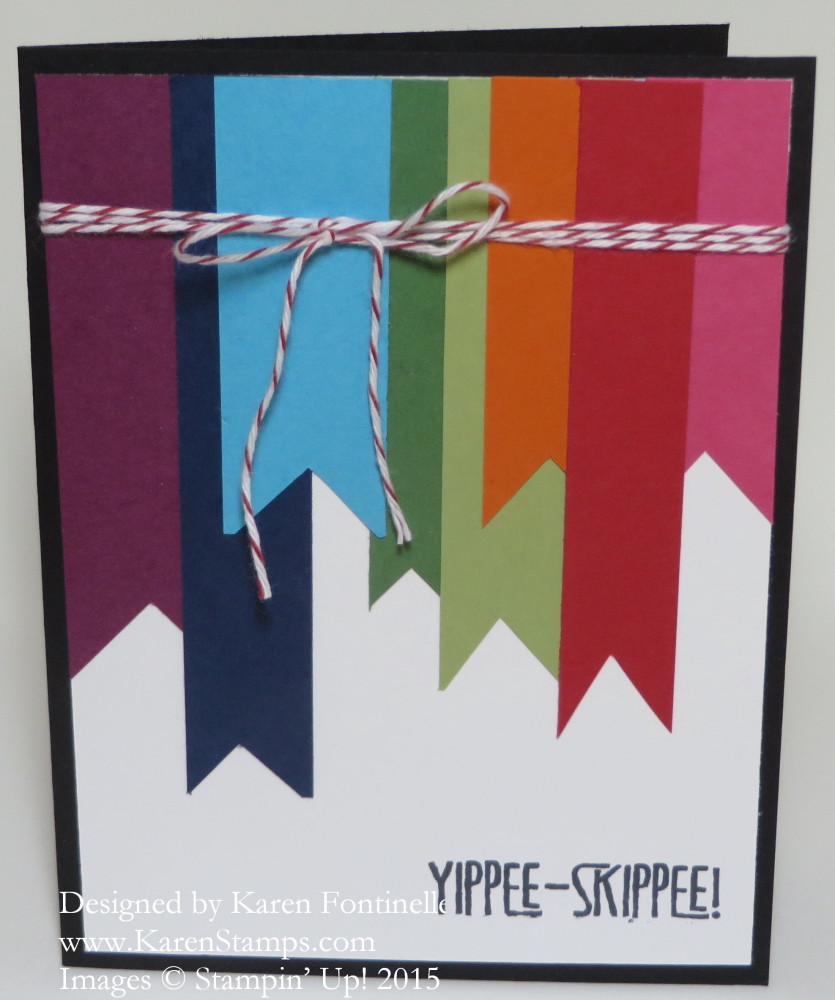
How about some chocolate inspiration for a card?  My daughter gave me this box of chocolates for Christmas (I know, you can’t believe I haven’t eaten it all by now!) but it is almost too cute to eat! At least it is so colorful that I enjoy looking at it on the counter. The other day I thought, those colors would make a good card! So this is my chocolate inspiration card below:

Chocolate Inspiration Card

I just matched up some colors of card stock to the wrappers in the candy box.  They didn’t have to be perfect but I was going for the look. I wanted to stamp just a fun greeting at the bottom, so I chose “Yippee-Skippee!” from the Yippee-Skippee Stamp Set. Just imagine the different greetings you could put on this same card!

I thought the top portion needed a little something, and then I noticed the candy box had some multi-colored twine wrapped around it! That was perfect! I just grabbed some Cherry Cobbler Baker’s Twine and wrapped it around. I like it!

So you never know where your inspiration can come from!  It can come from anywhere, not just a card website or magazine or something only stamping related. It might be a canned goods label in your pantry, a pillow at the store, a dress or scarf in a magazine, a map in an atlas – anything!

Don’t forget to take advantage of Sale-A-Bration so you’ll have even more stamps and supplies with which to make your gorgeous creations when inspiration strikes! Just purchase $50 in Stampin’ Up! products and choose a free Sale-A-Bration item FREE!

Easy Red, Black and White Valentine Card

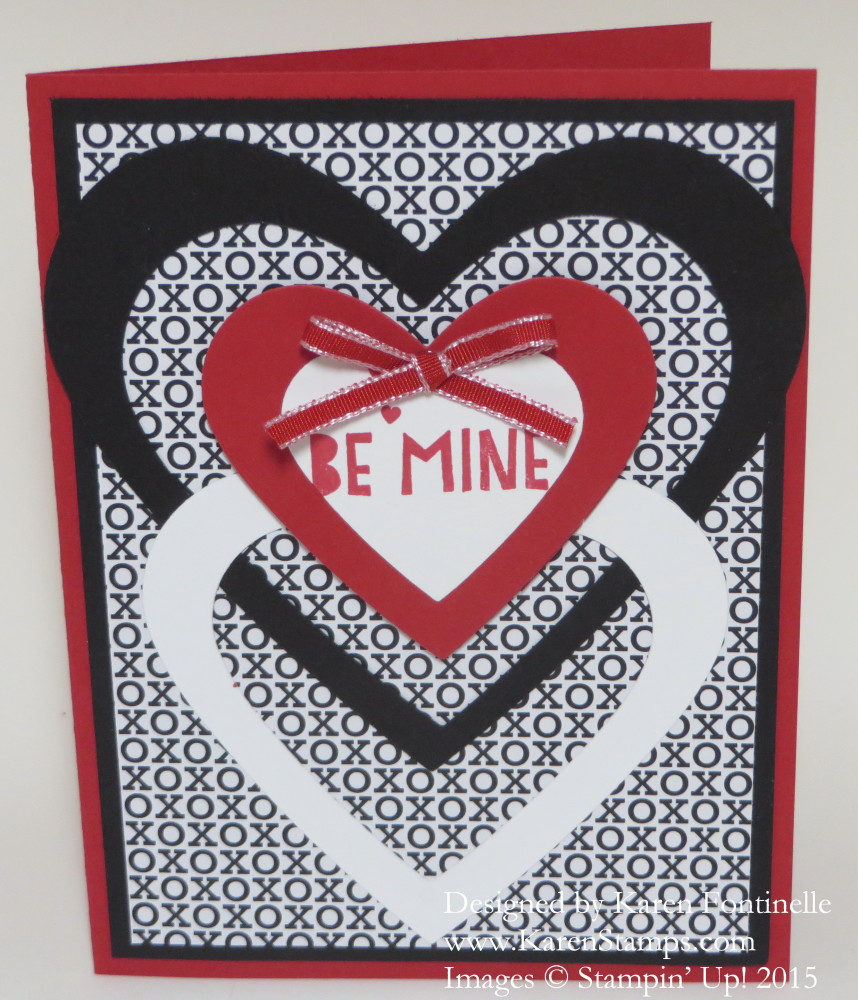
Easy Red, Black and White Valentine Card

Since I’ve been talking about using up scraps recently, I had to show you this card I made in minutes from a few extra pieces I found on my table. They turned into my easy red, white and black Valentine card! Some other day when I was cutting out hearts with the Hearts Collection Framelit Dies I just saved these scraps. This card began when I just paged through the Stacked with Love Designer Series Paper Stack and chose this paper with the x’s and o’s. I was debating exactly what to put on the front when I remembered these spare hearts and things over at the corner of the table. When I found them it was easy just placing them on the card and feeling satisfied with my creation. Then I just added a little bow with the Real Red 1/8″ Taffeta Ribbon. The greeting is stamped with the You Plus Me Stamp SetI suggest the Bundle of Stacked with Love Paper Stack and the stamp set and save 15%!

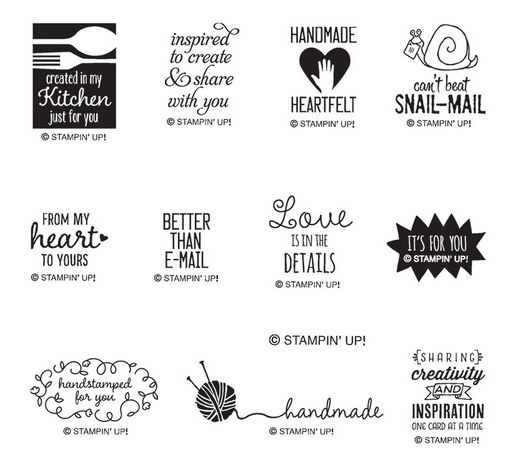
Don’t forget the new stamp set, Better Than E-mail Photopolymer Stamp Set! If you are making and selling cards, even if you are not a Demonstrator, you must add the Stampin’ Up! copyright stamp to your cards or any Stampin’ Up! images you are selling per the Angel Policy. Even if you are just making cards, I think these are great to stamp on the back just like the big card companies! Then sign or initial your card and put the date if you like.

Better Than Email Stamp Set

These can be ordered in my Stampin’ Up! Online Store!  And with a $50 purchase you can choose a FREE product during Stampin’ Up! Sale-A-Bration!

Make a Card From Scraps

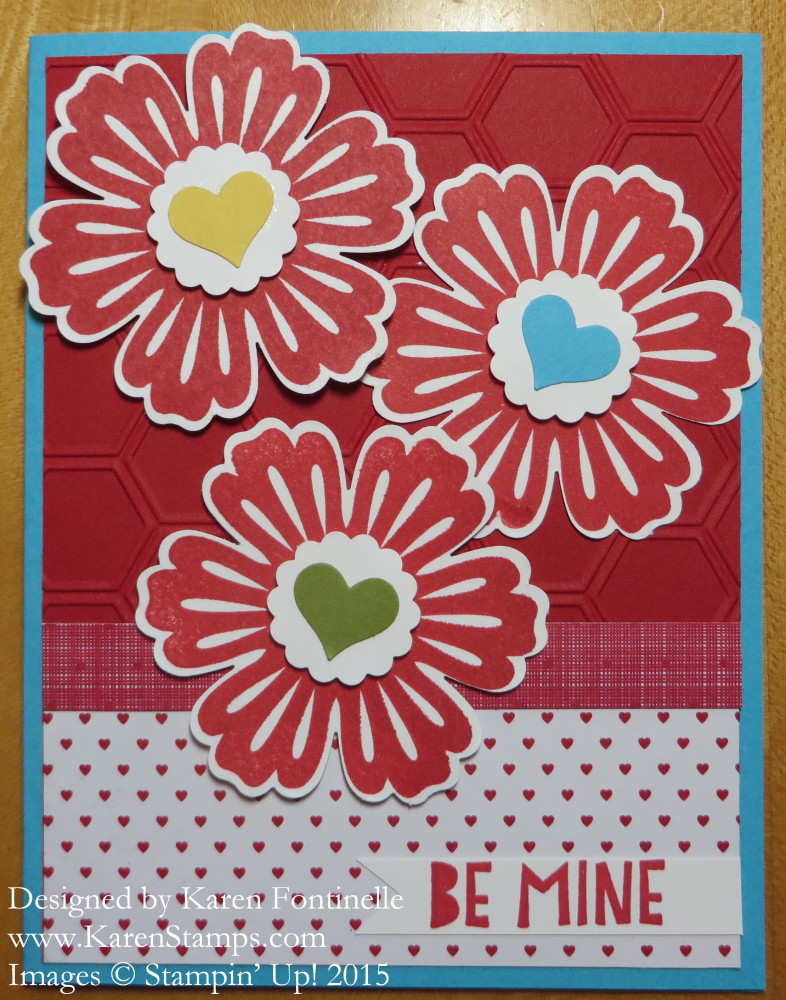
Make a Card Out of ScrapsOver the weekend, I found a plastic bag full of paper scraps, and I made this Valentine card mostly out of those scraps! My “system” is to shove scrap pieces into the card stock package, but these must have been some that were just loose for a long time and finally got collected into one bag when I HAD to clean up. Some of the colors were even retired! These Mixed Bunch stamps were already stamped on some scraps so I punched those out with the Blossom Punch. For the flower centers, I copied an idea I saw on Pinterest, making centers from little hearts! I used the heart punch in the Itty Bitty Accents Punch Pack and the 7/8″ Circle Scallop Punch.  The Honeycomb Embossing Folder was also in the bag of scraps so I used that as my background layer on a card base of Tempting Turquoise since the weather has warmed up and the sun has come out.  I thought we needed a bright card! The designer paper on the card is from the Stacked with Love Paper Stack in the Occasions Catalog. The greeting is stamped with the You Plus Me Stamp Set. There is also a bundle if you like that paper and stamp set, the You Plus Me Bundle.

Find some scraps that you have and make an effort to use them in a card or other project today!

Weekly Deals

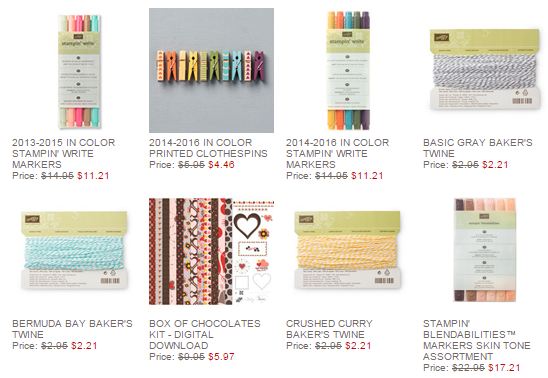
Here are the new Stampin’ Up! Weekly Deals for January 20 -26, 2015!  If you need markers or baker’s twine you are in luck this week!

Stampin' Up! Weekly Deal Jan 20 2015


Find all these good products in my Stampin’ Up! Online Store HERE! 

Make a Heart Garland for Valentine’s Day

Heart Garland Hanging

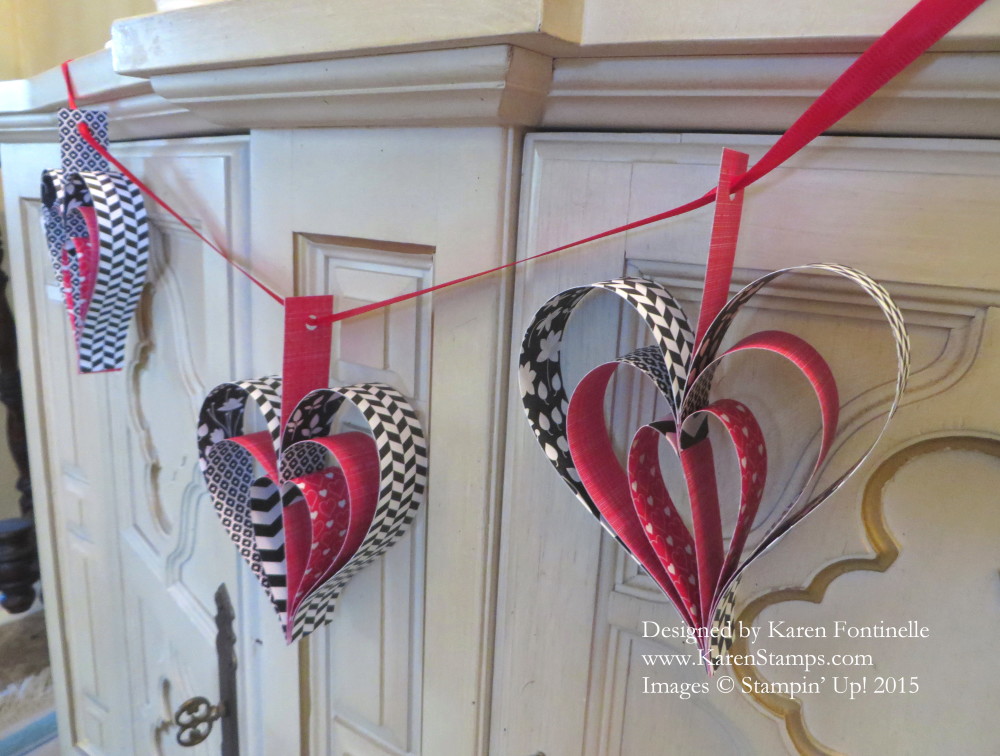
These heart garlands made with strips of paper are quite popular on the internet. Once I found one of these hearts, I found them everywhere! I wanted to use the Stacked with Love Designer Series Paper Stack but I also needed 8″ long strips. Luckily Stampin’ Up! has the Back To Black Designer Series Paper that I could use with the Stacked with Love papers.

There are some other methods of assembling them, but they are all easy to do. While we think of hearts for Valentine’s Day, this garland could be made for weddings or party decorations. Change the paper color and design for other occasions. Think how cute this would be for a baby shower or bridal shower!

Heart Garland One Heart

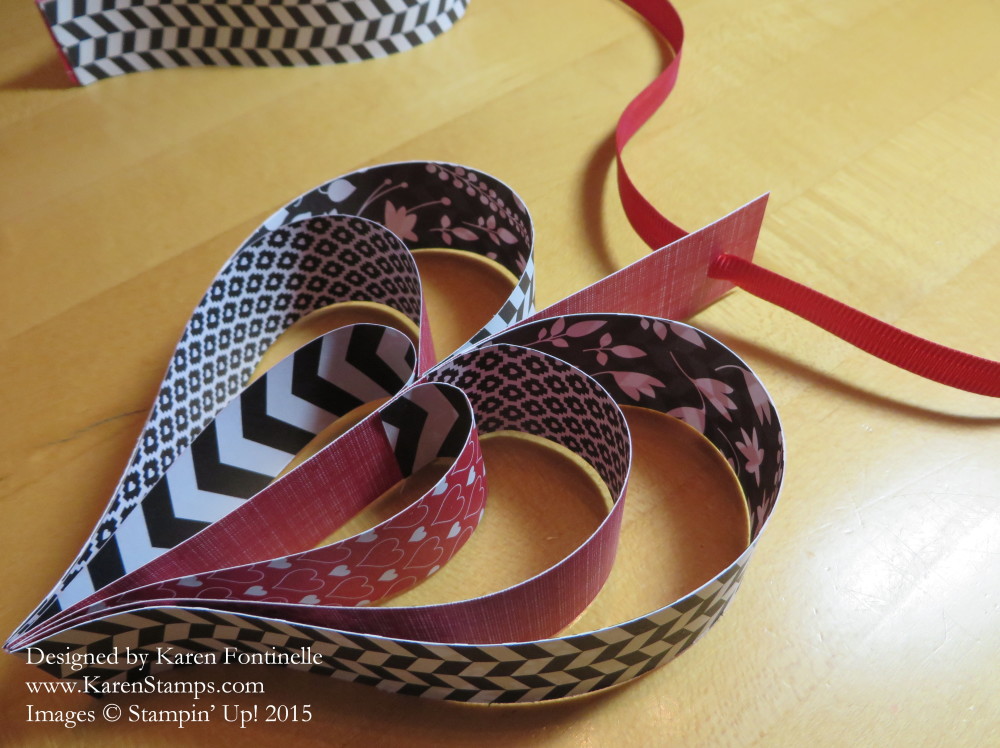
These are the instructions I followed to make these paper hearts. You can also find slightly different

directions using staples instead of glue and assembling the strips in a different way.

Cut 1″ wide strips of paper in these sizes:

2 – 8″ strips

3 – 6″ strips

2 – 4″ strips

Lay these strips out on the table in this order:

8″, 6″, 4″, 6″, 4″, 6″, 8″

The 6″ strip in the center is the center strip that will remain straight and become the hanger. Checking the way you want your paper patterns to go, adhere the bottom edges of the three strips on one side of the center 6″ strip. One time I used Glue Dots and the other hearts I used Liquid Multipurpose Glue (the green glue!). You just have to hold for a few seconds when you use the glue until it sticks. Glue this stack of strips to the center 6″ strip also at the bottom.

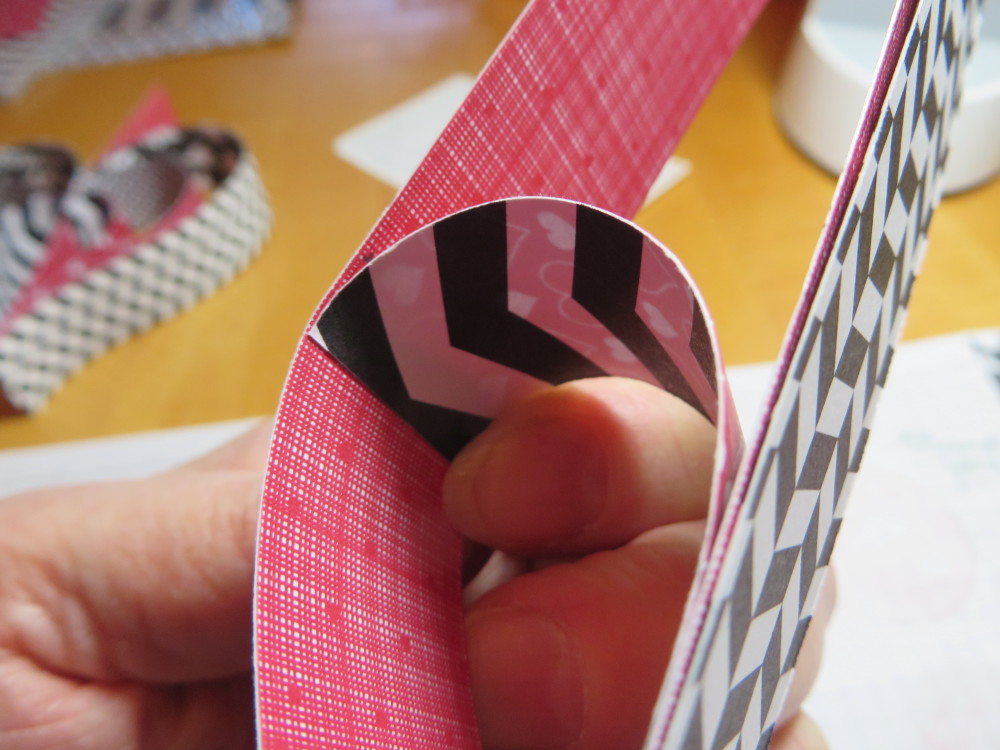
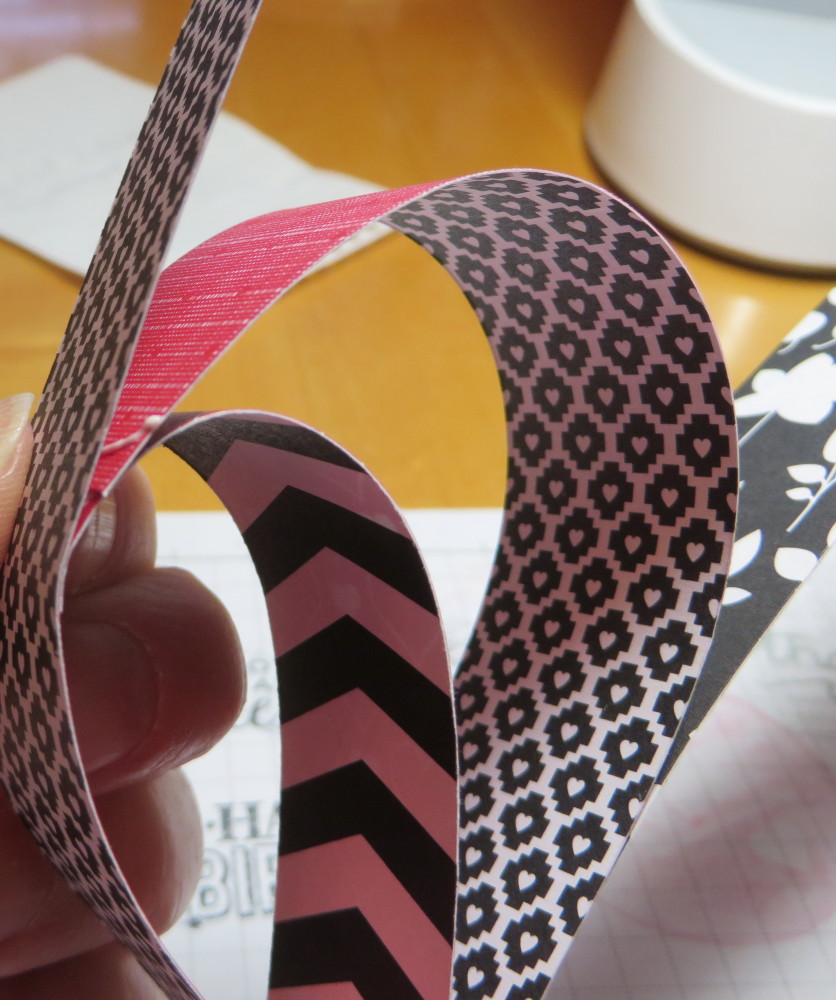
Then take the 4″ strip in the glued together stack, bend the top, put some glue on the end that will attach to the middle area of the center 6″ strip.

Heart Garland Strips Glueing

Next do the same with the 6″ strip.

Heart Garland Strips Glueing2

And finally the last 8″ strip.  Then you have half of your heart.  Do the same with the strips for the other side.

Punch a hole in the top of that center 6″ strip for each heart to thread ribbon through to hand. I used the Real Red 3/8″ Satin Woven Ribbon that was in the Holiday Catalog. I wish they had carried that over because it is SO pretty! But you can also use the Real Red 1/4″ Cotton Ribbon or any ribbon of your choice. You might even want to tie extra ribbons on between the hearts or add other decorations of some kind.

This is an easy papercraft to make and certainly is versatile for many occasions! All you need are paper strips and adhesive!

For any papercrafting supplies or stamping supplies you need, please visit my Stampin’ Up! Online Store. I can always put your order in for you if you like. During Sale-A-Bration, choose a FREE product from the Sale-A-Bration Brochure with every $50 purchase (before shipping and tax).

Make a Pretty Love Card

Pretty Love Card

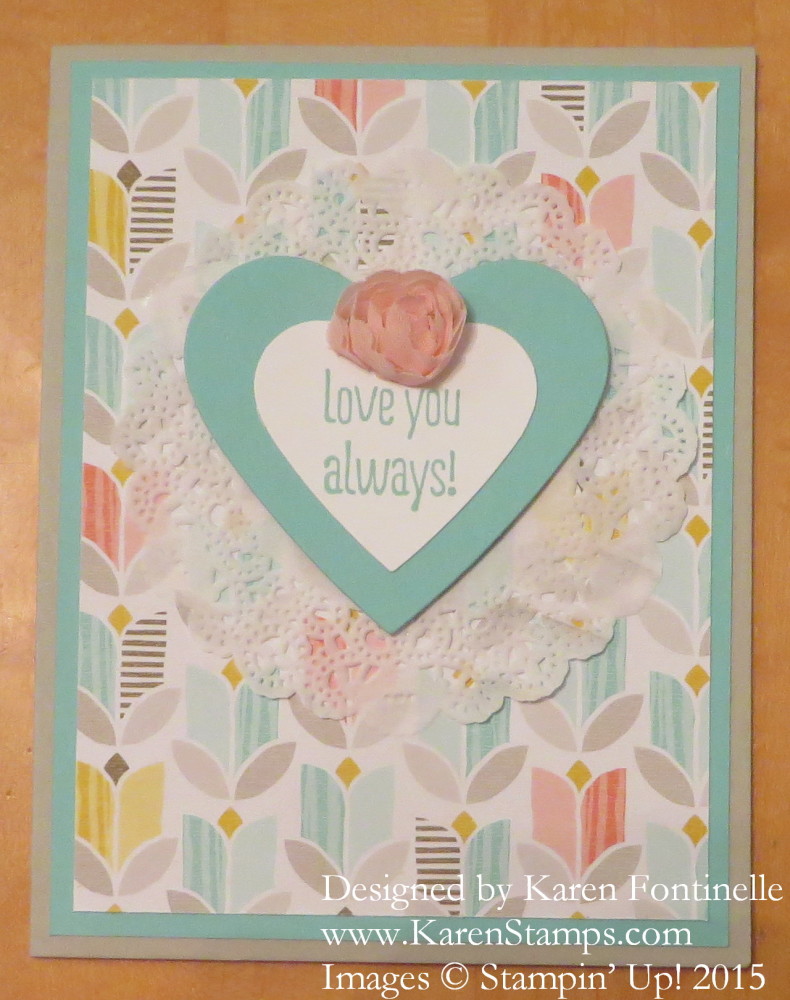
Make a pretty love card or Valentine or whatever nice occasion card you want to call it with a simple heart and embellishment on some pretty background paper.  This paper, layered on Coastal Cabana on a Sahara Sand card base, is one that you can earn FREE during Sale-A-Bration going on now through the end of March.  The paper is called Best Year Ever Designer Series Paper #138633 and you can find it on page 4 of the Sale-A-Bration Brochure HERE. With just a $50 purchase of any current Stampin’ Up! merchandise you can choose any of the free items in the brochure. No limits! You can choose from ribbon and buttons to paper to stamp sets to Project Life by Stampin’ Up! to EVEN Blendabilties Markers on page 20!

As I was cutting and working with this pattern from the Best Year Ever DSP I really noticed how pretty it was! Such soft pretty colors designed into tulip or flower shapes! I didn’t want to detract too much from the paper so I kept the hearts simple and stamped a small size greeting from the Something To Say Stamp Set in the Annual Catalog, page 104.

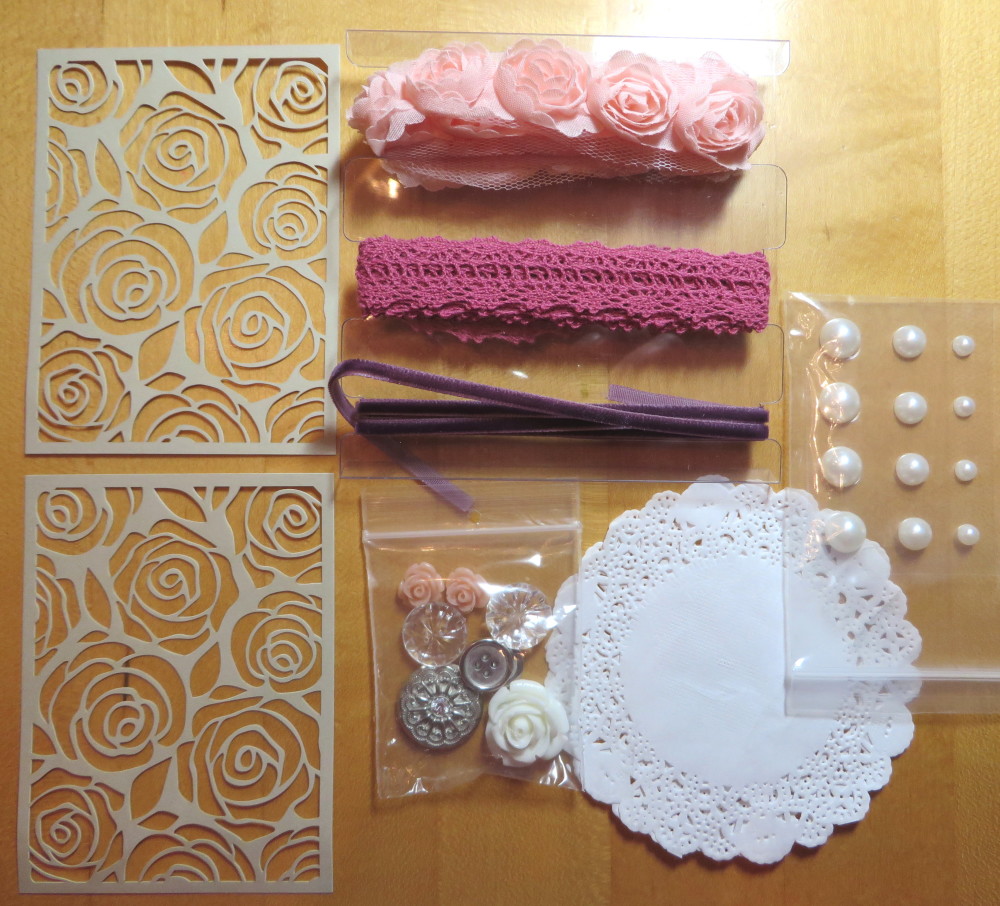
Of course I had to add some kind of embellishment, so I decided to get out the Artisan Embellishment Kit in the Occasions Catalog. I decided to use one of the doilies in the kit and one of the soft flowers. The ribbons and other embellishments in the kit are really pretty. Just a special touch to add to any card or project!

Artisan Kit

The back of every package of designer series paper has a listing of the colors that coordinate with that paper.  You can use that list as inspiration to help you design your project by choosing coordinating colors. I used to write the names of the colors on the back of the package after someone else figured it out! Now it is nice that Stampin’ Up! just adds the list to the package!

To shop and earn your free Sale-A-Bration gift, just go to my Stampin’ Up! Online Store!  Be sure to check all the categories in the left sidebar of the store, such as the Clearance Rack and the Weekly Deals, so you don’t miss a thing!

Email me at Karen@KarenStamps.com  if you want any of the Stampin’ Up! Catalogs!


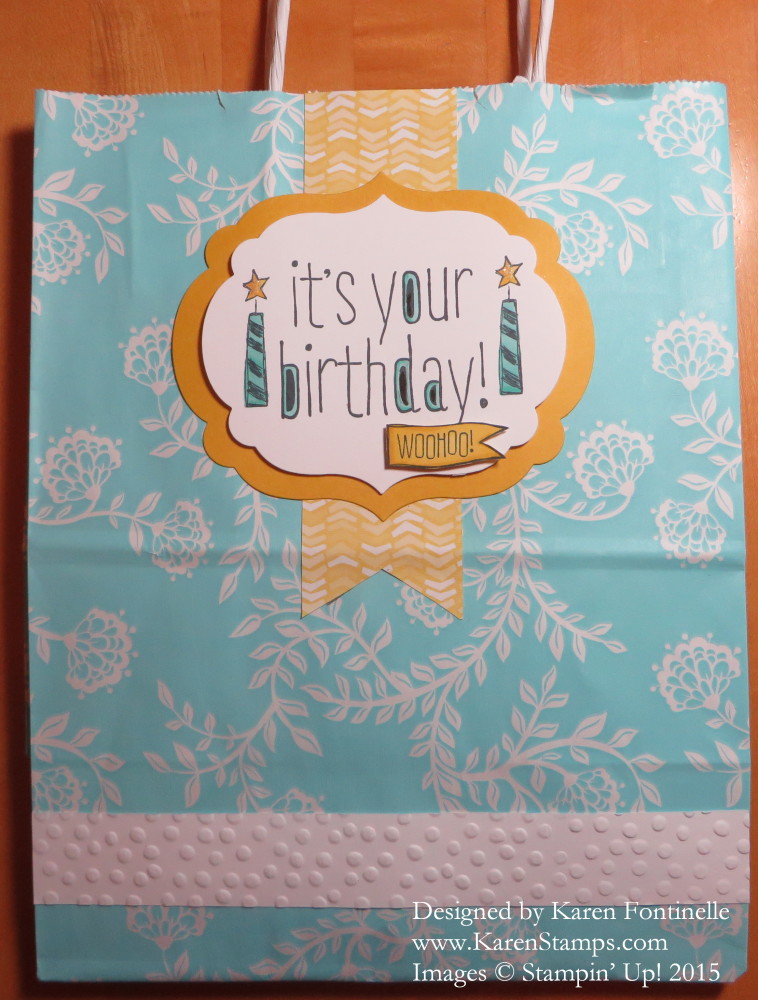
Alter a Shopping Gift Bag for a Birthday Bag

Altered Birthday Gift Bag

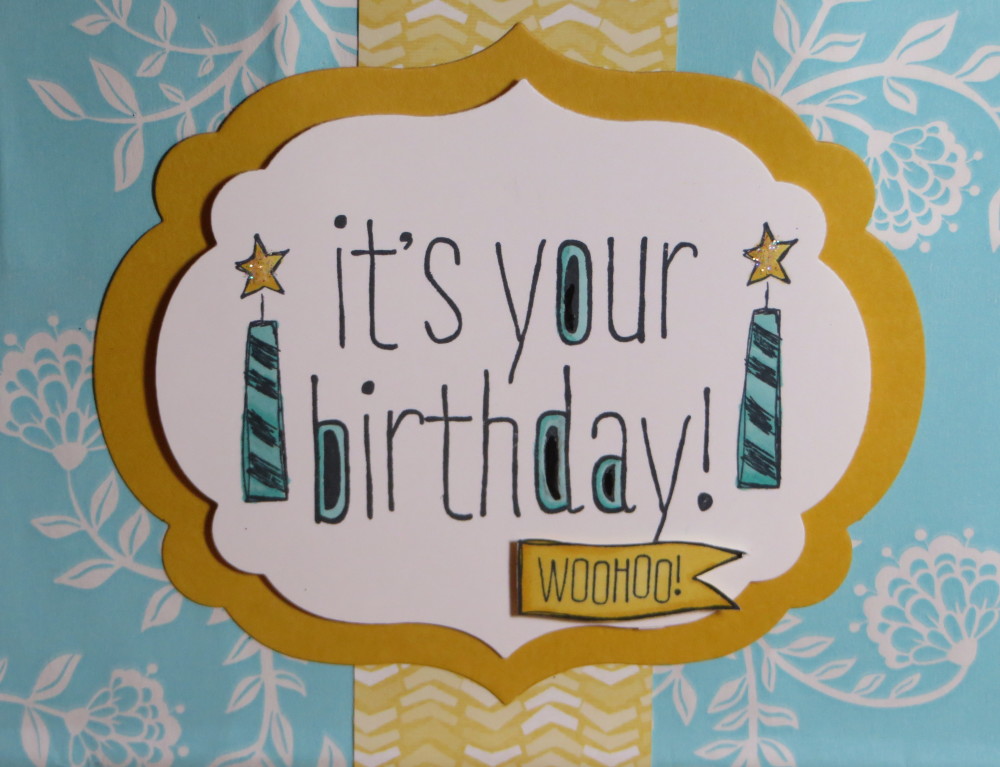
The other day I bought a birthday gift for a friend in a nice gift shop and got this pretty shopping bag. I wanted to create a large design to cover the store label on the front and back of the bag so I altered the shopping bag and turned it into a birthday gift bag! Since I needed a large design, I chose the Labels Collection Framelits Dies for the background. I also added a banner underneath from the Best Year Ever Designer Series Paper. You can choose a pack of this paper FREE during Stampin’ Up! Sale-A-Bration with a $50 purchase.

Next I needed a large stamp set for the design so I pulled out the Big News Stamp Set.  I stamped the greeting and put a birthday candle on each side of it.  I also stamped the “Woohoo” and cut it out by hand to add to the label. Everything was colored in with Blendabilities Markers, not so much for the blending opportunity but just because I love the feel of coloring with those markers!

There was some printing along a band at the bottom of the bag so I simply embossed a strip of Whisper White with the Decorative Dots Embossing Folder to adhere over the printing.

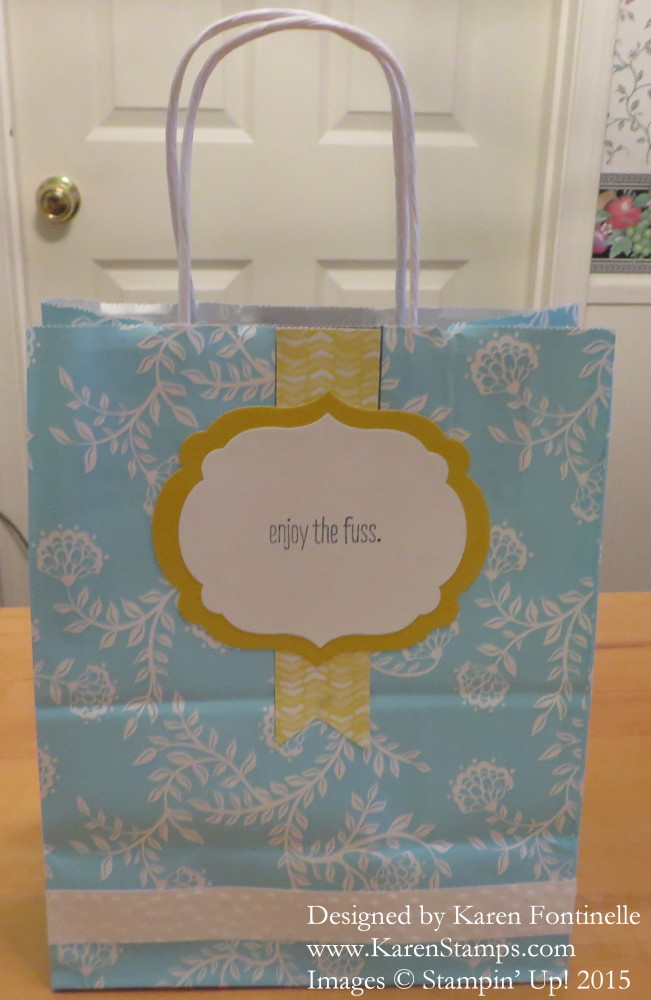
Since there was also some store printing on the back of the bag, I also covered the back to match.  I liked the saying in the stamp set “Enjoy the fuss.”  Great saying for enjoying one’s birthday!

Altered Birthday Gift Bag back label

Don’t forget Sale-A-Bration is underway so with any $50 purchase (before shipping and tax) you can choose a free product in the brochure.  Click on the link above. Look for the “FREE” label in the brochure to choose your product.  No limits, so with a $100 purchase you choose two products, with $150 choose three products and so on! Get together with some friends and submit the orders together and you, as a Hostess, with a $250 merchandise total will not only get the normal $40 in Hostess Dollars to spend, but during Sale-A-Bration you will also get an extra $25 in Hostess Dollars!

Shop at my Stampin’ Up! Online Store for everything stamping!

Find a shopping bag in your collection and see how you can alter it and turn it into a birthday gift bag instead! Recycling at its best! And most fun!

Altered Birthday Gift Bag Label Die

Show People You Stamped It!

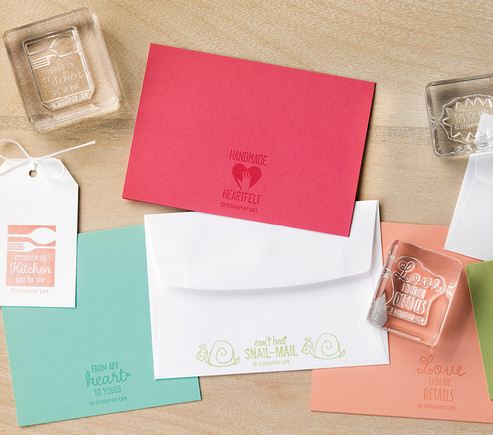
Better Than Email Stamp Set

Stampin’ Up!’s newest photopolymer stamp offering is this set, Better Than Email, which you might think is only for Demonstrators, but it is not. The main purpose of the stamp set is to provide new images for ANYONE selling items with a Stampin’ Up! copyrighted image on them. Each item must be stamped with the Stampin’ Up! copyright.  This is known as the Angel Policy. From Stampin’ Up! “Stampin’ Up!’s images are copyrighted, which means that they cannot be copied without permission. To help protect that copyright, all items for sale using our images must be marked with an official Stampin’ Up! Limited License stamp set.”  If you need more information about this policy, please let me know.

Even if you are not SELLING items you have stamped, wouldn’t any of these stamps be fun to stamp on the back of your card (like the BIG cardmaker?) or your project to let people know YOU made it yourself?! I’m still mostly using my original stamps for the Angel Policy or just for my own personal use (when I remember) to stamp on the back of cards and maybe put my initials or name and date. But this stamp set has great creative images so I think it will be very fun to use! If you want these just for personal use and really don’t want or need the brand name and copyright on it, you can cut those words off. (If you can stand to alter a stamp!) Or use a marker and only ink up the portions you want. I think stamping something like these images on the back of your cards really adds a professional and personal touch!

This stamp set is a direct result of feedback from demonstrators and customers wanting more images for the copyright and Stampin’ Up! listening and challenging department members to come up with fun and versatile ideas that would appeal to demonstrators and customers. I know it is going on my next order!

Here are some ways to use these stamps!

Better Than Email Samples

You can purchase this stamp set Better Than Email #140463 at my Stampin’ Up! Online Store! You’ll find it under “New Arrivals”.
Make a Chalkboard Paper Birthday Card

Chalkboard Birthday Card

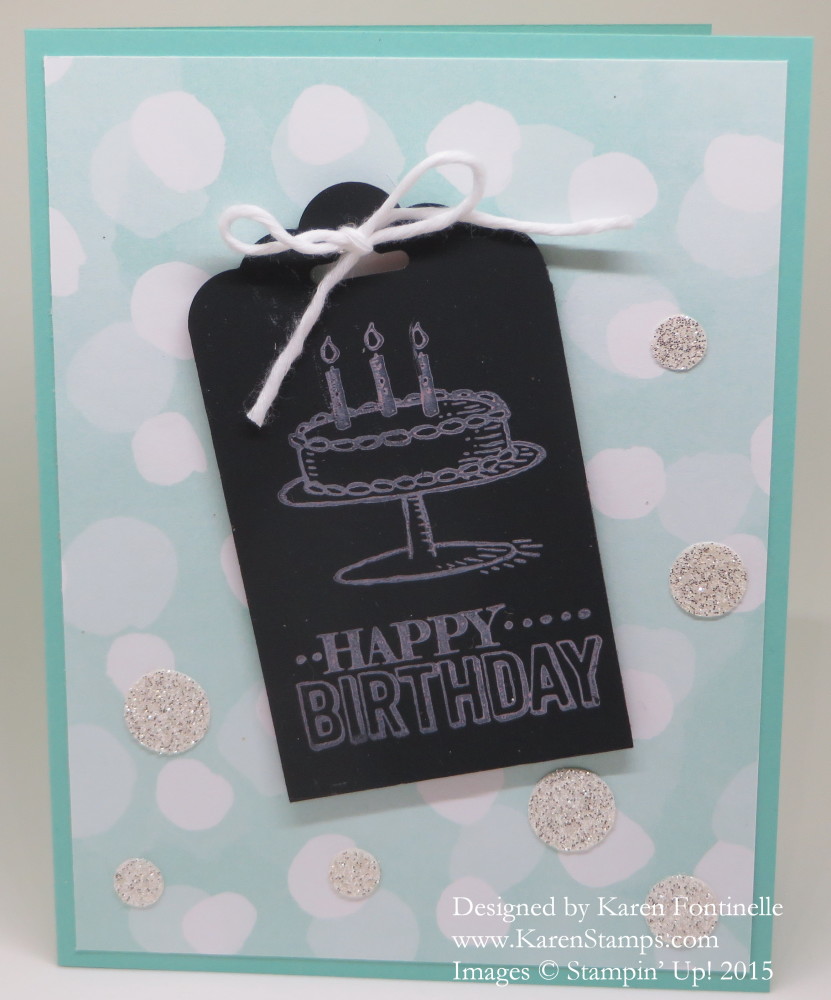
I’ve said before one of my favorite things in the world, perhaps becoming obsolete, is a chalkboard, and this Chalkboard Paper Birthday Card gives me a chance to sort of play with a chalkboard again. Two new products in the Stampin’ Up! Occasions Catalog are the Chalkboard Paper and the ColorBox Chalk Ink Pads. The color of Chalk Ink I used is Rose Coral. I cut the Chalkboard Paper 2″ wide so that I could use the Tag Topper Scalloped Punch and the stamps fit just fine. Using the clear-mount stamps means you can place two stamps you want to use on one larger block and stamp them both at the same time. This stamp set, Big Day, is available as a FREE product earned during Sale-A-Bration with a $50 purchase of Stampin’ Up! merchandise! The background paper, layered on Coastal Cabana card stock as the card base, is also available FREE during Sale-A-Bration. It is called Best Year Ever Designer Series Paper #138633. For a little added glitz and to complement the “bokeh” design of the background paper, I punched various sizes of circles from the Silver Glimmer Paper and put a little bow on top of the tag with the new Painted Blooms Cotton Twine (3-pack) in the Occasions Catalog.

It is recommended that you purchase the refill for the Chalk Ink right away because your pad needs to be juicy for it to stamp well.

If you need any stamping supplies, please visit my Stampin’ Up! Store. And be sure to check the new deals below!

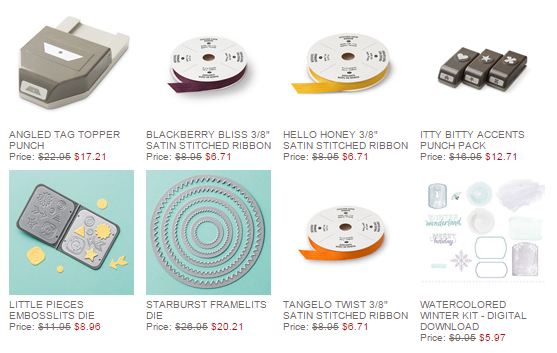
Here are the Stampin’ Up! Weekly Deals for January 13 – 19, 2015.  As usual, some good things I would recommend and would buy myself (if I didn’t already own them!). Small as they are, I use the Itty Bitty Accents Punch Pack a lot. One thing I don’t own is the Angled Tag Topper Punch, which I might have to consider now that it is on sale. I know the ribbon is beautiful.Stampin' Up! Weekly Deal Jan 13 2015


You Plus Me Confetti Hearts Valentine Card

You Plus Me Confetti Hearts Valentine Card

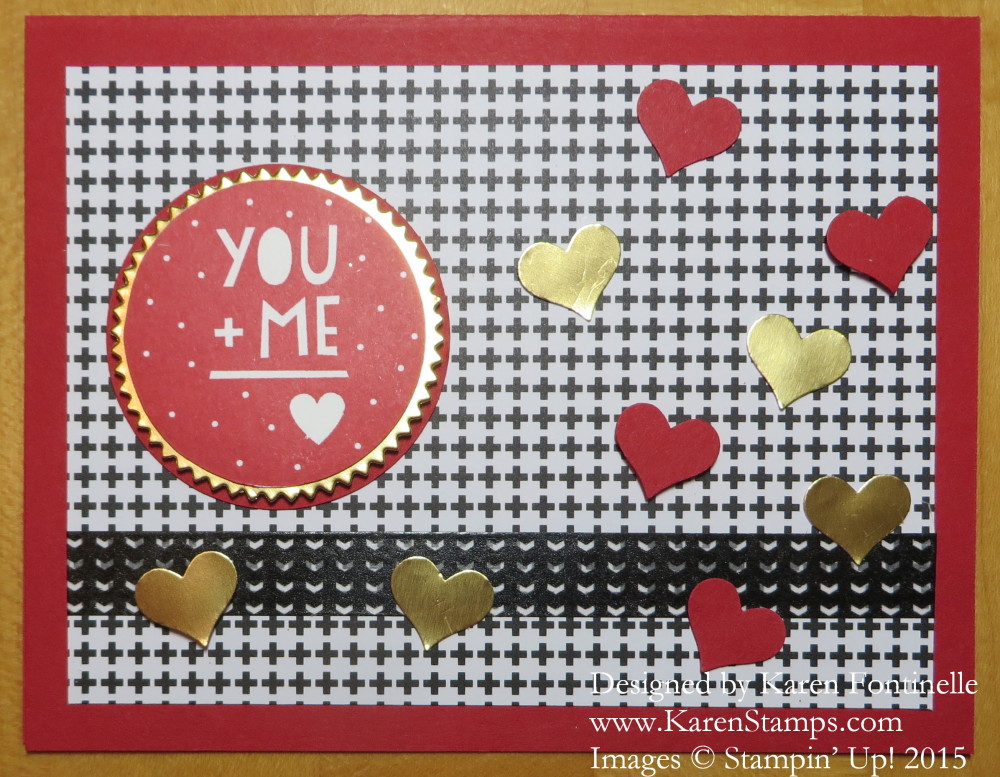
As I paged through the Stacked with Love Designer Series Paper Stack this black and white pattern caught my eye, and that was the start of this card.  And just because I wanted to use the Stacked with Love Designer Washi Tape I put a strip of it across the bottom of the card and I think it looks okay! The sentiment is from the You Plus Me Stamp Set in the Stampin’ Up! Occasions CatalogIt is punched out with the 1 3/4″ Circle Punch, layered on Gold Foil die cut from the Starburst Framelits Die and then layered again on the 2″ Circle Punch.

I suppose I was influenced by the star confetti in the shaker cards I was making with my December Paper Pumpkin Kit, so I punched a few hearts from Real Red and Gold Foil with the heart punch in the Itty Bitty Accents Punch Pack.  I dosubt you can have too many hearts on a Valentine!

If you need any Valentine supplies, remember with every $50 purchase you get to choose a FREE item from the Sale-A-Bration Brochure!

Shop for everything right HERE at my Stampin’ Up! Online Store!
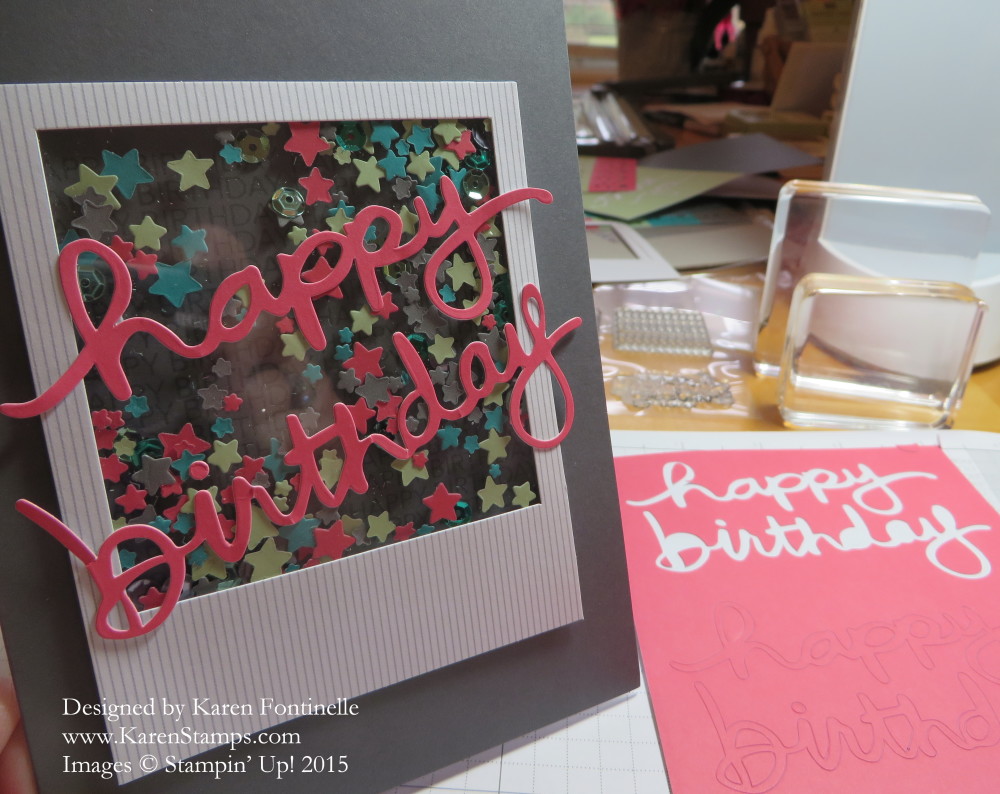
Paper Pumpkin Dec 2014 Kit Birthday Shaker Card

Paper Pumpkin Kit Confetti Birthday Card

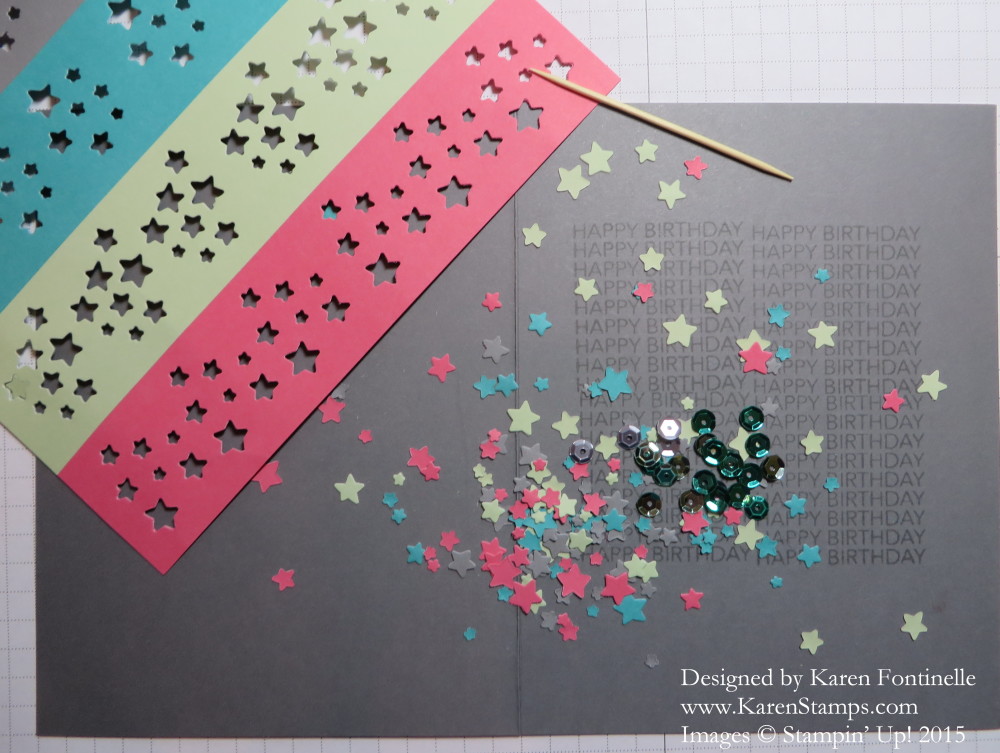
It may be cold, dark and rainy outside today, but inside it’s fun and happy making the cards in the December Paper Pumpkin Kit! The colors are cheery and the cards just brighten up the afternoon! All this star confetti plus turquoise-colored sequins make a shaker card using a window sheet adhered in a frame using long dimensionals provided in the kit so the confetti has room to move around inside. You get to make 3 Thank You cards, 3 Happy Birthday cards , and 3 Hello cards! What a helpful and happy kit to have to start off the New Year!  All supplies are included, even the toothpick!! In other kits you may need to provide your own adhesive.

Paper Pumpkin is the papercrafting kit from Stampin’ Up! that shows up in your mailbox once a month with a surprise project inside. While it is past time to receive this particular kit, there is a new one every month and all you have to do is sign up.  Once you are a Paper Pumpkin subscriber, you do have access to any past kits that you missed based on availability. Sometimes there are extra entire kits and sometimes just the supplies but no stamps.

Here is my finished Happy Birthday card with the confetti and sequins inside the shaker window!Paper Pumpkin Dec 2014 Kit Birthday Shaker Card

Right now during Stampin’ Up! Sale-A-Bration you can purchase a prepaid 3-month Paper Pumpkin subscription and save $5 Not only is that a little bit of a special deal, but since that subscription on your Stampin’ Up! order will cost $54.85, that will qualify you to earn a FREE Sale-A-Bration item from the Sale-A-Bration Brochure!  You can order other Stampin’ Up! products along with it, or give an extra Paper Pumpkin subscription to a deserving recipient for a gift, and for every $50 in merchandise you spend, you will receive a free Sale-A-Bration product!

Browse through the Sale-A-Bration Brochure right now, find the items marked FREE, and choose what you would like to receive as a bonus for every $50 purchase!

Let me know if you have any questions or if you would like copies of the Stampin’ Up! Occasions Catalog, Annual Catalog, or Sale-A-Bration Brochure! Email me at Karen@KarenStamps.com.