Monthly Archives: February 2013

Tea for Two Flower Folds Birthday Card

Tea for Two Flower Folds Birthday Card

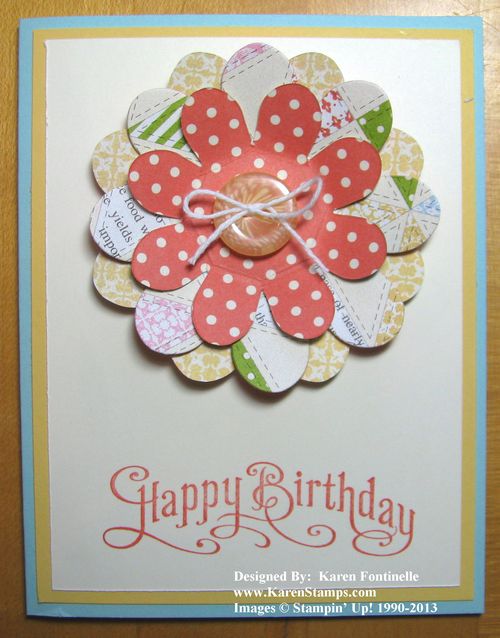
Recently I had a customer order the Flower Folds Die and it made me realize I hadn't used mine in a while. Maybe it has something to do with spring coming, but I've been having a ball making flower cards with this die. I'm not even making fancy flowers, just die-cutting the flowers out of designer series paper and layering them one on top of the other. I randomly picked the Tea for Two Designer Series Paper and am enjoying the pretty colors that coordinate (although I did use Pool Party which isn't one of the listed colors!).

You can just glue down each flower…but I put glue only in the center of each flower so that I could fold the petals up. Of course when you are mailing, unless you use a special padded envelope, you can't get too dimensional, but the recipient can "poof up" the petals after they receive it! I used a few Mini Glue Dots to adhere the button, tied with a White Baker's Twine bow, to the center of the flower.  The greeting is from the stamp set Perfectly Penned (a very useful set!). Remember, most any of our stamps you can purchase in wood-mount or clear-mount.  The rubber is the same in either case, it's just a matter of personal preference.

Don't forget….you could also cut out fabric flowers with this die!  It's not just for paper! And you can cut several layers at once!

Why not get out something you haven't played with in awhile like I did today with the Flower Folds Die? You might find a new streak of inspiration!

New My Digital Studio Downloads…& A Couple of Digital Freebies!

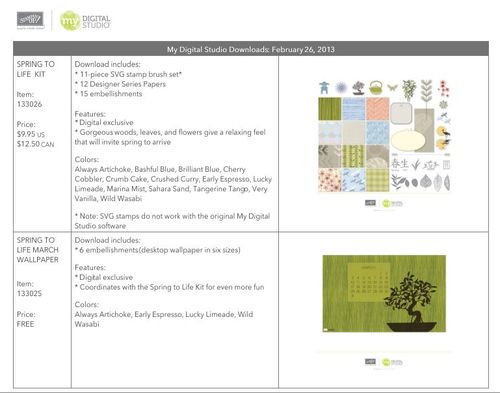
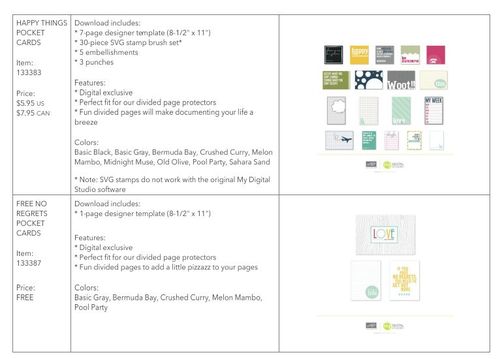
Today is Tuesday, so Stampin' Up! has released new downloads for My Digital Studio, the digital design software from Stampin' Up! If you don't own My Digital Studio, you can get the FREE 30-Day Trial and purchase any of these downloads that you like.  They can also be used in other programs, if you want a few particular ones but don't own My Digital Studio. And check the price on the "Spring to Life" March Wallpaper #133025….FREE! And check the price of the "No Regrets Pocket Cards" #133387…FREE!

To order these free downloads, and any others, just put in an order, as usual.  Enter the numbers of the free ones, the price should be $0.00, go through the whole ordering process as you normally would, and at the end you will be able to download these to your computer and use them!  No shipping when your order is only downloads! And no waiting for them to arrive!

MDS Downloads Feb 26 2013 (1)
MDS Downloads Feb 26 2013 (2)
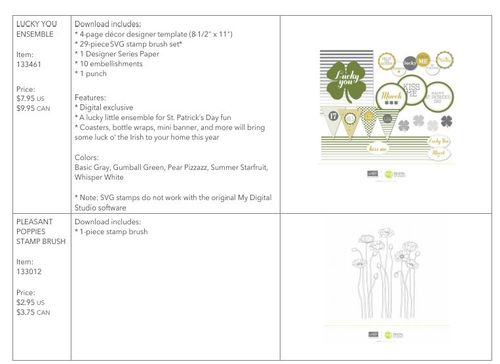
MDS Downloads Feb 26 2013 (3)
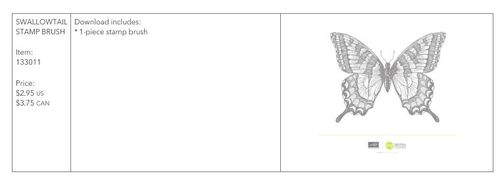
MDS Downloads Feb 26 2013 (4)

Click on any of the images above for more details!

To view a PDF file of these new downloads, click here.

Get your free downloads today so you don't forget.  Go to my Online Store HERE to order now!

Everything Eleanor Azalea Card

Everything Eleanor Azalea and Butterfly Card

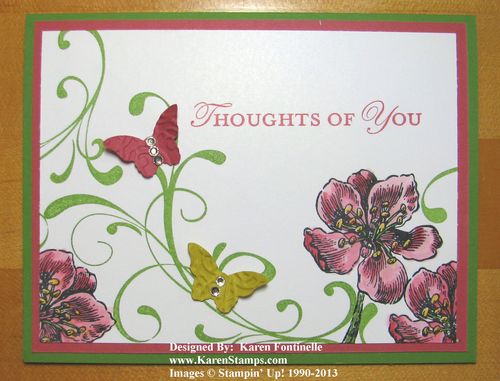
I don’t know if these flowers in the stamp set Everything Eleanor are azaleas, but they at least resemble them.  I know there are blizzards and snow in many parts of the country, but my azaleas are blooming! In fact, the annual River Oaks Garden Club Azalea Trail will be coming up the weekend after next.

Everything Eleanor is a beautiful stamp set, yet I haven’t used it a lot. I stamped the swirl with Gumball Green and stamped with flowers in Black Stazon so I could color them in. To color the flowers, I used my trusty Aqua Painter, which has water in the barrel, so it’s like using a paint brush with its own supply of water!  Since the flower images already have a lot of highlight marks on them (the little black lines), I colored in those areas with Primrose Petals ink first. Then I added a little more water to the dab of ink in the lid of the ink pad to lighten it and colored in the rest of the petals with the same color. When you are using Whisper White card stock rather than watercolor paper, you do have to be careful not to add too much water or work the coloring too much because Whisper White won’t hold up to it. But I can usually use it fine with just some light coloring.

The greeting is from Loving Thoughts.

Then I thought a butterfly or two might be in order. I punched out several colors plus one vellum one to see what I would like and Primrose Petals and Summer Starfruit won! I embossed both with the Lacy Brocade Embossing Folder, adhered them each with a Glue Dot, and added some Basic Rhinestone Jewels. The punch is the Bitty Butterfly Punch.

You could stamp a card like this and then add any kind of sentiment or greeting you wanted.

Stampin’ Up! has all the supplies you need to make this card!  Please visit my Stampin’ Up! Online Store here…..and don’t forget about Sale-A-Bration!  With every $50 purchase in merchandise, you get to choose one free product from theSale-A-Bration brochure.  Good until March 22!  But don’t wait until the last minute!

 .

Apothecary Art Sympathy Card

Sympathy Card

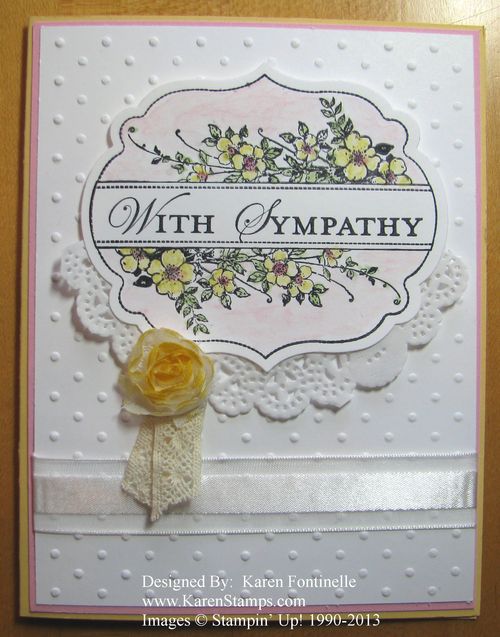
Sympathy cards are the ones we all hate to have to make, yet hopefully they bring much comfort and caring to the recipient. And we all know from experience that when you lose a loved one, every expression of love and sympathy helps ease our pain.

Maybe making sympathy cards are one of the most important things we can do with our stamping and cardmaking. This one is fairly simple. The Apothecary Art stamp set gives the card some formality and elegance. It may look complicated to color in, but really it is not.  Just take a few moments to add a little color to the flowers and then the leaves are easy. The sentiment is stamped with the Loving Thoughts stamp set. I added half of a Tea Lace Paper Doily underneath. The Apothecary Art stamped image is cut out with the Labels Collection Framelits. The background is embossed with the Perfect Polka Dots Embossing Folder. The little flower is one from the Vanilla 5/8″ Flower Trim in the Spring Catalog and dipped in a little bit of Daffodil Delight ink (just tap or twist the top of the flower into the ink pad). The little bit of 5/8″ Victoria Crochet Trim and Whisper White 5/8″ Organza Ribbon are shown in the Stampin’ Up! Annual Catalog. (I know the vanilla of the crochet trim doesn’t really “match” the Whisper White, but I did it anyway!)

My Digital Studio Card for the Houston Livestock Show and Rodeo

Rodeo-001

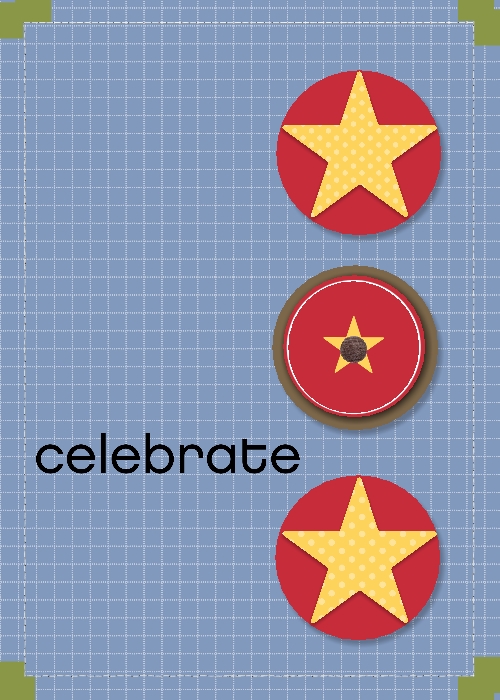
The Houston Livestock Show and Rodeo is a big deal here in Houston and it is about to begin! Actually the World Championship BBQ Contest is going on now for three days and the Carnival has opened. Next week the actual rodeo and livestock show will open along with a musical act at the end of the rodeo each night. 

Houston really gears up for the rodeo! I made this card in My Digital Studio, starting with a design for a baby card! I just changed out the colors, one star, one button, and added a greeting. My Digital Studio is an easy way to design your own projects either using the templates that come with the program or designing completely on your own.

You can try My Digital Studio FREE for 30 days! You can design anything you want and even get your projects printed. You can purchase downloads that appeal to you and use those as well.  Just go here to my Online Store to get the free trial for My Digital Studio!  You'll enjoy it!  And if you attend the Houston Livestock Show and Rodeo, you will be all set to scrapbook pictures from the rodeo!

A Birthday Card with the Chalkboard Technique

Birthday Card Chalkboard Technique

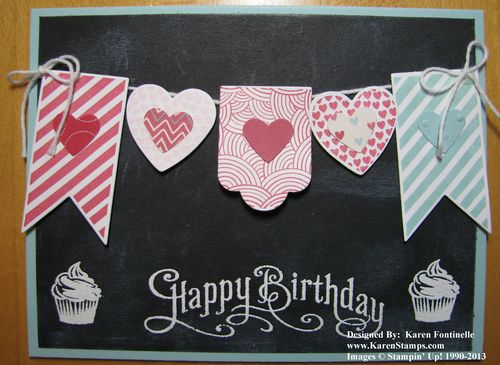
Some of us can’t seem to get enough of the chalkboard technique! Here is a birthday card using a banner and the chalkboard technique!

In case you are new to this chalkboard craze, the black card stock is stamped with Versamark ink and embossed with white embossing powder. You could also stamp with white craft ink. Then for me, the fun part is taking a small cloth or sponge or even your finger and smearing a little of that white craft ink onto the card to make it look like an old dusty chalkboard!  The look is not restricted to black card stock…lots of chalk boards were a dark green. Do whatever you want!  It’s your piece of art!

On this card, I used the More Amore Specialty Designer Series Paper in the Stampin’ Up! Spring Catalog, stamped with the Hearts A Flutter stamp set and cut out the banner pieces with the Hearts a Flutter Framelits Dies. Be sure to check out the Bundle if you are interested before you purchase!

Try out this technique!  It’s really fun and I love the look!  Once you are aware of it, you will see it in lots of advertising and lots of places!  Be trendy!  Try the chalkboard technique!

Rain or Shine Card for a Rainy Day!

Rain or Shine Card

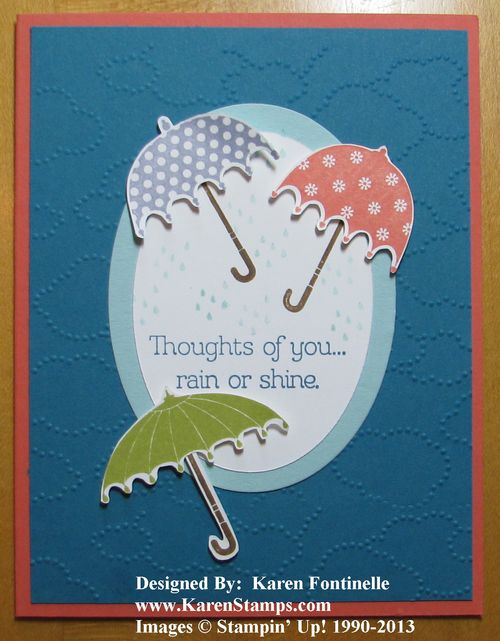
Today was supposed to be a rainy, stormy day here in Houston and we have had a little bit of rain at my house and some people are getting storm warnings, but nothing like I thought we would have. So I thought a card with dark blue clouds,Island Indigo and the Cloudy Day Textured Impression Embossing Folderusing the Rain or Shine stamp set in the Stampin’ Up! Spring Catalog would be perfectly appropriate today!

One of the top things people mention as the best thing about Stampin’ Up! is always their coordinating color collections. I used all 2011-13 In Colors plus two neutrals (Whisper White and Soft Suede) so I wouldn’t have to even think about what colors coordinated with what. The card base is Calypso Coral, the cloudy layer Island Indigo and the oval Pool Party.  The umbrellas are stamped in Calypso Coral ink, Wisteria Wonder and Lucky Limeade; the greeting in Island Indigo and the raindrops in Pool Party.

I just hand-cut the umbrellas but it wasn’t very tedious (at least if you have the Stampin’ Up! Paper Snips!) If you wanted to make it even simpler, you could cut straight across the bottom rather than go in and out the scalloped edges of the umbrellas, plus cut off the little top. Only one handle is cut out, the other two are stamped with Soft Suede.  The ovals were easy to cut, of course, with the Ovals Collection Framelits Dies.

For any stamping supplies you may need, Stampin’ Up! has the best! Visit my Online Store or contact me with your order.

My Digital Studio Downloads…Parent Memories and More Organizing

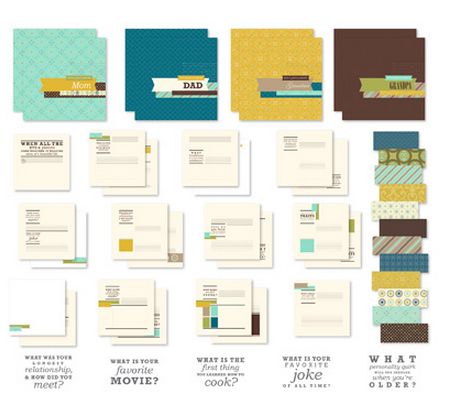
One of the new downloads this week for Stampin’ Up!’s digital software program, My Digital Studio, could turn out to be one of the most important ones you could buy and use. This one I am talking about is called “Think Back Photobook Templates“. Once printed it would be an album of questions for whomever you choose. It’s designed for your parents and grandparents to write about their lives. They write their answers in the book, maybe post some photos. A couple of questions in the book are: “What song defines your childhood?” and “What personality traits did you inherit from your mother?”

Think Back Photobook MDS

Click Image above

As with any My Digital Studio templates, you could print this book exactly as is or you can change colors, change names, change questions, add questions, add photos, change embellishments, change design, etc. etc. So you can design this book in whatever manner you want.  You can make it for yourself.

If you still have your parents and loved ones, you take it for granted that you know all about them and will remember all the stories you have heard over and over again in your life. But sometimes that isn’t the case, or your mind just goes blank because you no longer have someone to ask to verify a certain story or fact. If you can get their stories in writing, I guarantee you it will be a treasure to you like no other.

You can even purchase this download for My Digital Studio without owning My Digital Studio and use it in another program. You can even print it yourself or at a retail location.  But if you want the very best, I suggest doing the FREE 30-Day Trial of My Digital Studio and trying it out.  Get the photobook printed by Stampin’ Up!’s own printer and make sure the colors are accurate and the book well done.

If you no longer have your parents and grandparents, then do this for your own children and family. If not now, someday they WILL treasure what you wrote and what you told them.

Click here to see all the newest downloads for this week!  There are more for organizing your home, too!  Stampin’ Up! will have us all ship-shape pretty soon!

Hostess Gift Wine Bottle Tag

Wine Bottle Tag

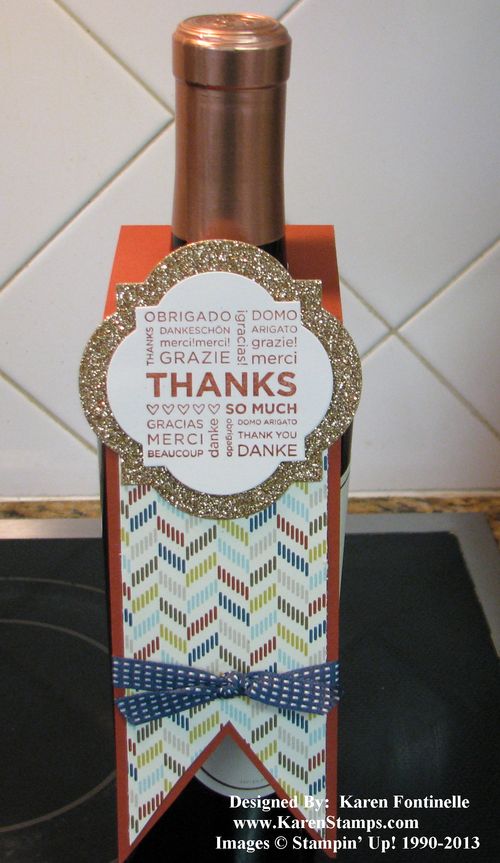
Often a good host or hostess gift to take to a party is a bottle of wine. When you are a stamper, you want to jazz up anything you can with some stamping! Here is an easy wine bottle tag to make in just a few minutes. And of course you could make the same kind of hanging bottle tag, but smaller, to go over water bottles or soda bottles or whatever!

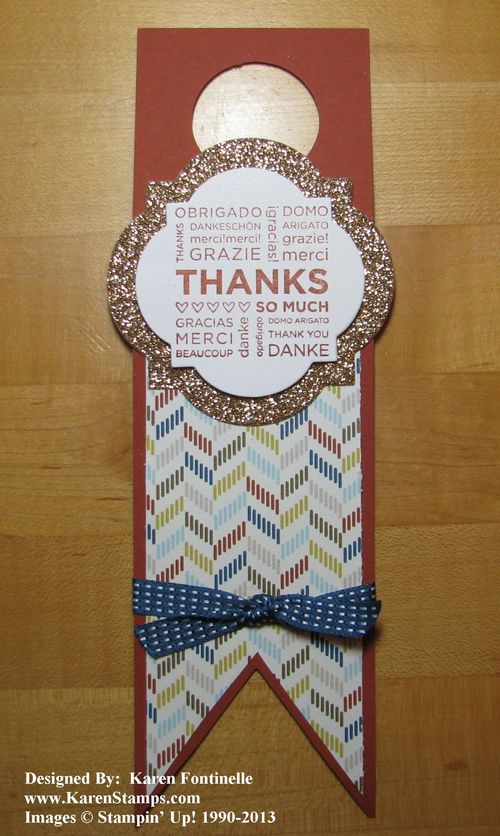
You will have to tailor the size of your hanging bottle tag according to the size of your bottle but these are the measurements I used:

  • Cut card stock 8 1/2" x 2 1/2"
  • Score at 2 1/4". Use the 1 3/8" Circle Punch to punch a hole in that area to hang over the top of the bottle. Fold on the score line.
  • Decorate your wine bottle tag!

Wine Bottle Tag for Hostess Gift

I used the Comfort Cafe Designer Series Paper for a layer. The "thanks" stamp is retired but seemed perfect for this project. It is cut out with the Window Frames Collection Framelits Dies (carried over from the Holiday Catalog) and layered on Champagne Glimmer Paper, also still available from the Holiday Catalog. The ribbon tied around the tag is the Midnight Muse 3/8" Stitched Satin Ribbon #126847.

Next time you are taking a bottle of wine as as hostess gift to a party, or even just decorating water bottles for a get-together, consider making a cute tag for the bottle!

Stampin' Up! has all the supplies you need at my Online Store here!

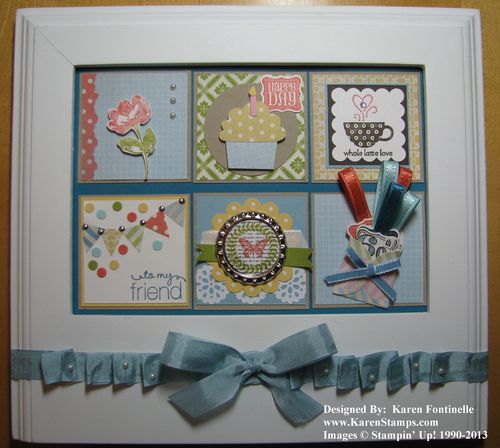
A Framed Birthday Collage for a Friend

Framed Birthday Collage for a Friend
I love how this framed collage turned out for a dear friend's birthday gift! I often pick up frames that I like just in case I come up with a stamping project I can use them for. This white frame intrigued me because of the extra space at the bottom. I thought maybe I could stamp something in that area or do something with it. There were lots of possibilities, but it took having every ribbon I owned out on the table until I came up with this ribbon design that I liked! Of course, the frame would have been fine even plain.
When I need a gift for someone, I often try to see if there is something I can make. With stamping I can make a personalized gift. It saves a trip to the mall for the same old/same old kind of gifts, and I can make something I hope they will like and will be a unique gift that no one else will give them. Rubber stamping opens so many creative opportunities to you and it is an easy skill to learn and do.
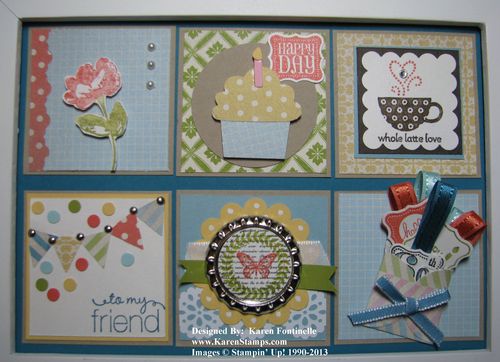
To make this I just measured the frame opening and did a little math…and just cutting some scrap paper samples…to see what size to make my squares. Then I just decorated each one with whatever idea I found or thought of. Don't ever let not having an idea stop you….once you sit down and play a bit, your creative juices will start flowing! And often, they overflow once you get going!!
Here is a close-up of the collage.
Framed Birthday Collage for a Friend Close-up
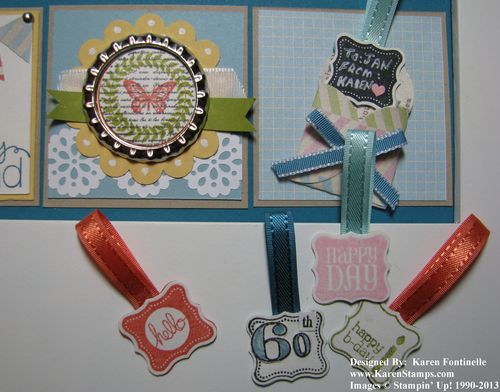
And here is a close-up of all the little tags I made to go in the tiny envelope.
Framed Birthday Collage Tags
Making collages like this to frame is a great gift idea because it is a personalized gift and can be as large or small as you like. Try one!
You can find any supplies you need at my Stampin' Up! Online Store here!

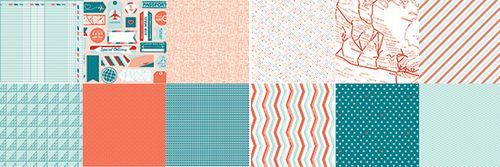
Sent with Love Designer Series Paper

SentWLove_DSPs

Click image above to go to page and then click "More Images"

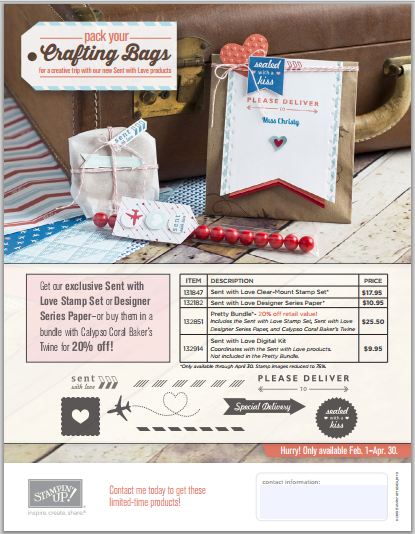
Don't forget about the Sent with Love special offer! It runs until April 30, 2013.

What is it?

Sent with Love Travel Special Flyer

Click on the image above for the full flyer or click HERE.

To do ALL your Stampin' Up! shopping, please go to my Online Store! With any orders of $50 or more you will get FREE Sale-A-Bration products, too!  Don't miss it!!


Last Minute Valentine’s Day Candy Treat Ideas

In case you are scrambling for a few last minute Valentine candy treat ideas, here are a few for you!

 Happy Valentine's Day!

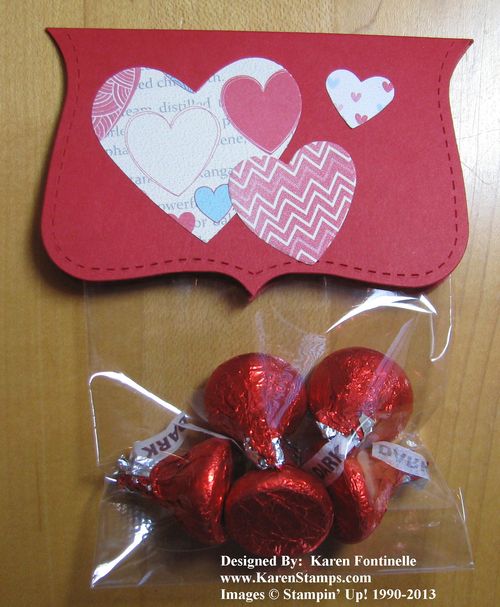
Valentine Top Note Candy Treat Bag

This is super easy! Just fill a cello bag with Valentine candy and make a topper for it! I used the Top Note Die (so versatile), folded it in half, and decorated it with punched hearts. You could add a Valentine greeting, too, if you wanted. You can staple the bag inside or use SNAIL adhesive.

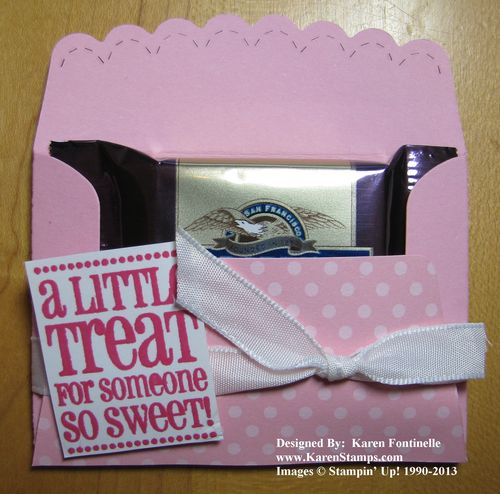
Valentine Scallop Envelope Candy Treat

The Scallop Envelope Die makes it easy to make a little treat holder. A Ghirardelli chocolate fits just right inside! Wrap a ribbon around the bottom to hold it closed and add a Valentine greeting! This greeting is from Got Treats. If you don't have the Scallop Envelope die you could fold up your own little envelope with paper.

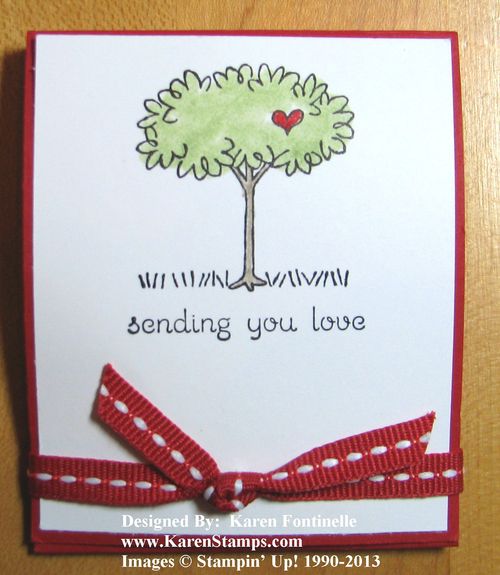
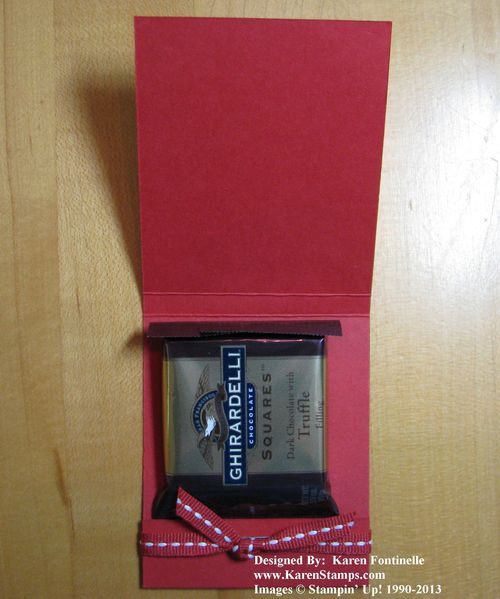
Valentine Candy Treat  Matchbook

One of the first cute things I ever learned to make when I first heard of Stampin' Up! was a matchbook! We put post-it notes inside then, but candy works well, too! Mine measures 2 1/2" x 7" and is scored at 3", 3 1/4", and 6 1/4" to fold around a Ghirardelli chocolate.  It you have some other candy, you might want to make it larger. The stamp on the Whisper White is from Easy Events, a very versatile stamp set for lots of occasions.

Valentine Candy Treat Matchbook Inside

I stapled the edge of the candy to the bottom flap or you could use a mini glue dot. The ribbon will hold the front flap closed.  Or the flap can go on the outside. However you want!

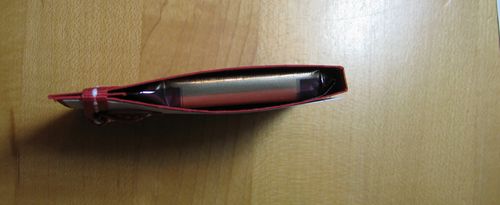
Valentine Candy Treat Matchbook Side

Matchbook from the side.  You can see how the scoring makes a little space to hold the candy.

Have a fun Valentine's Day doing something YOU love!

You Are Loved Valentine for Valentine’s Day

You Are Loved Valentine for Valentine's Day

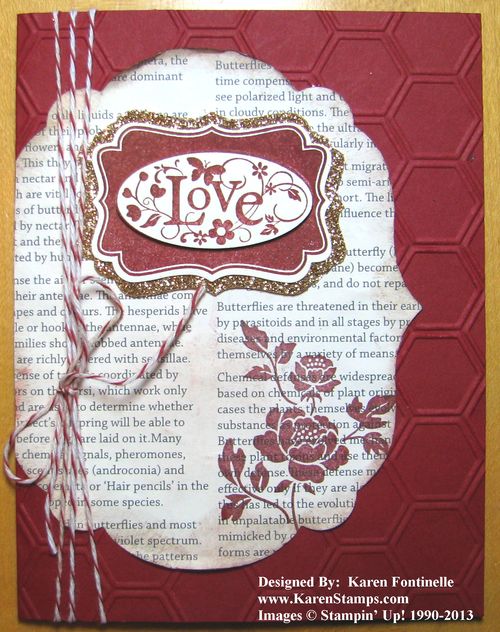
Valentine's Day is only one day away!  Did you make a Valentine for someone special? This one came to mind when I saw something similar online with non-Stampin' Up! materials. I decided to add texture to the Cherry Cobbler base of the card with the very popular Honeycomb Textured Impression Embossing Folder #1293778. (I never remember it is called "Honeycomb"….I think most of us think of it as the 'hexagon' embossing folder!) I used the Labels Collections Framelits Dies #125598 to die-cut the First Edition Specialty Paper #121878. I stamped on it with Cherry Cobbler ink and sponged the edges a bit with Soft Suede to give it  a little aged look. Couldn't you also see this as a wedding card?

Originally I stamped the "Love" image directly on the First Edition paper as I did the flower from the stamp set You Are Loved, but the design just didn't do enough for me. So I relented and stamped it on Very Vanilla and cut out with the Decorative Label Punch #120907. I stamped it again and punched out the word "Love" with the Large Oval Punch #119855.

Since I already had the Champagne Glimmer Paper #127885 out on the table, I couldn't resist using it! Once you see that glimmer paper in person, you just can't resist it! The Champagne paper is still available to order even though it is not in the Spring Catalog. I originally tried it as a large Label die-cut behind the First Edition paper but changed my mind.  But once I was using the Decorative Label Punch, it was easy to layer it behind that! There is a trick to doing that….just punch out two and cut each in half, one vertically and one horizontally, then layer behind the punch on all four sides.  You'll see how they fit. And for a final touch, I wrapped some Cherry Cobbler Baker's Twine around the front of the valentine.

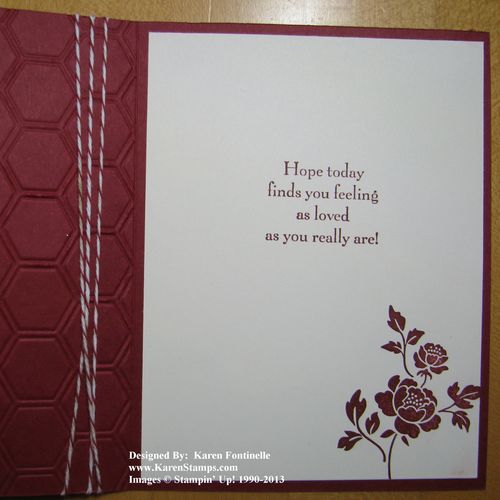
We often don't get a peek at the inside of the card, but since this You Are Loved stamp set had a nice saying in the set, I used that as well as stamped the flower on the inside layer.

You Are Loved Valentine inside

Now that's another Valentine card ready to go on February 14th! If you make a Stampin' Up! valentine, send me a picture and I'll put it on my blog!

Oh Hello Fat Tuesday Mardi Gras Card

Oh Hello Mardi Gras Card

Today is known as Fat Tuesday, or Mardi Gras, which refers to the rich, fatty feasting during the carnivals before Ash Wednesday and the beginning of Lent and fasting leading up to Easter Sunday. The colors of Mardi Gras are purple for justice, green for faith and gold for power.

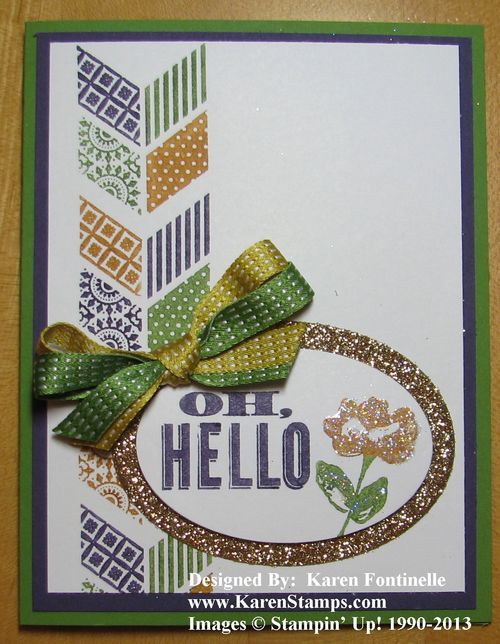
I made this card with the Oh Hello stamp set using Mardi Gras colors to commemorate the day. The Champagne Glimmer Paper stands in nicely for gold. (Champagne Glimmer Paper IS still available #127885). The more I used the Oh Hello stamp set the more I love it!  I colored in the chevrons using Stampin' Write Markers with three different colors: Elegant Eggplant, Gumball Green, and More Mustard. Maybe I should have used Summer Starfruit so I would have ribbon to match, but sometimes colors appear lighter when you stamp with markers. To easily cut out the ovals, use the Ovals Collection Framelits Dies.  Purchase them with the Oh Hello stamp set in a bundle and save 15%!

If you want to scrapbook your Mardi Gras photos and memorabilia, Stampin' Up! has all the stamps, ink, paper, and accessories that you need!  You can shop online here any time! Or email me at Karen@KarenStamps.com.

If you want to read more about Mardi Gras, check out this article from the Times-Picayune of Greater New Orleans.

Laissez les bons temps rouler!!

(Let the good times roll!)


Organize Your Craft Room with My Digital Studio Downloads

MDS  Downloads 2_12_2013

Click image above to enlarge

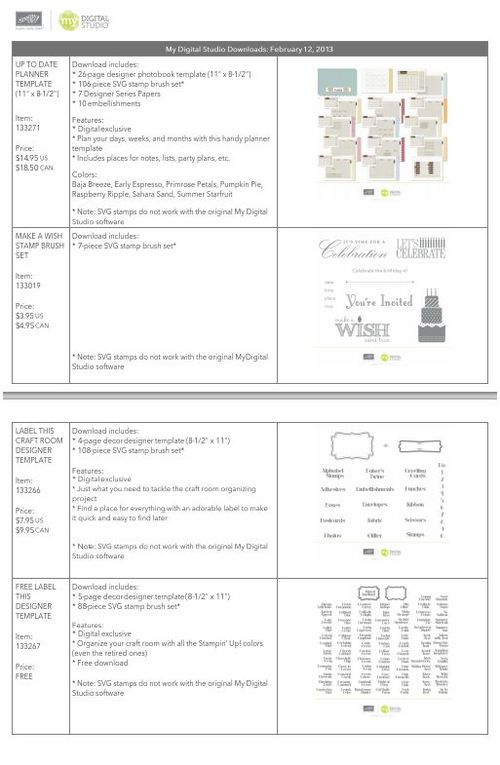
Looking for a way to organize your craft room and Stampin' Up! supplies?  Today My Digital Studio has new downloads that may help!  Click the list above to see the choices!  I highly recommend you own My Digital Studio, the Stampin' Up! software for digital papercrafting of all sorts, but if you do not own MDS yet, you can use the downloads in other design programs!

The downloads today include a birthday stamp brush set, Make a Wish, plus a template for a daily planner! Then for organizing your craft supplies, we have labels for things like "Adhesives", "Photos", and more in the Label This Craft Room Designer Template! And for FREE, you can get a download of ALL the Stampin' Up! color names in labels, even retired ones.  Yes, I said FREE! It's the Label This Designer Template! Just pretend like you are purchasing the download and put in the item number #133267 at my Online Store. The price should come up….$0.00!  There is no shipping on digital downloads.