Monthly Archives: October 2012

It’s Halloween! Trick-or-Treat! Happy Halloween!

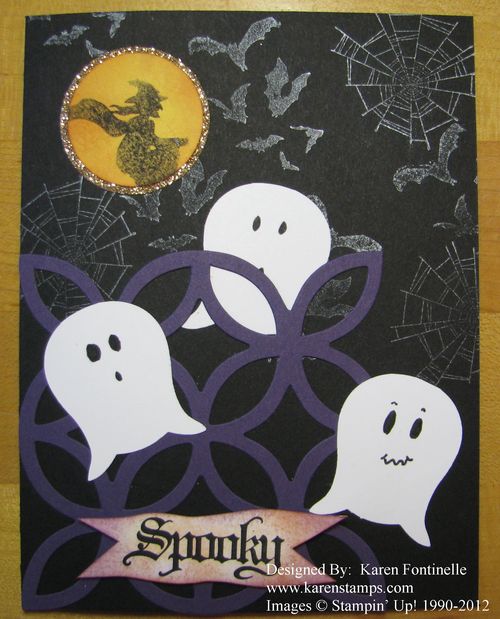
Spooky Owl Punch Ghosts Halloween Card

Today is Halloween! There are so many Halloween ideas out there that I didn't get to make that I almost hate to see that the day is here already! But I'm sure that the children who are eager to go trick-or-treating are glad it is October 31st finally!

I love that the Owl Punch can be used to make a ghost!  Do you recognize the owl? Cut off his feet and turn him upside down….he's a ghost! I just drew on little ghost faces with a marker.  The background is stamped with the new Illuminate Glimmer Watermark Stampin' Pad….the bats and spider webs. I wanted purple on my Halloween card so I used the Lattice Die and the Big Shot to add that element.

I almost don't remember how I made the moon, but maybe I just started with Whisper White card stock and sponged it with some colors, like More Mustard, Cajun Craze..maybe some Pumpkin Pie.  You could try any similar inks.  The I stamped a witch on the moon as if you would see her shadow on the moon as she flew by. The witch is from Toxic Treats in the Holiday Catalog but I just colored in the witch, not the whole stamp, with a black Stampin' Write Marker and laid the moon down onto the stamp of the witch. I like the kind of shadowy look I got instead of a crisp stamped black image.

And for some bling, I punched a larger circle of Champagne Glimmer Paper to layer behind the moon.

There are so many fun things to do with Halloween, from outdoor decorations to unique food ideas and recipes to cards and candy favors, party favors, costumes, Halloween decor and just not enough time to do them all!

I hope you have taken some time to make something fun for Halloween, whatever it is. I don't necessarily like the scary part of Halloween but I love the whimsical, the fun and cute ideas for Halloween.  And I hope I get lots of little trick-or-treaters tonight!

Happy Halloween!


Male Birthday Card…or Any Occasion Card!

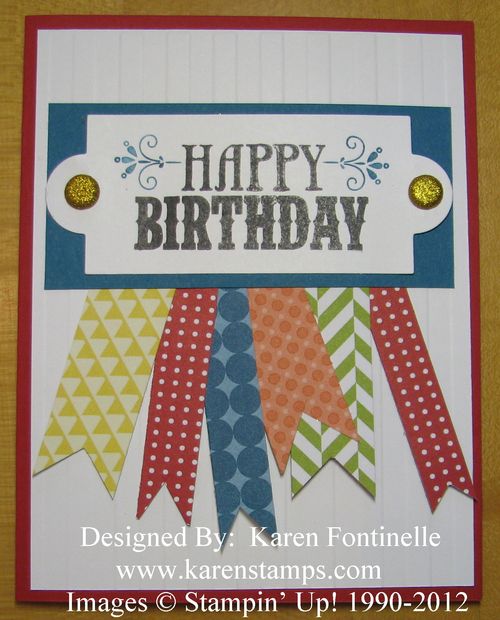
You're Amazing Birthday Card

Twenty-four years ago today I was driving my daughter home from Sunday School and had to practically stop the car while I let a contraction pass. When I got home I called my parents in St. Louis to say probably something was happening. We four all ate lunch and in the afternoon I baked cupcakes for the cake walk at the Halloween carnival that would be down the street the next night. Naturally I had some licks of the batter and frosting! Since we would be at the carnival and trick-or-treating the next night, I decided to cook a special Halloween dinner that night. In the midst of batter-licking and frosting-eating and dinner prep, I decided maybe I needed to quit eating and go sit down and time the contractions. By half-time of the televised Sunday night football game (my husband always appreciated the timing!), it was time to calmly call my friend and ask her to come get the kids since we'd be going to the hospital sometime that night. She rushed over and by the time my husband helped get the kids buckled in their seats in her car I was more than ready to be going to the hospital. The nurse taking my information laughed when I told her my last meal was cupcake batter and frosting!  In just a couple of hours, Steven was born, just about 45 minutes short of being a Halloween baby! How can that be so long ago??!!

We think making a masculine card is hard since we crafters seem to often be using flowers and colors and other images that don't seem to be appropriate for a man or boy. I actually started off thinking I would copy a card I'd seen online, but once I changed the shape of my stamped greeting from "You're Amazing" by cutting it out with one of the Apothecary Accents Framelits, I came up with this design instead. Great way to use up paper scraps, great way to make a card for a male birthday, great way to make a card for ANY occasion! The background of the card is embossed with the Stripes Embossing Folder. And a couple of Glimmer Brads add some pizzazz without being too much bling for a boy!

The paper strips (Summer Smooches…and you wouldn't think that paper would work for a masculine card but it does!) are just cut to varying lengths and widths, no big deal, just whatever you want.  And then cut a little "v" out of the end or use a square punch to punch it out. (I think it is easiest to just snip).

Have fun stamping today!

New Stampin’ Up! Card Kit–Fancy Friends!

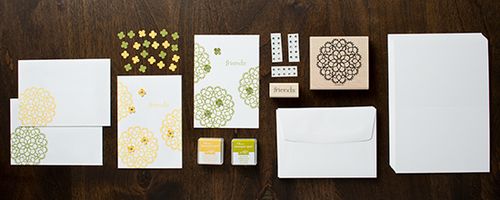
Fancy Friends Kit
Stampin' Up! just introduced a new card kit, "Fancy Friends"! You get everything you need to make six cards….and if you want to make more cards, just order some extra notecards….they already provide you with extra rhinestones!
Everything you need…stamps, paper, ink and accessories….is included in this kit. Maybe you voted for it in the Stampin' Up! Facebook survey post of October 1st. This was the winner!
Order this kit along with your 15% off stamps (today, Oct. 29 only) at my Online Store!

Trick-or-Treat! Have Fun with Halloween Candy Bars!

Candy Bars for Halloween

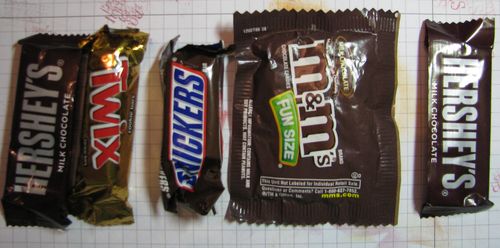
Halloween Candy Bars….Before!

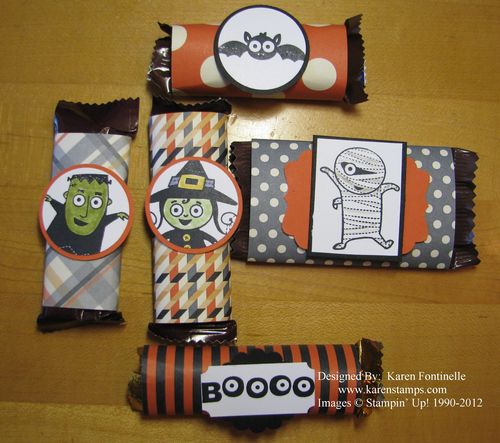
 Trick-or-Treat! It’s almost time to hand out Halloween treats, so why not make your Halloween candy bars something special? There are SO many fun Halloween ideas out there, but this is something easy to do for the kids’ Halloween treats.

Trick-or-Treat Halloween Candy Bars
Trick-or-Treat Halloween Candy Bars…After!!

Just take your candy bars and wrap some paper around them! Designer series paper makes it easy, but you could also use card stock. Then stamp a Halloween image and punch out with a circle punch or scallop punch and glue on. If you are looking for an easy Halloween craft to do with your kids, this might be an idea. This is especially good for those special trick-or-treaters, maybe class treats at Halloween parties at school, or your own Halloween parties.

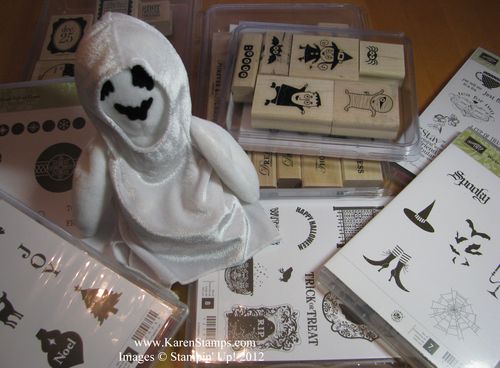
I used my Googly Ghouls stamp set for the images and the Houndstooth & Scaringbone Designer Series Paper, both in the Stampin’ Up! Holiday Catalog. I colored in a bit with Stampin’ Write Markers. It’s just something fun to do, and why not have some fun at Halloween?!


Have questions?  Just email me at Karen@KarenStamps.com

You can place your order online here or email me. 

Stampin’ Up! One Day Sale on Stamps! One Day Only: Monday, Oct. 29, 2012

SU Spooktacular

Wow!  Stampin' Up! is going all-out on Monday, October 29th!! 

For ONE DAY ONLY you will get 15% off any stamp (almost!) from Stampin' Up! The goal is to sell more stamps in a single day than ever before! It's the one-day Sell-A-Stamp Spooktacular!

Here are the details:

  • Starting at 12:00 AM (MT) and ending at 11:50 PM (MT), almost every stamp will be 15 percent off.

This means all stamps in the current catalogs including: 

  • Background stamps
  • Personalized name stamps
  • Cookie press stamps
  • Single-image stamps

This DOES NOT include:
Hostess sets
Bundled stamp sets
Digital stamp brush sets

There is no minimum purchase, and no limit to the number of stamps you can order.

This is going to be a contest for all Stampin' Up! Demonstrators and we will get prizes (new items from the spring catalog!) according to how many stamps we sell! So I'll get the prize, but you will get the 15% off deal! That's the important part…the sale price that you get!  And if I win a prize, I'll be showing you how to use it on my blog!

So your assignment this weekend is to grab your pencil and paper, your computer word-processing program, your Excel spreadsheet, or  your app on your smartphone and start making your shopping list of stamps!! Then you'll be ready on Monday, October 29th for the first-ever Stampin' Up! Sell-A-Stamp Spooktacular!

Look here for all the catalogs to start your list!!

Or click here to view the stamps in my Online Store! On Monday, all the stamp prices will reflect the 15% savings.

But that's not all…….

Stampin' Up! has added more SINGLE STAMPS to their test program!  It must be popular!

You can see all the Single Stamps available for purchase HERE:

  • Single Stamps: Assortment 1 *New!
  • Single Stamps: Assortment 2 *New!
  • Single Stamps: Word Play
  • Single Stamps: Perfectly Penned
  • Single Stamps: Seasonal Sayings

But that's not all……….really!!!!………..

Monday Oct. 29th is Digital Scrapbooking Day and Stampin' Up! will celebrate all week! More about that later!


Punch Art Pumpkin Halloween Card

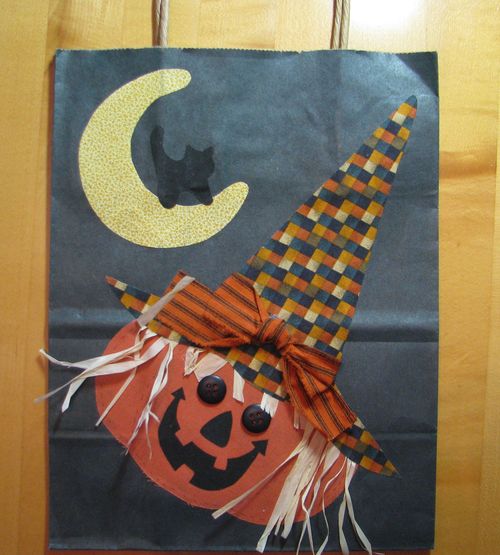
Years and years ago I purchased this Halloween gift bag at a craft show and have only used it as one of my many Halloween decorations around the house. It's made with fabric probably ironed on to the paper bag.

Halloween Bag

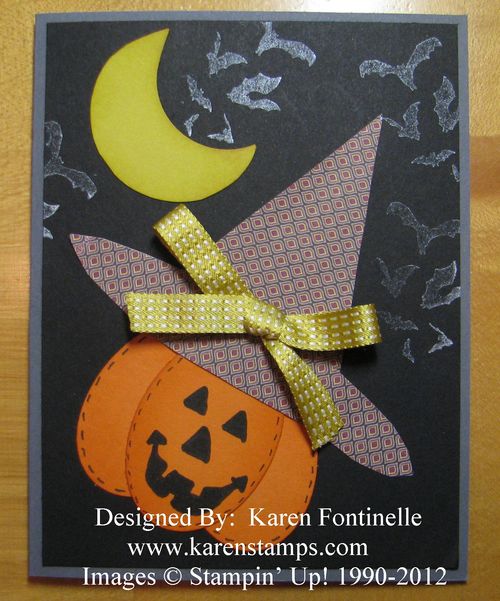
Then I thought why not make a card like the bag? So I did!

Halloween Pumpkin Card

I started with the pumpkin head, made out of three ovals punched with the Extra-Large Oval Punch.  I sponged Pumpkin Pie ink around all three ovals and then just played with them until I got them placed how I wanted them. You could even use punched circles if you wanted. I just drew on the face with a black marker and drew on the little stitching lines.

For the Halloween hat, I die-cut the medium-size triangle on the Perfect Pennants Bigz L Die using the International Bazaar Designer Series Paper.  Who would think you would use that paper for Halloween? The hat brim I just cut by hand and tied a Summer Starfruit Stitched Satin Ribbon bow.

The moon is a scrap piece of Summer Starfruit card stock.  You can cut it by hand or punch out a small circle for the inside of the crescent moon and then another circle to cut the outside edge.  You still might need to trim the points of the moon.

And for one more embellishment to the card, I stamped the bats from the Wicked Cool stamp set using the new Illuminate Glimmer Watermark Ink Pad. I just wanted a very light, night-time look for the bats in the background. There is a slight shimmer to the ink but it doesn't photograph as such at all…at least not with my camera and skills!

Halloween is getting close!  Time to finish making those cards and mail some out to your friends!

Make an Anniversary or Wedding Card

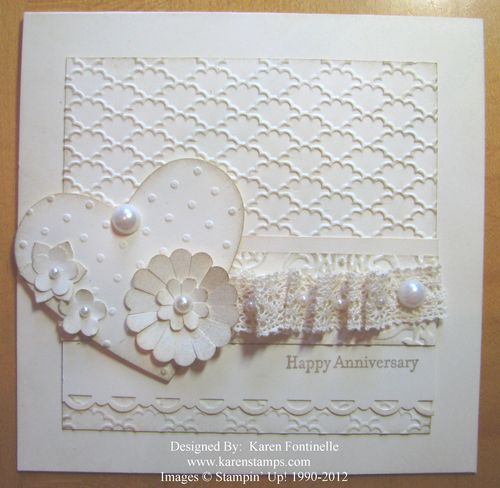
Very Vanilla Vintage Anniversary Embossed Card

For today, let's look at an idea for a wedding anniversary card (or this could be a wedding card) and take a break from Halloween and Christmas.  I got this idea from a card I saw on our Stampin' Up! site for demonstrators and changed a few things a little bit.  This is a square card made with Very Vanilla card stock on all the layers. I mailed the card so I'm going to have to guess how I really made it!

The layer on top of the card base is embossed with the beautiful Fancy Fan Folder.  I cut a wide strip which I punched along the bottom with the Scallop Trim Border Punch and stamped "Happy Anniversary" from Teeny Tiny Wishes. I cut another narrower strip and embossed it with the Lacy Brocade Folder and adhered that near the top of the wide strip. Then you need a punched or die cut or hand-cut out heart and a few paper flowers. Add some ribbon, or I used some Victoria Crochet Trim kind of gathered up and adhered with Sticky Strip.  And for some bling, I added lots of Pearl Basic Jewels, including one or two Large Pearl Basic Jewels.

Just to add a little more to this card and differentiate all the Very Vanilla layers, I sponged a little Crumb Cake ink here and there, along edges and lightly over the embossed pieces.  Just adds a little something, especially if you want a little vintage look, which is often good for wedding or anniversary.

If you would like to place an order for any stamping supplies, you can order online any time, at your convenience, at my Stampin' Up! Online Store.  Be sure to check the Clearance Rack, too!

Get Ready for the Holidays with My Digital Studio!

New Tuesday downloads for My Digital Studio are out! If you want digital papercrafting to help you out with the holidays, My Digital Studio from Stampin' Up! has some solutions…and fun, of course! To see all the current downloads, check here at my Stampin' Up! Online Store.

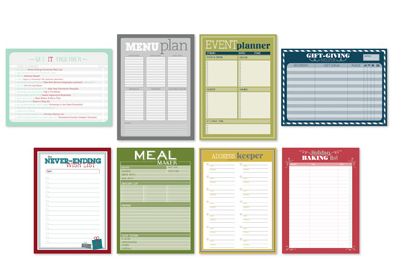
Holiday Lists of All Lists

Holiday Lists

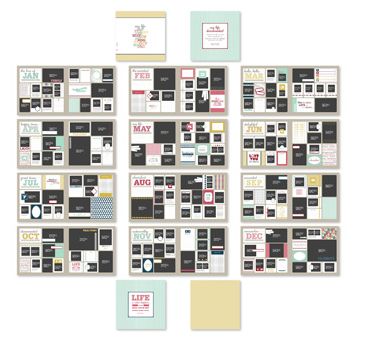
The Best Year Photobook Template

Photobook
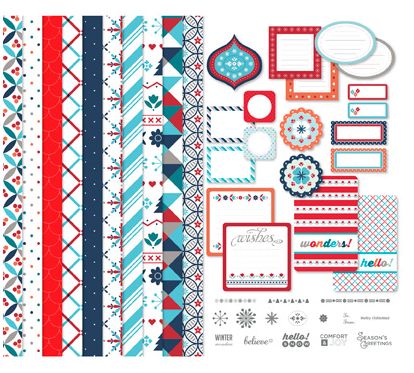
Winter Wonders Kit

Winter Wonders Kit


If you don't own My Digital Studio, you can purchase it here in my Online Store.  I think the MDS +2 with the software and over $500 in content is the absolutely best deal.  And if you prefer to try it out first, do the 30-Day Free Trial of My Digital Studio.  I think you will love it!  You can read about My Digital Studio and watch a short video here.  Click the images above for more information.

Candlelight Christmas Flocked Clear Strip Christmas Ornament

Candlelight Christmas Strip Ornament

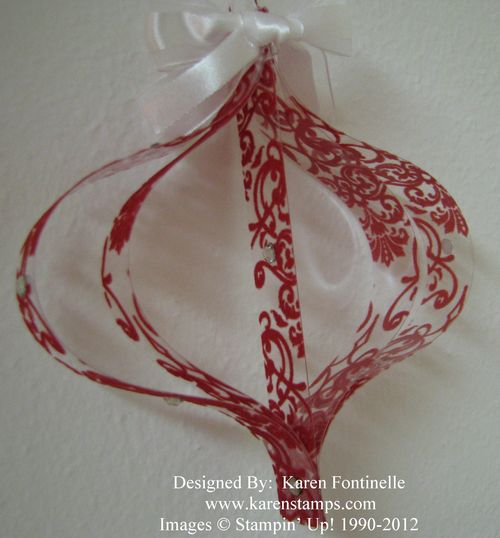
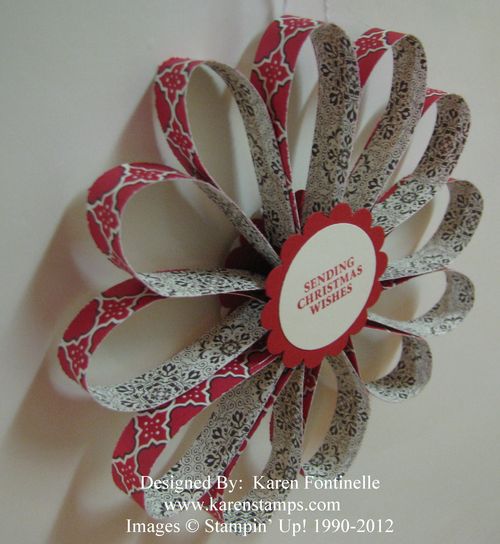
I had to play again with the design of the ornaments on the cover of our Stampin' Up! Demonstrator magazine called Stampin' Success. You can make these Christmas ornaments with just strips of paper! This time I decided I wanted a fancier one…I only intended to add some ribbon and maybe some rhinestones.  But once I pulled out the Candlelight Christmas Specialty Designer Series Paper, I noticed the beautiful flocked clear window sheet "paper"! I thought that would make something pretty! So here it is!

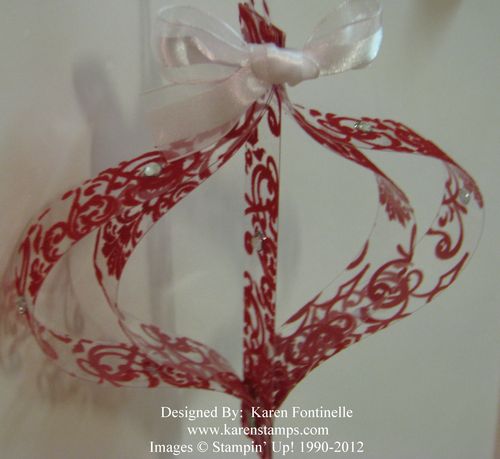
Once I made the ornament, I attached a bow at the top with some mini glue dots and added just a few Rhinestone Jewels here and there.

Candlelight Christmas Paper Strip Ornament

My strips this time were 4 3/4" for the center one, two strips 6" each and 2 strips 7 1/4".  I think you just need to play with the lengths of the strips to get the size of ornament that you want. These strips are only 1/2" wide. You can read my directions for how I put the ornament together on my post the other day here. I think you can see in this photo above that I put rhinestones near the top, middle and bottom of the outside strips and one on each side of the center strip. I used Baker's Twine for the hanging thread.  Just feed it in through the center of the ornament and pull tightly for it to come up to the top in between the strips.

I might not be done yet!  I think the next one I will try will have another set or two of strips!

If you want a pack of the Candlelight Christmas Specialty Designer Series Paper, you know where to go!  While you are there, check out the Merry Christmas special which includes the Candlelight Christmas paper, and also the Clearance Rack! New items were just added on Friday!  Although some products sold out the first day, there still are great bargains to be had, so don't miss out!

Candlelight Christmas Paper Strip Christmas Ornament

Paper Strip Christmas Ornament
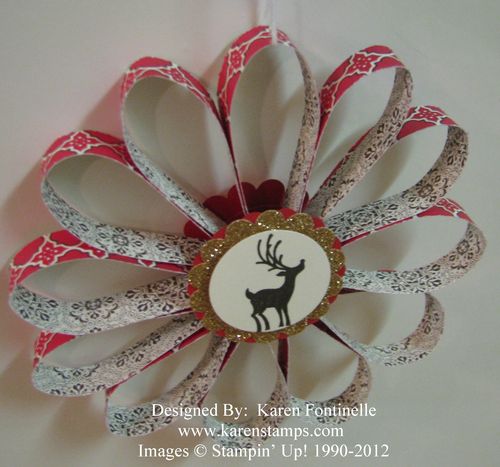
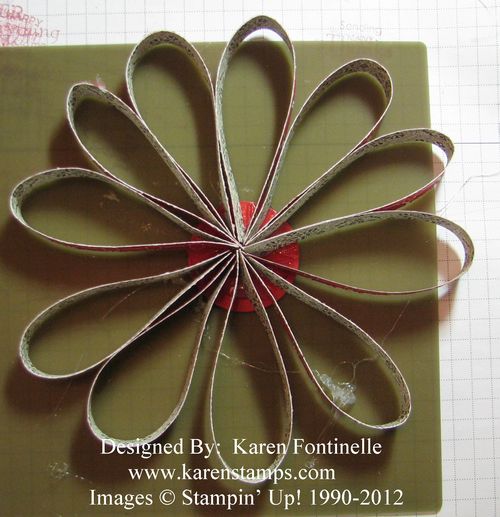
I'm playing with some more paper strips to make a Christmas ornament again, this time using the Candlelight Christmas Specialty Designer Series Paper. I cut twelve strips, each 1/2" wide and 6" long. I punched a  circle with the 1 3/8" Circle Punch on which to glue the strips.
Paper Strip Christmas Ornament inside
Yes, I have hot glue all over the place!  Thank goodness for the Silicone Craft Sheet! There should be twelve strips glued in there but one got lost….when I found it I was able to stick it in the slightly empty space with some Tombow Multi Glue. I used more hot glue to add scallops and circle punches to decorate the outside.
Paper Strip Christmas Ornament Back
The little reindeer and the greeting are from the Joyous Celebrations stamp set. I love the Champagne Glimmer Paper scallop behind the reindeer on the front of the ornament.
Time is getting closer and closer to start thinking about making some things for Christmas! If you need any supplies for crafting, you will find what you need at my Stampin' Up! Online Store!  Be sure to check the Stampin' Up! Clearance Rack for some great bargains!  New items just added yesterday!

Make Your Own Halloween Ornament with Paper Strips

Paper Strip Halloween Ornament

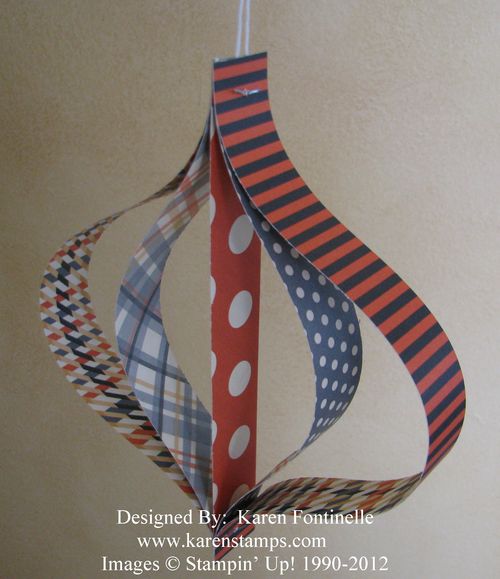
As Stampin' Up! Demonstrators, we receive a magazine that we all love filled with creative ideas, business tips, and the latest Stampin' Up! news.  On the cover of the latest issue are pictures of ornaments like these, except for winter or Christmas. I decided to try making a paper ornament for Halloween with the Howlstooth & Scaringbone Designer Series Paper. These would be so fun to make for Halloween decorations for a party!

Stampin' Up! didn't provide any specific instructions that I found, but I found some examples online! This particular one is made with five strips of paper.  Basically you need two "long" strips, two "shorter" strips, and one "even shorter"!

This is what I used:

Strips are cut 1" wide.

2 strips 10" long, 2 strips 8" long, and 1 strip 6 3/4" long.

Arrange the strips in a "sandwich", paying attention to how you want the sides of your paper to show:  shortest strip in the middle, next longest on each side of the shortest strip, and the longest strips on the outside. So for my ornament, I have the strips stacked 10" – 8" – 6 3/4" – 8" – 10" and make them all flush at one end (they'll be uneven at the opposite end of the pile). Using my paper-piercing tool I poked a hole and inserted a brad. Then I lined up the bottom of the strips, which shapes the ornament and inserted a brad to hold it.  That's it!  Tie a string or ribbon through the top and you've got it!  Experiment with sizes and you can have ornaments of all sizes! I think I would make the next one a little narrower and shorter strips.

Try one with your paper scraps!  Bet you can't make just one!!

When you want to order MORE paper, just go to my Stampin' Up! Online Store….but be sure to check the Clearance Rack because Stampin' Up! added over 70 new products today…some might be gone, so check as soon as you can!  Clearance Rack orders must be made online only because of the availability of the items.

Ornament Keepsakes Paper Christmas Ornament

Stampin' Up! Holiday Catalog Cover Ornament

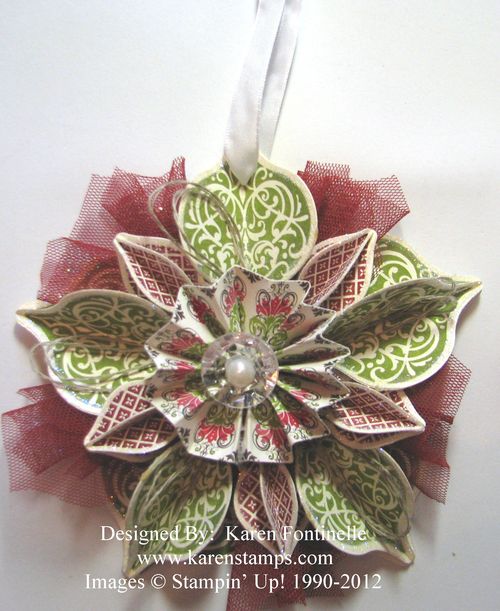
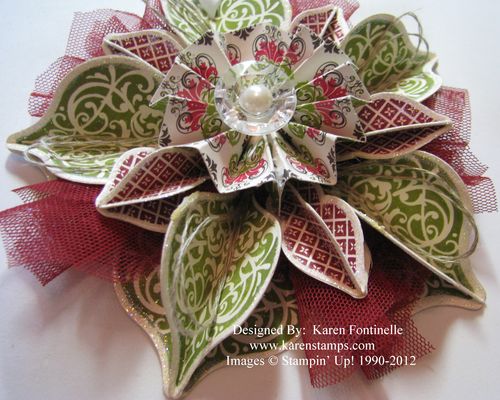
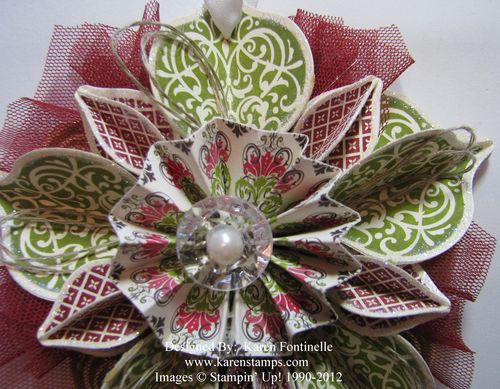
I know you have seen this ornament before…it's on the cover of the Stampin' Up! Holiday Catalog and a lot of people have been making them! I finally stopped the world and made the hanging ornament myself! It really is beautiful in person and the Dazzling Diamonds Glitter around the edges of each little ornament really makes it look fantastic.  This is made with the Ornament Keepsakes stamp set and the Holiday Ornaments Framelits Dies. The only difficult part is cutting out your stamped images of the ornaments with the Framelits as it just takes awhile to do twenty of each!  But once you have that part done (you can also just cut out designer paper, not stamped images) the rest is fairly easy to assemble and glue. Mine has Linen Thread loops in each of the large ornaments, but I think something more sparkly would be better. The Scalloped Tulle Ribbon was fun to work with and insert and twist between some of the ornaments. The rosette in the center is made with the Candlelight Christmas Specialty Designer Series Paper.  Then a Vintage Faceted Designer Button is hot-glued into the center of the rosette with a Large Pearl Basic Jewel adhered to the center of the button.

I hope you will take some time to make something special for Christmas, just because! Just to relax and enjoy the creative side of yourself! Sometimes we all have to do that!

If you need any stamping or scrapbooking supplies, please visit my Stampin' Up! Online Store or email with your order. Don't forget to check the Merry Christmas October Promotion by Stampin' Up! which is only good until the end of October….which is sure sneaking up on all of us!

Ornament Keepsakes Christmas Ornament

Ornament Keepsakes Christmas Ornament Front

Have fun making your ornament!  You'll be glad you did!

Ornament Keepsakes Paper-Pierced Christmas Card

Ornament Keepsakes Paper Piercing Card
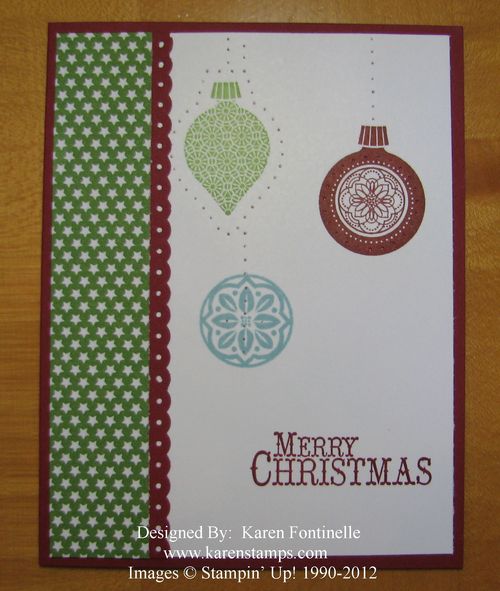
Stampin’ Up! gives us so many options for designing our handmade Christmas cards and other projects. One of the big trends right now is paper-piercing. If you look closely at my card, stamped with the Ornament Keepsakes stamp set, you can see three different styles of paper-piercing.  On the Gumball Green ornament, I went around the outside. On the Cherry Cobbler ornament I made a circle inside the ornament, and on the Baja Breeze ornament the piercing is on the center design. Then I free-handed piercing for the ornament strings up to the top of the card.
The Paper Piercing Tool is very handy to have!
Feel free to email me with any questions at Karen@KarenStamps.com.

Christmas Porcelain Ornaments….A Blast from the Past!

Christmas Porcelain Ornaments

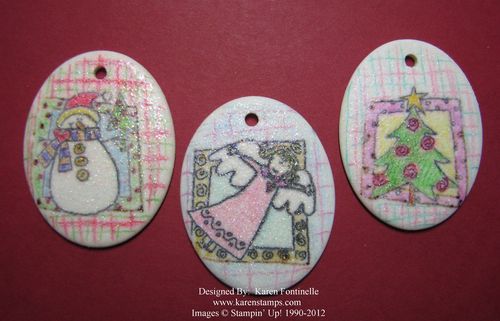
Anybody remember these Christmas porcelain ornaments Stampin' Up! used to sell? I'm thinking it was back in the beginning days of my association with Stampin' Up! And that's now been over ten years ago if you count from the time I first heard about Stampin' Up! from my friend I was visiting. If you've been around Stampin' Up! that long, I'm sure you will recognize the stamp set, too!

As I was cleaning out my craft closet recently, I knew I was going to find a bag of plain porcelain ornaments….but I didn't remember that I had already stamped them! What a nice surprise to find something stashed that was actually used, so now I am happy to bring them out of the darkness and hang them on the tree this year! They would also make a cute Christmas tag on a package! Just remember that a handmade Christmas ornament can be very special.

I believe these were stamped with Stazon and then colored in with markers. For the sparkly finish they probably were stamped with VersaMark ink and embossed with Iridescent Ice Embossing Powder #101930.

Find something in your stash that you've been putting off or forgot you even had and make something with it today! You might find some Christmas gift ideas that you didn't know you had!

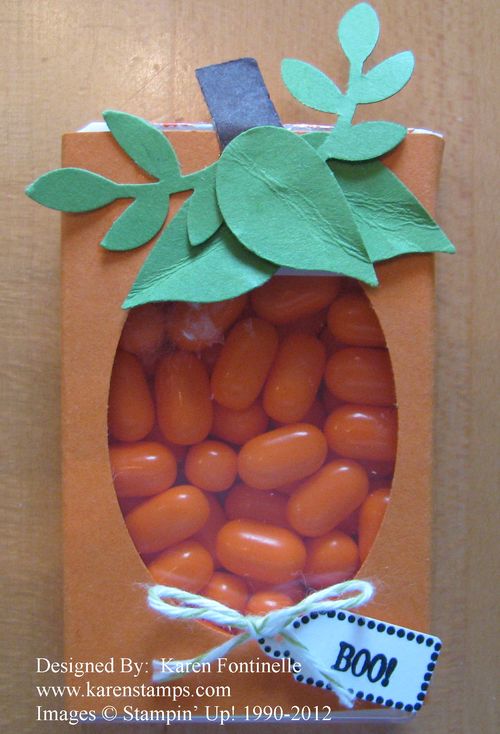
A Tic Tac Pumpkin for Halloween

Tic Tac Pumpkin Folds

I've seen a lot of different characters online made by various stampers using Tic Tac boxes. When you wrap some paper around the Tic Tacs and punch a hold in order to see through to the Tic Tacs, you can make a cute Santa, snowman, jack-o-lantern, elf, etc. Some have used the Two Tags Die and tied it with ribbon on the side, some have used the Top Note Die, and some have just wrapped a piece of card stock around the Tic Tac box.

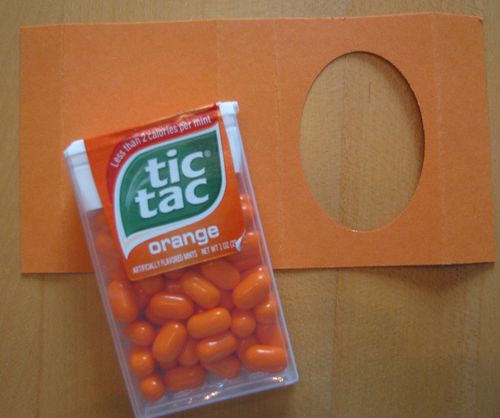
In this project, I used a piece of Pumpkin Pie card stock cut at 5 1/4 x 2 3/4" (I assume all Tic Tac boxes are the same size, but I'm not sure). Either you can just wrap the strip around the Tic Tac box tightly, sort of scoring the edges with your fingers as you fold, or you can score at 5/8", 2 3/8", 3" and 4 3/4". The fun part is punching out a shape on the front so you can see through to the Tic Tacs inside.  You will need to tear off the label or it might show in your punched hole. For this pumpkin, I used the Extra-Large Oval Punch #119859 but you could use a small circle punch. Figure out which panel is going to be the front, and center the punch as best you can.  You could also punch a Post-it Note, stick it where you want your shape to be punched on your project, and then punch.

Tic Tac Pumpkin for Halloween

Then to make my box look like a pumpkin, I punched some leaves and branches with the Bird Builder Punch #117191 and cut a little scrap of brown for the pumpkin stem. You could also add scraps of black to make a jack-o-lantern face if you wanted to. You could also add a piece of window sheet inside the card stock and glue a face on that…or just stick on the Tic Tac box.  Then for some embellishment, I added a "Boo" from the Tiny Tags stamp set and punched out with the Jewelry Tag punch #117190. Finally, I tied on a little piece of Lucky Limeade Baker's Twine to the little tag.

This is an easy project and fun to do!  Use your imagination and come up with something to coordinate with the color of Tic Tacs you have!

For any card stock and punches, just shop at my Online Store! Don't forget the Merry Christmas promotion if you are interested in the Ornament Keepsakes Bundle.