Monthly Archives: September 2012

Merry Minis Teeny Tiny Wishes Christmas Card

Merry Minis Teeny Tiny Wishes Christmas Card

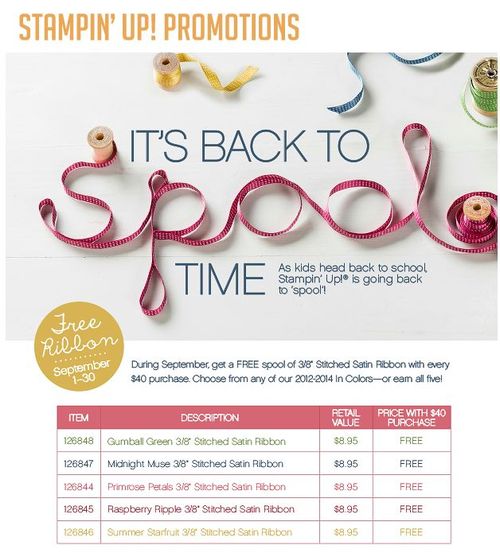
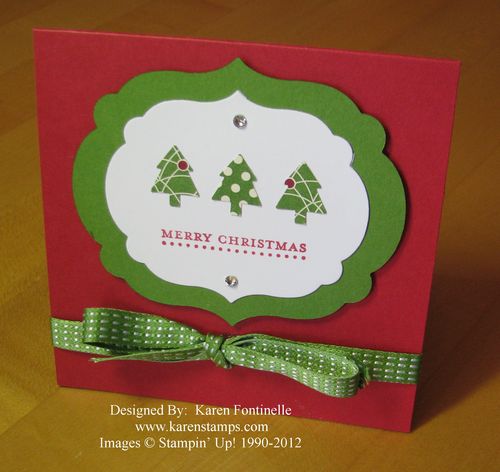
Here is my Merry Minis Teeny Tiny Wishes Christmas Card! Cute name, cute card….if I do say so myself! This is a 4" x 4" square card of Real Red that I just pulled out of my package of card stock scraps and decided to use it. I wanted to emphasize the Gumball Green 3/8" Stitched Satin Ribbon because tomorrow, Sunday September 30th, is the LAST DAY for the "Back to Spool" Promotion by Stampin' Up! With a $40 purchase of Stampin' Up! product from my store, you can choose a free roll of this ribbon, in any of the 5 colors.  These are the current In Colors so you will love them!

So back to the card….I cut two of the Labels Collections Framelits shapes in Whisper White and Gumball Green.  Then I just punched out three Christmas trees with the fun little Merry Minis Punch Pack from the Be of Good Cheer Designer Series Paper (in the annual catalog) and stamped the greeting from Teeny Tiny Wishes. I was going to jazz up the card more maybe with a designer paper layer, some Dazzling Details around the edge of the framelit, maybe a rhinestone on top of each tree…but once I put just the two Basic Rhinestones on top and bottom of the label…that was it! Perfection! Keep it simple!!  Done!  I love this card!

Now I need to go my make own Stampin' Up! order so I can get some FREE RIBBON!!

Back to Spool

Halloween Medallion Decorations

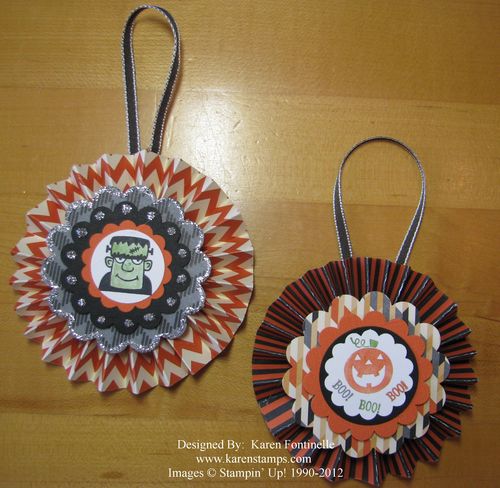
You can have so much fun with Halloween crafts! Here are two Halloween Medallion Decorations that I made very easily by just pulling out some designer paper, some punches, some stamps, hot glue and my Simply Scored Scoring Tool. Make your medallions (or lollies) whatever size you want, add some layers and add a stamped Halloween image of some kind to the top. Tie on some ribbon or glue onto a stick. You could make big ones or tiny ones to hang on an ornament tree.
**************
Need any stamping supplies? If you order $40 in product before the last day of September, you can choose a roll of ribbon for every $40 you spend! This offer is quickly coming to an end as September 30 is not far off!

Note from Stampin’ Up! Peppermint Embossing Powder

Stampin' Up! has updated us about the Peppermint Sticks Scented Stampin' Emboss Powder (Item 127830):

Due to quality issues, this Peppermint Embossing Powder from the Holiday Catalog will no longer be available for purchase. The product will still emboss and you can continue to use it; however, the peppermint scent does not last as long as indicated in the catalog. The supplier will not be able to reformulate the powder in time for use during the holidays, so Stampin' Up! has decided to stop selling the product.

If you have already ordered this item and are unsatisfied with it, please contact me (or your Demonstrator) or Stampin' Up! for a refund or to exchange it for a different scented Stampin' Emboss Powder.

Gently Falling Card

Gently Falling Card
It's fall, for two days now!  Not that we can tell here in Houston, TX and we won't have colored leaves until December. But just to KNOW that it is fall makes me feel cooler and looking forward to all the things that are autumn.

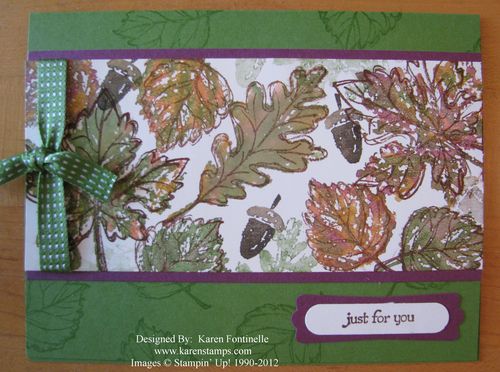
This card was made with one of the leaf sets I have….Gently Falling. It's a two-step stamping set which means you can stamp the solid image of the leaf and then stamp over it with the outline image to define it….or just leave the solid image! Or you might want to just stamp the outline image and color in…or use it as a background as I did on the Gumball Green card base.

To give the look of fall leaves, I used several Stampin' Write Markers to ink the stamps. I would start with the lightest color of marker I was using on that stamp and ink up parts of the stamp.  Then I would progress with darker and darker colors of green or brown, for example.  This gives a multi-colored effect.  Either breathe heavily on the stamp to remoisten the ink or spritz it with a little water from a distance. That helps to blend the colors on your stamp.

Just because some packages of card stock were still not put away, I thought they looked good together and decided to use them….Gumball Green, Rich Razzleberry, and Very Vanilla….and some Soft Suede ink plus a little More Mustard and Tangerine Tango markers.

The little greeting is from Teeny Tiny Wishes (such a useful set!!), punched out with the Word Window Punch and layered on the Modern Label Punch. I almost didn't put a greeting so I could add an appropriate one later when I needed a card, but "Just for You" will do for a lot of occasions! I recommend purchasing the wood-mount version of Teeny Tiny Wishes since the stamps are so tiny.

It's fall so lets start enjoying the colors and the mood of autumn! The Stampin' Up! Holiday Catalog also has many stamp and paper choices as well as inspiration to get you in a fall-ish mood! If you need a Holiday Catalog, just email me at Karen@KarenStamps.com

Canyon Scenery from the Air

We arrived home last night after a week's vacation in California visiting our daughter and son-in-law. The weather was a little hotter most of the time than we have experienced there before but still not quite as bad as the always tropical Houston! And the mountains and scenery are always gorgeous!

I always like the window seat on the plane so I can look out and hopefully see something interesting. I actually wish there was a little map of the plane flying so I could see what state or area we are flying over at all times. On the way out to Burbank, we changed planes in Denver, and as I looked out the window, the scenery below was just spectacular! I took pictures from the plane hoping we could figure out where we were or if we were actually flying over the Grand Canyon. (We're typically on the wrong side of the plane if the pilot announces something to see out the window!)

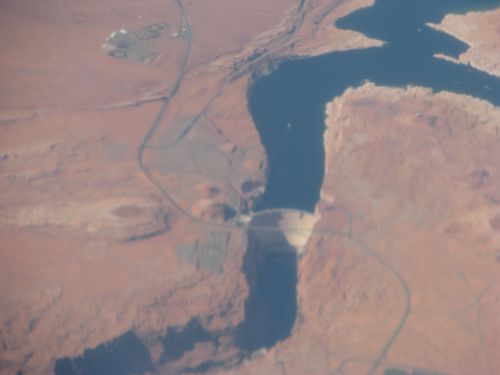
We did spot a dam and some water. As it turned out, it was the Glen Canyon Dam and Lake Powell behind it! And… as it turned out, the top Stampin' Up! Demonstrators who were rewarded with a free trip called Founder's Circle from Stampin' Up! to St. George, Utah had gone on a float trip in the same area just the day before! Stampin' Up! really knows how to treat demonstrators (and everyone!) the right way so all Stampin' Up! events are always top-notch! But for these top demonstrators, this Founder's Circle trip is always spectacular! From reading some of their blogs, they first visited Kanab, UT where the Stampin' Up! manufacturing facility is loated and had lunch with the employees. Then they took a bus to begin this 3-hour float trip which looked really amazing. If we had just flown one day earlier, perhaps we could have seen their tiny rafts (tiny from the air!) floating down the Colorado River!  :) 
Glen Canyon Dam and Bridge
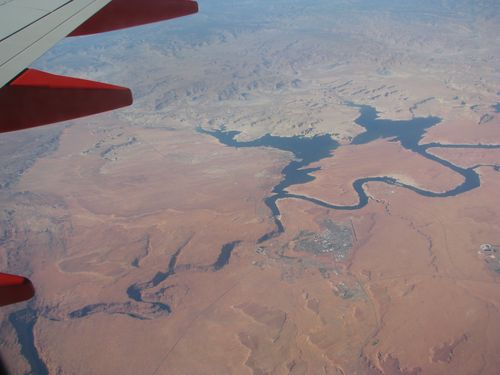
Glen Canyon Dam

Glen Canyon Dam and Lake Powell

Glen Canyon Dam in center.The Founder's Circle float trip was in canyon below that.

Lake Powell

Dam in the very lower left and looking back at Lake Powell

Glen Canyon Dam

Glen Canyon Dam with bridge in front of it
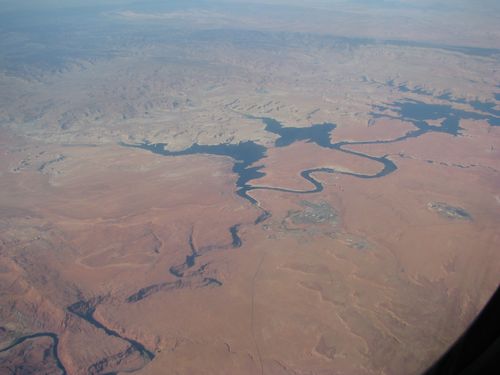
 

Glen Canyon

Wiggly canyon going down to lower left is where they floated


These photos really do not do justice to seeing these views yourself from the plane. It's almost spiritual to fly over this kind of scenery that seemed to go on and on and on.  Just magnificent!  Now that my husband and I have compared our photos from the air to Google maps and photos on some of the demos' blogs, he thinks we need to do this float trip!

You can read about the whole Founder's Circle experience on Shelli Gardner's blog!

And if you think you'd like to be a part of a company that rewards hard work by top achievers like this, then check out some more information about Stampin' Up! Even if you don't reach this level, you will certainly enjoy being part of the Stampin' Up! family from the moment you join!



My Digital Studio Halloween Card


Hallwn-001

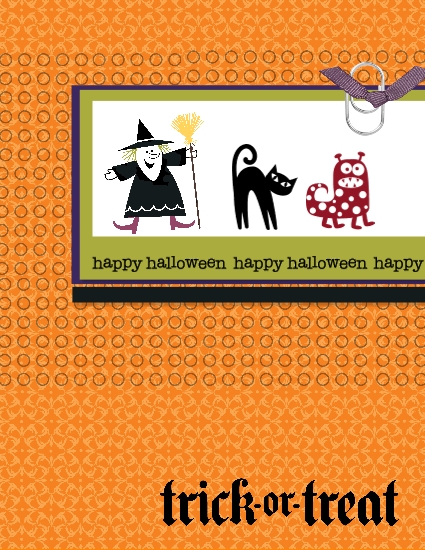
Here is a Halloween card I made in My Digital Studio using a designer template….and then changing it!  It was a birthday card with a little bird, but I changed the background paper, added a layer under the main panel, and added Spooky Bingo Bits images instead of the bird.  A couple of Halloween greetings, of course, change the card from birthday to Halloween!  It's so much fun!  Just start with something already designed and then you can change one thing on it or every single thing!  Whatever you like!

For the free 30-Day Trial of My Digital Studio, just go to my Online Store!

New My Digital Studio Downloads


MDS Download Sept 18 2012
MDS Download Sept 18 2012Prices

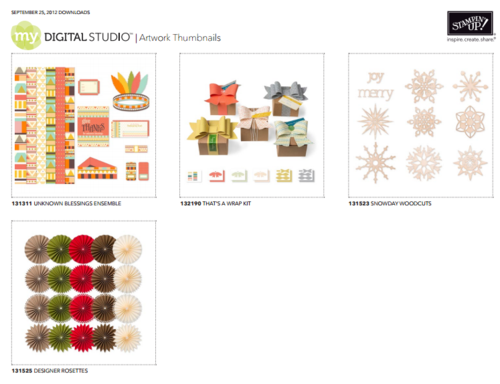
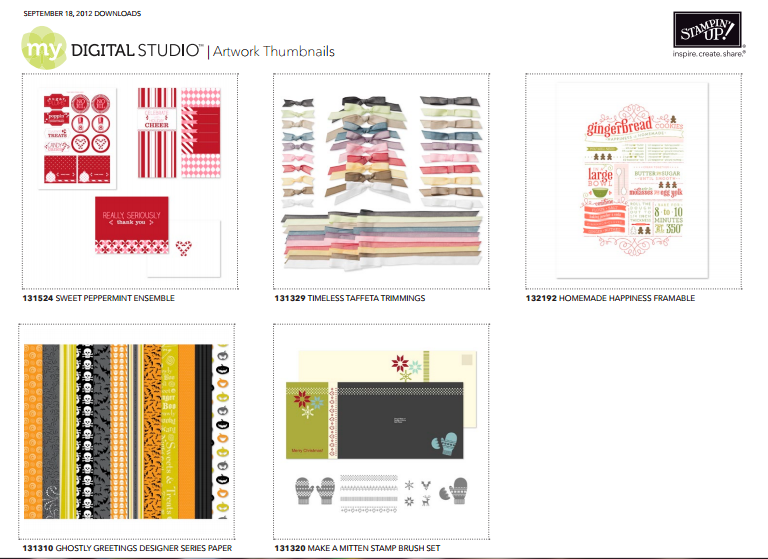
These are the new downloads that came out yesterday for My Digital Studio, the Stampin' Up! digital papercrafting design software.  We now have the new Version 2 of My Digital Studio, and it has so many new improved features that it is really exceptional. I love it and I wish everyone would try the My Digital Studio Free 30-Day Trial!

Click on the images above to see the full page.

Halloween Glittery Spider Web Card


Halloween Card Spider Web

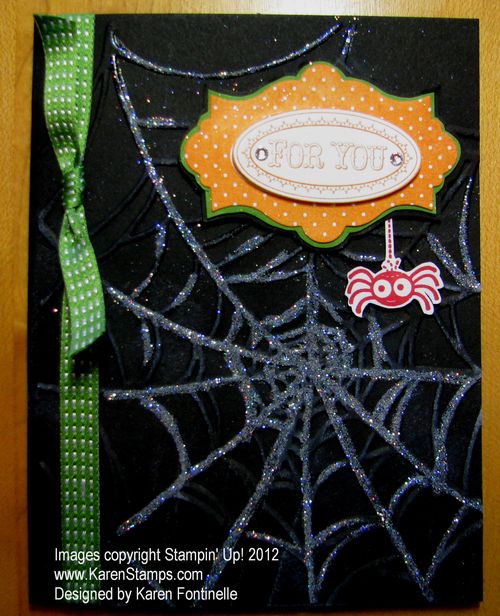
If you need a Halloween greeting card with a glittery spider web, this is the card for you! The Stampin' Up! Embossing Folders make it so easy with the Big Shot to jazz up your cards!

For this card, I just ran my Basic Black card stock card front through the Big Shot Die-Cutting Machine #113439 with the Spider Web Folder #120889 and sponged a little White Craft Ink #101731 over the raised edges.  But for some extra glitz, I couldn't resist using the 2-Way Glue Pen #100425 and some Dazzling Diamonds Glitter #102023 on parts of the spider web.

To make the label and greeting at the top, I stamped the "For You" frame image from Layered Labels (p. 103 in the Catalog) and cut out with the Apothecary Accents Framelits #127003. Since there isn't a large framelit to layer, I just cut out a slightly larger layer by hand.  Using your Paper Snips #103579  makes it an easy job. And then if you stamp the Layered Label again and punch out the words with the Oval Punch, you can layer that on top, popped up with a Stampin' Dimensional.

The little red spider is from Googly Ghouls in the Stampin' Up! Holiday Catalog p. 27. I don't know if any spiders are red, but I thought this one would be cute in red! I just cut him out by hand, again with my Paper Snips.

For the finishing touches, I added a couple of Rhinestone Jewels to the label and tied the Gumball Green ribbon around the side of the card.  Remember, you can get a spool of that ribbon FREE with a $40 purchase in September!

It's time to order your supplies for your Halloween projects!  You can do so easily at my Online Store!

Stampin’ Up! Free Ribbon with Purchase….Back to”Spool” Time!


Spool Promotion

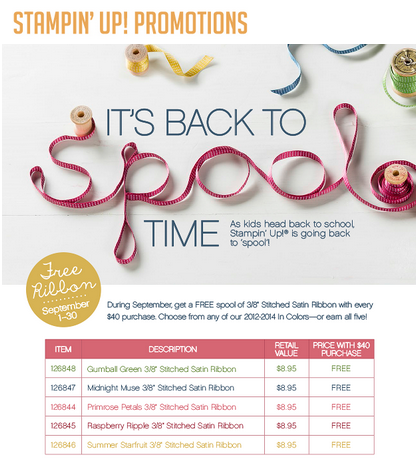
Don't forget this free ribbon promotion from Stampin' Up! during the whole month of September!  For every $40 you purchase in product, you may choose one free spool of 3/8" Stitched Satin Ribbon in the 2012-14 In Colors!  It's real "purty"!  You'll want to get some!!

Click on the image above for details.

Shop for your Stampin' Up! supplies at my Online Store!

Punch Art Panda Card

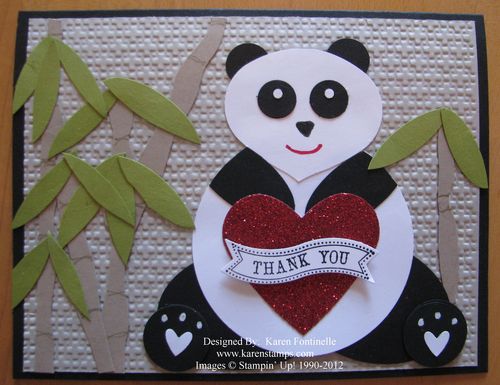
Panda Punch Art Card
While in St. Louis a few weeks ago, we were able to attend the Lantern Festival at the Missouri Botanical Garden. It was a beautiful and colorful display of wire forms covered with silk, and after dark they lit all the displays and scenes. One of the displays was called "Panda's Paradise".  My sister-in-law's friend was able to get us all tickets to go, so when I heard her say she loved pandas, I knew I would make her a punch art panda card!
I know I found this idea somewhere on the stamping internet, but I modified it a little bit and added the red glimmer heart for my thank you. I thought the Lattice embossing folder made a good background. Can you guess that the panda's face is made with the Ornament Punch with the little top cut off?
Stampin' Up! sells a great variety of punches, and plenty of talented stampers, demos and customers alike, come up with all the creative uses for them, not just what you first see! So you know you will get your money's worth out of all the punches!
You can shop here for your Stampin' Up! punches  and any other papercrafting supplies! Of course if you prefer to email me your order, I'm happy to place it for you.

Stampin’ Up! Spooktacular Kit Offer…Last Day Sunday Sept 16th!


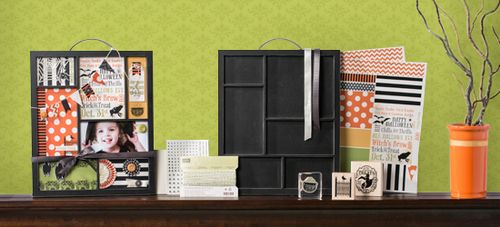
Spooktacular Project Kit for Recruits Aug 2012

Sunday, Sept. 16th, is the last day to get this adorable kit for Halloween when you sign up to be a Stampin' Up! Demonstrator! If you would like to make some extra money for the holidays, if you need some extra money for some bills, if you want a stash of money for yourself….or if you just plain want to enjoy being a Stampin' Up! Demonstrator….then take advantage of this offer!  Of course, any day is a good day to sign up to be part of the Stampin' Up! family, kit or no kit!  But this is just an extra fun perk!  One of many, as you will discover, being a Stampin' Up! Demonstrator.

Being a Stampin' Up! Demonstrator gives you flexibility to have a business and run it the way that works best for you and your family.

For more information on this promotion, click here and then scroll way down!

For general information about becoming a Stampin' Up! Demonstrator and starting your new business, please look at my Stampin' Up! website here. You'll find information about choosing $125 in product for your Starter Kit which only costs $99! You'll also receive some business supplies to get you started and your kit ships for free!  You Halloween project kit will also ship with your Starter Kit.

Email me if you have any questions.

When you're ready (anytime) just sign up online here!  Once on the page, just click the "JOIN NOW" button on the left.  No password required. It will ask you to read and agree to the Demonstrator Agreement, then choose and purchase your Starter Kit. Stampin' Up! will then email you your Demonstrator number and information to get into the Demo website!  Once you choose your kit, it only takes minutes!

31% of Digital for 31 Days…..Last Day Today!


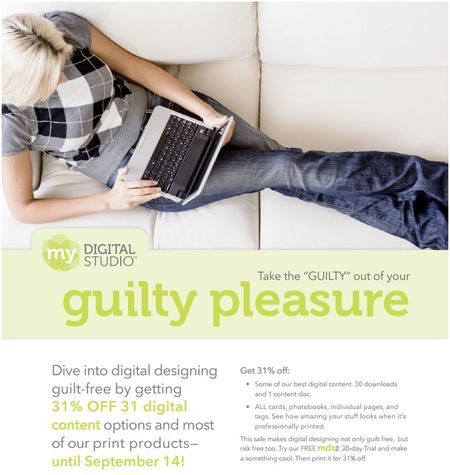
31 off

Today is the last day for the Stampin' Up! 31% OFF 31 digital promotion! It's not just about getting your projects printed, there is also digital content to purchase….downloads AND the Floral District Collection DVD! Check it all out in my Stampin' Up! Online Store! Downloads ship free of course…..because they don't ship!! You get them immediately to download!

Get the My Digital Studio FREE 30-Day Trial today and also purchase some extra downloads you think you might like….believe me, you'll like them all!

And now I've got to finish up my swatchbook and get it sent in to the Stampin' Up! printer to take advantage of the sale myself!!

Layered Labels Trick or Treat Halloween Card

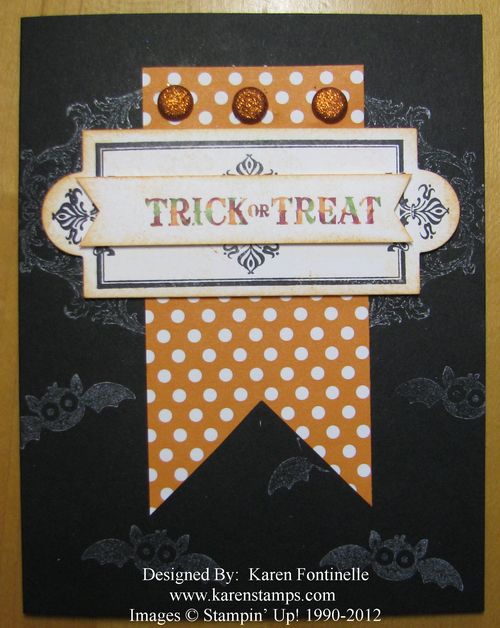
Trick or Treat Halloween Card
While I already had out the Layered Labels Stamp Set  and the cute Polka Dot Parade Designer Series Paper I decided to make another card in the same mode as yesterday's post.  Well, it turned out to be a Halloween Card! Notice how I did the "Trick or Treat" greeting! I'll tell you about that in a minute.
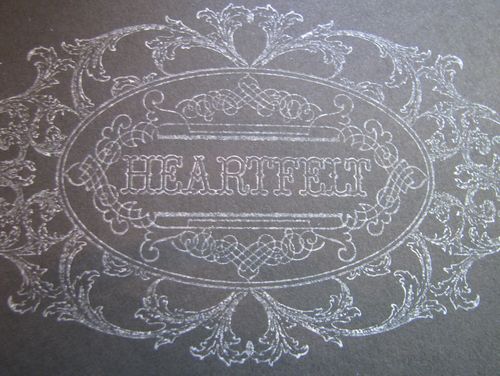
In stamping the large background image, which has "Heartfelt" on it, I used the new Illuminate Glimmer Watermark Stampin' Pad #126857.
Illuminate Glimmer Pad Stamping
The photo really doesn't pick up the slight shimmer of the ink, which is why it just looks white. The Holiday Catalog describes it as "a luminescent shimmer" and "watermark ink for tone-on-tone shimmer stamping.  Acid free." I also stamped the little bats on my card from Googly Ghouls with this Illuminate Glimmer pad.
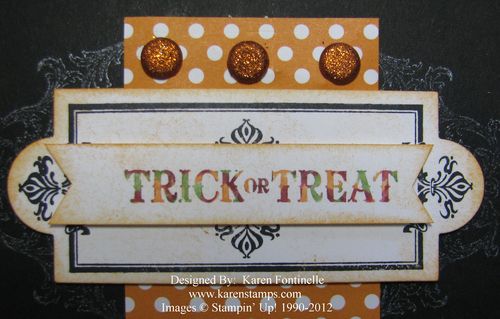
To make the multi-colored "Trick or Treat" on the Layered Label, I colored the image randomly with markers.  I started with the lightest color first (because you don't want to mess up your markers with other colors!) and just colored here and there with one color, then did the same with the next color.  Of course it is very hard to tell if you hit all the spots except to look carefully and see if all the areas of the stamp are wet.  I got pretty lucky on this one, although after looking at the photo, I can see some tiny areas I missed!  But overall I loved the way it turned out!
Here is a close-up:
Halloween Layered Labels on Card
Instead of a ribbon bow at the top, I used three Glimmer Brads. I also sponged the labels with Pumpkin Pie ink to take off a little of the bright white.  I love the way it turned out!
It's time to order your supplies for your Halloween crafting!  My Online Store is always open!

Rubber Stamped Layered Labels Congratulations Card

Rubber Stamped Layered Labels Congratulations Card
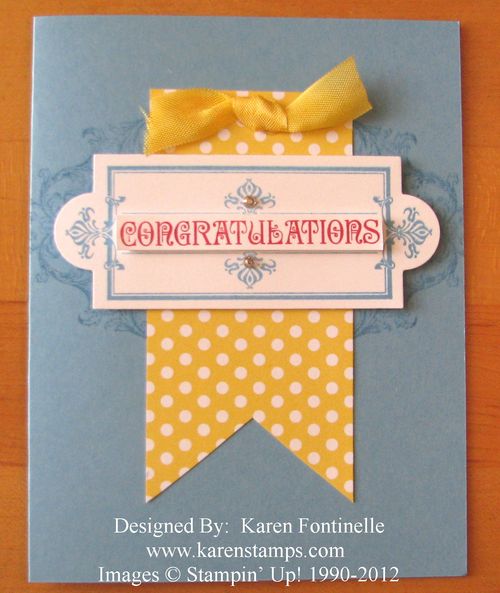
Sometimes you need to say "congratulations" to someone so it is good to make some rubber stamped cards to have on hand. This versatile card is made with the stamp set Layered Labels, found in the Stampin' Up! Catalog on page 103. I actually used the sample on that page to duplicate this card. And the Apothecary Accents Framelits Dies (p. 191) make it easy to cut out the frame with the Big Shot. I stamped the same frame again in Real Red and used my Paper Snips to cut out just the word "Congratulations".
The card base is Marina Mist card stock and the designer paper is the new fun Polka Dot Parade. The bow is made with a little piece of Daffodil Delight Seam Binding Ribbon. And for a little bling, I added a couple of Rhinestone Jewels. You gotta have some rhinestones now and then!!
The Layered Labels stamp set and the Apothecary Accents Framelits Dies work so well together to help you make lovely cards and other projects for all occasions.
You can find these stamping supplies and more at my Stampin' Up! Online Store! Put in your own order online….or if you prefer, call or email me with your order any time.