Monthly Archives: July 2012

Last Day for Reason to Smile


Reason to Smile

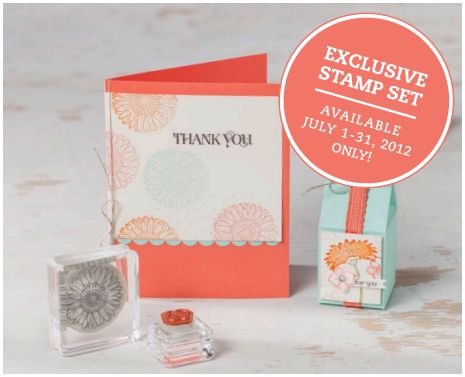
It's not really the last day to have a reason to smile, just the last day to purchase the Reason to Smile stamp set for only $5 with a $50 purchase! It was fun having a stamp set to buy for only $5!

  • Stampin' Up! has notified us that they are switching the type of liner used in the Snail Adhesive.  It is now tinted blue and thinner that the previous liner so the roll may look like it has less adhesive, but it does have the same amount.
  • Are you on my mailing list??!  Be sure to sign up at the top of the middle column of my blog!  My August newsletter will be coming out next!
  • The Stampin' Up! Holiday Catalog begins tomorrow!!  If you do not have a demonstrator you are working with and would like a Holiday Catalog, please email me. You will certainly LOVE this catalog!
  • The new Version 2 of My Digital Studio is supposed to come out tomorrow! Can't wait!!  If you would like to try first before buying, you will be able to order a free 30-day trial.

Enjoy your last day of July!!  We are one day closer to cooler weather (hopefully!!).

If you want to place a $50 order to get the Reason to Smile Stamp Set for only $5, you can shop until 11:50 MT tonight online!

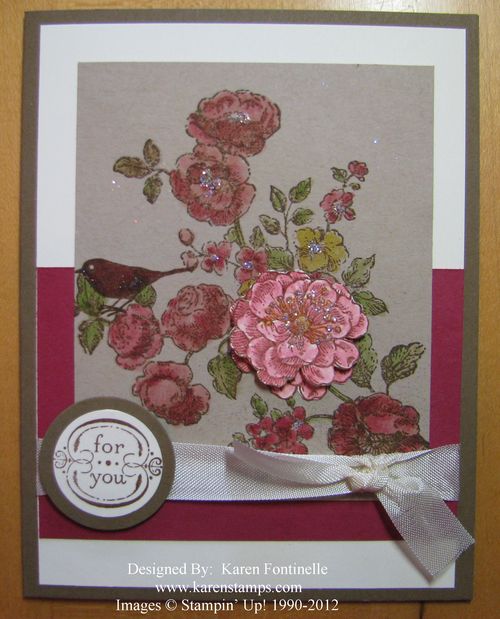
Stampin’ Up! Reason to Smile Scrapbook Page

Reason to Smile Scrapbook Page

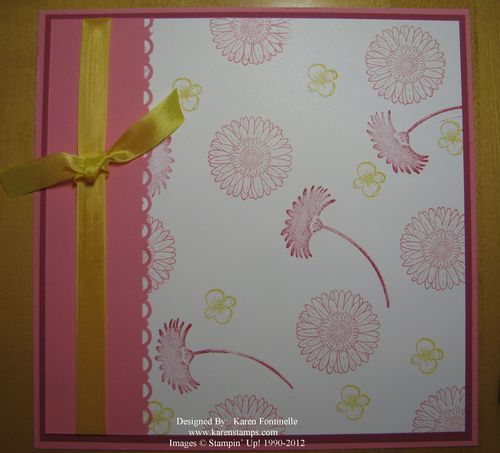
Here is an easy, bare-bones scrapbook page using the Stampin' Up! stamp set "Reason to Smile".  Only today and tomorrow to get it for only $5 with a $50 purchase!  Just do some random stamping with the flowers on Whisper White, mat it, put a little embellishment on the page and add your photos and mats…plus some journaling!  You've got an easy scrapbook page (of any size) that you can lay out and embellish according to your design.  I decided to use some colors I don't use as much and consulted the Stampin' Up! Color Coach….always a good idea….and came up with Rose Red, Regal Rose and Daffodil Delight!

Be sure to check out the Reason to Smile promotion if you like flowers!  Ends July 31st!

New Stampin’ Up! Foam Ink Pad Labels

I knew that the new Stampin' Up! foam ink pads were coming with labels to use on the bottom of the case..but when I got mine I kind of forgot about it.  Finally one day I remembered the labels were there as a new feature and I actually stopped and took time to adhere them!

If you haven't applied the labels to your new foam ink pads yet, maybe this will remind you!  And if you haven't ordered your new foam ink pads yet, maybe this will help you in  applying the labels.

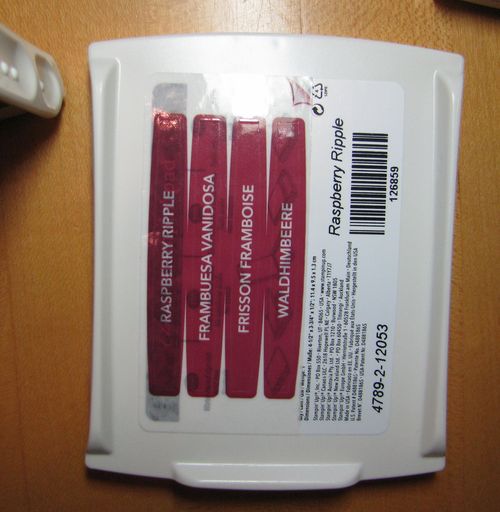
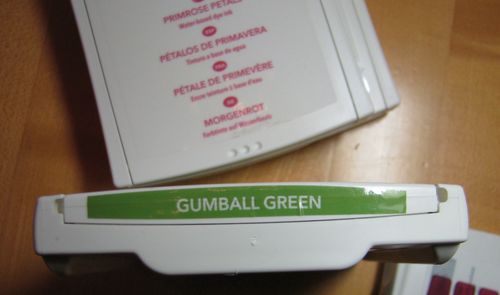
Stampin' Up! Foam Ink Pad Labels

This is how the labels come on the bottom of your ink pad in English and three languages.

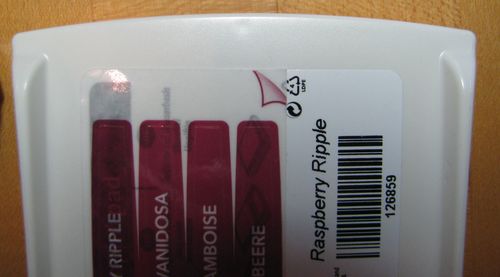
Stampin' Up! Foam Ink Pad Labels corner
Look for that little corner on the label that indicates where you peel back the label.

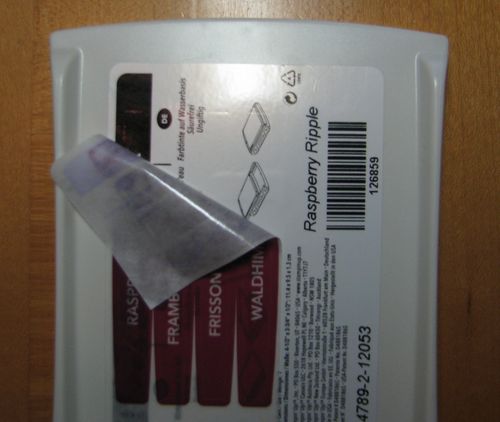
Stampin' Up! Foam Ink Pad Labels corner peel back
You want to grab all the pieces of the label down to what you see here.

Stampin' Up! Foam Ink Pad Labels applied
Peel off the label in the language that you want and apply it in this position on the ink pad case. It will be self-adhesive.

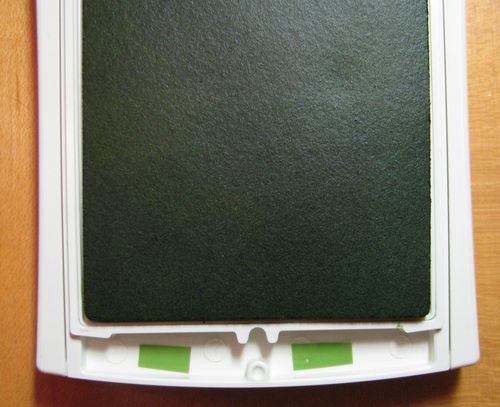
In Color Ink Pad Label Inside
This is optional, but if you want to cut the solid ends off of another language label, you can stick the two pieces INSIDE your ink pad, which sometimes help identify what color you are using when the top of the ink pads are just dark.

There you go!  Easy to do, handy to use, and you are ready to stamp with the new labeled foam ink pads from Stampin' Up!


Stampin’ Up! Carry On Hostess Set Available Again!

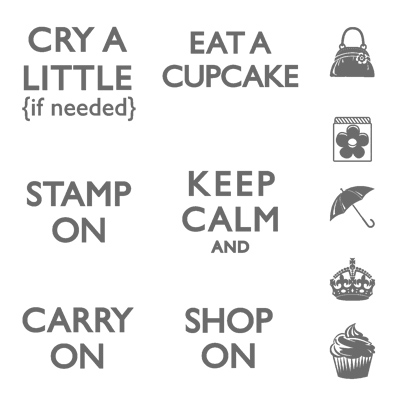
Due to the discovery of legal issues back in June, Stampin' Up! turned off this Hostess Set. But now after review by the legal department, Stampin' Up! is making this Carry On Hostess Set available again! So if you host a workshop with sales of $150 or more or you have your own personal order of $150 or more, you can now consider purchasing this stamp set with your Hostess Dollars! It was a popular set while it was available and promises to be so now that we can all get our hands on it!

Carry On Hostess Stamp Set

The Olympics Begins!!

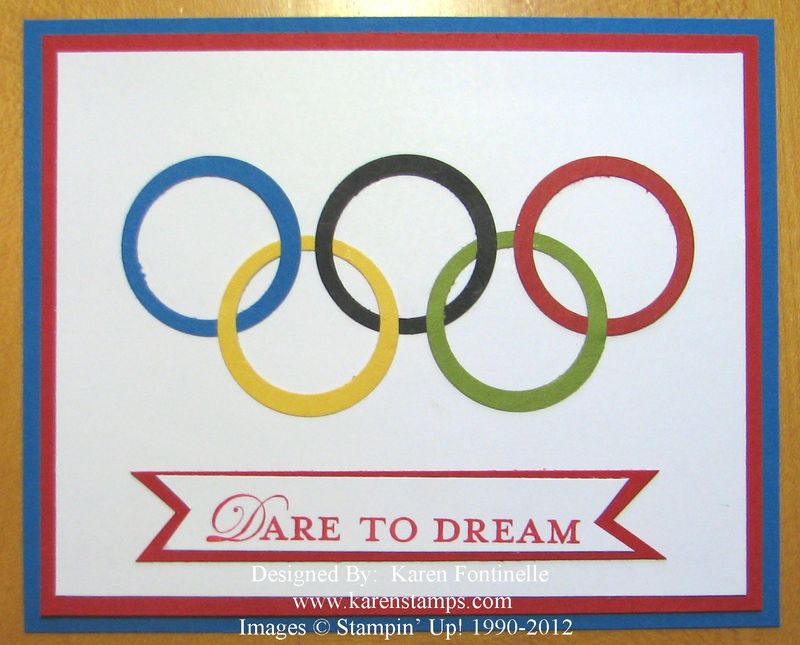
Olympics Rings Card

The Olympics begin with the Opening Ceremony tonight! The city of London is hosting the 2012 Olympic games and they are finally going to get started! It seems like we have been looking forward to the Olympics for a long time and now it is finally here!

Here is the story behind the colored Olympic rings from the Olympic Museum Manual:

 "Pierre de Coubertin first proposed this symbol at the 1914 Olympic congress in Paris.

 The five rings on a white background form the Olympic flag, which was unveiled during the same congress. The flag flew for the first time in an Olympic stadium in 1920 during the Antwerp Games.

If the number of rings represents the continents, the colours (six of them, counting the white background) were chosen to ensure that every country would have at least one of the colours in its national flag included."

"The five rings that make up the Olympic symbol represent the union of the five continents and the meeting of athletes from all over the world during the Games. They symbolise the universality of the Olympic Movement."

To make this card:

Stamps:  Loving Thoughts Stamp Set

Ink:  Real Red Classic Ink

Paper:  Pacific Point, Real Red, Whisper White, Basic Black, Old Olive, Daffodil Delight

Accessories: 1" Circle Punch, 1 1/4" Circle Punch

Note:  Punch the 1" circle first, the turn your 1 1/4" punch upside down, reinserting the punched piece so you can see the sides.  Once you have it lined up correctly, punch out the ring.  This is easier than punching the larger circle first and then trying to center the 1" circle.

Enjoy the games!


Prepare Today for Tomorrow’s Memories

McMenemy

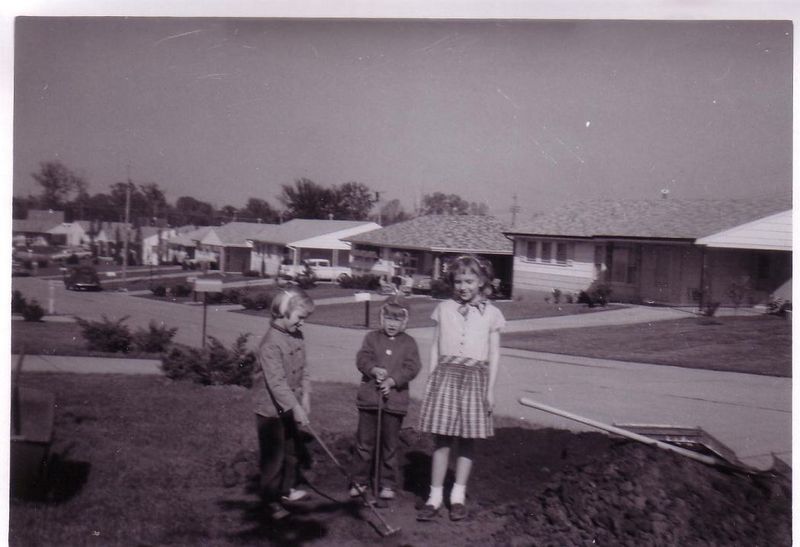
Maybe this is the age when we start getting nostalgic. But then I've always loved looking at old photos. I've been having so much fun on Facebook…not so much the regular part of Facebook, but on the group that someone created of where I grew up. I would NEVER remember all the things that the other people mention, the businesses, the places, the schools, the amusement parks…everything that made up our childhood. And recently someone in my exact neighborhood started posting, who lived up the street from me. I knew I had some old photos of our street and some of the girls attending my birthday party when I was 7 and pictures of the kids in the backyard. Other people have taken more recent photos or dug up some old ones of the area outlying out subdivisions, along the main streets, etc.

My point is….in time, you may wish you remembered what businesses were along the main street you traveled to work everyday or what the houses (not just the front of your house) looked like in your neighborhood, the schools, the movie theaters, the mall, your church, etc. etc. etc. In this photo above of two friends and me in a pile of dirt my dad got for the yard…sure, it's great to see the people, but as a bonus I can see some other houses on the street, how little the bushes are, how old the cars are. Sometimes those details are just as fun as seeing the people in the photos. I'm sure my mom (probably) taking this picture never thought about the rest of the street she was capturing…but now it's a great memory!

McMenemy up the hill

Here's another "off to school" photo, but look, I can see three houses up the hill from me also! Hmm, I don't see any cars in the carports either, although our old Buick is in the corner of the photo. I remember that most people did not have two cars back then, so perhaps the dads already drove the car to work, and the kids rode the school bus. 

Just something to think about!  Take some pictures of what is around you on your street, in your neighborhood, parts of your house that don't usually get photographed….the things we take for granted because we see them everyday. Whether or not you scrapbook them doesn't matter so much, just take those pictures. Those photos might jog some memories in the future and be as valuable as the "normal" memories you think you are capturing!

Stampin’ Up! 2012 Convention Highlight Video!

Not much chance that all the  Stampin' Up! 2012 Convention energy is over yet even if the convention is over! Stampin' Up! produced this Convention Highlights video.  The theme of Convention was "I Am…". As Shelli Gardner explained on her blog, she thought this was a theme everyone could find meaning in, both personally and professionally. That will help explain the beginning of the highlights video and the Convention theme song (which everyone seemed to love!).


You'll see the shopping at Memento Mall, the presenters on stage, the Prize Patrol, the free stamps, the swapping, the Awards Night, the dancing, the laughing, the fun of it all!

Take a few minutes to find out about starting your own stamping and scrapbooking business and see if you would like to become a Stampin' Up! Demonstrator and join the fun!

 Contact me if you have any questions!

Perfect Punches Twitterpated Birthday Card

Perfect Punches Twitterpated Birthday Card

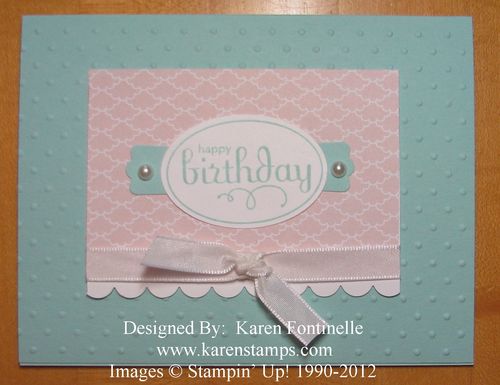
As I looked through some of the photos other demonstrators took at the Stampin' Up! Convention last week, I was inspired to make a birthday card using these colors.  Then I found a scrap with a scallop border punched with the Scallop Edge Border Punch #119882 so I just started with that. I covered the scrap of Whisper White with a piece of Twitterpated Designer Series Paper #125406 just down to the scallop edge. The card is embossed with the Perfect Polka Dots Folder #117335 (one of my favorites). The greeting is from the Perfect Punches stamp set (page 120).  If you noticed that the Modern Label Punch #119849 is unusually long to fit behind the Perfect Punch stamp, it is because I cut it in half so the ends would stick out on the sides of the greeting.  And then I added a pearl on each side.

So there you have a simple, soft pretty card perfect to send to someone special for a birthday!

If you haven't gotten your $5 Reason to Smile stamp set with a $50 order from Stampin' Up! yet, place your order today at my Stampin' Up! Online Store.

Trendy Mason Jars!

Yesterday Stampin' Up! did something they have never done before! They live streamed about thirty minutes of the last general session of the 2012 Convention to us demonstrators.  I think it was mainly to give us all a taste of what attending Convention is like, for those who haven't attended yet. Next year will be the 25th Anniversary of Stampin' Up! and you can imagine that they will do that convention up right!

During the live stream, Sara Douglass, Shelli Gardner's daughter, gave a demonstration of some decorating ideas for mason jars!  When you see the Holiday Catalog August 1st you will see why! Apparently mason jars are trendy items right now!

Here are some photos that I took of my computer screen during the live stream from the Stampin' Up! Convention!

Tie DyeTag for Mason Jar

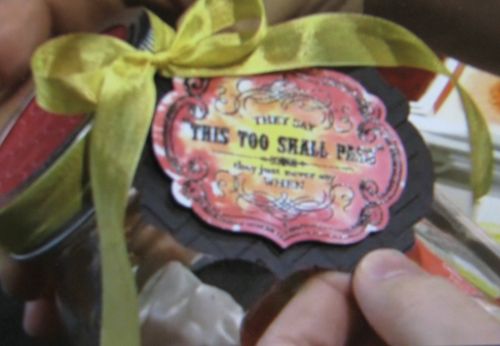
Here's a tag she made look tie-dyed just by embossing and then coloring in (not neatly!) with various inks.  The bottom tag is embossed with the chevron design.

Doily Mason Jar

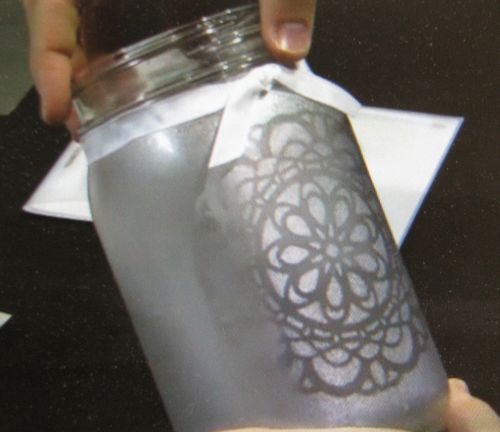
Very pretty!  I'll have to listen again to catch the instructions! I'm sure you recognize the doily die.

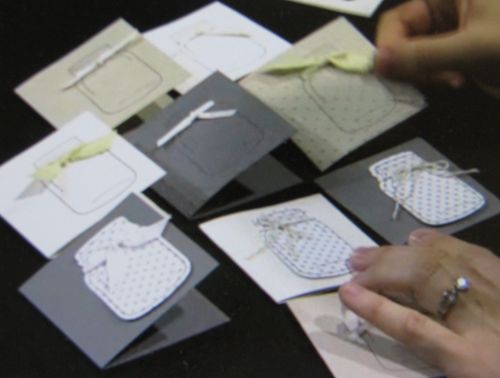
Mason Jar Cards

Here are matching cards you could give as a gift or have people write advice or good wishes at a wedding or shower or whatever occasion. Then they get put in the mason jar!

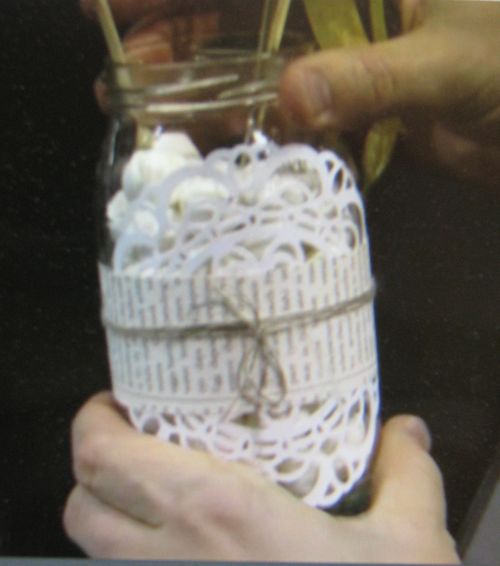
Mason Jar Idea

And here's another creative idea…this time the jar is filled with something (mints?) to hold skewers attached to decorations or flowers or whatever you would want to make…just like a vase.

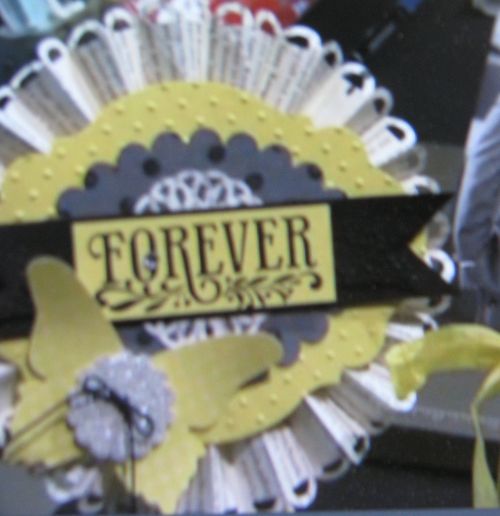
Rosette in Wedding Mason Jar

All Images copyright Stampin' Up! 2012

And here's one item she made to stick in the jar for a wedding gift for a friend.  She also stuck a gift card holder on the back.

Even thirty minutes of live Stampin' Up! was great fun!

Stampin’ Up! Two Tags Die Scallop Flower Thank You Card

Two Tags Die Scallop Flower Thank You Card

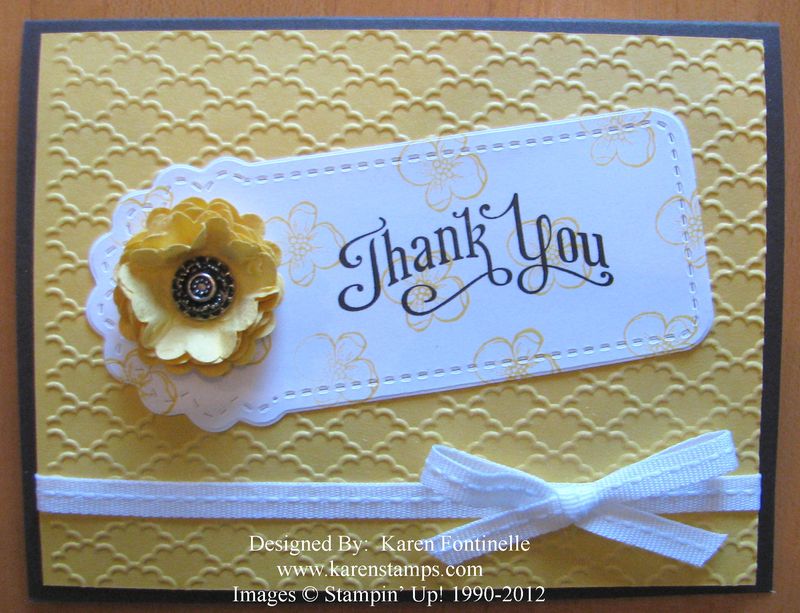
While cleaning up my scraps recently, I found I had a little stack of these Two Tags die cuts already cut out, so today I decided to use one somehow on this thank you card. This is also a sneak peek at the 1 1/4" Scallop Circle Punch coming in the Holiday Catalog August 1st.  So cute!!

Since I was making my scallop flower out of Daffodil Delight, I looked at my Color Coach for fun to see what colors they put with it.  One was Early Espresso so I used that for my card base. Of course the Daffodil Delight card stock layer needed a little something so I tried out my new Fancy Fan Embossing Folder #127751.  Love it!  I love this die cut from the Two Tags Die, so to jazz it up a bit I stamped with the small flower in Reason to Smile (the stamp set you can get during July for $5 with a $50 purchase). The greeting is from the Perfectly Penned stamp set (page 132), stamped in Early Espresso.

To make the scallop flower, I punched six scallops, then softened them up with my bone folder, crinkled them up, stacked them up, pierced the center, and inserted an Antique Brad #117273.  You could use other brads or a button (if you glued them together first). Then I squished each layer up around the brad to get some dimension and then let them lay back down gently!  The ribbon is our new 1/4" Stitched Grosgrain Ribbon in Whisper White #126877.

Since the Early Espresso is such a dark color I added a piece of Whisper White to the inside of the card, with a few Daffodil Delight flowers stamped in the corner from Reason to Smile again.

Whew!  For such a simple thank you card I had a lot to say! I love how the new little Scallop Circle Punch flower fits so perfectly in that top of the Two Tags die….of course you also get another die on that same die so it is a great deal!

***If you like my projects and news on my blog, please sign up for my newsletter mailing list in the upper left corner of the blog!  My August newsletter will be hitting email boxes soon!

My Digital Studio Version 2 Is Coming August 1st!

Yesterday at the Stampin' Up! 2012 Convention, Shelli Gardner's daughter Sara made this little video about My Digital Studio Version 2.  Just the news we have been hoping for!! (and you get a peek backstage at the Convention!)


If you are not familiar with My Digital Studio, it is the Stampin' Up! digital design software featuring Stampin' Up! colors, artwork and templates. It is easy to learn and easy to do.  Once you create your project, just send it off to the Stampin' Up! printer to get perfect colors and quality…or do it yourself.

My Digital Studio is WAY more than digital scrapbooking…..you can design cards, photo albums, calendars, invitations, scrapbook pages, party favors, framed art…almost anything you can think of. Stampin' Up! releases new downloads every week….it's like Christmas every Tuesday!

As great as we have all thought My Digital Studio was, Version 2 promises to be even better!  Lots of new features….things like being able to "color in" the stamps, resize images without pixilation, new search feature, recoloring designer paper….just to list a few!  More details will come out soon, I'm sure!

I heard that the demonstrators who attended a class at Convention for My Digital Studio got to download a free trial of MDS2!

Check out My Digital Studio and see if you are game to try!

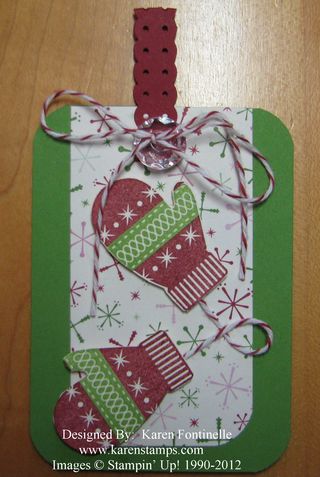
Chock-Full of Cheer Christmas Tag

Chock-Full of Cheer Christmas Tag

I could say I am “Chock-Full of Cheer” because the Stampin’ Up! 2012 Convention is underway in Salt Lake City. Right this minute the first General Session is going on and you can feel the excitement through the Stampin’ Up! Demonstrators who are there blogging and tweeting and reporting to those of us who are home!  You can’t believe the festive atmosphere that goes on before the beginning of each General Session, especially this first one, with music playing and dancing in the aisles, swapping, chatting, and cameras taking it all in.

So while I am home enjoying keeping up with Convention coverage, I’ll be playing with some new stamp sets. This one is Chock-Full of Cheer (catalog page 10) and I pretty much copied the sample tag on page 9. The designer paper on the Gumball Green card stock is the new Be of Good Cheer #126896. Notice the new cute button at the top! It’s one of the Vintage Faceted Designer Buttons #127555.

It’s never too early to start on Christmas projects!  And the Holiday Catalog will be out August 1st! So take a little time during these hot days to cool yourself off with some Christmas stamping!

For all your stamping supplies, shop Stampin’ Up! Online any time!

Elements of Style Meets Eleanor

Elements of Style

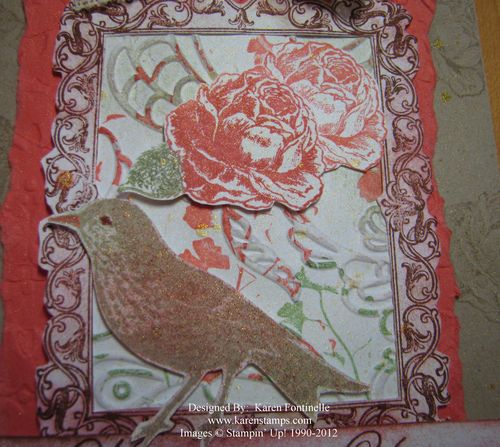
Amazing what you can find in your card stock scraps!  I had already stamped some flowering branches from Elements of Style on pieces of Crumb Cake card stock but then didn't use them….they were stuck in my pile of scraps in the card stock package. I guess I stamped them one time and then it didn't work out. But today I thought I'd see what I could do with a piece.

All it took was a little coloring in by touching my Blender Pen to the ink pad to pick up ink. If you want to try to be artistic, you can follow the highlighting (the little lines) on the stamped images and apply a little darker ink in those areas.  Then come back in and either spread that out a little with your Blender Pen or use a lighter color.  This gives you a shaded look that will make people think you are a professional artist! Stamping can make anyone look good!

I thought one of the flowers from Everything Eleanor, a new stamp set I got free at Stampin' Up! Leadership in San Antonio last January, looked like it would match closely enough with the flowers on the branch, so I stamped that separately, twice, cut them both out and glued on the card, slightly offset.  And stamped the little bird from Everything Eleanor.  The greeting is from Elements of Style.  Such a beautiful set!

If you want any stamping sets or accessories, Stampin' Up! has them here!

Place an order of $50 and add on Reason to Smile for only $5!


Use Your Stampin’ Up! Catalog! Papaya Collage Card

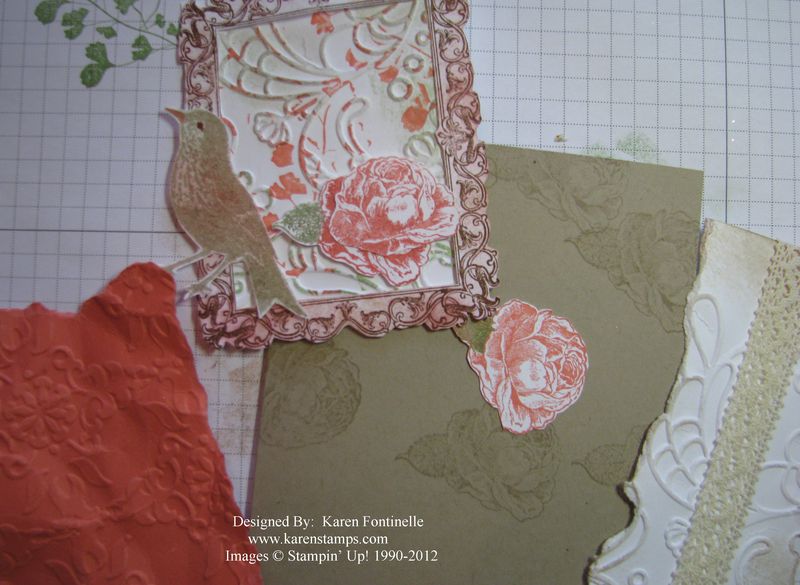
Papaya Collage card pieces

Don't think your catalog is just for shopping!  Get out your Stampin' Up! Catalog and use it!  If you just flip through the pages, you will certainly find some ideas to inspire you.  Don't be left hanging with no creative juices flowing!  Maybe you will see a card or box you like….maybe you will see an element on a scrapbook page you could put on a card instead. Maybe you will see a card you can picture enlarged into a scrapbook page if you just add some photo mats.  And the samples aren't just on the stamp set pages….look back in the accessories, too!  This catalog features close-ups and allows you, in some cases, to imagine what the rest of the project looks like and develop it yourself.

My inspiration for this post was found on page 74.  My card isn't exactly like that sample but at least it got me started. Above you can see the elements I made to assemble the card.

  • The Papaya Collage stamp set is a beautiful one to use! Be sure to check out all the elements included in this one set.
  • The Whisper White Elegant Lines (#119277) embossed pieces were just scraps in my bag that maybe didn't turn out perfectly for some reason. But they were useful on this project.
  • Paper Snips are essential for easy cutting of intricate pieces! It may be referred to as "fussy cutting" but don't be too fussy about it! Just keep turning your piece while you hold your scissors relatively still.  And don't forget to cut off the excess edges first or as you cut. Don't worry about every single cut and curve…just get somewhat close.  It really doesn't have to be exact, in most cases.

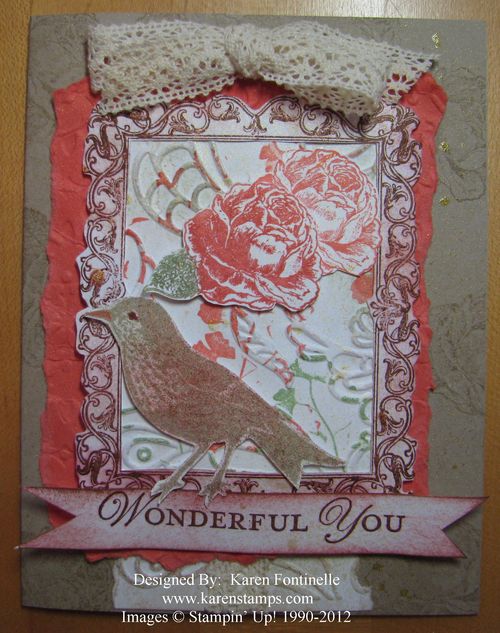
Papaya Collage Card

And as you might barely be able to see, when I was finished I spritzed the whole card with Gold Glow Smooch Spritz #118770. I like the way it turned out.  I didn't get big blobs of gold or overspray and ruin the project. What I have heard about the Smooch Spritz is don't be afraid to push down the sprayer!  Put your project in a box or somewhere that you won't make a mess.  Do some practice sprays after shaking the tube back and forth gently to mix it up.  Then don't try to be delicate in spraying….that's when you will get a mess. Push down like you know what you are doing! Of course hold a little distance away.  Try it!

Papaya Collage Gold Smooch Spritz
Click to Enlarge

If you are interested in buying Stampin' Up! products and would like a new catalog, please contact me at Karen@Karenstamps.com.  I just got a new box of them!

Shop my Online Store for the best products in papercrafting!