Monthly Archives: May 2009

It’s the Last Day to Be a Stampin’ Up! Demo for $75!!

If you've EVER thought about being a Stampin' Up! Demonstrator, this is your day!  Sign up online TODAY for only $75 and you'll be a demo in minutes!  Just go HERE, click on the "Join Now" button and use my password "karenstamps" in the application.  You'll have access to the Stampin' Up! Demo area of the website.  TOMORROW, June 1st, you'll be able to preorder certain new goodies coming in the new catalog out July 1st….except you won't even have to wait, because you will get a new catalog with your first order in June!  You can still register to go to Convention in August, one of the most exciting things you'll ever get to do!  Click HERE to read more about this special Scrapbooking Starter Kit offer and contact me with any questions.  Today is the last day!

It's also the last day for the Designer Paper Buy 3 Get One Free offer.

And it's your last chance to order the Jumble Alphabet at 20% off!

Click HERE to see the new Jumble Alphabet.

Whether you are taking advantage of any of these deals today or not, you'll want to start thinking about your last purchases from the current catalog because tomorrow the list of retiring stamps and accessories will come out…and accessories often go fast!

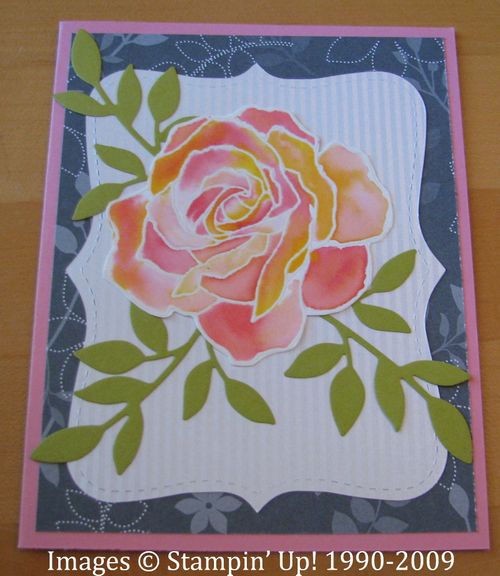
Watercolor Rose

This has been a fabulously popular technique for everyone to try after being demonstrated at the Stampin' Up! Seattle Regional. 

WatercolorRosegrayDSP

You need the Stampin' Up! Shimmery White cardstock for this technique.  Just stamp the rose from "Fifth Avenue Floral" with Craft White ink and emboss with clear embossing powder.  Now most gals have used a small plastic bottle to mist water over their rose, but not having one handy, I used my Aquapainter (another fabulous must-have tool!), just running the brush over the whole rose to get a fair amount of water within all the embossing.  Put some drops of reinker, whatever colors you want to try for your rose, on top of your plastic stamp case.  Pick up a color of ink with your Aquapainter and deposit it on your rose.  Since you already have a lot of water floating on it, the ink will spread pretty easily.  You can use several different colors for your rose….for example, Regal Rose, Pirouette Pink, Summer Sun…. and just place the ink in each little embossed section of the rose.  You really can play with it quite a bit, moving the color around, filling in, making something darker, tipping your paper to make the ink run down a little, etc!  Don't worry if the color gets outside the lines because you will cut out the rose anyway!  Once you have the color filled it, set it aside to dry for awhile.  You can pick up excess water with your Aquapainter, wiping it off on your paper towel each time.  Once it is dry, just cut out the rose and make your card.  You can stamp some leaves, or in my case, I used the Big Shot to make the "Stampin' Up! Little Leaves".  Be sure to stamp and emboss more than one rose……cuz I bet you can't make just one!!

If you need any of the supplies to make this card, please contact me!  Don't forget about the Designer Paper Buy 3, Get One Free offer for May!  Ends this weekend!

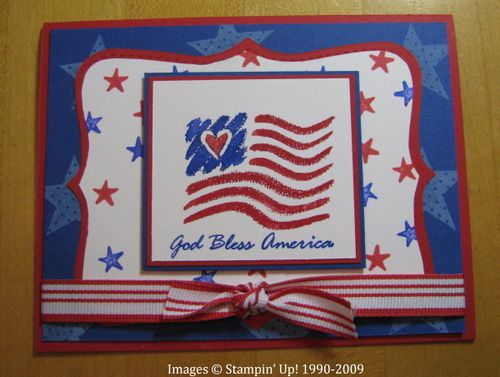
Happy Memorial Day!

MemDayGodBlessAmer 

Although the stamps used on this card are retired, I hope you enjoy this patriotic card for Memorial Day.  You probably have something similar if you wanted to duplicate this card or one like it.  The focal point of this card is the "God Bless America" stamp by Stampin' Up!  This was a special edition single stamp released by Stampin' Up! in remembrance of September 11, 2001.  The entire purchase price of the stamp was donated to the September 11th Fund created by the United Way and the New York Community Trust to provide services for the victims and their families.  I wasn't even a demo when the stamp came out, just bought it from my upline as a customer, although it wasn't long until I became a demo.  I used my Stampin' Write Markers to ink up the different parts of the stamp.  The other stars on the card are from a retired stamp set "In the Stars".  I used the Top Note die with the Big Shot, cutting out one in white and one in red and trimming the white along the score lines to fit as a layer on the red.  The ribbon is current and is the 1/2" striped grosgrain in Real Red.

Fun! Fun! Fun! Going to the Stampin’ Up! Convention!!

One of the most fun things I have ever done was to attend the Stampin' Up! Convention!  I've only been to two, and it's been a few years now, but yesterday I registered for the upcoming convention being held in Salt Lake City, Utah August 5-8.  Stampin' Up! does everything nicely in every way at Convention and all their activities and incentive trips.  I remember a man selling roasted nuts or something from a cart in the lobby at Convention in Orlando and near the end of the last session I needed a snack.  This man said to me, "I just don't get it!  You ladies have been here since 7 am and now it is 5 pm and you are all still smiling!"  Yes we were!!  What is more fun than to go to a well-planned event FILLED with creativity WITH dear friends and meeting plenty of new ones, being amazed at the fantastic Stampin' Up! employees you get to see and meet in person, not the least of whom is Shelli Gardner who graciously makes herself available for hours so demos can get a picture with her, great entertainment, awards, lunch, SWAPPING like you have never seen……it's all just fabulous!

And it is not too late for YOU to take get in on this and at a great deal besides!  Just sign up to be a Stampin' Up! Demonstrator and you can register for convention, attend all the classes and general sessions, take photos and more photos of the display boards of samples and projects, swap yourself silly, talk, laugh, and be inspired by fellow demonstrators.

If you want the whole kit & caboodle, order the Starter Kit for $199.  But if you already have a lot of SU products, order the Scrapbooking Starter Kit for only $75 and you will be a demo in minutes if you sign up online!  Contact me with any questions!!  The scrapbooking special is only available until the end of May so don't let it slip by!


Need Another Graduation Card?

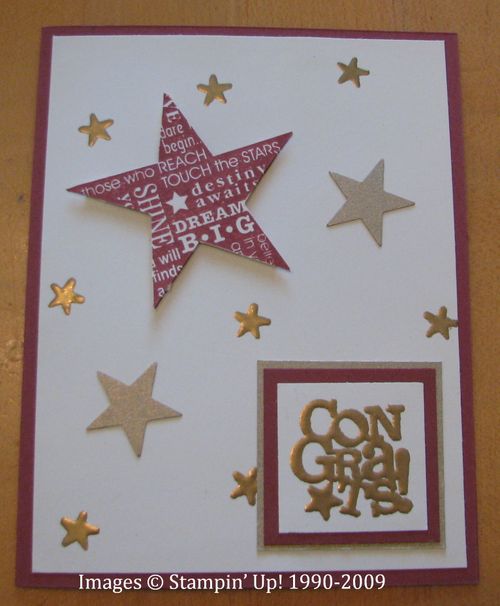
Graduation Card Congratulations 

This is a pretty easy graduation card to make.  I admit to using some retired paper and stamps, but the color, Cranberry Crisp, seemed to match the school colors pretty well.  The retired stamp set is "In the Stars" but I thought that words on the star were perfect for graduation.  I stamped the star on the ivory cardstock twice, cutting out one image and popping it up with dimensionals.  I had embossed the little stars on the card with gold embossing powder, but then added a couple of star punches out of Brushed Gold cardstock.  The gold-embossed "Congrats" is from the current Ronald McDonald stamp set, "Say It with Scallops", found on the inside of the back cover of the catalog.  Stampin' Up! donates $2 for every one of this set sold to RMDH…..it's a great stamp set and while you're stamping you know you're also helping out a worthy cause.

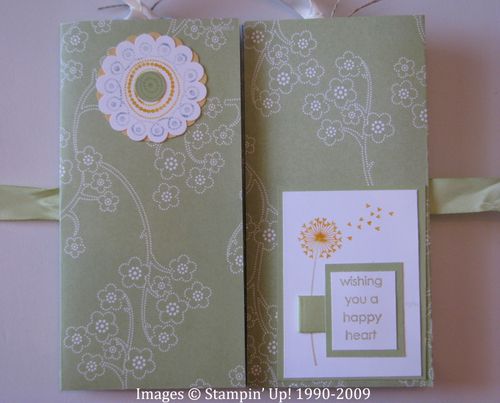
One DSP Sheet Mini Album

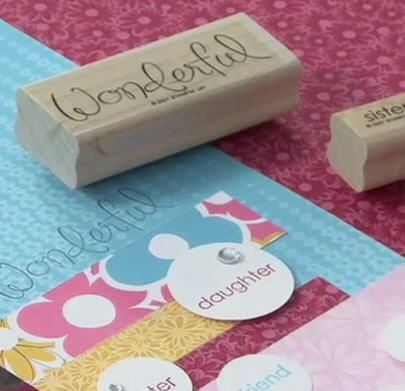
Have you watched this video yet on my Stampin' Up! website?  It's right there under "Featured Project" and I'm sure you will enjoy it.  Click HERE to see the Stampin' Up! video.

SBVid  

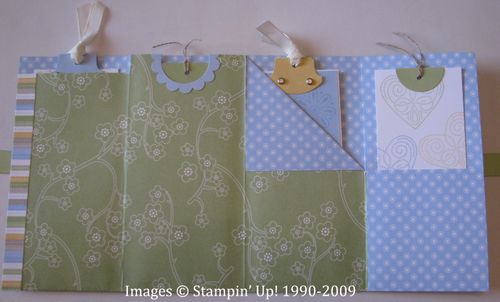
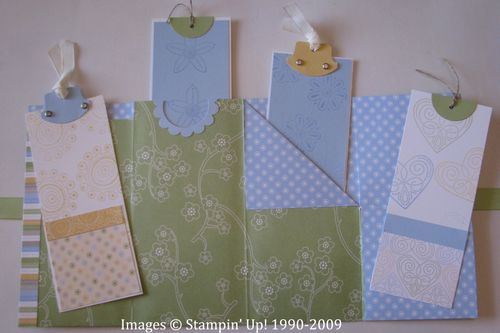
And here is a mini album I made using one of the techniques in the video. I used the Sale-A-Bration Designer Series Paper called "Delicate Dots".

MiniAlbumHearts 

MiniAlbumHearts2 

MiniAlbumHearts3 

MiniAlbumHearts4 

While you cannot still get this same paper, you can use any of our Designer Series Paper.  Choose any papers in the package to use because they all coordinate!  And during the month of May, if you purchase three packages of Designer Paper, you get one free!  Read all about this special offer for National Scrapbooking Month HERE.

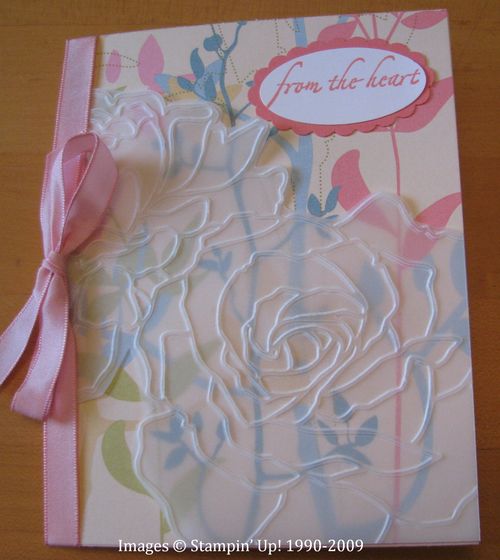
A Mother’s Day Card for You

VellumRose 

HAPPY MOTHER'S DAY!


Stamp Set:  Holidays and Wishes

Cardstock:  Blush Blossom CS, Walk in the Park Designer Series Paper, Vellum Cardstock, Whisper White CS, Cameo Coral CS

Ink:  Cameo Coral

Accessories:  Stampin' Up! Manhattan Flower Textured Impressions Die (you gotta have this!), Pretty in Pink Taffeta Ribbon


Seeing Houston Astros Baseball in Style!

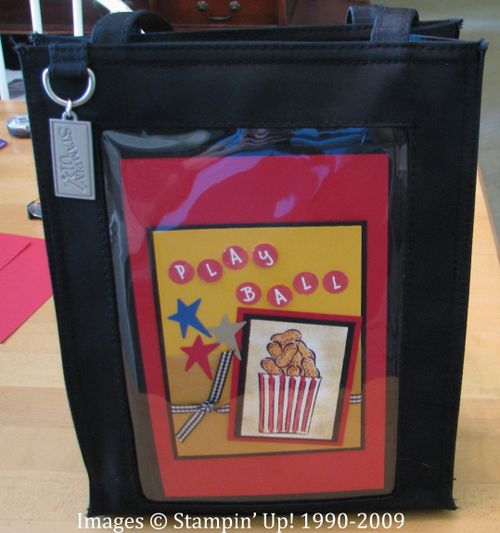
Last night we got to attend a Houston Astros baseball game at Minute Maid Park.  A few years ago I had a tote bag with three "windows" in it and had made baseball-themed card fronts to put in it to take to the ballgame.  Yesterday I thought of a special small tote bag from Stampin' Up! available to demonstrators that I had purchased that has a large plastic window in the front in which to insert a current mini catalog, such as the Occasions Mini, if you want.  I looked back at my larger tote bag with the baseball card fronts in it and chose one to put in this demo tote bag.  It was too small for the insert so I just adhered it to some layers of Basic Black and Real Red card stock.  The stamp sets and star punch are long-ago retired, but you could substitute something  current that fit your theme, if you had such a bag.

SuBaseballbag2  

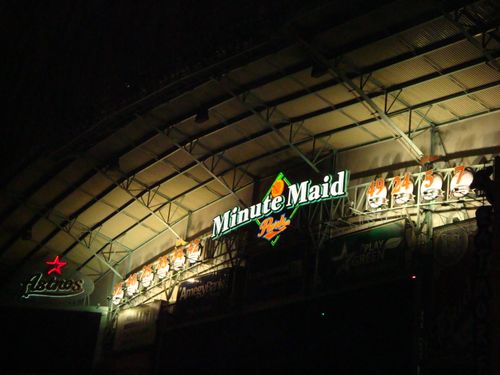
And here are some photos of Minute Maid Park and the Friday Night Fireworks!

DSC00121 

DSC00102 

The roof is open and you can see the little train that runs when the Astros hit a home run.

DSC00106 

DSC00115


A Fun Graduation Card

A really great thing about stamping is that you don't need electricity to do it (except for embossing, of course).  The other day my power went off for the whole afternoon (only going to McDonald's to get a cold drink made it go back on, as  soon as I left, I'm sure!) so I just did some stamping.  Even the Big Shot doesn't need electricity!  What a great feature!

Here is one of the cards I made that afternoon:

Graduation Card 

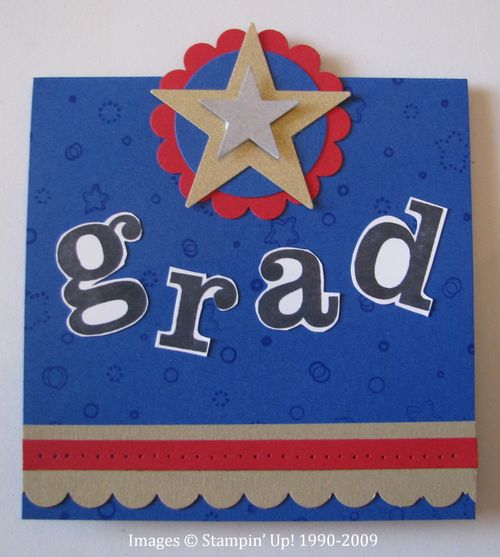
The Brilliant Blue card base is 4×4.  The "grad" letters come from the stamp from "Great Grads" but I cut them apart.  Just playing around!  The wheel I used is actually retired but very similar to the Jumbo "See You Around" wheel….or you could stamp a little background of something….or leave it plain.  I used the two star punches to make gold and silver cardstock stars, the Scallop Circle punch, the Scallop Edge punch for the border and the paper piercing tool in the Crafters' Kit to make the little pokey holes in the Real Red strip.  I think it would be a great size card to use the Slit Punch to hold a gift card inside.

It’s Graduation Time

A year ago we were looking forward to our son's college graduation and now that first year post-college has really flown by.  If I can offer a few words of advice to those of you going to graduation at a large university…..Don't park in the garage!  Not that we knew that, but we happened to see a spot on the street as we were dropping him off for the ceremony and managed to parallel park there.  That saved us at least an hour of time trying to get out of the parking garage after the ceremony!  We know because we were waiting for his friends to join us at lunch and they had parked in the garage!

Another tip would be to make sure your graduate is awake and AT the ceremony before you sit there with the whole family waiting for that glorious moment of seeing your child walk across the stage, only to find out that he overslept and isn't even there!  Thankfully that isn't a personal story, but I heard other parents recounting that story while I waited to be seated at a restaurant!  Just a college thing, I'm sure!

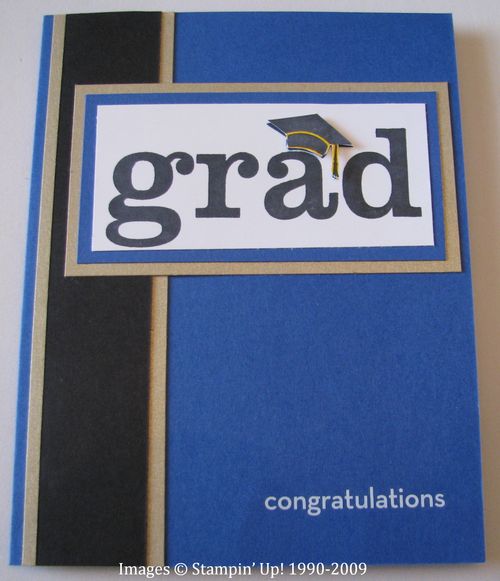
So here's a sample graduation card made with the "Great Grads" set and a rub on from "A Perfect Day".  Gotta love those rub ons!  Of course you would want to use your school colors or favorite combination, but I used Brilliant Blue, Whisper White, Basic Black, and Brushed Gold.  The cap is stamped twice, cut out, and popped up with a Dimensional.  I colored around the white area a little just to help it stand out.

If you need supplies to make a graduation card, hurry and contact me so we can get them ordered and in your hands.  You might not think that high school or college kids would care that their card was handmade by you, but they do!

Graduation Card Congratulations

Time for Wedding Cards!

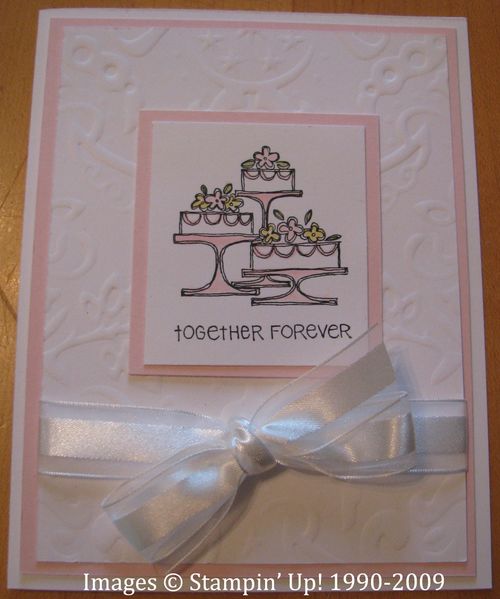
I tried to do some research on what months are the most popular for weddings, but the answer varies between sources.  One says the most popular has always been June, but now July and August are overtaking that month.  Another lists August as the second most popular, followed by May, July and September.  Yet another lists September in the third spot, followed by October and May.  So who knows?!  All I know is that we all probably need some wedding cards throughout the year!  Here is one I made for my friend recently.

WeddingCardJan 

Stamps:  Fun and Fast Notes

Cardstock:  Whisper White, Pink Pirouette (or Pretty in Pink)

Ink:  Stazon Black

Accessories:  Whisper White Organza Ribbon, Big Shot Stampin' Up! Backgrounds 1 Texturz Plate, Aquapainter and reinkers, Adhesives