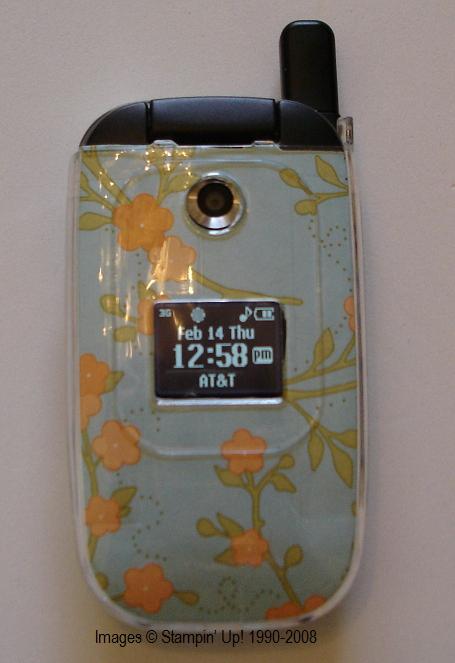
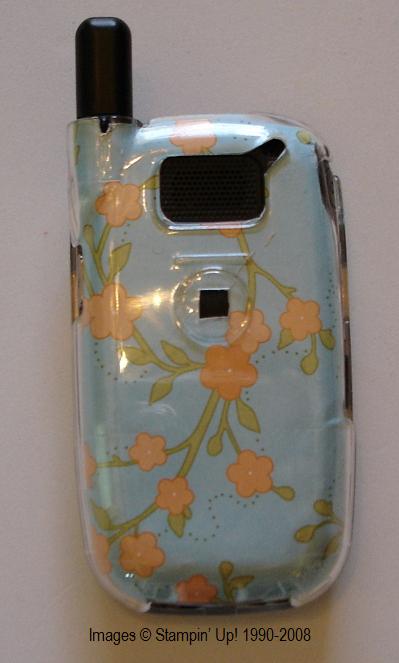
Now I can’t remember where I first got this idea, but I didn’t even understand it at first. I thought someone had bought a clear cellphone and then put Stampin’ Up! Designer Paper on the inside somehow. Finally I realized you could buy a clear COVER for your cellphone and line that with designer paper! The person gave a certain website where you could purchase them and indeed the one for my phone was on sale and very cheap so I ordered one! I lined the cover with the new Stampin’ Up! Bali Breeze Designer Paper. I just kind of traced around the cover using scrap paper for a pattern, trimmed here and there and finally got a template that fit pretty well. I then cut out the designer paper and trimmed it to fit perfectly. I think it is a fun project and makes it easier to see the light-colored phone in my purse!
Monthly Archives: February 2008
One Last Valentine!
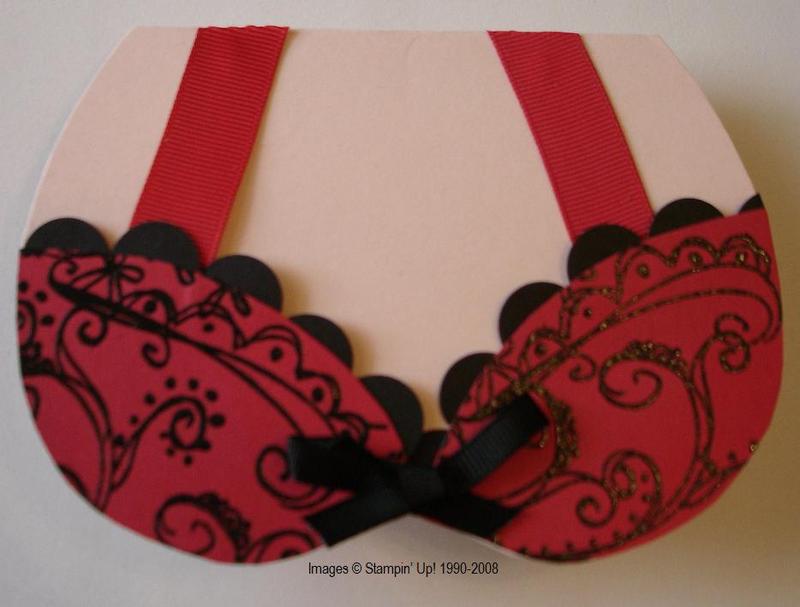
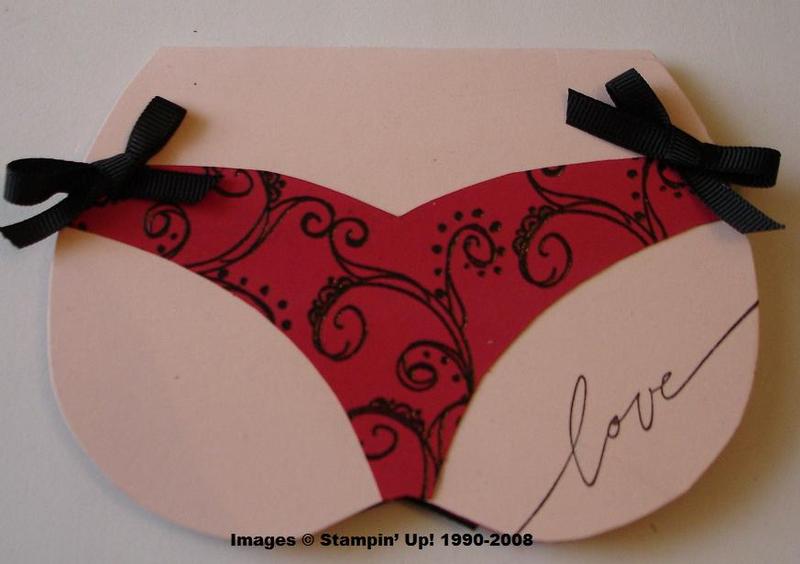
OK, I just couldn’t resist making this card I saw on Splitcoast for my husband for Valentine’s Day! It was some sort of challenge on SCS so there are a lot of examples. Mine pretty much copies one by another ‘Karen’. The base of the card is Blush Blossom. You could use Designer Paper for the "fabric" and then doll it up however you like. I chose to use Real Red cardstock which I embossed in black with the doodles from Doodle This. I thought it looked Valentine-y. For the lace I just used my Slit Punch to make a strip and then bent it a little to fit the curve. I used the wide red grosgrain ribbon for the straps and the regular black grosgrain for the bows. The possibilities are endless! Have fun with it! (You can click on any photos for a larger image.) Here is a link to the SCS challenge and template:
http://www.splitcoaststampers.com/forums/showthread.php?t=316869
Happy Valentine’s Day!
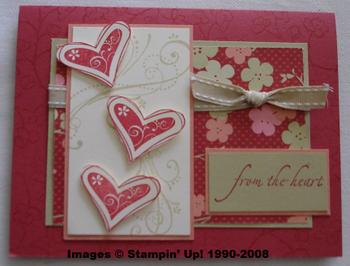
Here is another card we made at my Valentine’s stamp camp. I’m afraid I don’t remember where I got the idea or how much I directly copied it, but I "think" a little of it is my own design….maybe just the words! I love the card because while it looks like it is for Valentine’s Day it really can be used for other occasions. In fact, I sent it to my sister-in-law for her birthday. The card is made with Ruby Red, River Rock, Groovy Guava, and Very Vanilla cardstock as well as the new Designer Paper "Ginger Blossom". To add some interest to the background I stamped the Ruby Red with some flowers in Embrace Life with Ruby Red ink (although you could also use Versamark). The swirls from Priceless (what a great set this is!) are stamped on the Very Vanilla and the Priceless hearts cut out and mounted with Stampin’ Up! Dimensionals. The words, ‘from the heart’, are from Holidays & Wishes. And, of course, the ribbon is the double-stitched River Rock. It was fun using these colors!
Demo Swaps
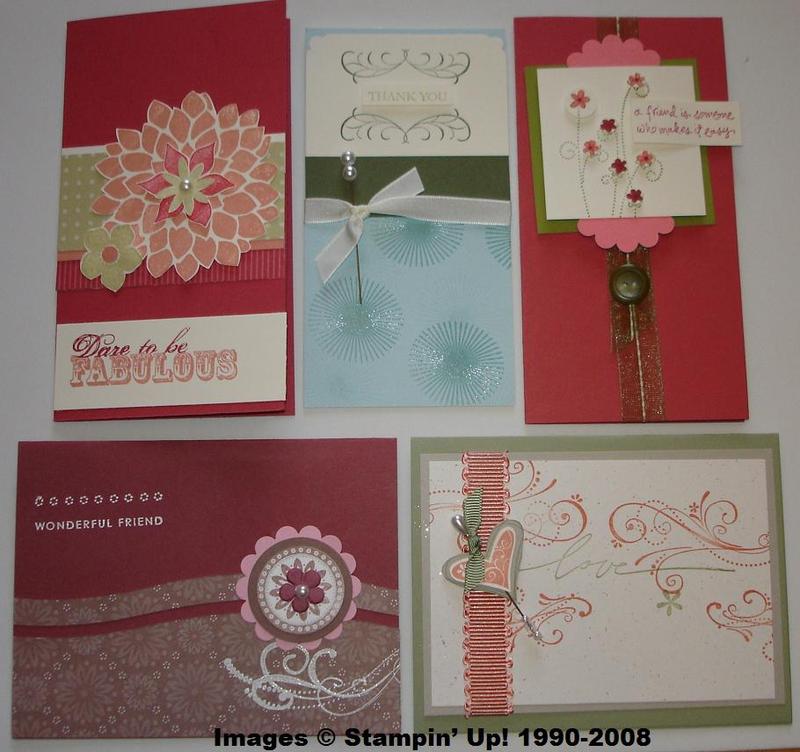
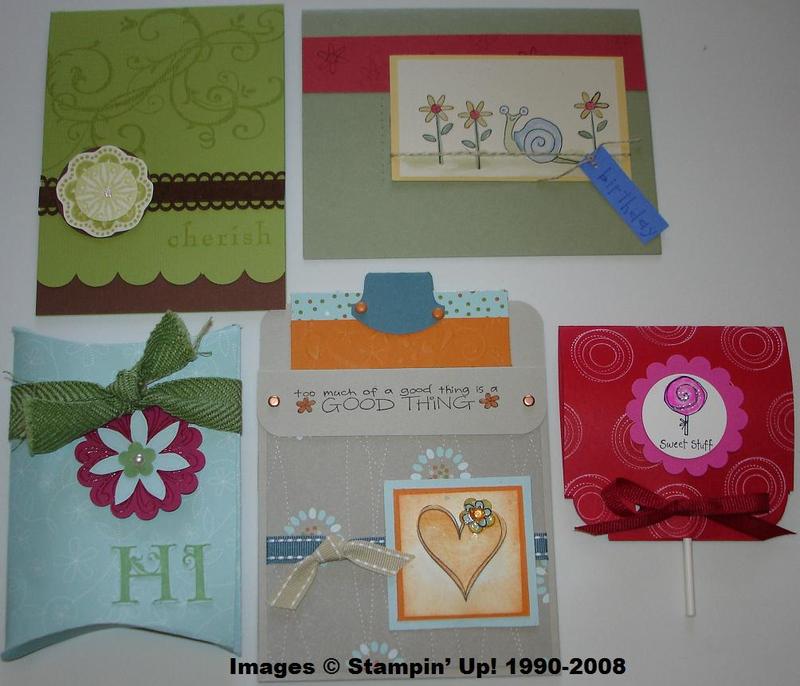 Yesterday our little group of SU Demos got together for our monthly meeting. Not everyone is still a demo, but that’s how we met and we still keep it pretty much Stampin’ Up!-oriented. I always say, "What could be more fun than getting together with other stampers, having lunch, stamping, and swapping?!" One person is always in charge of a project we will stamp that day and everyone else brings a swap. So fun!! Most of these swaps were to copy something out of the new catalog, Spring~Summer Collection 2008. Thanks Anne, Nona, Dixie, Gerrie, Sandi, Joan, Diana, and Cindy!
Happy Valentine’s Day Pail
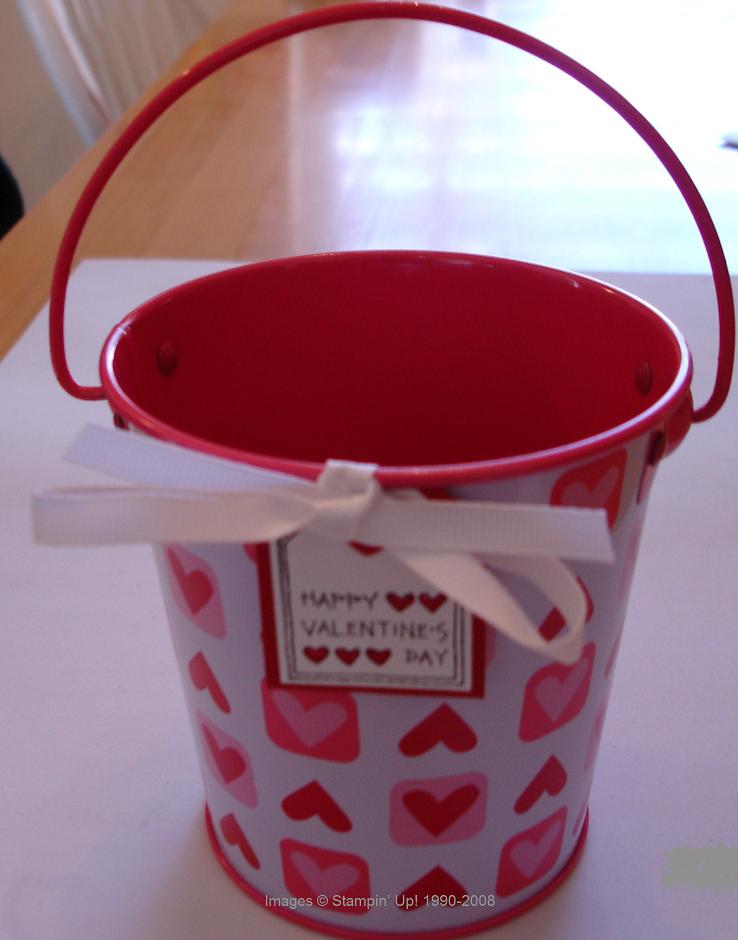
Last year these little pails were in the Target Dollar Spot and I bought enough for the army! Here is one we just put a tag on with the Happy Heart Day stamp set. I wanted my customers to see how easy it is to use the Crop-a-Dile to set eyelets and especially to punch a hole in the tin pail! Then you can add a cello bag of candy or little gifts inside the bucket and you have a cute, easy little gift! It would be really cute to tie a lot of ribbons on the handle also.
Kids’ Valentines
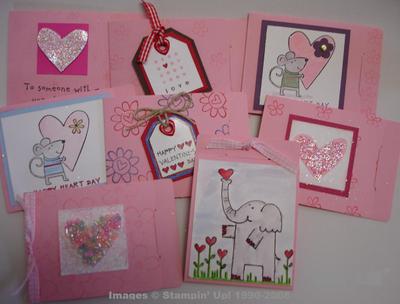
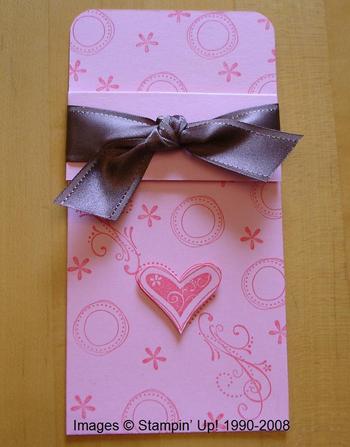
I had so much fun making Valentines yesterday! Naturally, it was a race against the clock to try to get them out to the mailbox before the mailman came. I wanted to make some valentines for my eight nieces and nephews. Normally I would spend at least half a day searching for all possible designs that I liked online before I would find something to copy….but I’m finding that if I just sit down and play around with my stamps and ink I can actually come up with things myself! For these valentines I wanted just kind of the little "kid size" cards. I got into my stash of retired items and found these Pretty in Pink Pocket Note Cards. You can still buy an assortment of Pocket Notes in the catalog, just different colors. They’re very cute and really suited my purpose. On the one heart you can see some retired colors of beads, which I attached with the new Tombow Multi Purpose Adhesive. I used the Happy Heart Day stamp set, Simply Said, Tagger’s Dozen, and Holidays and Wishes to make the cards. You’ll also notice some Dazzling Diamonds Glitter on a couple of the cards. What’s a day of stamping without some glitter?!
Valentine Pouch
After I made this, I just loved it! I guess I should have photographed it with something stuck inside, but I forgot! This size is actually a pretty tight fit for whatever would go inside, but you can adjust measurements to accomodate whatever you want to use. I found the directions on SCS. I used a 7×7" piece of Regal Rose card stock. Fold in half, then open up again. On the center seam, cut down 1.5" from the top. Score across from this seam to the outside edge to get the front flap which folds down. When you fold this flap down and fold the card stock closed again you will have your pouch with one side open. Use Sticky Strip on the bottom and side to close the pouch. I stamped my pouch with Priceless to decorate. Of course, you could use Designer Paper or other stamping for whatever theme you were using. I stamped an additional Priceless heart and popped it up on the center with a Dimensional. Finally, the pouch is tied with the beautiful chocolate chip satin ribbon from Ribbon Originals Theater.
Valentine Candy Holder
This week I was bitten by the flu bug that is going around, but it’s finally starting to go away….slowly! At least I can post something on my blog without fear of spreading germs. Fortunately I held a Valentine Stamp Camp before I got sick, or had any idea I was going to get sick, or I would feel even worse that I hadn’t gotten to stamp valentines with my friends.
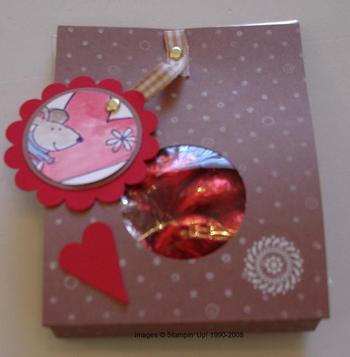
Here is one of the candy items we made at the stamp camp. I saw the idea and directions by Menolly13 on SCS and changed mine a little to incorporate certain products and a Valentine’s theme.
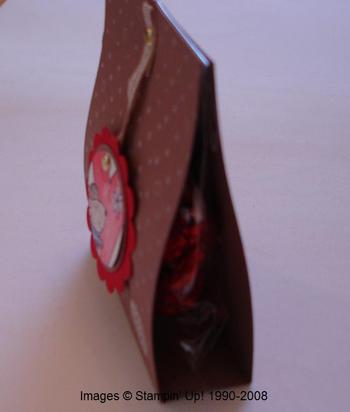
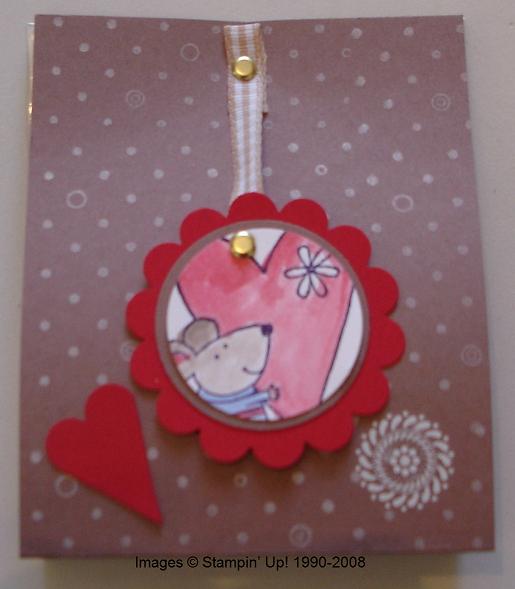 This is just a strip of Close to Cocoa cardstock, folded in the shape of a "W" with a small cello bag of candy inside, held together with the little brad at the top. The cardstock is 3×8.5". I stamped all over with the dots from Polka Dots and Paisley and White Craft Ink. It is then scored at 3.75, 4.25, and 4.75 then folded so that little W shape is at the bottom of the inside. Take your
1 3/8" circle punch and slide in from the side all the way. That will center it on your strip. Punch the circle and save this piece as a layer. I stamped the mouse and heart with the Happy Heart Day set and used the 1 1/4" circle punch to punch out a portion of the image. I also wanted to use the Scallop Circle Punch so I punched a scallop out of Real Red.
Here’s a cute trick with the scallop punch. With another red scallop, I cut it in half, then marked the midpoint of the cut side. From that midpoint, you can cut up toward the scallops and make yourself a little heart! We loved them at the stamp camp!
I also wanted everyone to try their hand at using the new Rub ons, so everyone chose something from the sheet and applied it to their candy holder. You can see mine, the little white design.
To finish up, I just took a piece of gingham ribbon, attached to the scallop with a gold brad and folded the ribbon over for the top and inserted another brad through the ribbon, the cardstock, the cello bag of candy on the inside and of course, the back of the strip of cardstock. Really easy in spite of this long description!

